1. Wprowadzenie
Thank you for choosing the DEPSTECH DS650-DL Dual-Lens Articulating Industrial Endoscope. This device is designed for detailed visual inspection in hard-to-reach areas, featuring a dual-lens system with 210° bidirectional rotation, a 4.5-inch IPS monitor, and 1080P high-definition imaging. It is an essential tool for home maintenance, vehicle inspection, and machinery checks.
Please read this manual thoroughly before use to ensure proper operation and to maximize the product's lifespan.
2. Informacje dotyczące bezpieczeństwa
- Nie należy używać endoskopu w środowiskach, w których występują gazy łatwopalne lub wybuchowe.
- The probe is IP67 waterproof, but the main unit is not. Avoid exposing the main unit to water or excessive moisture.
- Nie należy podejmować prób demontażu ani modyfikacji urządzenia. Spowoduje to unieważnienie gwarancji i może spowodować uszkodzenia.
- Przechowywać urządzenie w miejscu niedostępnym dla dzieci.
- Unikaj bezpośredniego światła LED w oczach.
- The device features overheat protection. If the temperature exceeds 70°C, a warning will display. If it exceeds 80°C, the device will automatically shut down to prevent damage. Allow the device to cool down before resuming operation.
3. Zawartość opakowania
Przed otwarciem opakowania należy sprawdzić, czy wszystkie elementy znajdują się w opakowaniu i są w dobrym stanie.
- DEPSTECH DS650-DL Endoscope Unit
- Etui do przechowywania
- Instrukcja obsługi
- Kabel ładujący typu C.
- Karta pamięci 32 GB (wstępnie zainstalowana lub dołączona osobno)

Image: Contents of the DEPSTECH DS650-DL package.
4. Konfiguracja
4.1 Ładowanie urządzenia
Before first use, fully charge the endoscope unit. Connect the provided Type-C charging cable to the charging port on the device and to a suitable USB power adapter (not included).
4.2 Wkładanie karty pamięci
If the 32GB memory card is not pre-installed, locate the TF card slot on the side of the monitor unit. Insert the memory card with the contacts facing down until it clicks into place.
4.3 Włączanie/wyłączanie
Press and hold the power button (usually located near the monitor) for a few seconds to turn the device on or off. The IPS monitor will display the startup screen.
5. Działanie
5.1 Zrozumienie elementów sterujących

Obraz: Ponadview of the endoscope controls and ports.
- Przycisk OK/Potwierdź: Potwierdza wybory w menu.
- Up/Zoom In Button: Navigates up in menus or zooms in on the image.
- Down/Zoom Out Button: Navigates down in menus or zooms out on the image.
- Przycisk obrotu o 180°: Rotates the real-time image on the screen by 180 degrees.
- Przycisk przełączania obiektywu: Toggles between front camera, side camera, and dual-view tryb.
- Przycisk zdjęcia/wideo: Naciśnij krótko, aby zrobić zdjęcie. Naciśnij długo, aby rozpocząć/zatrzymać nagrywanie wideo.
- Power Button/LED Adjustment: Short press to adjust LED brightness (3 levels), long press to power on/off.
- Articulating Angle Dial: Controls the 210° bidirectional rotation of the probe tip.
- Gniazdo karty TF: Do wkładania karty pamięci.
- Port typu C: Do ładowania i przesyłania danych.
- Przycisk resetowania: Resets the device (use a pin to press).
5.2 Using the Dual-Lens and Articulation
The DS650-DL features both a front camera and a side camera, allowing for a wider inspection range. The probe tip can be articulated up to 210° in two directions for comprehensive viewing.
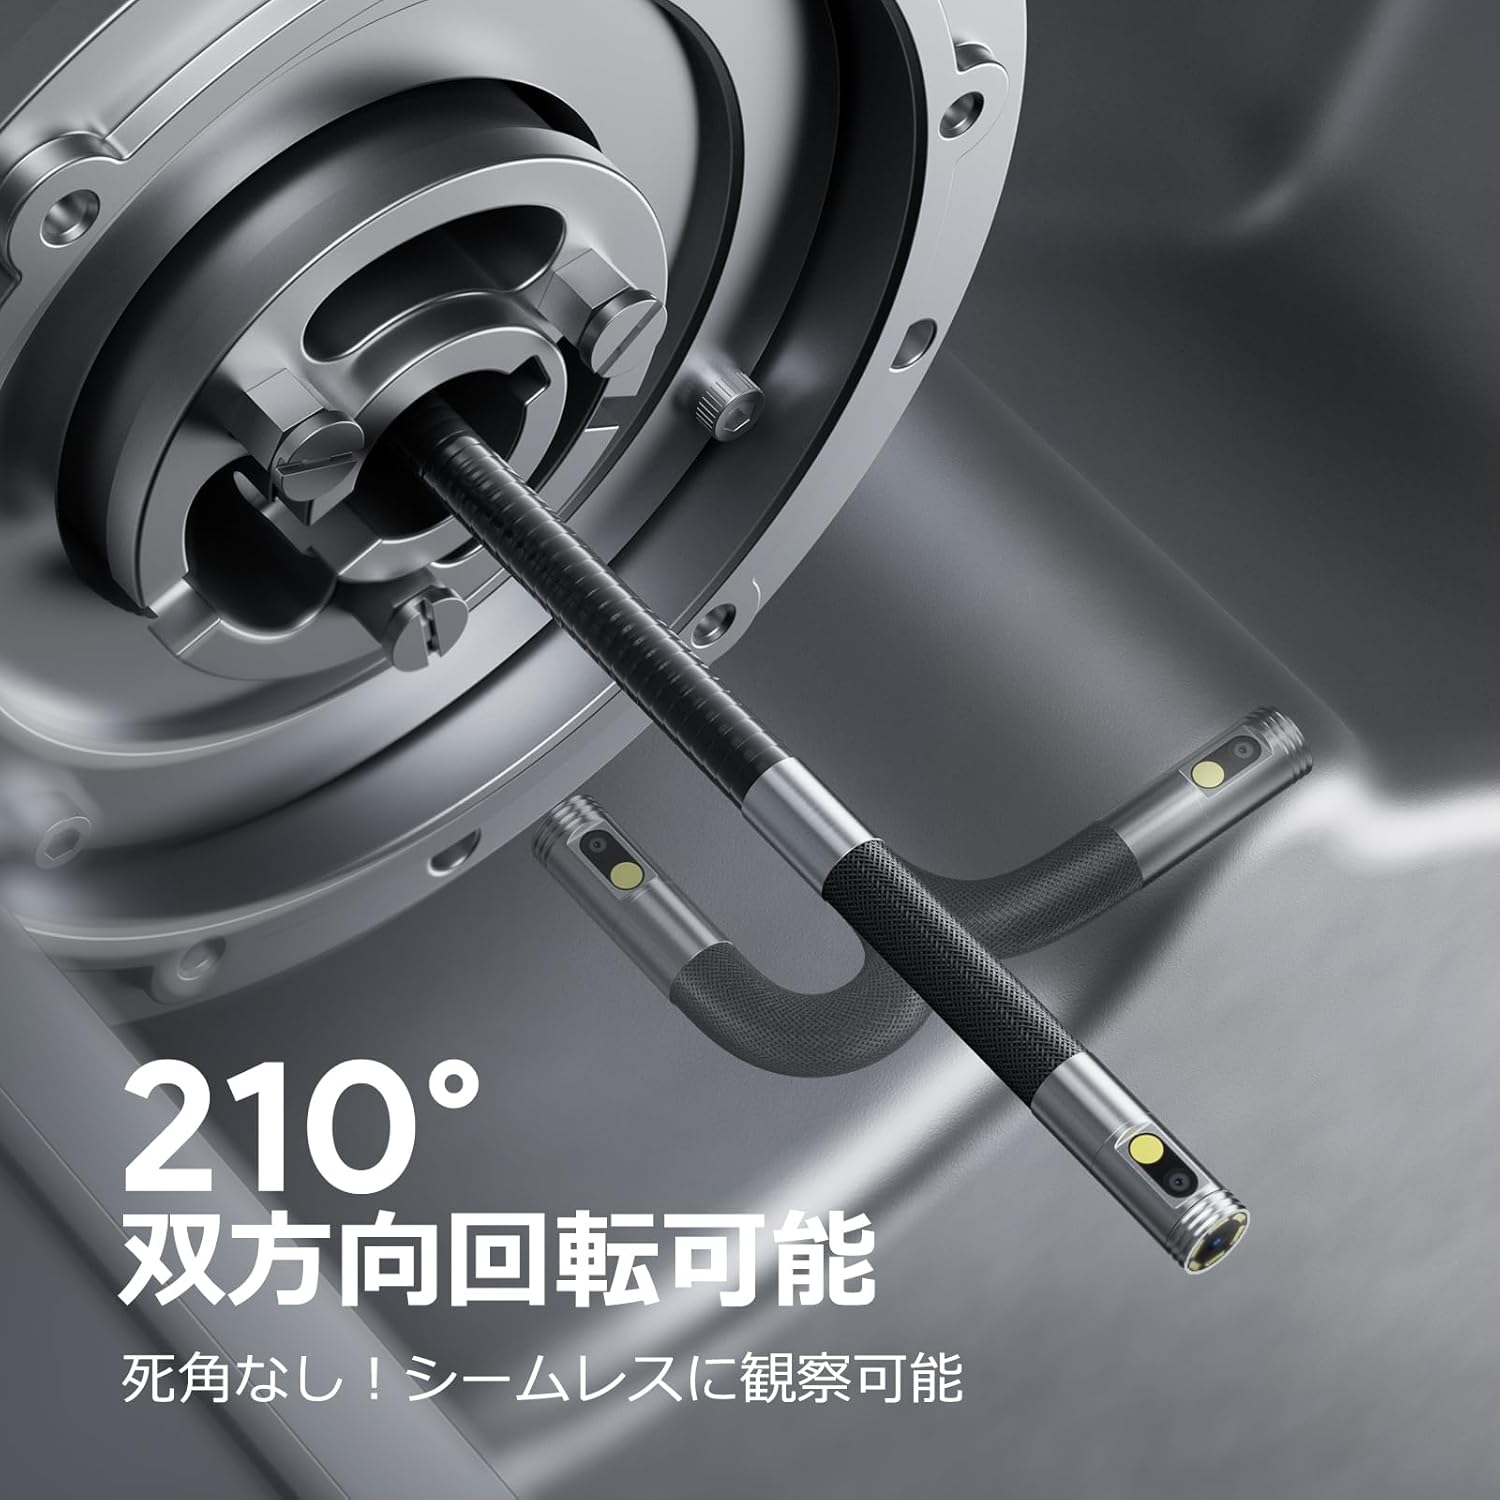
Image: Endoscope probe demonstrating 210° bidirectional articulation.
- Użyj Przycisk przełączania obiektywu to cycle between the front camera, side camera, or a split-screen dual-view tryb.
- Obróć Articulating Angle Dial to precisely adjust the direction of the probe tip. This allows you to navigate around obstacles and view areas from multiple angles without repositioning the entire cable.
5.3 Robienie zdjęć i nagrywanie filmów
The device supports capturing both still images and video recordings directly to the inserted 32GB memory card.

Image: Monitor display showing photo and video capture features.
- Aby zrobić zdjęcie: Naciśnij krótko Przycisk Zdjęcie/Wideo.
- Aby nagrać wideo: Naciśnij i przytrzymaj Przycisk Zdjęcie/Wideo to start recording. Long press again to stop recording.
- Złapany files are saved to the 32GB memory card. You can store approximately 10,000 images or 50 videos.
5.4 Regulacja jasności diod LED
The probe is equipped with high-brightness LED lights to illuminate dark inspection areas. Short press the Power Button/LED Adjustment button to cycle through 3 levels of LED brightness.

Image: IP67 waterproof probe with adjustable LED illumination.
5.5 Przesyłanie danych
You can transfer captured images and videos to a computer via the Type-C cable or by directly accessing the memory card.

Image: High-speed data transfer from endoscope to PC.
6. Konserwacja
- Czyszczenie sondy: After use, especially in dirty or wet environments, gently wipe the probe with a soft, damp cloth. Ensure no debris remains on the camera lenses.
- Czyszczenie monitora: Use a soft, dry cloth to clean the IPS monitor. Avoid abrasive cleaners or solvents.
- Składowanie: Store the endoscope in its provided storage case in a cool, dry place, away from direct sunlight and extreme temperatures. This prevents damage from improper storage and moisture.
- Pielęgnacja baterii: Aby przedłużyć żywotność baterii, unikaj częstego całkowitego rozładowywania urządzenia. Ładuj je regularnie, nawet jeśli nie jest używane przez dłuższy czas.
7. Rozwiązywanie Problemów
| Problem | Możliwa przyczyna | Rozwiązanie |
|---|---|---|
| Urządzenie nie włącza się. | Niski poziom naładowania baterii; awaria urządzenia. | Naładuj urządzenie do pełna. Jeśli problem będzie się powtarzał, skontaktuj się z pomocą techniczną. |
| Brak obrazu na ekranie. | Kabel nie jest prawidłowo podłączony; obiektyw kamery jest zasłonięty. | Ensure the probe cable is securely connected. Check for obstructions on the lens. |
| Obraz jest rozmazany lub niewyraźny. | Lens is dirty; focus distance incorrect. | Clean the camera lens. Ensure the object is within the optimal focal range (3-10cm). |
| Nie można zapisywać zdjęć/filmów. | Karta pamięci jest pełna lub nieprawidłowo włożona. | Check if the 32GB memory card is inserted correctly. Delete old filelub wymień kartę, jeśli jest pełna. |
| Urządzenie wyłącza się automatycznie. | Aktywna ochrona przed przegrzaniem. | Allow the device to cool down. Avoid using in excessively hot environments. |
8. Specyfikacje
| Funkcja | Szczegół |
|---|---|
| Marka | DEPSTECH |
| Numer modelu | DS650DJ |
| Wyświetlacz | 4.5-calowy monitor LCD IPS |
| Rozdzielczość kamery | 1080P |
| Średnica sondy | 8.5mm |
| Kąt artykulacji | 210° Bidirectional |
| Typ kabla | 1.5M Semi-rigid |
| Stopień wodoodporności | IP67 (tylko sonda) |
| Oświetlenie | Regulowane światła LED |
| Składowanie | Karta Micro SD 32 GB (w zestawie) |
| Bateria w zestawie | Tak |
| Wymiary opakowania | Wymiary 43.1 x 21.4 x 7.4 cm |
| Waga paczki | 1.33 kilogramów |
9. Gwarancja i pomoc techniczna
9.1 Gwarancja producenta
This DEPSTECH product comes with a 24-miesięczna gwarancja producenta. Your order number serves as your proof of purchase for warranty claims. Please retain it.
9.2 Obsługa klienta
For any questions, technical assistance, or warranty inquiries, please contact our professional support team:
E-mail: wsparcie.jp@depstech.com
We aim to respond to all inquiries within 24 hours (excluding weekends and public holidays, where responses will be provided on the next business day).

Image: DEPSTECH customer support and warranty information.