1. Wprowadzenie
This manual provides detailed instructions for the installation, operation, and maintenance of your XTRONS Android 14 Car Stereo GPS, model XTRONS FREELANDER 2. This unit is specifically designed for Land Rover Freelander 2 vehicles manufactured between 2007 and 2012. Please read this manual thoroughly before using the product to ensure proper functionality and to prevent damage.
2. Informacje dotyczące bezpieczeństwa
- Zalecana profesjonalna instalacja: Ze względu na złożoność układów elektrycznych w samochodach, zaleca się zlecenie montażu profesjonalnemu instalatorowi, aby uniknąć uszkodzenia urządzenia lub pojazdu.
- Zasilanie: Upewnij się, że urządzenie jest podłączone do źródła zasilania 12 V DC z ujemnym biegunem uziemienia.
- Okablowanie: Do not modify or cut any wires unless explicitly instructed. Incorrect wiring can cause damage or fire.
- Bezpieczeństwo jazdy: Nie obsługuj skomplikowanych funkcji urządzenia ani nie oglądaj filmów podczas jazdy. Zawsze priorytetem jest bezpieczeństwo na drodze.
- Temperatura: Unikaj wystawiania urządzenia na działanie ekstremalnych temperatur lub bezpośredniego światła słonecznego przez dłuższy czas.
- Wilgoć: Trzymaj urządzenie z dala od wody i nadmiernej wilgoci.
3. Zawartość opakowania
Proszę sprawdzić zawartość przesyłki na poniższej liście:
- XTRONS Car Stereo Unit
- Wiązki przewodów
- Antena GPS
- Kable USB
- Mikrofon zewnętrzny
- Instrukcja obsługi (ten dokument)
- Pilot zdalnego sterowania (jeśli jest dołączony)

Figure 3.1: Included components in the XTRONS car stereo package.
4. Koniec produktuview
The XTRONS Android 14 Car Stereo GPS is an advanced infotainment system designed to seamlessly integrate with your Land Rover Freelander 2. It features a powerful Octa-Core CPU, 4GB RAM, and 64GB ROM for smooth performance. Key features include:
- System operacyjny Android 14
- Built-in Apple CarPlay and Android Auto (Wireless support)
- Integrated GPS Navigation with GLONASS support
- Wi-Fi and 4G connectivity (SIM slot included)
- Bluetooth 5.0 do prowadzenia rozmów w trybie głośnomówiącym i strumieniowego przesyłania dźwięku
- Digital Sound Processor (DSP) for enhanced audio
- Obsługa oryginalnych elementów sterujących na kierownicy
- Multiple UI options
- IPS Display for wide viewkąty
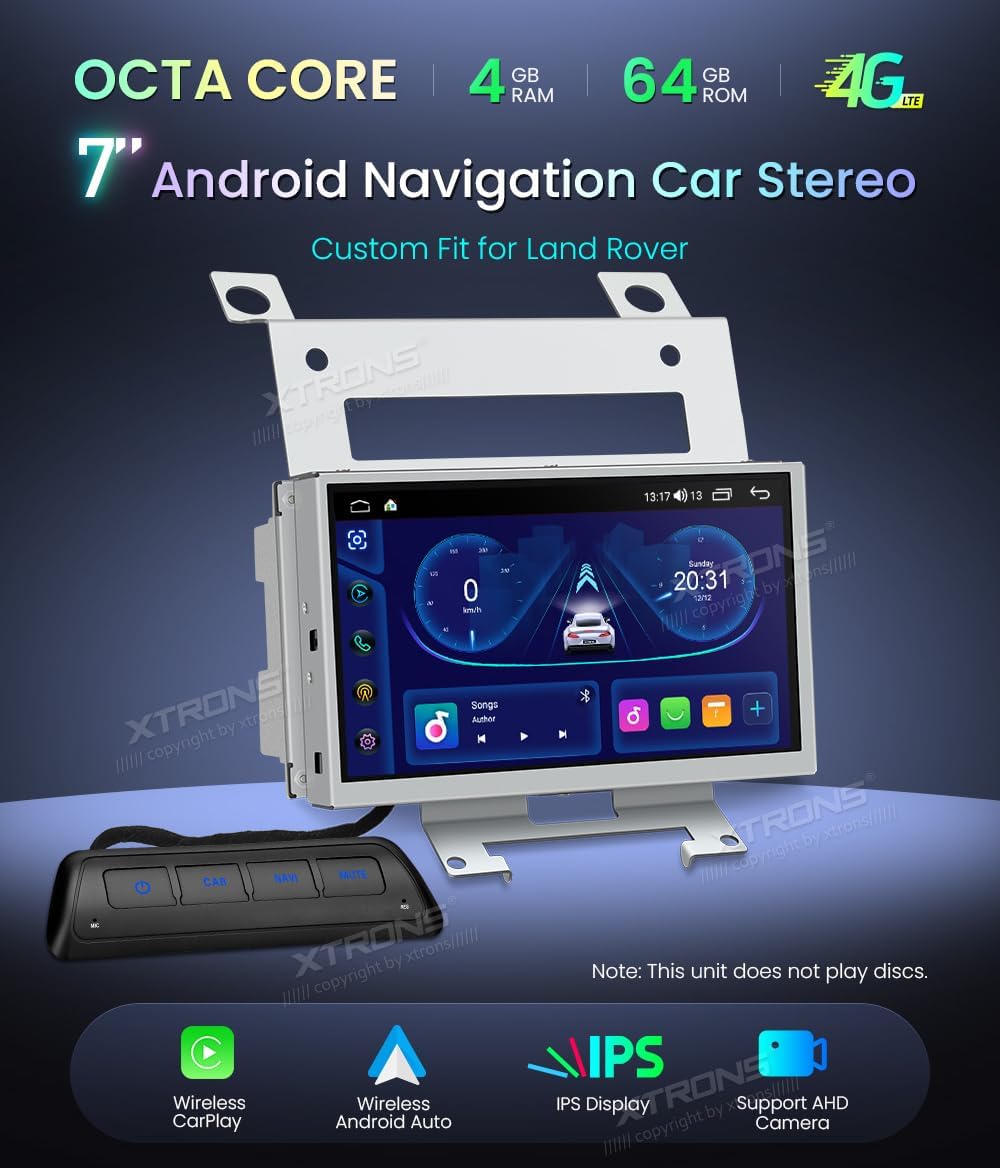
Figure 4.1: XTRONS Car Stereo Unit with key features.

Figure 4.2: Unit installed in a Land Rover Freelander 2 dashboard.
5. Konfiguracja i instalacja
5.1 Kontrole przed instalacją
- Ensure your vehicle is a Land Rover Freelander 2 (2007-2012).
- Przed rozpoczęciem instalacji należy odłączyć akumulator pojazdu.
- Sprawdź, czy w opakowaniu znajduje się cała zawartość.
5.2 Kroki instalacji
- Usuń oryginalną jednostkę: Carefully remove the existing car stereo and trim panels from your dashboard. Refer to your vehicle's service manual for specific instructions.
- Podłącz wiązki przewodów: Connect the provided wiring harnesses to the vehicle's existing connectors. Ensure all connections are secure. The XTRONS unit relies on the original radio, which remains installed and functional.
- Podłącz urządzenia peryferyjne: Connect the GPS antenna, USB cables, and external microphone to the corresponding ports on the XTRONS unit. Position the GPS antenna in a location with a clear view nieba.
- Montaż urządzenia: Securely mount the XTRONS unit into the dashboard opening using the provided brackets.
- Podłącz ponownie akumulator: Po wykonaniu i zabezpieczeniu wszystkich połączeń podłącz ponownie akumulator pojazdu.
- Pierwsze włączenie: Turn on your vehicle's ignition and power on the XTRONS unit. Follow any on-screen prompts for initial setup.

Figure 5.1: Before and After installation comparison.
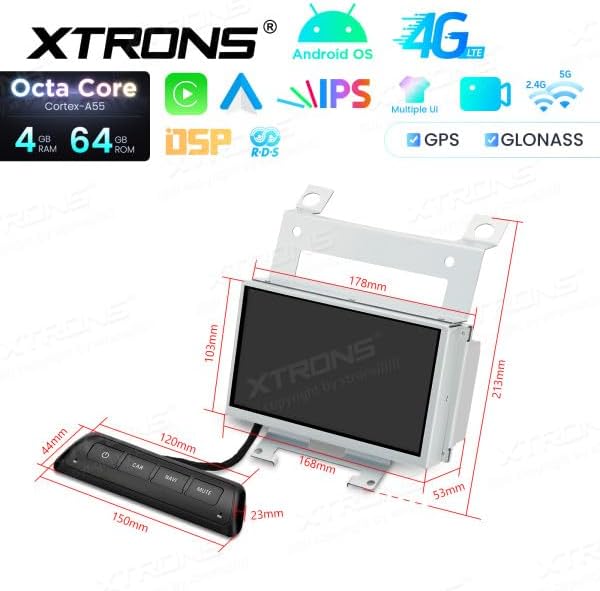
Figure 5.2: Unit dimensions and remote control.
6. Instrukcja obsługi
6.1 Nawigacja w interfejsie użytkownika
The unit features a responsive touchscreen display. Swipe left or right to navigate between home screens, tap icons to open applications, and use the top bar for quick settings and notifications.
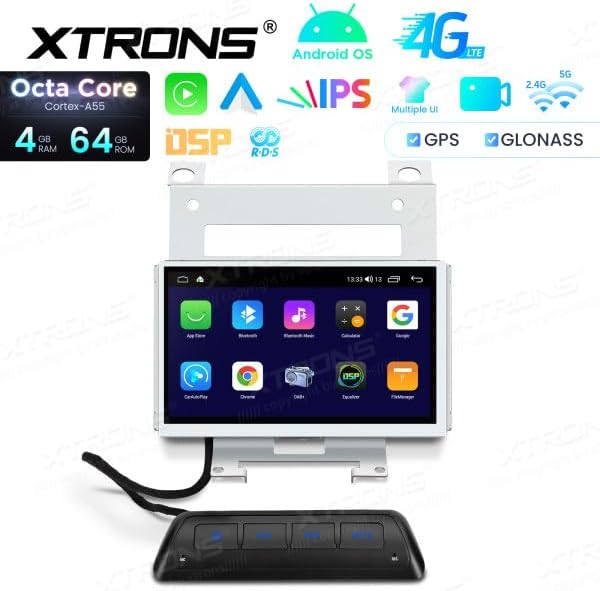
Figure 6.1: Android UI example.
6.2 Apple CarPlay i Android Auto
The unit supports both wireless Apple CarPlay and Android Auto. Connect your compatible smartphone via Bluetooth and Wi-Fi, or a USB cable, to access navigation, music, messages, and more directly on the car stereo display.

Rysunek 6.2: Interfejs Apple CarPlay.

Rysunek 6.3: Interfejs Android Auto.
6.3 Łączność Bluetooth
Pair your mobile phone via Bluetooth for hands-free calling and audio streaming. Go to the Bluetooth settings on the unit, enable Bluetooth, and search for your phone. Follow the pairing instructions on both devices.
6.4 Łączność Wi-Fi i 4G
Connect to a Wi-Fi hotspot or insert a 4G SIM card into the designated slot to enable internet access. This allows for online navigation, app downloads, and streaming services.
6.5 Nawigacja GPS
The built-in GPS module provides accurate navigation. Ensure the GPS antenna is properly installed and has a clear view of the sky for optimal signal reception. You can use pre-installed navigation apps or download others from the app store.
6.6 Odtwarzanie multimediów
Connect USB drives to the provided USB ports to play audio and video files. The unit supports various formats. Use the built-in media player application to browse and play your content.
6.7 Elementy sterujące na kierownicy
The unit supports your vehicle's original steering wheel controls. After installation, you may need to configure these controls in the unit's settings menu to match your vehicle's functions.
6.8 Akcesoria opcjonalne
The XTRONS unit supports various optional accessories (not included in the standard package):
- DVR Camera: Connect an optional DVR camera for recording driving footage.
- Dekoder DAB+: Enhance your radio experience with digital audio broadcasting by connecting an optional DAB+ box.
- TPMS Kit: Monitor your tire pressure with an optional TPMS (Tire Pressure Monitoring System) kit.
7. Konserwacja
7.1 Czyszczenie urządzenia
Use a soft, dry cloth to clean the display and exterior of the unit. For stubborn smudges, slightly dampen the cloth with water. Avoid using harsh chemicals or abrasive materials, as they can damage the screen or finish.
7.2 Aktualizacje oprogramowania
Okresowo sprawdzaj oficjalne informacje XTRONS website or contact customer support for available software updates. Keeping your unit's software up-to-date ensures optimal performance, new features, and bug fixes. Follow the provided instructions carefully when performing updates.
8. Rozwiązywanie Problemów
If you encounter issues with your XTRONS car stereo, refer to the following common problems and solutions:
- Brak zasilania:
- Sprawdź wszystkie połączenia zasilania i bezpieczniki.
- Sprawdź, czy akumulator pojazdu jest naładowany.
- Brak dźwięku:
- Sprawdź połączenia głośników.
- Sprawdź poziom głośności i ustawienia wyciszenia.
- Sprawdź, czy wybrano właściwe źródło dźwięku.
- Utrata sygnału GPS:
- Upewnij się, że antena GPS jest prawidłowo podłączona i umieszczona w miejscu, gdzie nie ma przeszkód. view nieba.
- Przemieść pojazd na otwartą przestrzeń, z dala od wysokich budynków i gęstej roślinności.
- Problemy z połączeniem Bluetooth:
- Upewnij się, że Bluetooth jest włączony zarówno w urządzeniu, jak i w telefonie.
- Usuń poprzednie sparowania i spróbuj połączyć się ponownie.
- Uruchom ponownie oba urządzenia.
- Brak reakcji ekranu dotykowego:
- Uruchom ponownie urządzenie.
- Upewnij się, że ekran jest czysty i wolny od zanieczyszczeń.
If the problem persists, please contact XTRONS customer support for further assistance.
9. Specyfikacje
| Funkcja | Specyfikacja |
|---|---|
| Marka | XTRONY |
| Numer modelu | XTRONS FREELANDER 2 |
| System operacyjny | Android 14 |
| BARAN | 4 GB |
| ROM | 64 GB |
| Procesor | Ośmiordzeniowy |
| Technologia łączności | Wi-Fi, Bluetooth, 4G, USB |
| Cechy specjalne | Android Auto, Apple CarPlay (Wireless) |
| Kompatybilne urządzenia | Smartfon |
| Wszystkie porty HDMI | 1 |
| Typ złącza | USB, Wi-Fi |
| Tryb wyjścia audio | Stereo, dźwięk przestrzenny |
| Konfiguracja kanału dźwięku przestrzennego | 5.1 |
| Kodowanie wideo | H.264, H.265/HEVC |
| Moc wyjściowa | 180 watów |
| Liczba kanałów | 2 |
| Internet Application | CarPlay, Android Auto |
| Metoda kontroli | Dotykać |
| Typ wyjścia audio | Bluetooth, Headphone, Speaker |
| Zgodność z inteligentnym domem | Niekompatybilny z inteligentnym domem |
| Kolor | Czarny |
| ASIN | B0F9YV3YDD |
10. Gwarancja i wsparcie
For warranty information, technical support, or service inquiries, please refer to the warranty card included with your product or visit the official XTRONS webZachowaj paragon jako dowód zakupu.