
ClokoWe HY300PRO+
CLOKOWE Mini Projector User Manual
Model: HY300PRO+
Wstęp
This manual provides detailed instructions for the safe and efficient operation of your CLOKOWE Mini Projector. Please read this manual thoroughly before using the product and retain it for future reference. The CLOKOWE Mini Projector is a portable device designed for versatile projection, featuring built-in streaming apps, Wi-Fi 6, Bluetooth 5.2, 180° rotation, and automatic keystone correction.

Image: The CLOKOWE Mini Projector, a compact white cylindrical device with a lens, shown projecting content onto a curved screen displaying various streaming app logos and a movie scene.
Co jest w pudełku
Sprawdź, czy po rozpakowaniu znajdują się wszystkie elementy:
- CLOKOWE Mini Projector (Model: HY300PRO+)
- Przewód zasilający
- Kabel HDMI
- Zdalne sterowanie
- Instrukcja obsługi (ten dokument)
Cechy produktu
The CLOKOWE Mini Projector offers a range of features for enhanced viewing experiences:
- Wbudowane aplikacje do strumieniowania: Access platforms like YouTube, Disney+, and more directly via Wi-Fi.
- Wszechstronna łączność: Supports wireless mirroring (iPhone, Android, tablet, laptop) and wired connections (HDMI, USB).
- Obrotowa projekcja 180°: The projector body can rotate 180° for flexible projection angles, including ceiling projection.
- Automatyczna korekcja trapezu: Ensures aligned visuals automatically.
- Ręczne ustawianie ostrości: Allows for fine-tuning image clarity.
- Wi-Fi 6 i Bluetooth 5.2: Provides fast, stable wireless streaming and audio pairing with external speakers.
- Ultraprzenośna konstrukcja: Compact size (3.73 × 3.73 × 6.17 inches) and lightweight (0.77 lb).
- High Clarity Display: 8000 Lux brightness, supports 1080P display, with a 0.9:1 short throw ratio.
- Customizable Wallpapers: Upload personal background images via USB.
- Timer automatycznego wyłączania: Set a timer for controlled usage.

Image: A visual representation of the projector's built-in app store, showing various streaming service icons like Netflix, YouTube, Spotify, and Prime Video on a projected screen.

Image: A family watching a movie projected onto the ceiling of a bedroom, demonstrating the 180° rotation feature for ceiling projection.
Przewodnik po konfiguracji
1. Początkowe rozmieszczenie i moc
- Ustaw projektor na stabilnej, płaskiej powierzchni.
- Podłącz przewód zasilający do projektora, a następnie do gniazdka elektrycznego.
- Naciśnij przycisk zasilania na projektorze lub pilocie, aby go włączyć.
2. Adjusting Projection Angle (180° Rotation)
The projector features a 180° rotatable body, allowing projection onto walls, screens, or ceilings without needing a tripod.
- Gently rotate the projector body to achieve the desired projection angle.
- Ensure the lens is facing the intended projection surface.
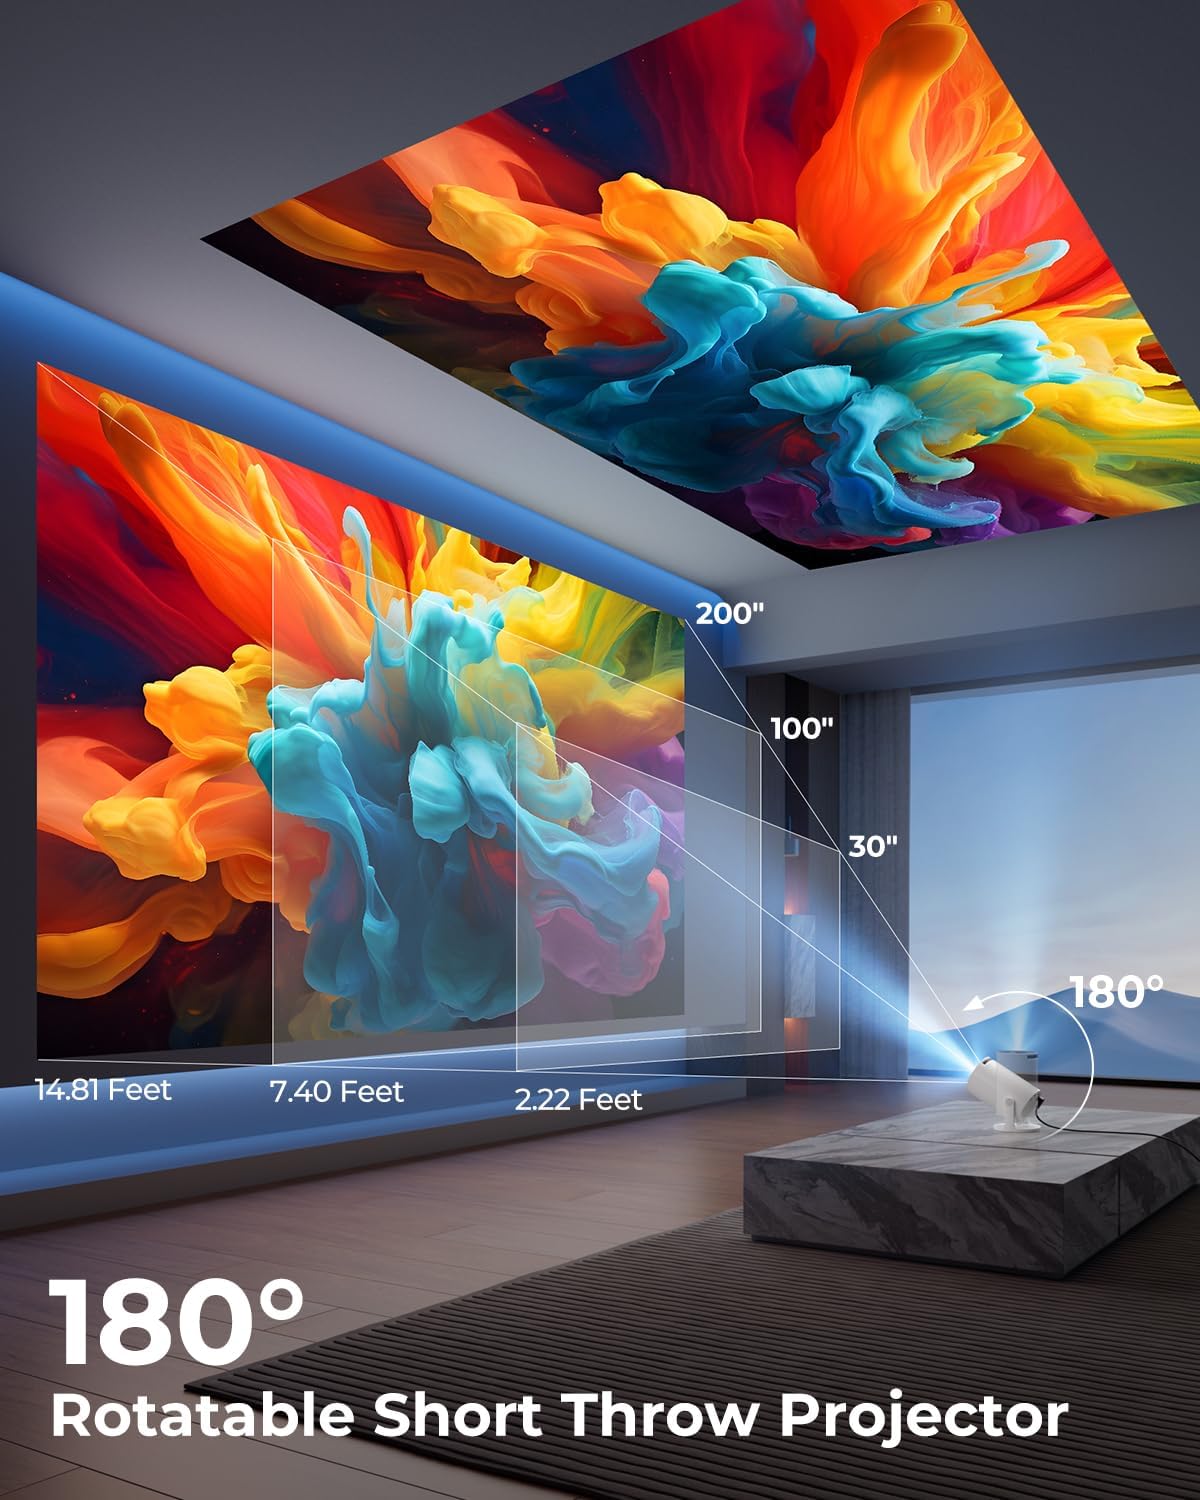
Image: A diagram illustrating the 180° rotation capability of the projector and various projection distances (30", 100", 200") with corresponding throw distances in feet.
3. Korekcja ostrości i trapezu
- Automatyczna korekcja trapezu: The projector will automatically adjust the image to be rectangular. If further adjustment is needed, navigate to the settings menu.
- Ręczne ustawianie ostrości: Obróć pierścień regulacji ostrości wokół obiektywu, aż obraz stanie się ostry i wyraźny.

Image: A projected image on a wall demonstrating automatic keystone correction and manual focus adjustments, with icons for ±45° Auto Keystone, Manual Focus, and 50%-100% Zoom.
4. Network and Bluetooth Connection
- Połączenie Wi-Fi:
- Przejdź do menu „Ustawienia” w projektorze.
- Wybierz „Sieć” lub „Ustawienia Wi-Fi”.
- Choose your Wi-Fi network from the list and enter the password. The projector supports Wi-Fi 6 (2.4G and 5G).
- Połączenie Bluetooth:
- Przejdź do „Ustawień” i wybierz „Bluetooth”.
- Włącz Bluetooth i wyszukaj dostępne urządzenia.
- Wybierz głośnik lub słuchawki Bluetooth z listy, aby je sparować.

Image: A projected image showing Wi-Fi 6 and Bluetooth 5.2 connectivity, with a smartphone mirroring content to the projector and a soundbar connected via Bluetooth.
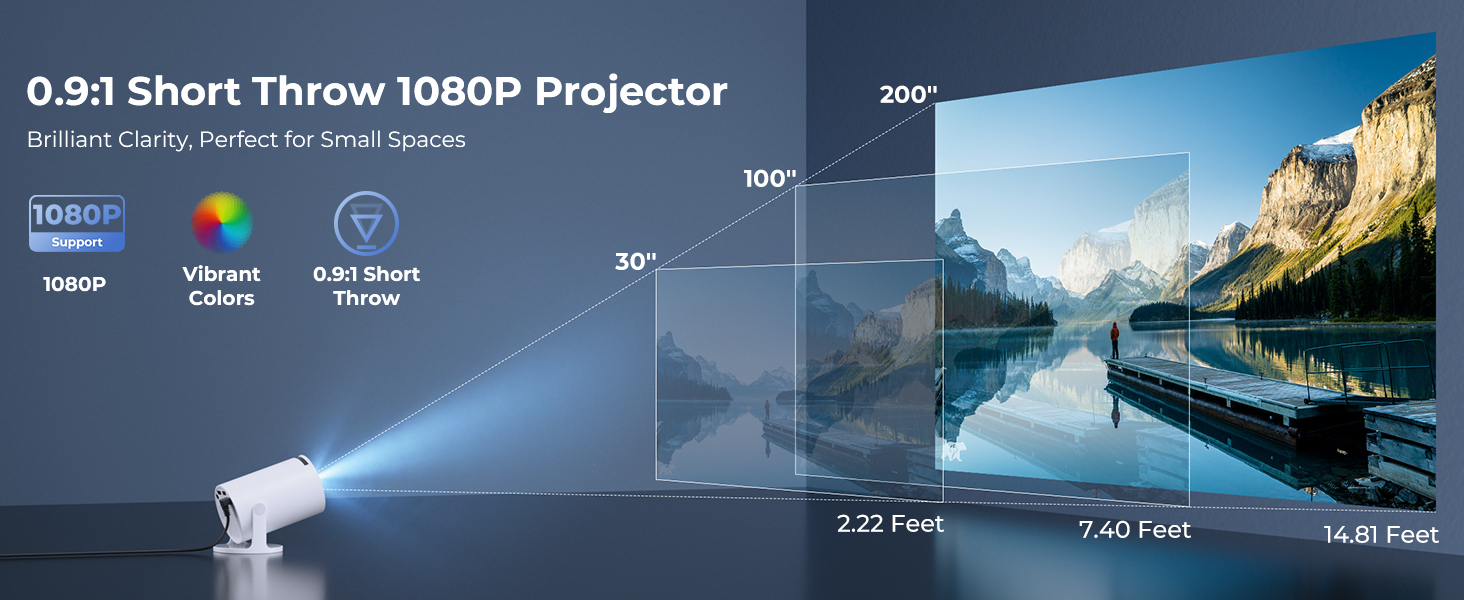
Image: A visual demonstrating Bluetooth 5.2 audio connection, showing the projector wirelessly paired with headphones and a portable speaker.
Instrukcja obsługi
1. Nawigacja w interfejsie
- Use the provided remote control to navigate through menus and select options.
- Basic navigation buttons are also available on the projector unit.
2. Korzystanie z wbudowanych aplikacji
- Once connected to Wi-Fi, access the main interface to find pre-installed streaming applications.
- Select an app (e.g., YouTube, Disney+) and log in with your credentials to start streaming.
3. Kopiowanie ekranu
The projector supports wireless mirroring from compatible smartphones, tablets, and laptops.
- Upewnij się, że urządzenie i projektor są podłączone do tej samej sieci Wi-Fi.
- Select the "Screen Mirroring" or "Wireless Display" option on the projector's menu.
- On your mobile device, activate its screen mirroring feature (e.g., AirPlay for iOS, Smart View for Android) and select the projector from the list of available devices.
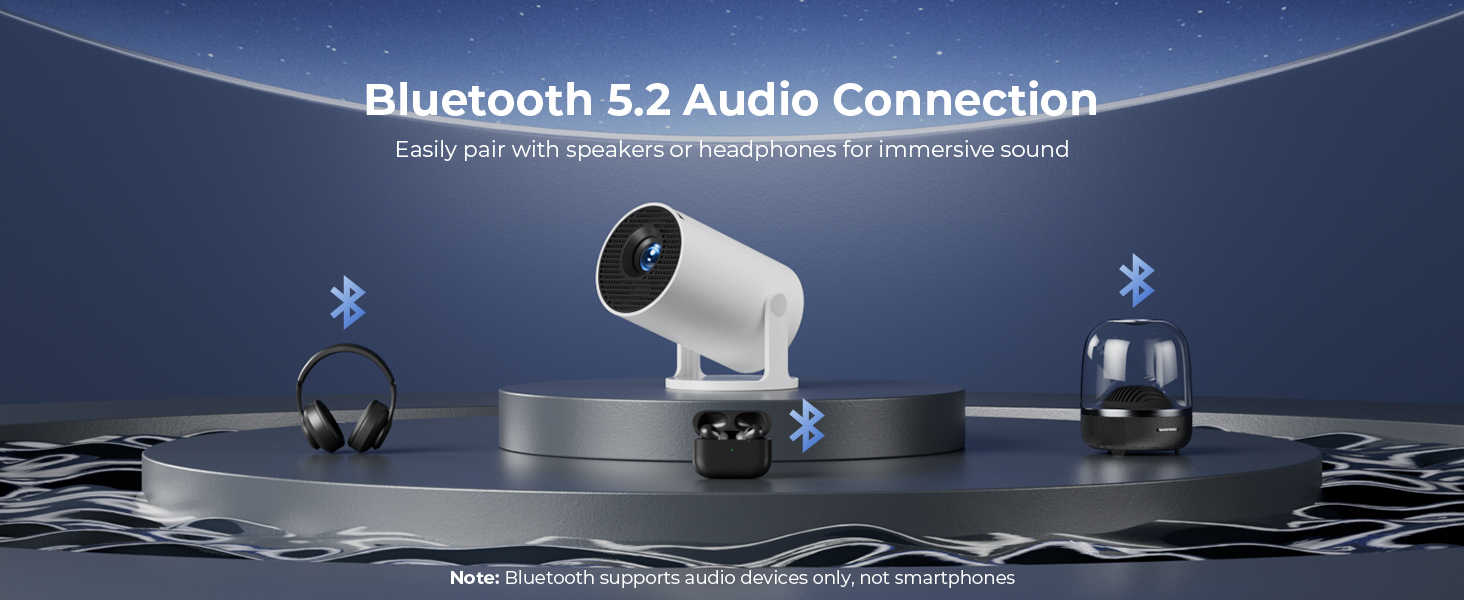
Image: A diagram illustrating Dual-Band Wi-Fi 6 connection for faster, smoother screen mirroring from various devices like smartphones, tablets, and laptops to the projector.
4. Wired Connections (HDMI/USB)
- Connect devices like game consoles, TV sticks, or computers using the HDMI port.
- Use the USB port to play media files directly from a USB drive or to upload custom wallpapers.
- To select the input source, press the "Source" button on the remote control and choose HDMI or USB.
Obraz: Zbliżenie view of the projector's rear panel, highlighting the HDMI, USB, and power ports, along with an ON/OFF switch and manual focus ring.
5. Custom Wallpapers and Timer
- Custom Wallpapers: Insert a USB drive containing your desired background images. Navigate to the settings to select and apply them.
- Timer automatycznego wyłączania: Access the system settings to set a timer for the projector to automatically power off after a specified duration.
Konserwacja
- Czyszczenie obiektywu: Używaj miękkiej, niepozostawiającej włókien ściereczki przeznaczonej specjalnie do soczewek optycznych. Nie używaj środków czyszczących ani rozpuszczalników o właściwościach ściernych.
- Czyszczenie powierzchni zewnętrznej: Przetrzyj zewnętrzną część projektora miękką, suchą ściereczką. W przypadku uporczywych zabrudzeń delikatnie przetrzyj.ampi szmatkę z wodą.
- Wentylacja: Aby zapobiec przegrzaniu, upewnij się, że otwory wentylacyjne projektora nie są zablokowane.
- Składowanie: Jeśli projektor nie będzie używany przez dłuższy czas, należy go przechowywać w chłodnym i suchym miejscu, z dala od bezpośredniego światła słonecznego i ekstremalnych temperatur.
Rozwiązywanie problemów
| Problem | Możliwa przyczyna | Rozwiązanie |
|---|---|---|
| Brak obrazu lub obraz jest rozmazany | Incorrect focus; lens cap on; input source not selected; projector too far/close. | Adjust manual focus; remove lens cap; select correct input source; adjust projection distance. |
| Obraz jest trapezoidalny lub zniekształcony | Projektor nie jest ustawiony prostopadle do ekranu. | Utilize automatic keystone correction or manually adjust in settings. Ensure projector is on a level surface. |
| Brak dźwięku lub niska głośność | Volume too low; external audio device not connected/paired; projector's internal speaker off. | Increase volume on projector/source device; ensure Bluetooth speaker is paired; check audio settings. |
| Pilot nie odpowiada | Batteries low/dead; obstruction between remote and projector; remote sensor blocked. | Replace batteries; ensure clear line of sight to projector's IR sensor. |
| Problemy z połączeniem Wi-Fi | Nieprawidłowe hasło; poza zasięgiem; zakłócenia w sieci. | Re-enter password; move projector closer to router; restart router and projector. |
Specyfikacje
| Funkcja | Szczegół |
|---|---|
| Numer modelu | HY300PRO+ |
| Marka | ClokoWe |
| Wymiary produktu | 3.73 x 6.17 x 3.73 cala |
| Waga przedmiotu | 1.61 funtów (0.73 kg) |
| Rozdzielczość wyświetlacza | 1280 x 720 (Supports 1080P) |
| Jasność | 8000 luks |
| Technologia łączności | Bluetooth 5.2, HDMI, USB, Wi-Fi 6 (2.4G & 5G) |
| Cechy specjalne | Built-in Apps, Digital Keystone Correction, Short Throw (0.9:1), 50%-100% Zoom, 180° Rotatable Projection, Mini Portable Design |
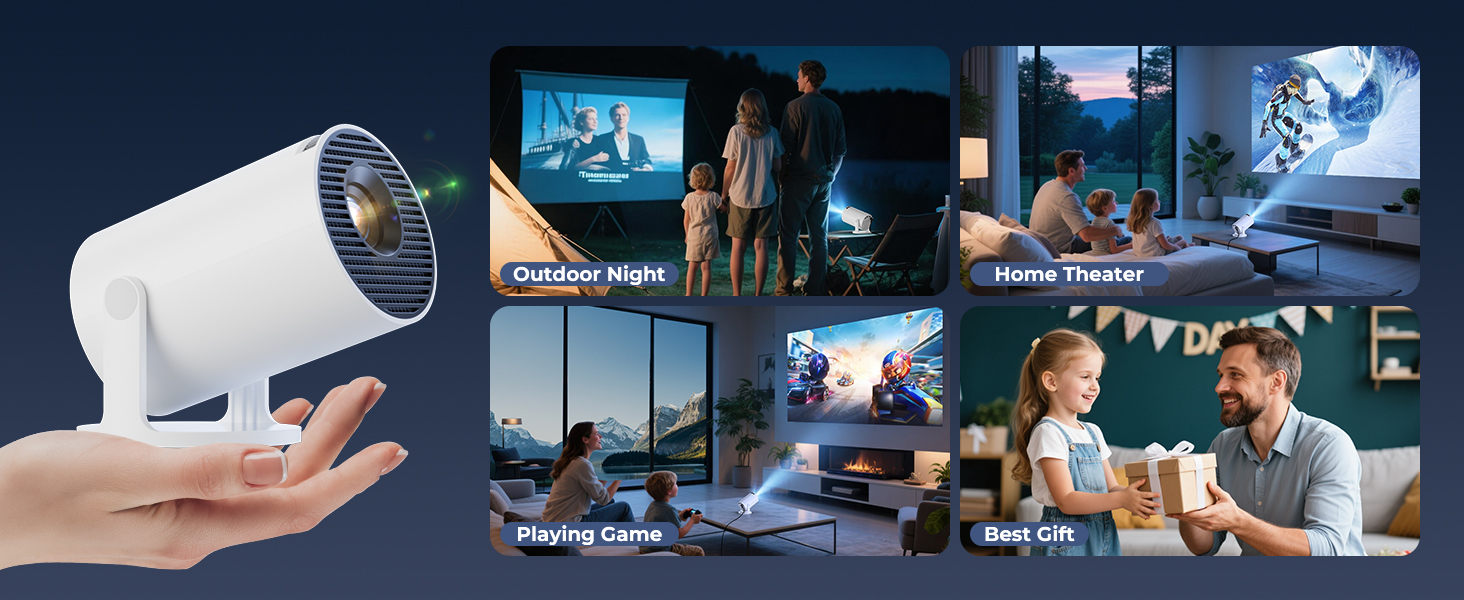
| Zalecane zastosowania | Home Cinema, Gaming, Business, Education |
Gwarancja i wsparcie
The CLOKOWE Mini Projector includes 2-years factory support. For technical assistance, troubleshooting, or warranty claims, please contact ClokoWe customer support through the retailer where the product was purchased or visit the official ClokoWe webwitryna do informacji kontaktowych.
Zachowaj dowód zakupu w celu potwierdzenia gwarancji.
Ask a question about this manual
Ask about setup, troubleshooting, compatibility, parts, safety, or missing instructions. Manuals+ will review the question and use this page’s manual context to help answer it.