
1. Wprowadzenie
The Jauarta MY8236B is a compact and reliable digital multimeter designed for accurate electrical measurements. It features a clear 4000-count display and a new generation layout for enhanced usability. This instrument is suitable for various applications including power electronic circuit measurement, new energy equipment testing, power system strength testing, automotive circuit maintenance, and educational purposes.
Ważna uwaga dotycząca bezpieczeństwa: Always keep the inside of the meter clean and dry to prevent electric shock or damage to the meter. Read all safety warnings and operating instructions before using this instrument.
2. Funkcje produktu
- Wyczyść wyświetlacz: Features a new display and function layout for improved readability.
- 4000 Counts Reading: Provides industrial-grade readings up to 4000 counts for precise measurements.
- Szerokie zastosowanie: Versatile for power electronics, new energy, automotive, and educational testing.
- Dokładne i niezawodne: Designed for high reliability in electronic parameter detection.
- Trwała konstrukcja: Made from excellent ABS material, offering impact and scratch resistance.
3. Zawartość opakowania
Proszę sprawdzić zawartość przesyłki po jej otrzymaniu:
- 1 x Jauarta MY8236B Digital Multimeter
- 2 x Multimeter Test Leads (Red and Black)
- 1 x Instrukcja obsługi
4. Konfiguracja
4.1 Instalacja baterii
The Jauarta MY8236B multimeter requires two 1.5V AAA batteries (not included) for operation.
- Znajdź pokrywę komory baterii z tyłu multimetru.
- Za pomocą śrubokręta poluzuj śrubę(y) mocującą(e) pokrywę baterii.
- Remove the cover and insert two 1.5V AAA batteries, observing the correct polarity (+ and -) as indicated inside the compartment.
- Załóż pokrywę baterii i dokręć śrubę(y).
4.2 Podłączanie przewodów pomiarowych
Prawidłowe podłączenie przewodów pomiarowych ma kluczowe znaczenie dla dokładności i bezpieczeństwa pomiarów.

Image: Close-up of the multimeter's input jacks. The black COM jack, the red VΩmA jack, and the red 10A jack are visible.
- Włóż czarny przewód pomiarowy do KOM (Zwykły) walec.
- Dla większości tomówtage, resistance, and small current measurements (up to 400mA), insert the red test lead into the VΩmA podnośnik.
- W przypadku pomiarów dużego prądu (do 10A) włóż czerwony przewód pomiarowy do 10A jack. Ensure the rotary switch is set to the appropriate 10A range.

Image: The Jauarta MY8236B Digital Multimeter shown with its red and black test leads properly connected to the input jacks.
5. Instrukcja obsługi
5.1 Włączanie/wyłączanie i wybór funkcji
To power on the multimeter, rotate the central rotary switch from the 'OFF' position to the desired measurement function. To power off, rotate the switch back to 'OFF'.
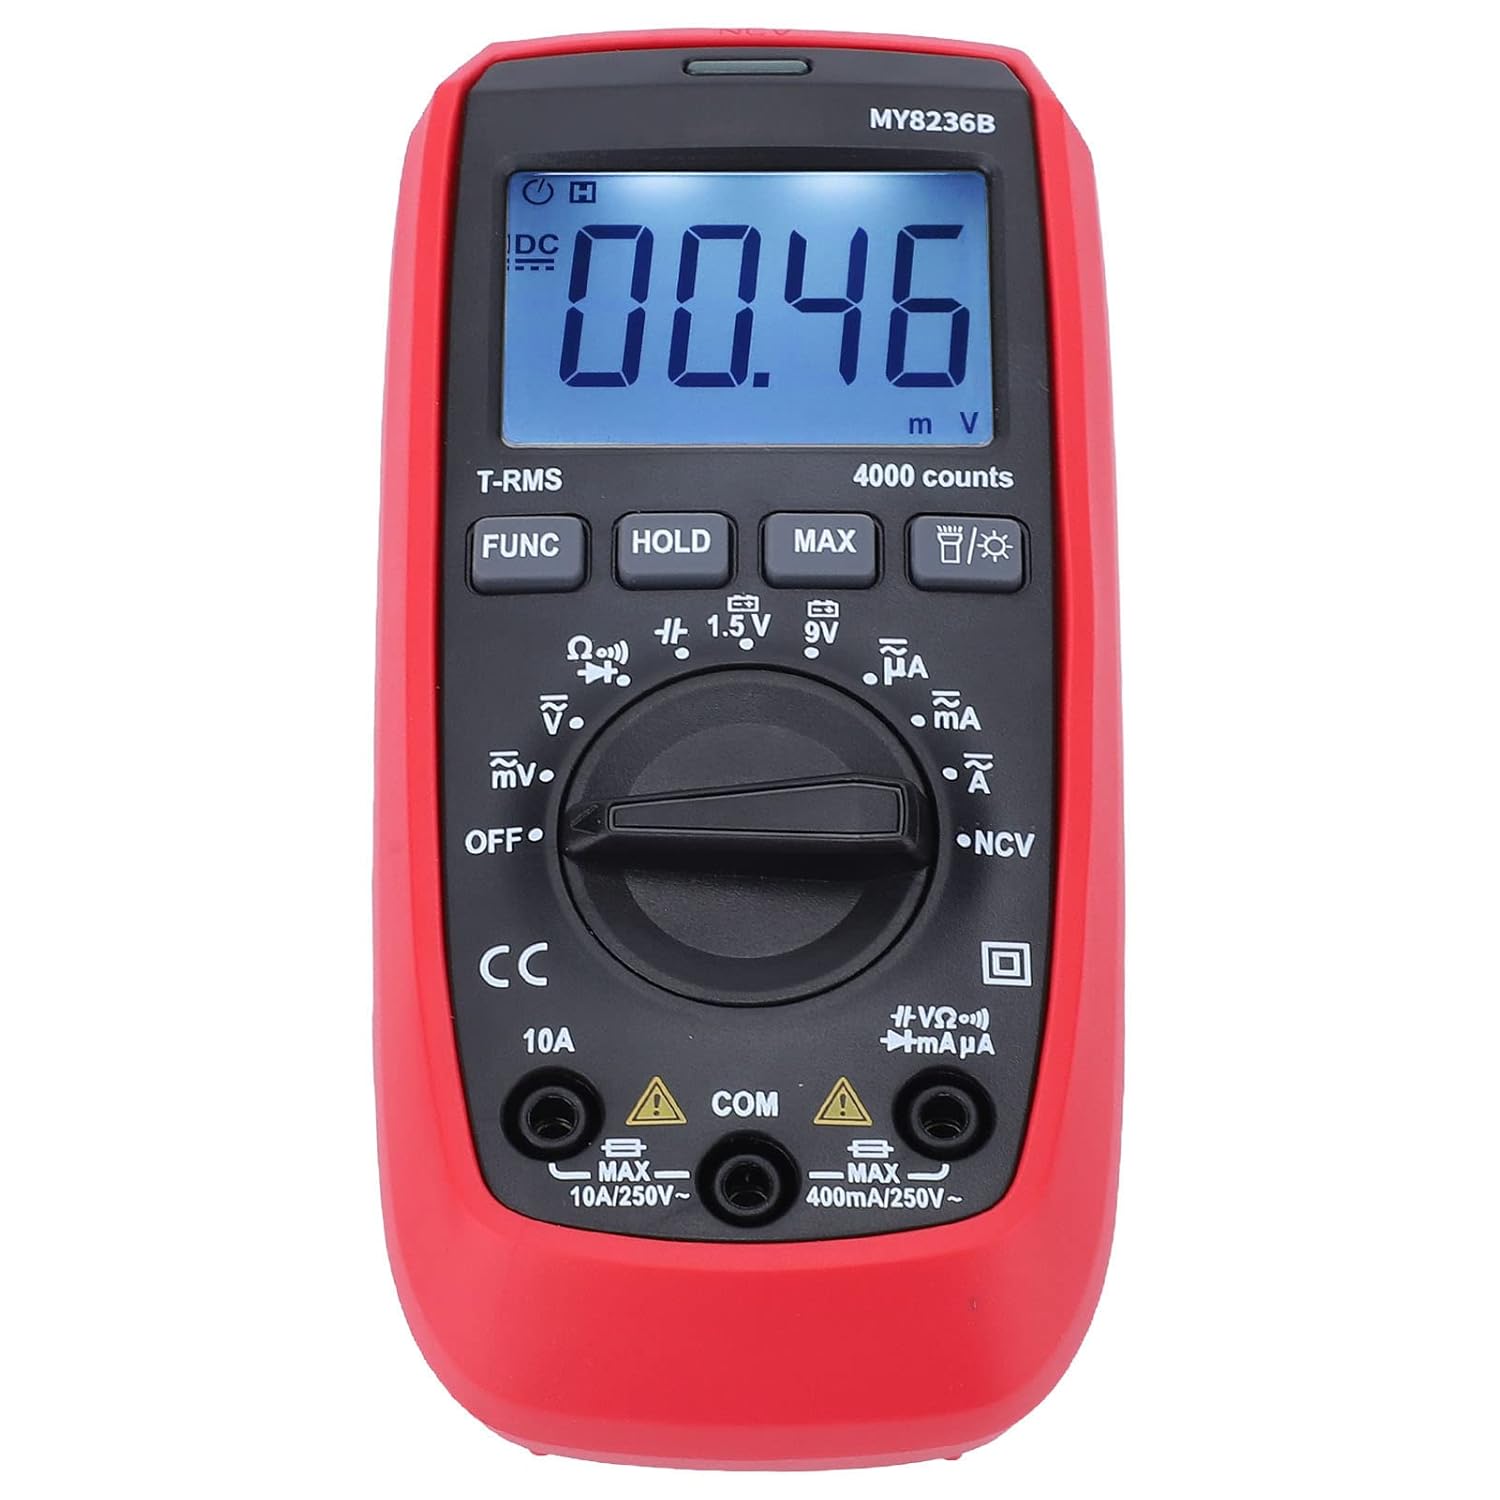
Obraz: Przód view of the Jauarta MY8236B Digital Multimeter, highlighting the central rotary switch for function selection and the digital display.
5.2 Pomiar objętości prądu stałegotage (V–)
- Set the rotary switch to the 'V–' range. Select an appropriate range (e.g., 4V, 40V, 400V) higher than the expected voltage. Jeśli objętośćtagJeśli wartość e jest nieznana, zacznij od najwyższego zakresu i zmniejszaj go w razie potrzeby.
- Podłącz czerwony przewód pomiarowy do dodatniego (+) bieguna obwodu, a czarny przewód pomiarowy do ujemnego (-) bieguna.
- Przeczytaj tomtage wartość na wyświetlaczu.
5.3 Pomiar objętości prądu przemiennegotage (V∼)
- Set the rotary switch to the 'V∼' range. Select an appropriate range higher than the expected voltage.
- Podłącz przewody pomiarowe do obwodu prądu przemiennegotagŹródło.
- Przeczytaj tomtage wartość na wyświetlaczu.
5.4 Measuring DC Current (A–)
Ostrożność: Nigdy nie podłączaj multimetru równolegle do miernika woltowego.tage source when measuring current. Always connect it in series with the load. Ensure the correct input jack (VΩmA or 10A) is used.
- Wyłącz zasilanie obwodu.
- Przerwij obwód w miejscu, w którym chcesz dokonać pomiaru prądu.
- Set the rotary switch to the 'A–' range (e.g., µA, mA, or 10A).
- Connect the red test lead to the appropriate current input jack (VΩmA for up to 400mA, 10A for up to 10A).
- Podłącz multimetr szeregowo do obwodu.
- Przywróć zasilanie obwodu i odczytaj wartość prądu.
5.5 Measuring AC Current (A∼)
Follow the same safety precautions and connection method as for DC current, but set the rotary switch to the 'A∼' range.
5.6 Pomiar rezystancji (Ω)
Ostrożność: Ensure the circuit is de-energized before measuring resistance. Do not measure resistance on a live circuit.
- Turn off power to the circuit or component.
- Set the rotary switch to the 'Ω' range.
- Podłącz przewody pomiarowe do mierzonego elementu lub obwodu.
- Odczytaj wartość rezystancji z wyświetlacza.
5.7 Funkcje specjalne
- Przycisk FUNC: Used to switch between different functions within a single rotary switch position (e.g., AC/DC, Diode/Continuity).
- Przytrzymaj przycisk: Zamraża aktualny odczyt na wyświetlaczu. Naciśnij ponownie, aby zwolnić.
- Przycisk MAX: Wyświetla maksymalną zmierzoną wartość.
- Przycisk podświetlenia: Activates or deactivates the display backlight for better visibility in low-light conditions.
6. Konserwacja
6.1 Czyszczenie
To maintain accuracy and prevent damage, keep the multimeter clean and dry. Wipe the case with a damp cloth and mild detergent. Do not use abrasives or solvents. Ensure no moisture enters the meter.
6.2 Wymiana baterii
When the battery indicator appears on the display, replace the batteries promptly to ensure accurate readings. Refer to Section 4.1 for battery installation instructions.
6.3 Przechowywanie
If the multimeter is not used for an extended period, remove the batteries to prevent leakage and damage. Store the instrument in a cool, dry place away from direct sunlight and extreme temperatures.
7. Rozwiązywanie Problemów
- Brak wyświetlacza: Sprawdź, czy baterie są prawidłowo zainstalowane i wystarczająco naładowane. W razie potrzeby wymień baterie. Upewnij się, że przełącznik obrotowy nie jest w pozycji „OFF”.
- Nieprawidłowe odczyty: Verify that the test leads are properly connected to the correct input jacks and that the rotary switch is set to the appropriate function and range. Ensure the circuit is de-energized for resistance measurements.
- No Reading for Current: Check if the fuse is blown. If measuring high current, ensure the red lead is in the 10A jack.
- Na wyświetlaczu pojawia się komunikat „OL” (przeciążenie): Zmierzona wartość przekracza wybrany zakres. Zmień zakres na wyższy lub upewnij się, że sygnał wejściowy mieści się w maksymalnych parametrach miernika.
8. Specyfikacje
| Parametr | Zakres |
|---|---|
| Objętość DCtage | 400mV, 4V, 40V, 400V, 600V |
| AC Objętośćtage | 400mV, 4V, 40V, 400V, 600V |
| Prąd stały | 400µA, 4000µA, 40mA, 400mA, 10A |
| Prąd zmienny | 400µA, 4000µA, 40mA, 400mA, 10A |
| Opór | 400Ω, 4kΩ, 40kΩ, 400kΩ, 4MΩ, 40MΩ |
| Wyświetl liczbę | 4000 liczy |
| Typ baterii | 2 baterie AAA 1.5 V |
| Tworzywo | ABS |
| Waga przedmiotu | 323 gramów |
| Wymiary paczki | Wymiary 16 x 11 x 5 cm |
9. Informacje dotyczące bezpieczeństwa
- Zawsze sprawdzaj multimetr i przewody pomiarowe pod kątem uszkodzeń przed użyciem. Nie używaj, jeśli są uszkodzone.
- Nie stosować objętościtage or current that exceeds the maximum rated input for any range.
- Zachowaj ostrożność podczas pracy z objętościątagpowyżej 30 V AC RMS, 42 V szczytowo lub 60 V DC. Te wartościtagStwarzają ryzyko porażenia prądem.
- Przed zmianą funkcji lub zakresów należy zawsze odłączyć przewody pomiarowe od obwodu.
- Nie należy używać miernika w środowisku zagrożonym wybuchem gazów, oparów ani w środowisku zapylonym.
- Ensure your hands are dry when operating the meter.
10. Gwarancja i wsparcie
For warranty information or technical support, please refer to the documentation provided with your purchase or contact Jauarta customer service through your retailer. Keep your purchase receipt as proof of purchase.