
1. Ważne informacje dotyczące bezpieczeństwa
Always wear appropriate safety gear, including gloves and eye protection, when using this sprayer. Keep the sprayer and its contents away from heat sources and open flames. Never point the sprayer at people or animals. Always follow the manufacturer's instructions for proper use, maintenance, and disposal. This sprayer contains chemicals that may be harmful if swallowed or inhaled. In case of accidental ingestion or inhalation, seek medical attention immediately.
2. Koniec produktuview
The Graco Ultra 450 Electric Airless Sprayer, Model 25F506, is designed for efficient and professional-grade paint application. This stand-mounted unit delivers up to 3300 PSI, making it suitable for a variety of painting projects. It features a robust design with alloy steel and plastic components, ensuring durability and reliable performance.
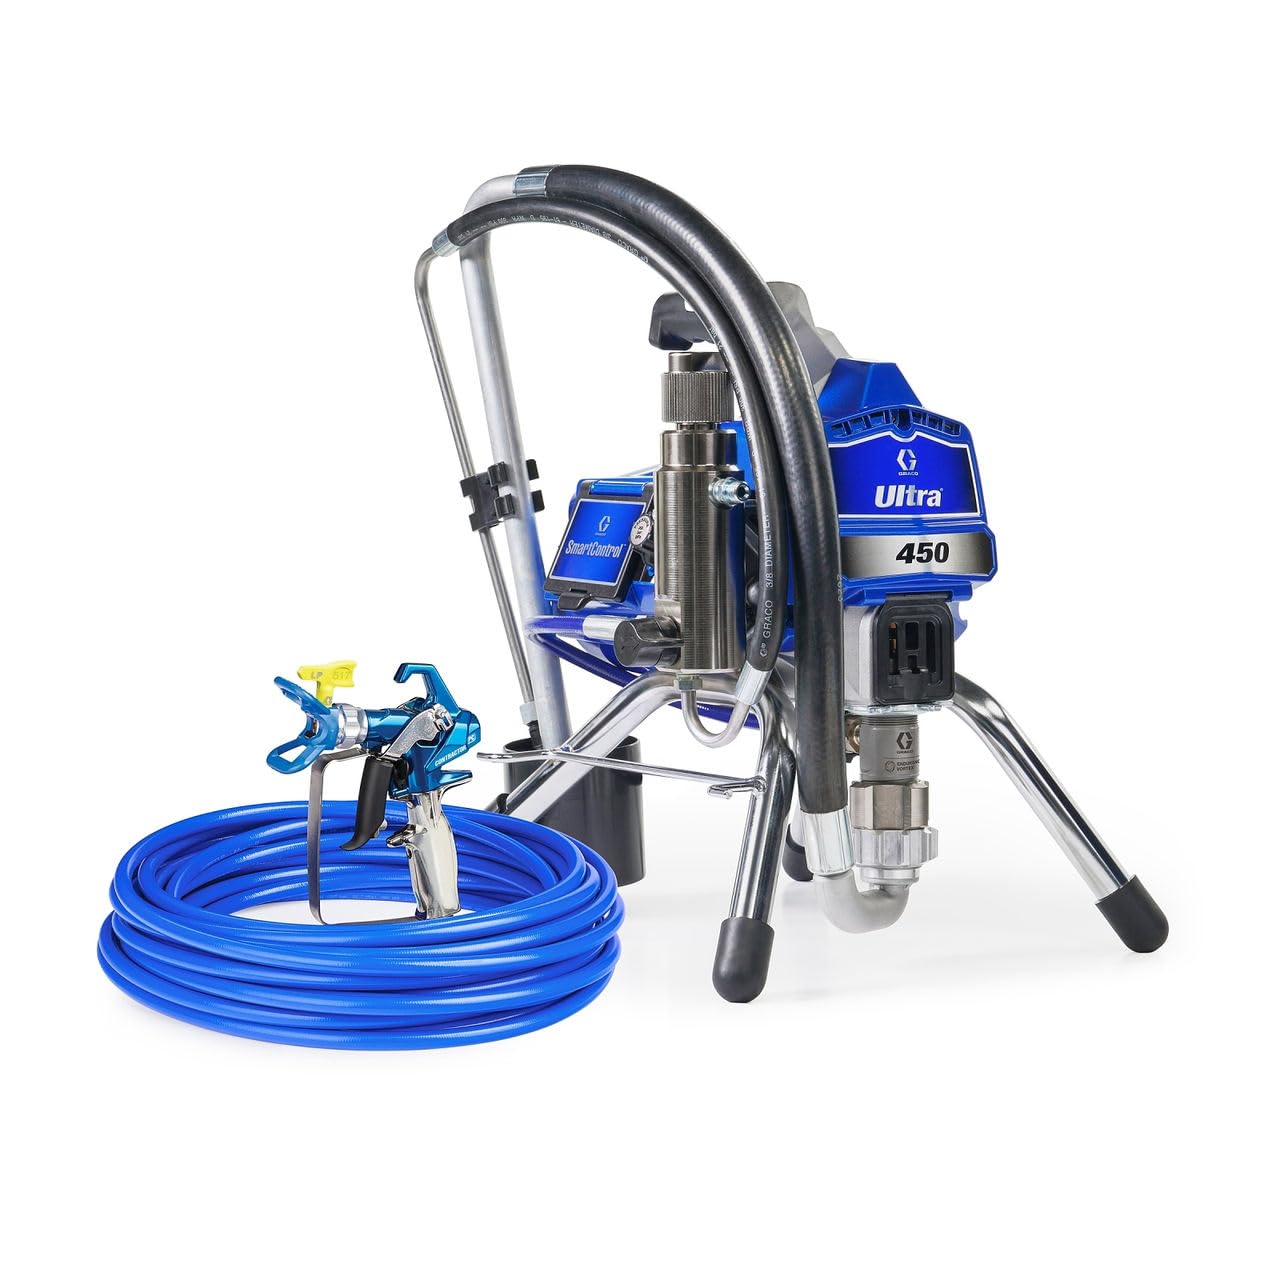
Rycina 2.1: Przód view of the Graco Ultra 450 Electric Airless Sprayer, showing the main unit, hose, and spray gun.
3. Instrukcje konfiguracji
3.1 Rozpakowanie i kontrola
Carefully remove all components from the packaging. Inspect the sprayer for any signs of damage that may have occurred during shipping. Ensure all listed components are present.
- Main Sprayer Unit
- Wąż wysokociśnieniowy (50 stóp)
- Pistolet natryskowy
- Końcówka natryskowa
- Suction Tube and Return Tube
- Instrukcja obsługi (ten dokument)
3.2 Montaż
- Place the sprayer unit on a stable, level surface.
- Connect the high-pressure hose to the fluid outlet on the sprayer and to the spray gun. Ensure all connections are tight.
- Attach the suction tube to the inlet valve and the return tube to the prime valve.
- Insert the appropriate spray tip into the spray gun.

Rysunek 3.1: Strona view of the sprayer, illustrating hose connection points.
4. Instrukcja obsługi
4.1 Preparing the Sprayer
- Place the suction tube into the paint container.
- Submerge the return tube into a waste bucket or back into the paint container (for priming).
- Przekręć zawór zalewania/spryskiwania do pozycji „Zalewanie”.
- Turn on the sprayer. Allow the pump to run until paint flows smoothly from the return tube, indicating the system is primed.
- Wyłącz opryskiwacz.
4.2 Technika natryskiwania
- Turn the prime/spray valve to the "Spray" position.
- Włącz opryskiwacz.
- Trzymaj pistolet natryskowy w odległości około 10-12 cm od malowanej powierzchni.
- Maintain a consistent distance and speed for an even finish. Overlap each pass by about 50%.
- Zwolnij spust na końcu każdego przejścia, aby uniknąć gromadzenia się farby.
4.3 Regulacja ciśnienia
The Graco Ultra 450 allows for pressure adjustment up to 3300 PSI. Use the pressure control knob located on the unit to increase or decrease the spray pressure. Start with a lower pressure and gradually increase until the desired spray pattern is achieved without tails or excessive overspray.

Rysunek 4.1: Strona view of the sprayer, highlighting the control panel and pressure adjustment knob.
5. Konserwacja
5.1 Czyszczenie po użyciu
Proper cleaning after each use is crucial for the longevity and performance of your sprayer.
- Turn off the sprayer and relieve pressure by triggering the gun into a waste bucket.
- Remove the suction tube from the paint and place it into a bucket of appropriate cleaning solution (water for latex, mineral spirits for oil-based paints).
- Place the return tube into the waste bucket.
- Turn the prime/spray valve to "Prime" and turn on the sprayer. Allow the cleaning solution to circulate until it runs clear from the return tube.
- Turn the valve to "Spray" and flush the gun until the cleaning solution runs clear.
- Turn off the sprayer and disconnect all hoses. Clean the spray tip and gun filter.
5.2 Przechowywanie
Store the sprayer in a clean, dry, and frost-free environment. For long-term storage, flush the system with a pump protector fluid to prevent corrosion and freezing.
5.3 Wymiana filtra
Regularly inspect and replace the gun filter and manifold filter as needed. Clogged filters can lead to poor spray patterns and reduced performance. Refer to the filter replacement guide for specific instructions.
6. Rozwiązywanie Problemów
W tej sekcji znajdziesz rozwiązania typowych problemów, na jakie możesz natrafić.
| Problem | Możliwa przyczyna | Rozwiązanie |
|---|---|---|
| Brak rozpylania lub słaby rozpylacz | Clogged tip, clogged filter, low paint level, air in system. | Clean or replace tip/filter. Refill paint. Re-prime the sprayer. |
| Uneven spray pattern or "tails" | Worn tip, incorrect pressure, paint too thick. | Replace tip. Adjust pressure. Thin paint according to manufacturer's recommendations. |
| Wycieki z połączeń | Loose fittings, damaged O-rings or seals. | Tighten connections. Inspect and replace damaged O-rings/seals. |
| Motor runs but no pressure builds | Inlet valve clogged, pump packing worn, air leak in suction system. | Clean inlet valve. Consult service manual or authorized technician for pump packing. Check all suction connections. |
7. Specyfikacje
Detailed technical specifications for the Graco Ultra 450 Electric Airless Sprayer.
| Funkcja | Szczegół |
|---|---|
| Marka | Graco |
| Nazwa modelu | 25F506 |
| Źródło zasilania | Elektryczny |
| Maksymalne ciśnienie | 3300 psi |
| Zalecane zastosowania | Malarstwo |
| Tworzywo | Stal stopowa, tworzywo sztuczne |
| Waga przedmiotu | 40 funta |
| Długość węża | 50 stóp |
| Wymiary (szer. x wys.) | 13.5" szer. x 17.5" wys. |
| Zawarte komponenty | 3300 PSI, GRACO 25F506 - Ultra 450 Electric Airless Sprayer, Stand |
8. Gwarancja i wsparcie
The Graco Ultra 450 Electric Airless Sprayer comes with a manufacturer's warranty of 12 miesięcy od daty zakupu. Niniejsza gwarancja obejmuje wady materiałowe i wykonawcze przy normalnym użytkowaniu.
For technical support, warranty claims, or to purchase replacement parts, please contact Graco customer service. Refer to the official Graco webAktualne dane kontaktowe znajdziesz na stronie internetowej lub w dokumentacji zakupu.