E-ACE DMMRUTXB
E-ACE 4.3-calowy rejestrator samochodowy z dwoma obiektywami, tylnyview Instrukcja obsługi lustrzanej kamery na deskę rozdzielczą
Model: DMMRUTXB
1. Koniec produktuview
The E-ACE 4.3-inch Dual Lens Car DVR Rearview Mirror Dash Cam is designed to enhance driving safety by providing comprehensive video recording of your journeys. This device integrates a front-facing camera and supports an optional rear-facing camera, offering a wide field of view and continuous recording capabilities. Its sleek design replaces your existing rearview mirror, providing a discreet and integrated solution for vehicle surveillance.
Key features include a 4.3-inch high-definition display, dual-lens recording, night vision, loop recording, and a G-sensor for automatic incident detection.

Image: The E-ACE rearview mirror dash cam displaying both front and rear camera feeds on its integrated screen.
2. Zawartość opakowania
Proszę sprawdzić, czy w paczce znajdują się następujące elementy:
- E-ACE Rearview Kamera samochodowa Mirror Dash Cam Unit
- Ładowarka samochodowa
- Fixed Bandages (for mounting)
- Instrukcja obsługi
- Czytnik kart
- Opcjonalnie: Tył View Camera + Cable (6M or 10M, depending on variant)
- Optional: Buck Line (for parking monitoring power)
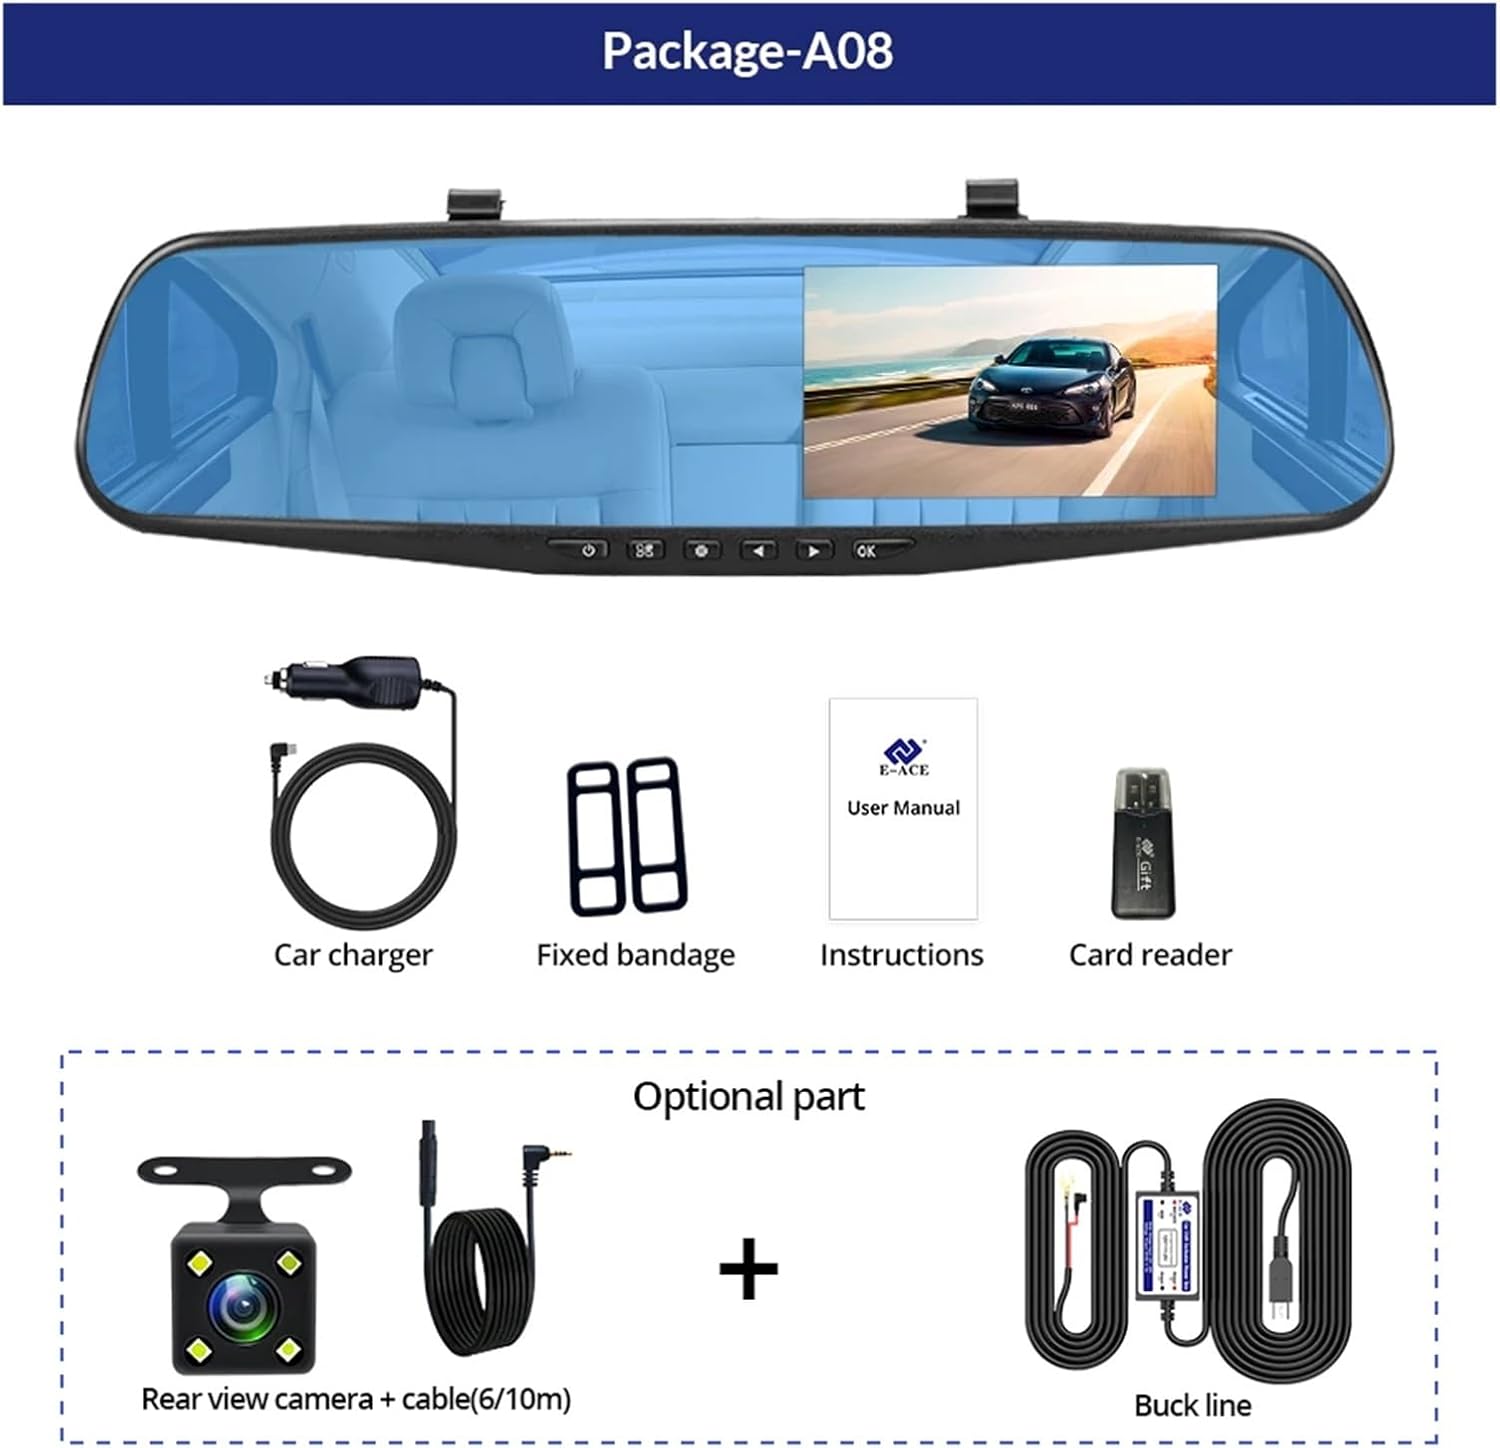
Image: A visual representation of the items included in the E-ACE dash cam package, showing the main unit and accessories.
3. Funkcje produktu
- 4.3-calowy wyświetlacz o wysokiej rozdzielczości: Provides clear visibility for real-time monitoring and playback.
- Konstrukcja z dwoma soczewkami: Captures both front and rear footage simultaneously for comprehensive coverage.
- Built-in Night Vision Technology: Ensures clear recordings in low-light conditions.
- Instalacja przyjazna dla użytkownika: Sleek rearview mirror design integrates seamlessly into your vehicle.
- Nagrywanie w pętli: Automatycznie nadpisuje najstarszy footage gdy karta pamięci jest pełna, zapewniając ciągłe nagrywanie.
- G-Sensor Feature: Detects sudden movements or impacts and automatically locks the current video file aby zapobiec jego nadpisaniu.
- Monitorowanie parkowania: Records video when motion or impact is detected while the vehicle is parked (requires buck line connection).
- Szeroki kąt 170 stopni: Zapewnia szeroki view drogi przed nami.
- Obraz odwrotny: Displays the rear camera view z wytycznymi dotyczącymi parkowania podczas cofania.

Image: An illustration highlighting the various functional features of the E-ACE dash cam.
4. Identyfikacja komponentów
Familiarize yourself with the various parts and controls of your E-ACE dash cam:

Image: A detailed diagram identifying the buttons, ports, and features on the E-ACE dash cam unit.
- Przycisk WŁ./WYŁ.: Włącza lub wyłącza urządzenie.
- Przycisk menu: Dostęp do ustawień i opcji.
- Przycisk trybu: Switches between video recording, photo, and playback modes.
- Przycisk W GÓRĘ: Navigates up in menus or adjusts settings.
- Przycisk w dół: Navigates down in menus or adjusts settings.
- Przycisk OK: Potwierdza wybór lub rozpoczyna/zatrzymuje nagrywanie.
- Gniazdo karty TF: Insert your MicroSD (TF) card here.
- Port AV-IN: Umożliwia podłączenie tylnej kamery.
- Port USB: Do zasilania i przesyłu danych.
- Przycisk resetowania: Resets the device to factory settings (use a thin pin).
- Mikrofon: Nagrywa dźwięk wewnątrz pojazdu.
5. Konfiguracja i instalacja
5.1 Wkładanie karty pamięci
Before installation, insert a high-speed MicroSD (TF) card (Class 10 or higher, up to 64GB recommended) into the TF Card Slot (7) with the contacts facing the screen. Ensure the card is inserted correctly until it clicks into place.
5.2 Montaż kamery samochodowej
- Attach the fixed bandages to the back of the dash cam unit.
- Securely strap the dash cam over your vehicle's existing rearview mirror using the fixed bandages. Ensure it is centered and stable.
5.3 Podłączanie zasilacza
- Connect the car charger to the USB Port (9) on the dash cam.
- Podłącz drugi koniec ładowarki samochodowej do gniazda zapalniczki w pojeździe.
- Poprowadź kabel zasilający starannie wzdłuż listwy przedniej szyby, aby nie przeszkadzał. view.
5.4 Montaż tylnej kamery (opcjonalnie)
- Connect the rear camera cable to the AV-IN Port (8) on the dash cam.
- Route the rear camera cable from the dash cam to the rear of your vehicle. This typically involves tucking the cable under the headliner and along the side pillars.
- Mount the rear camera on the rear windshield or near the license plate using its adhesive or screws. Ensure it has a clear view drogi z tyłu.
- If using the reverse image function, connect the red wire from the rear camera cable to your vehicle's reverse light power supply.
6. Instrukcja obsługi
6.1 Włączanie/wyłączanie zasilania
- Automatyczny: The dash cam will automatically power on and start recording when your vehicle's ignition is turned on (if connected to a switched power source).
- Manual: Press and hold the ON/OFF Button (1) to manually power the device on or off.
6.2 Podstawowa obsługa
- Tryby przełączania: Press the Mode Button (3) to cycle between Video Recording, Photo, and Playback modes.
- Dostęp do menu: In any mode, press the Menu Button (2) to enter the settings menu. Use the UP (4) and Down (5) buttons to navigate, and OK (6) to select.
- Rozpocznij/zatrzymaj nagrywanie: In Video Recording mode, press the OK Button (6) to manually start or stop recording.
6.3 Tryby wyświetlania
While recording, you can typically switch between different display views by pressing the UP or Down buttons:
- Front Camera Only
- Rear Camera Only
- Picture-in-Picture (Front main, Rear sub-window)
- Picture-in-Picture (Rear main, Front sub-window)
6.4 Nagrywanie w pętli
Set the loop recording duration (e.g., 1, 3, or 5 minutes) in the settings menu. When the memory card is full, the oldest unlocked filezostaną nadpisane przez nowe nagrania.
6.5 Czujnik G
The G-sensor automatically detects collisions or sudden braking. When triggered, it locks the current video file, preventing it from being overwritten by loop recording. Adjust sensitivity in the settings.
6.6 Monitorowanie parkingu (opcjonalnie)
If the buck line is installed, the dash cam can monitor your vehicle while parked. When motion or impact is detected, it will automatically record a short video. Enable this feature in the settings.
6.7 Ustawianie daty i godziny
It is important to set the correct date and time in the system settings for accurate timestampna twoich nagraniach.
7. Konserwacja
- Czyszczenie: Use a soft, dry cloth to clean the lens and screen. Avoid abrasive cleaners or solvents.
- Karta pamięci: Format the MicroSD card regularly (e.g., once a month) within the dash cam's settings to maintain optimal performance and prevent data corruption. Back up important files przed formatowaniem.
- Temperatura: Avoid exposing the device to extreme temperatures, as this can affect battery life and component integrity.
- Aktualizacje oprogramowania układowego: Sprawdź producenta website periodically for firmware updates that may improve performance or add features.
8. Rozwiązywanie Problemów
| Problem | Możliwa przyczyna | Rozwiązanie |
|---|---|---|
| Kamera samochodowa nie włącza się. | Brak zasilania, uszkodzona ładowarka, luźne połączenie. | Check car charger connection and vehicle's cigarette lighter. Try a different USB cable/charger. |
| Nagrywanie zatrzymuje się automatycznie. | Memory card full; slow memory card; G-sensor sensitivity too high. | Format the memory card. Use a Class 10 or higher MicroSD card. Lower G-sensor sensitivity in settings. |
| Wideotage jest rozmazane. | Folia ochronna na obiektywie; brudny obiektyw; nieprawidłowa ostrość. | Remove any protective film. Clean the lens with a soft cloth. |
| Tylna kamera nie jest wyświetlana. | Luźne połączenie; uszkodzony kabel/kamera. | Check the AV-IN connection. Ensure the rear camera is properly installed. |
| Urządzenie zawiesza się lub ulega awarii. | Software issue; memory card error. | Press the Reset Button (10) with a thin pin. Format the memory card. |
9. Specyfikacje
- Nazwa modelu: DMMRUTXB
- Wyświetlacz: 4.3 cali
- Kamera: Dual Lens (Front & Rear support)
- Rozdzielczość wideo: FHD 1920x1080P (Front)
- Cechy: Loop Recording, G-Sensor, Night Vision, Parking Monitoring, 170-degree wide angle
- Składowanie: Supports MicroSD (TF) card, Class 10 or higher (up to 64GB)
- Łączność: USB, AV-IN (for rear camera)
- Waga przedmiotu: Około 1.76 uncji (50 gramów)
- Wymiary opakowania: Około 0.39 x 0.39 x 0.39 cala
- Producent: DMMRUTXB
10. Gwarancja i wsparcie
Aby uzyskać informacje o gwarancji i pomocy technicznej, zapoznaj się z dokumentacją dołączoną do produktu lub skontaktuj się bezpośrednio ze sprzedawcą/producentem. Zachowaj paragon jako dowód zakupu.