
1. Wprowadzenie
This manual provides detailed instructions for the installation, configuration, and maintenance of your Suapouen X99M-A Motherboard. The X99M-A is a Micro-ATX motherboard designed for Xeon E5 V3/V4 CPUs, featuring 4 DDR4 memory slots, M.2 NVMe/NGFF support, and a Gigabit network interface. Please read this manual thoroughly before proceeding with installation.
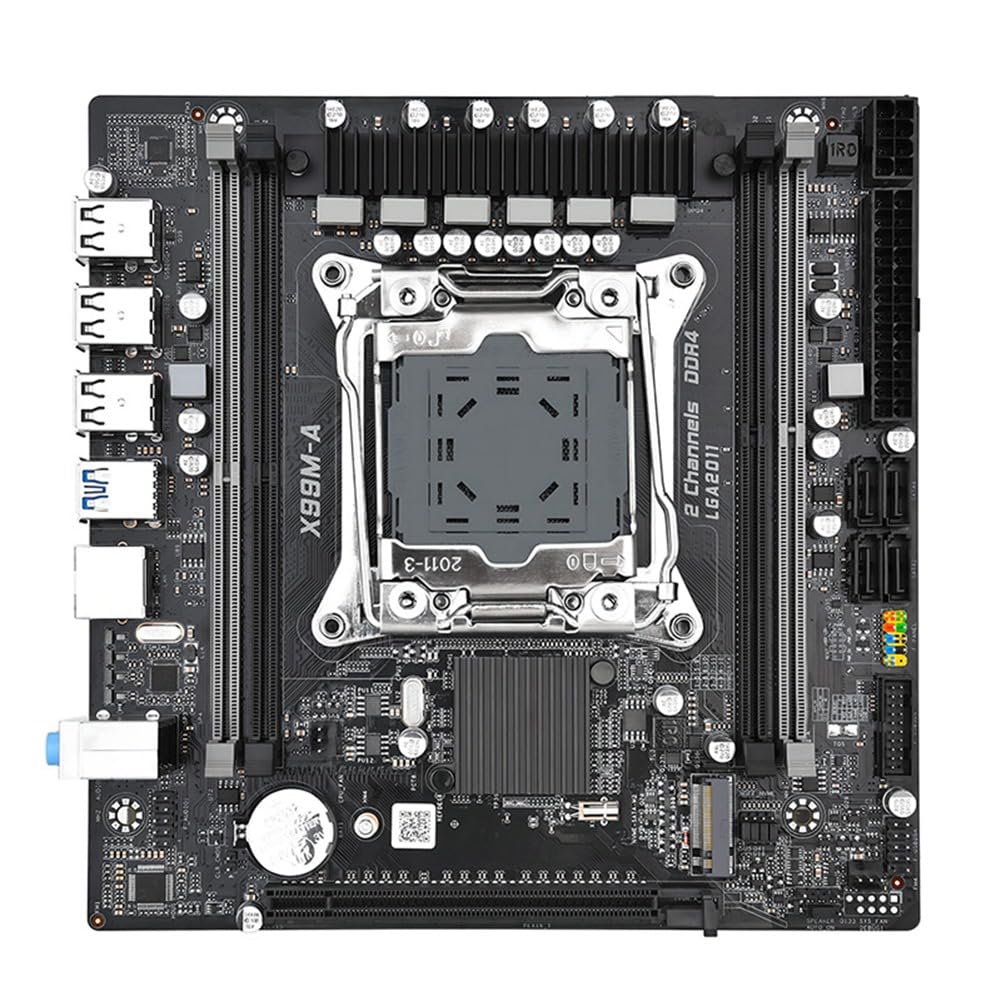
Obraz 1.1: Koniecview of the Suapouen X99M-A Motherboard, showcasing its layout with CPU socket, RAM slots, and various ports.
2. Funkcje produktu
The Suapouen X99M-A Motherboard incorporates several key features designed for performance and stability:
- All-Solid Capacitors: Utilizes all-solid capacitors with a 6-phase power supply for stable performance and extended motherboard lifespan.
- High-Speed M.2 Slot: Features one M.2 2280 NVMe x4 3.0 Port + NGFF slot, providing high performance for demanding applications like gaming, graphics, and data analysis.
- Gigabit Network Interface: Equipped with a Gigabit Fast Ethernet port and a high-performance network control chip for fast data transmission speeds.
- Optimized Computing Power: Supports Xeon E5 V3/V4 CPU processors, delivering powerful performance for multitasking and intensive applications.
- SATA3.0 Ports: Includes four SATA3.0 interfaces to improve computer performance and accelerate program loading.
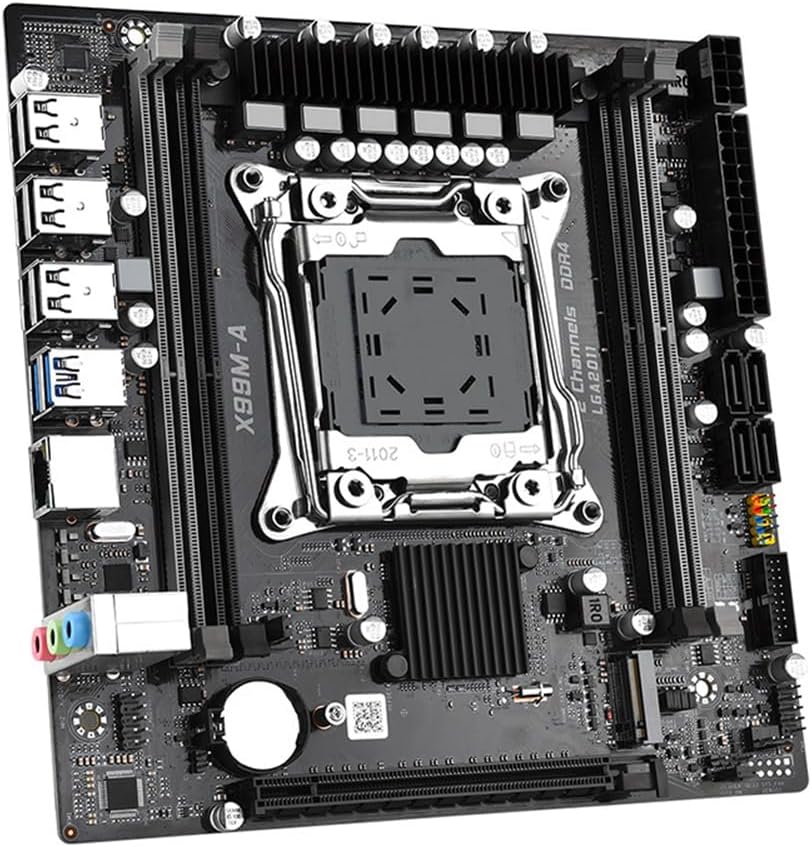
Image 2.1: Diagram illustrating the four core technologies: Full solid capacitor, Gigabit NIC, High-speed M.2, and SATA3.0.

Obraz 2.2: Zbliżenie view of the motherboard's CPU power delivery area, highlighting the full solid capacitors and 6-phase power supply.
3. Specyfikacje
| Funkcja | Szczegół |
|---|---|
| Model | X99M-A (Part Number: 500801980) |
| Wersja płyty głównej | Micro-ATX |
| CPU Slot | LGA2011-3 (Supports Xeon E5 V3/V4 CPU) |
| Gniazda pamięci | 4 x DDR4 (Supports 1600/1866/2133/2400 MHz, up to 128GB) |
| Interfejsy SATA | 4 x SATA3.0 |
| Gniazdo M.2 | 1 x M.2 2280 NVMe x4 3.0 Port + NGFF |
| Gniazdo karty graficznej | 1 x PCI-E3.0x16 |
| Karta dźwiękowa | 5.1 channel high-definition audio chip |
| Karta sieciowa | 1 x Gigabit network port |
| Interfejsy USB | 8 x USB2.0 (6 rear, 1 F_USB2.0 pin for 2 ports), 4 x USB3.0 (2 rear, 1 F_USB3.0 pin for 2 ports) |
| Inne interfejsy | F_AUDIO, 3PIN CPU_FAN, 3PIN SYS_FAN, 1*AUTO_ON, 1*24pin ATX power, 1*8pin 12V power, 1*CLR_COMS, 4*3 NGFF_NVME Transfer pin |
| Wymiary produktu | Wymiary 25 x 10 x 21 cm |
| Waga | 637.5 gramów |

Image 3.1: Rear I/O panel showing USB ports, Gigabit Ethernet, and audio jacks.
4. Konfiguracja i instalacja
Przed montażem płyty głównej upewnij się, że zasilacz jest odłączony od gniazdka ściennego. Trzymaj płytę główną za krawędzie, aby uniknąć wyładowania elektrostatycznego.
4.1. Instalacja procesora
- Znajdź gniazdo procesora LGA2011-3 na płycie głównej.
- Otwórz mechanizm blokujący gniazdo procesora.
- Carefully align the CPU (Xeon E5 V3/V4) with the socket, ensuring the gold triangle on the CPU matches the indicator on the socket.
- Ostrożnie umieść procesor w gnieździe, nie używając siły.
- Zamknij mechanizm mocujący, aby zabezpieczyć procesor.
- Nałóż pastę termoprzewodzącą i zamontuj chłodnicę procesora zgodnie z instrukcją producenta.
4.2. Instalacja pamięci (RAM)
- Identify the four DDR4 memory slots.
- Otwórz zatrzaski na obu końcach gniazda pamięci.
- Dopasuj wycięcie na module pamięci DDR4 do wypustki w gnieździe pamięci.
- Naciśnij mocno oba końce modułu pamięci, aż klipsy zatrzasną się na swoim miejscu.
4.3. M.2 NVMe/NGFF SSD Installation
- Znajdź gniazdo M.2 na płycie głównej.
- Włóż dysk SSD M.2 do gniazda pod kątem.
- Delikatnie dociśnij dysk SSD i zabezpiecz go za pomocą dołączonej śruby.
4.4. Instalacja urządzenia SATA
- Podłącz jeden koniec kabla danych SATA do portu SATA3.0 na płycie głównej.
- Podłącz drugi koniec kabla danych SATA do urządzenia pamięci masowej (HDD/SSD).
- Podłącz kabel zasilający SATA do zasilacza i urządzenia magazynującego.
4.5. Połączenia zasilania
- Podłącz 24-pinowe złącze zasilania ATX zasilacza do głównego gniazda zasilania na płycie głównej.
- Connect the 8-pin 12V CPU power connector from your power supply to the CPU power socket.

Obraz 4.1: Widok z góry na dół view of the motherboard, highlighting key components like the CPU socket, DDR4 slots, M.2 slot, and SATA ports.
5. Instrukcja obsługi
Po zainstalowaniu i podłączeniu wszystkich komponentów można włączyć system.
5.1. Pierwsze uruchomienie
- Sprawdź, czy wszystkie kable zasilające są solidnie podłączone.
- Podłącz monitor, klawiaturę i mysz.
- Naciśnij przycisk zasilania na obudowie komputera.
- The system should boot and display the BIOS/UEFI splash screen.
5.2. Konfiguracja BIOS/UEFI
To enter the BIOS/UEFI setup, press the designated key (usually USUNĄĆ or F2) during the initial boot sequence. Within the BIOS/UEFI, you can configure boot order, system time, fan speeds, and other advanced settings. Refer to the on-screen instructions or the motherboard manufacturer's website for detailed BIOS/UEFI navigation.
6. Konserwacja
Właściwa konserwacja zapewnia długowieczność i stabilną pracę płyty głównej.
- Usuwanie kurzu: Regularnie czyść płytę główną i podzespoły sprężonym powietrzem z kurzu. Przed czyszczeniem upewnij się, że system jest wyłączony i odłączony od zasilania.
- Aktualizacje BIOS-u/UEFI: Okresowo sprawdzaj producenta webStrona z aktualizacjami BIOS/UEFI. Aktualizacje mogą poprawić kompatybilność, stabilność i wydajność. Postępuj zgodnie z instrukcjami aktualizacji, aby uniknąć uszkodzenia systemu.
- Aktualizacje sterowników: Keep your operating system and device drivers (chipset, network, audio) updated for optimal performance and security.
7. Rozwiązywanie Problemów
Jeśli napotkasz problemy, rozważ poniższe kroki rozwiązywania problemów:
- Brak zasilania:
- Ensure the power supply is connected to the motherboard (24-pin ATX and 8-pin 12V CPU power).
- Check if the power supply switch is ON.
- Sprawdź połączenie przycisku zasilania na panelu przednim z płytą główną.
- Brak wyświetlacza:
- Confirm the monitor is connected to the graphics card (if dedicated) or the motherboard (if integrated graphics are used and supported by the CPU).
- Ponownie zamontuj kartę graficzną i moduły pamięci.
- Spróbuj uruchomić system przy użyciu tylko jednej kości RAM.
- Niestabilność/awarie systemu:
- Sprawdź temperaturę procesora i procesora graficznego.
- Sprawdź, czy wszystkie elementy są prawidłowo osadzone.
- Uruchom narzędzia diagnostyczne pamięci.
- Update drivers and BIOS/UEFI.
- Nie wykryto urządzenia peryferyjnego:
- Verify the device is correctly connected to the appropriate port (USB, SATA, M.2).
- Sprawdź Menedżera urządzeń pod kątem problemów ze sterownikiem.
- Jeżeli to możliwe, przetestuj urządzenie na innym porcie lub systemie.
For further assistance, consult the manufacturer's support webstronie internetowej lub skontaktuj się ze sprzedawcą.
8. Gwarancja i wsparcie
For information regarding the warranty period, terms, and conditions for your Suapouen X99M-A Motherboard, please refer to the warranty card included with your product or visit the official Suapouen website. Support resources, including updated drivers and BIOS versions, may also be available on the manufacturer's webstrona.
When contacting support, please have your motherboard model (X99M-A) and serial number ready.