1. Ważne informacje dotyczące bezpieczeństwa
Please read this manual thoroughly before operating your Ströme TDW55C01 compact dishwasher. Keep this manual for future reference. Always follow basic safety precautions to reduce the risk of fire, electric shock, or injury.
- Upewnij się, że zmywarka jest prawidłowo uziemiona.
- Nie używaj zmywarki, jeśli jest uszkodzona.
- Trzymaj dzieci z dala od zmywarki podczas jej działania.
- Używaj wyłącznie detergentów i nabłyszczaczy przeznaczonych specjalnie do zmywarek.
2. Koniec produktuview
The Ströme TDW55C01 is a compact countertop dishwasher designed for small households, offering efficient cleaning with a 6 place setting capacity. It features an intuitive LED display, multiple wash programs, and a quiet operation.

Image: The Ströme TDW55C01 compact dishwasher positioned on a kitchen countertop.
Główne cechy:
- Kompaktowa konstrukcja: Ideal for small apartments or single households.
- 6 nakryć stołowych: Sufficient capacity for daily dishwashing needs.
- 6 Wash Programs & 5 Temperatures: Versatile options for various cleaning requirements.
- Wyświetlacz LED: Clear indication of program status and remaining time.
- Zegar opóźnionego startu: Schedule wash cycles up to 24 hours in advance.
- Cicha praca: Działa przy niskim poziomie hałasu wynoszącym 49 dB.
3. Konfiguracja i instalacja
3.1 Rozpakowanie
Carefully remove all packaging materials. Inspect the dishwasher for any damage during transit. Retain packaging for potential future transport or service.
3.2 Umieszczenie
Place the dishwasher on a stable, level surface near a water supply, drain, and electrical outlet. Ensure adequate ventilation around the unit. The dimensions are 50D x 55W x 44H cm.

Obraz: Bok view of the dishwasher, illustrating the hose connections at the rear.
3.3 Podłączenie wody
Connect the inlet hose to a cold water tap with a 3/4-inch thread. Ensure the connection is secure to prevent leaks. The inlet hose length is 1.45 meters. Position the drain hose into a sink or a dedicated drain connection, ensuring it is not kinked or obstructed.

Image: A hand securing the water inlet hose connection at the rear of the dishwasher.
3.4 Podłączenie elektryczne
Plug the dishwasher into a grounded electrical outlet. Ensure the voltagNapięcie i częstotliwość odpowiadają specyfikacjom podanym na tabliczce znamionowej urządzenia.
4. Instrukcja obsługi
4.1 Panel sterowania
The dishwasher features an intuitive LED display and control buttons for easy operation. The display shows the selected program, remaining time, and error indicators.

Obraz: Szczegółowy view of the dishwasher's control panel, showing the LED display and program selection buttons.
4.2 Załadunek zmywarki
Arrange dishes to allow water to reach all surfaces. Place larger items in the lower rack and smaller items, glasses, and cups in the upper rack. The dishwasher includes two wine glass holders for delicate stemware and a cutlery basket for utensils.
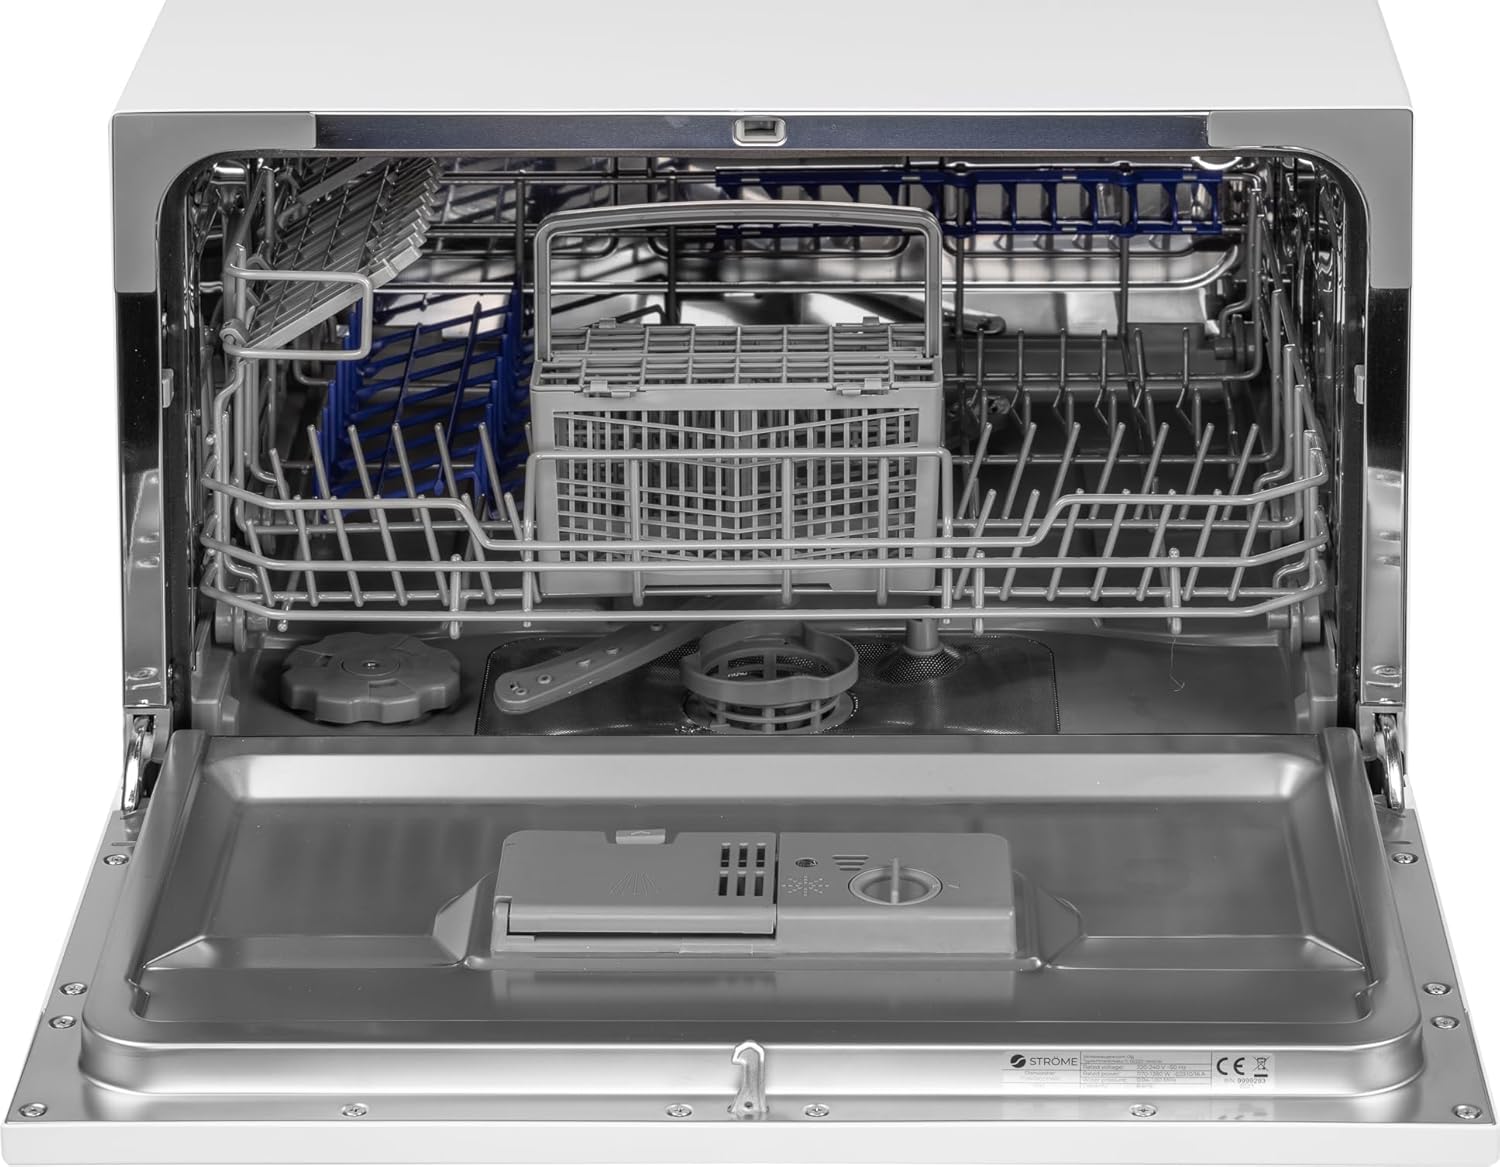
Image: The interior of the dishwasher, showing the arrangement of racks and the cutlery basket.

Obraz: szczegółowy view of the cutlery basket, designed to hold various utensils.
4.3 Dodawanie detergentu i środka nabłyszczającego
Open the detergent dispenser and add the recommended amount of dishwasher detergent. Close the dispenser lid securely. Fill the rinse aid dispenser with rinse aid to ensure streak-free drying.

Image: A close-up of the detergent and rinse aid dispenser inside the dishwasher door.
4.4 Wybór programu
Select one of the six available wash programs based on the soil level of your dishes. Programs include Economy, Intensive, Normal, Quick, and Delayed Start. Each program has specific temperature settings.
4.5 Rozpoczęcie cyklu prania
Close the dishwasher door firmly. Press the Start button to begin the selected wash cycle. The LED display will show the program progress and remaining time.
4.6 Funkcja opóźnionego startu
To delay the start of a wash cycle, select your desired program, then use the timer button to set a delay from 1 to 24 hours. The dishwasher will start automatically after the set delay.
5. Konserwacja i czyszczenie
Regularna konserwacja zapewnia optymalną wydajność i długą żywotność zmywarki.
5.1 Czyszczenie filtrów
The filter system should be cleaned regularly to prevent food particles from clogging the spray arms and affecting wash performance. Remove the filter assembly, rinse it under running water, and brush away any debris. Reassemble correctly.

Image: The empty interior of the dishwasher, highlighting the filter system at the bottom.
5.2 Czyszczenie ramion natryskowych
Check the spray arm nozzles for blockages. If any holes are clogged, remove the spray arm and clear the blockages using a thin object like a toothpick. Ensure the spray arms rotate freely after reinstallation.
5.3 Czyszczenie wnętrza i zewnętrza
Wytrzyj zewnętrzną część zmywarki miękką szmatką.amp cloth. For the interior, periodically run a dishwasher cleaning cycle with a specialized cleaner or a cup of white vinegar to remove grease and limescale buildup.
6. Rozwiązywanie Problemów
Przed skontaktowaniem się z obsługą klienta zapoznaj się z poniższą tabelą zawierającą informacje na temat typowych problemów i ich rozwiązań.
| Problem | Możliwa przyczyna | Rozwiązanie |
|---|---|---|
| Zmywarka nie uruchamia się | Power cord not plugged in; Door not closed properly; Fuse blown/circuit breaker tripped | Ensure power cord is connected; Close door firmly; Check household fuse/circuit breaker |
| Słabe wyniki czyszczenia | Improper loading; Clogged spray arms; Insufficient detergent; Incorrect program selection | Reload dishes correctly; Clean spray arm nozzles; Add appropriate detergent; Select suitable program |
| Woda nie spływa | Zatkany wąż spustowy; Zatkany filtr; Awaria pompy spustowej | Check and clear drain hose; Clean filter system; Contact service if pump is faulty |
| Zmywarka przecieka | Loose hose connections; Damaged door seal; Too much detergent causing excessive suds | Tighten hose connections; Inspect and replace door seal if damaged; Use correct amount of detergent |
7. Specyfikacje
Detailed technical specifications for the Ströme TDW55C01 compact dishwasher.
| Funkcja | Specyfikacja |
|---|---|
| Model | TDW55C01 |
| Wymiary (gł. x szer. x wys.) | 50 gł. x 55 szer. x 44 wys. cm |
| Ustawienia miejsca | 6 |
| Poziom hałasu | 49dB |
| Programy prania | 6 (Economy, Intensive, Normal, Quick, etc.) |
| Ustawienia temperatury | 5 |
| Zużycie energii | 61 kWh / 100 cykli |
| Długość węża wlotowego | 1.45 metrów |
| Cechy specjalne | Digital Display, Remaining Time Indicator, Compact, Quick Wash, Timer Delay |
| Kolor | Biały |
8. Gwarancja i wsparcie
For warranty information, please refer to the warranty card included with your product or contact your retailer. For technical support or service inquiries, please reach out to Ströme customer service through their official webstronie internetowej lub danych kontaktowych podanych w miejscu zakupu.