ULANZI OMBRA VIDEO II
Instrukcja obsługi statywu do aparatu ULANZI Ombra Video Ⅱ
Model: OMBRA VIDEO II
1. Koniec produktuview
The ULANZI Ombra Video Ⅱ Camera Tripod with Fluid Head is designed for photographers and videographers seeking a stable, versatile, and portable support solution. This 61.5-inch travel tripod features a 360° rotated Arca Quick Release Plate, making it suitable for various shooting scenarios including vlogging, video shooting, and photography with both cameras and smartphones. Its robust aluminum construction ensures stability while remaining lightweight for easy transport.
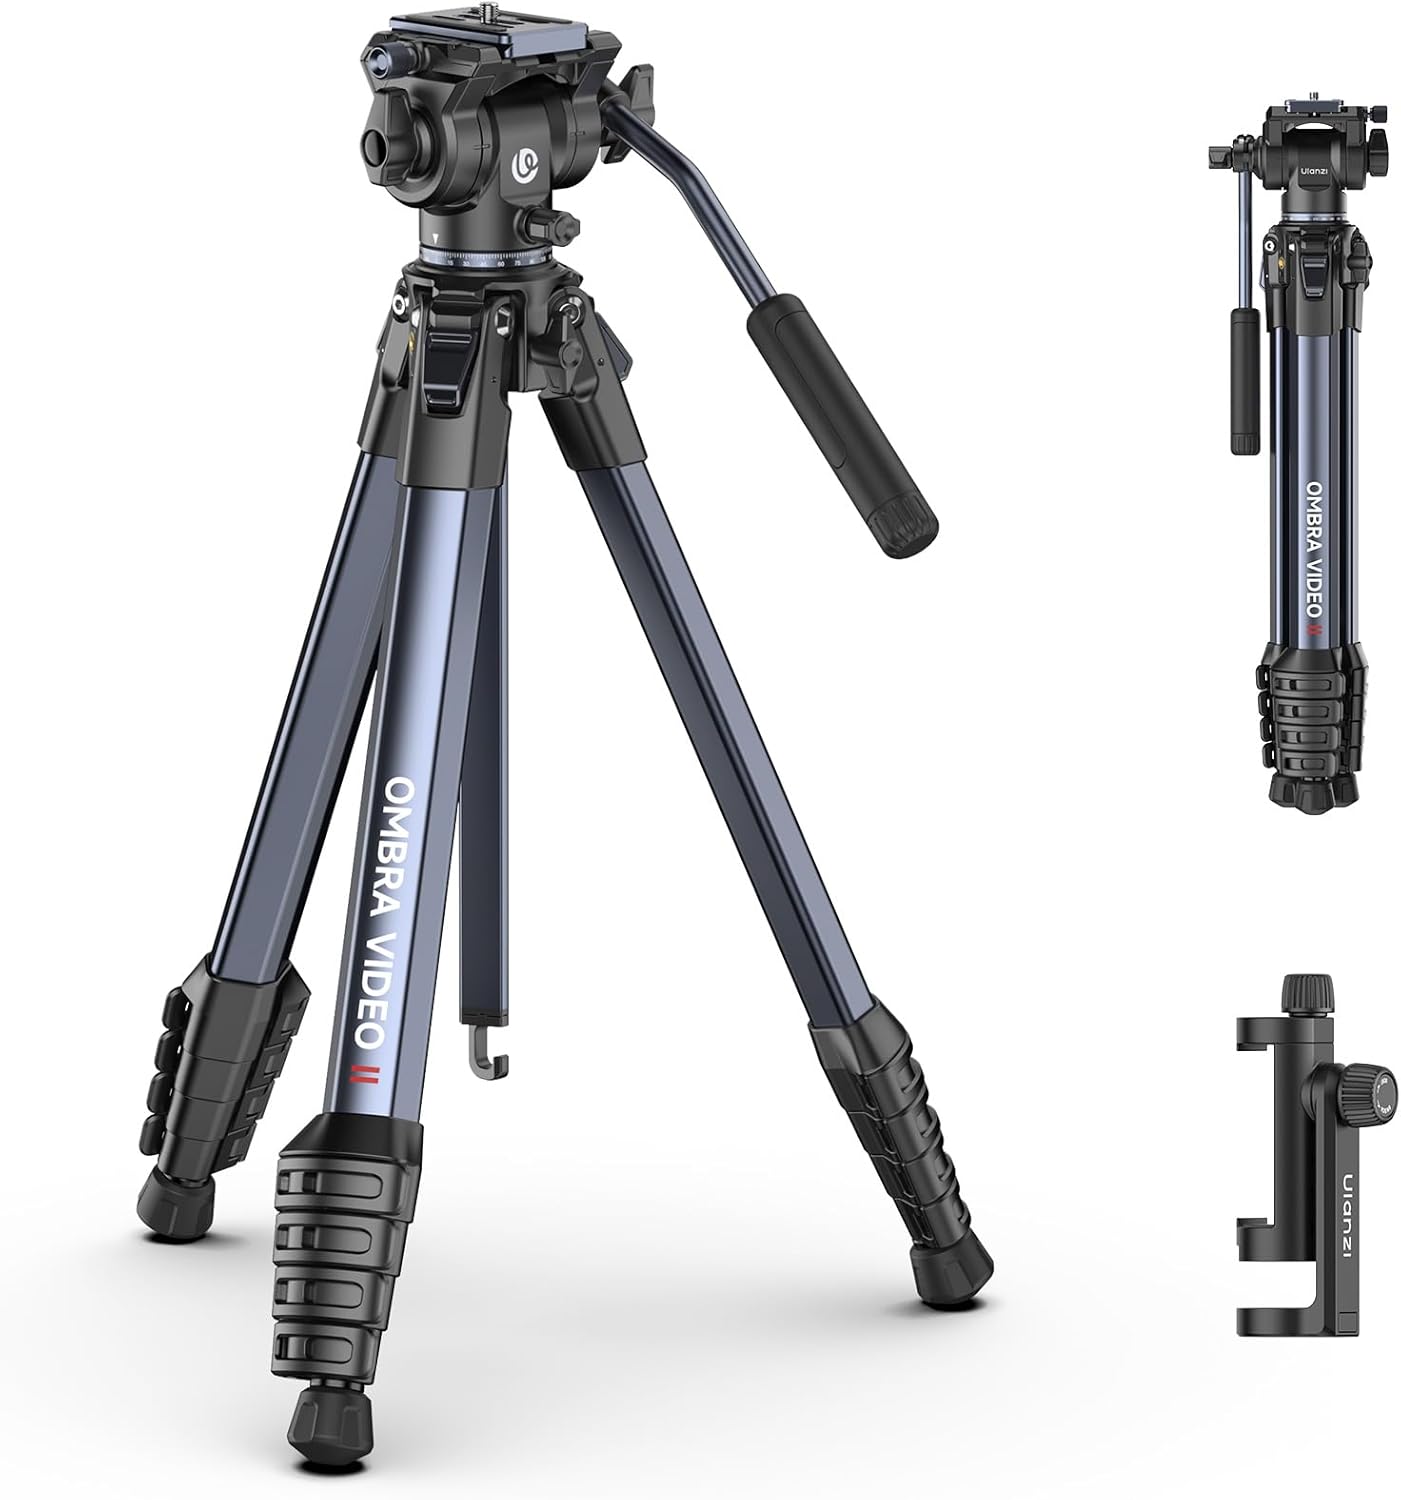
Figure 1.1: ULANZI Ombra Video Ⅱ Camera Tripod with Fluid Head.
Co jest zawarte:
- Statyw do aparatu x 1
- Torba na statyw x 1
- Telefon Clamp x1
- Klucz sześciokątny x 2
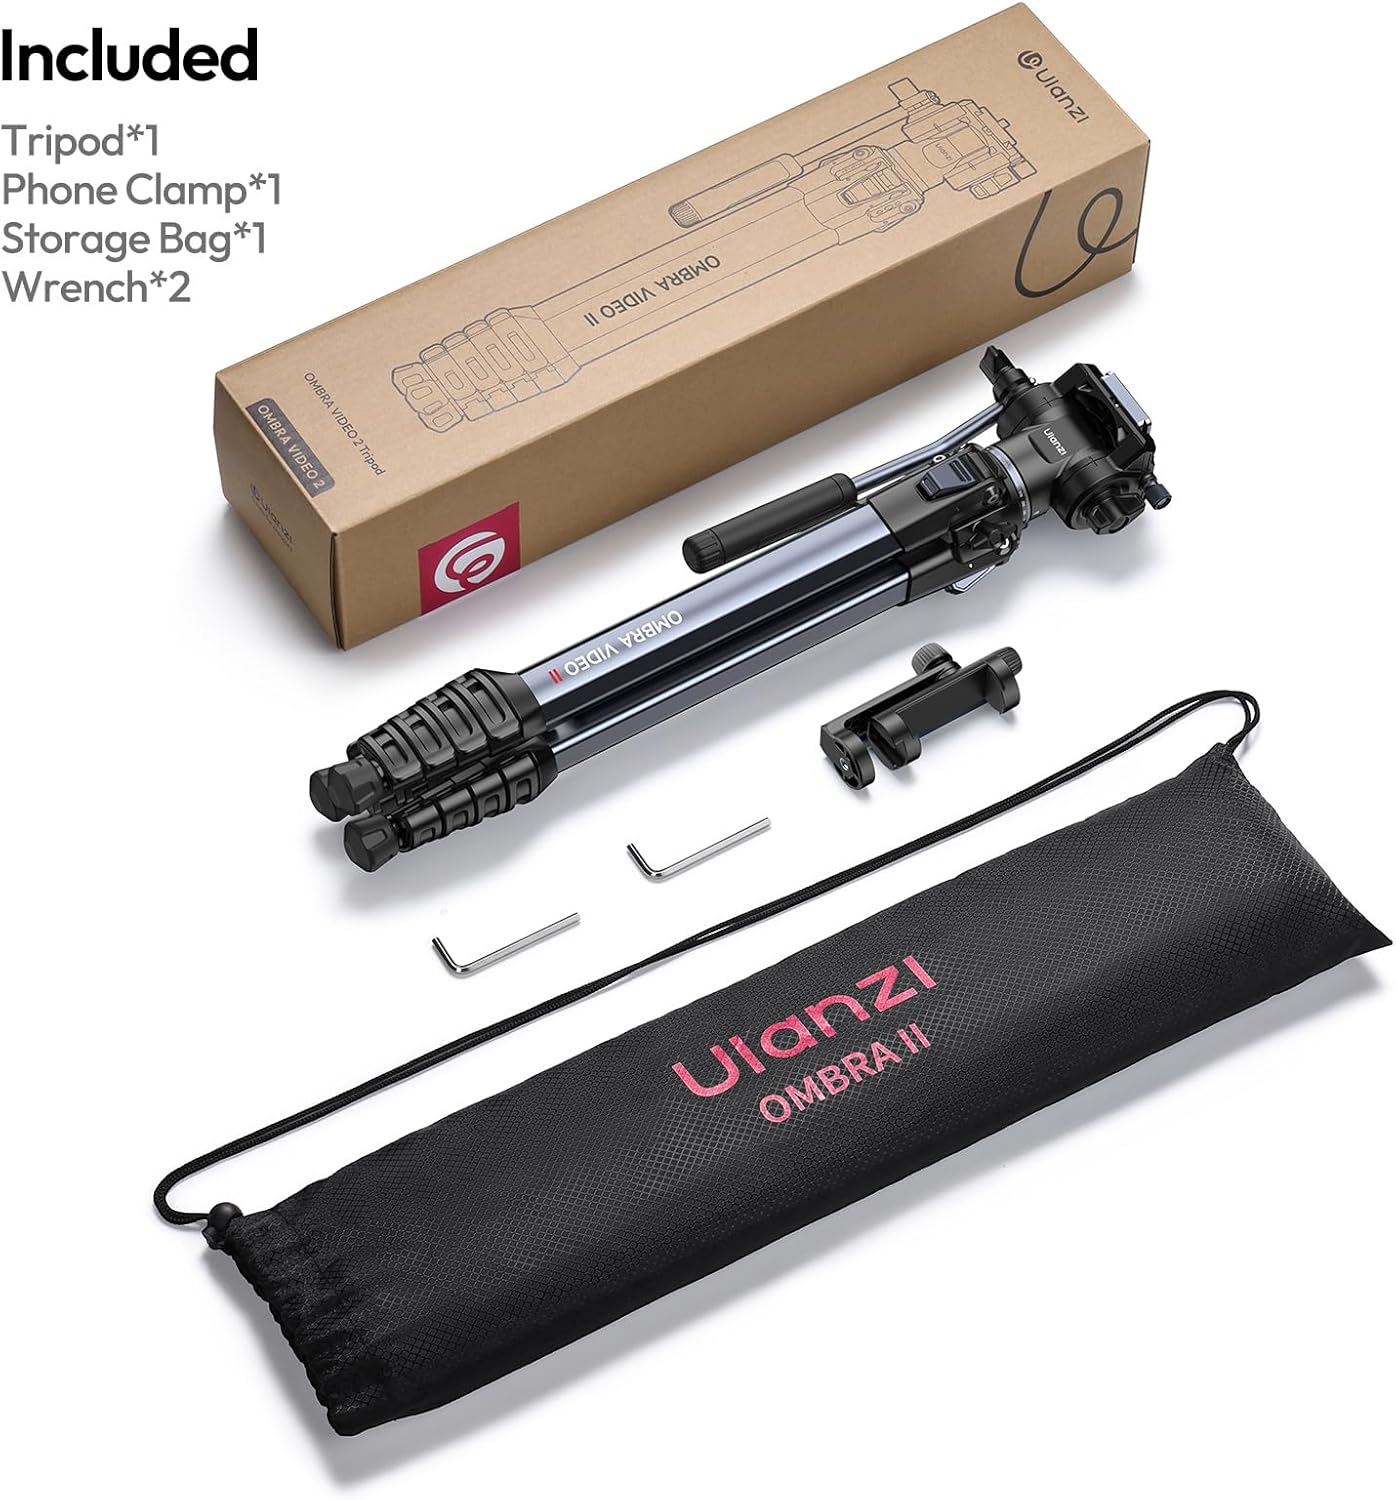
Rysunek 1.2: Wszystkie komponenty zawarte w pakiecie.
2. Informacje dotyczące bezpieczeństwa
Please read and understand all safety instructions before using the ULANZI Ombra Video Ⅱ Camera Tripod. Failure to follow these instructions may result in injury or damage to the product or connected equipment.
- Ensure all leg locks and head adjustments are securely tightened before mounting any equipment.
- Nie przekraczać maksymalnego udźwigu 22 funtów (10 kg). Przeciążenie może spowodować niestabilność i uszkodzenia.
- Always check the stability of the tripod on uneven surfaces. Use the counterweight hook if necessary to enhance stability, especially in windy conditions.
- Keep hands and fingers clear of moving parts, especially when extending or collapsing the legs.
- Do not leave the tripod unattended with expensive equipment mounted, particularly in public areas or unstable environments.
- Avoid exposing the tripod to extreme temperatures, direct sunlight for prolonged periods, or corrosive substances.
- Clean the tripod with a soft, dry cloth. Do not use harsh chemicals or abrasive materials.
3. składniki
Familiarize yourself with the main components of your ULANZI Ombra Video Ⅱ Tripod:
- Fluid Head: Provides smooth panning and tilting movements.
- Pan Handle: Attaches to the fluid head for controlled movements.
- Arca Quick Release Plate: Allows for rapid attachment and detachment of cameras.
- Kolumna środkowa: Extends vertically for additional height.
- Sekcje nóg: Five-section legs for adjustable height and compact storage.
- Zamki Flip: Securely lock leg sections in place.
- Regulowane kąty nóg: Allows for various spread angles for stability on different terrains.
- Hak przeciwwagi: Located at the bottom of the center column for adding stability.
- Odłączane gumowe nóżki: Provides grip on various surfaces and can be removed.
- Otwór montażowy ARRI 1/4": For attaching accessories like magic arms.
- Telefon Clamp: Uniwersalny clamp for mounting smartphones.

Figure 3.1: Key features including the 1/4" ARRI Locating Hole, Counterweight Hook, and Detachable Rubber Feet.
4. Konfiguracja
4.1 Rozkładanie statywu
- Remove the tripod from its carry bag.
- Gently spread the tripod legs outwards until they are fully extended or set to your desired angle.
- Unlock the flip locks on each leg section and extend the legs to the desired height. Securely close all flip locks to ensure stability.
- Adjust the leg angles by pressing the button locks at the top of each leg to select from multiple angle positions.

Figure 4.1: Illustration of extending and locking tripod legs.
4.2 Attaching Your Camera/Device
- Ensure the fluid head is securely mounted to the tripod.
- Locate the Arca Quick Release Plate on the fluid head. Press the release lever to detach the plate.
- Attach the quick release plate to the bottom of your camera or device by screwing the 1/4" screw into the mounting thread. Ensure it is tightened securely.
- Slide the quick release plate with your camera back into the fluid head until it clicks into place. Verify it is locked by gently attempting to lift the camera.
- If using a smartphone, attach the provided phone clamp to the quick release plate or directly to the tripod's 1/4" thread. Insert your phone into the clamp, ensuring it is held firmly.
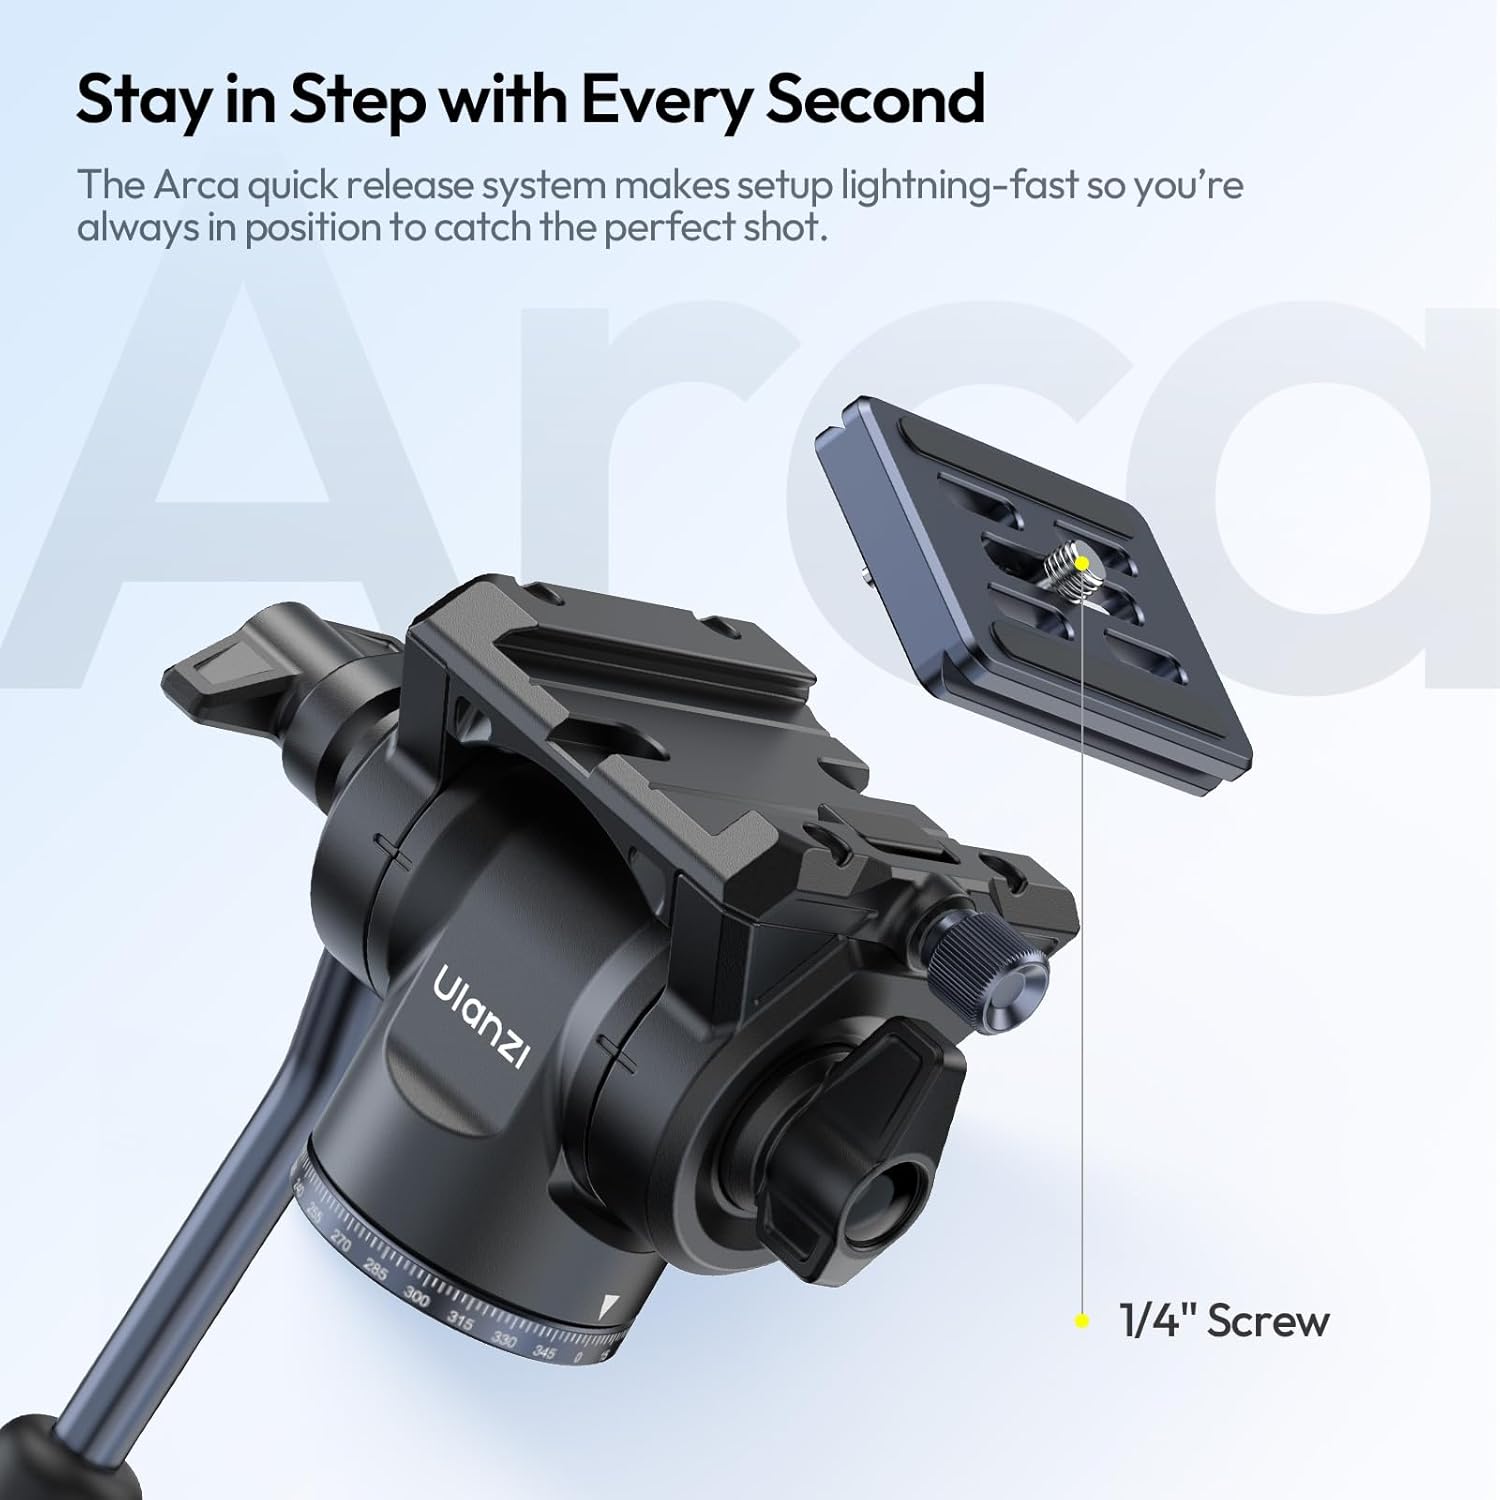
Figure 4.2: The Arca Quick Release System for fast camera mounting.
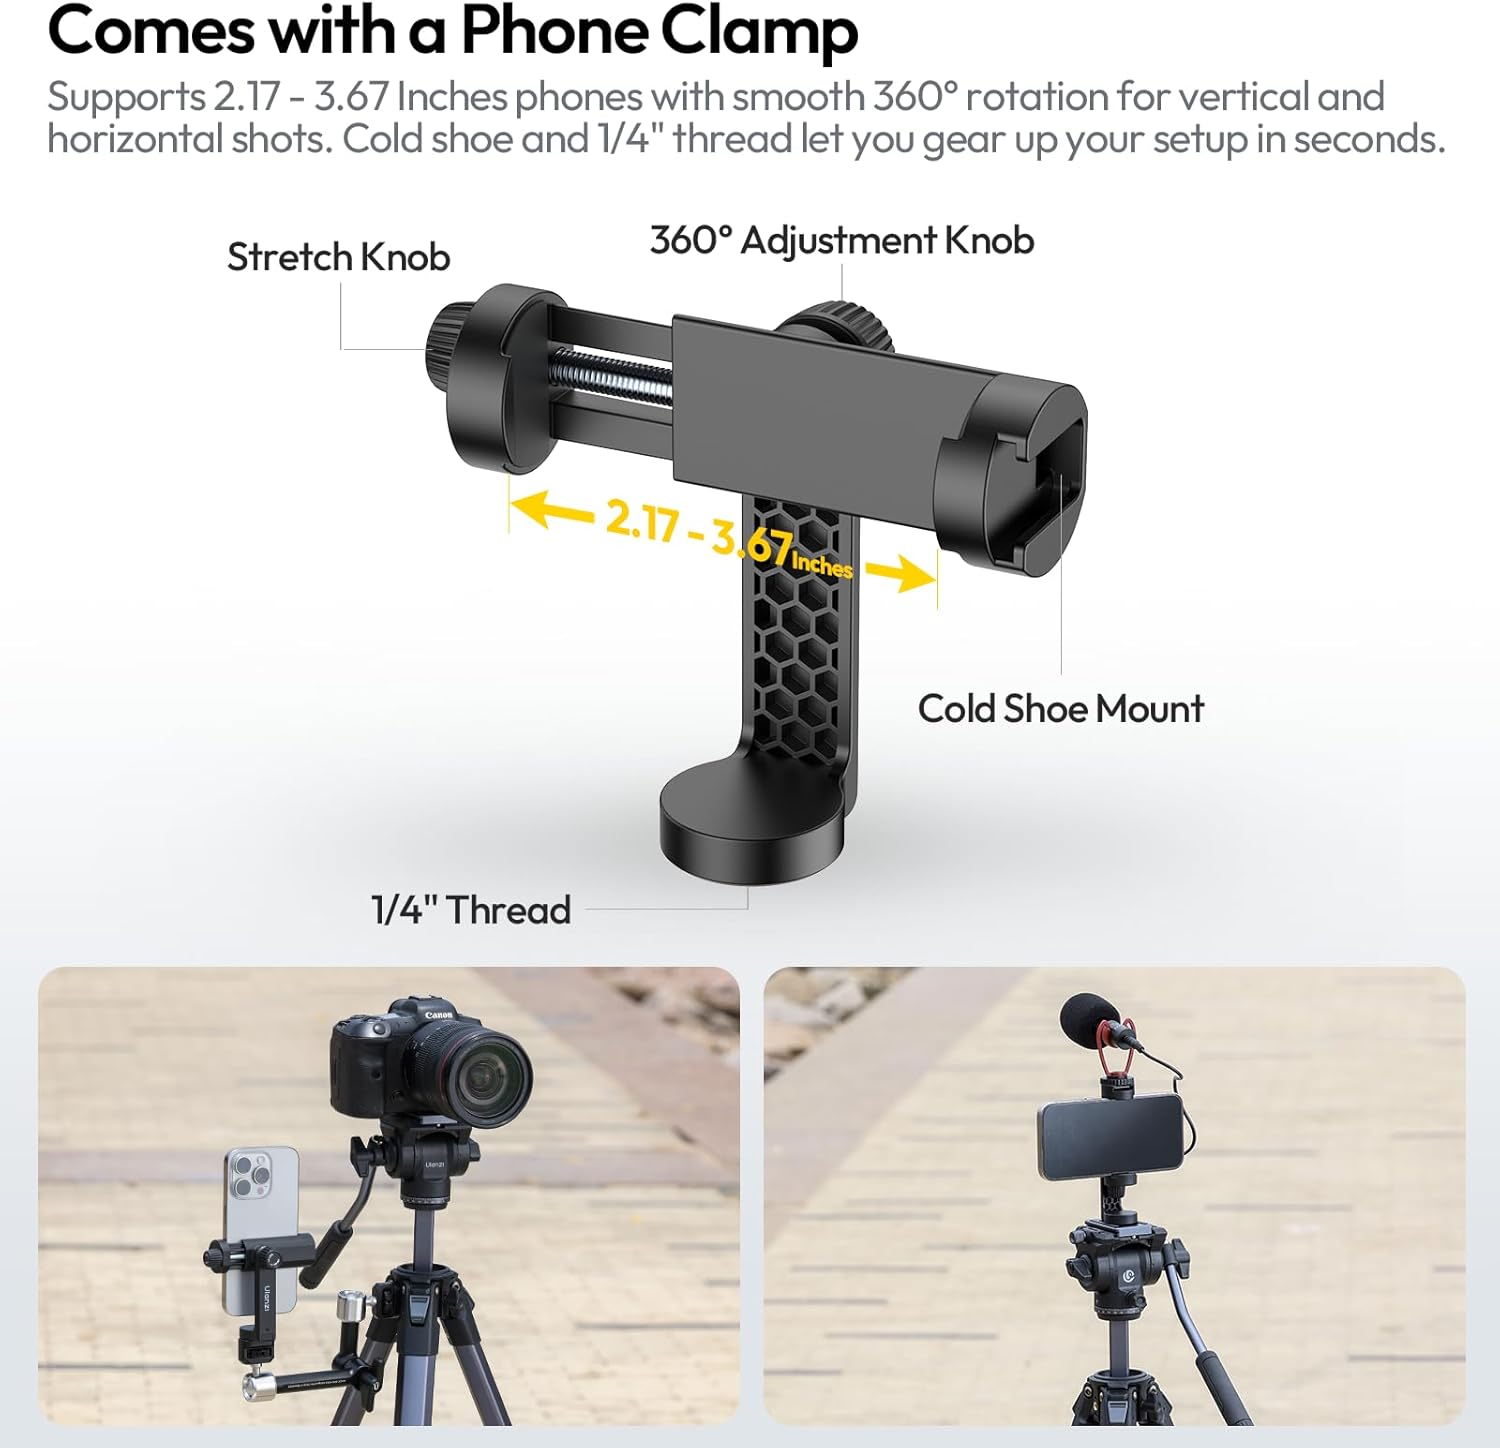
Figure 4.3: The universal phone clamp for smartphone compatibility.
5. Obsługa
5.1 Adjusting Height and Stability
- Wyprost nóg: Extend the 5-section legs using the flip locks to achieve heights up to 61.5 inches. Ensure all locks are firmly closed after adjustment.
- Kolumna środkowa: For additional height, unlock the center column knob and raise the column. Re-tighten the knob to secure.
- Zdjęcia z niskiego kąta: The center column can be removed or inverted for extremely low-angle shots. Adjust leg angles for maximum stability in this configuration.
- Hak przeciwwagi: For added stability, especially with heavier cameras or in windy conditions, hang a weight (e.g., a camera bag) from the counterweight hook located at the bottom of the center column.
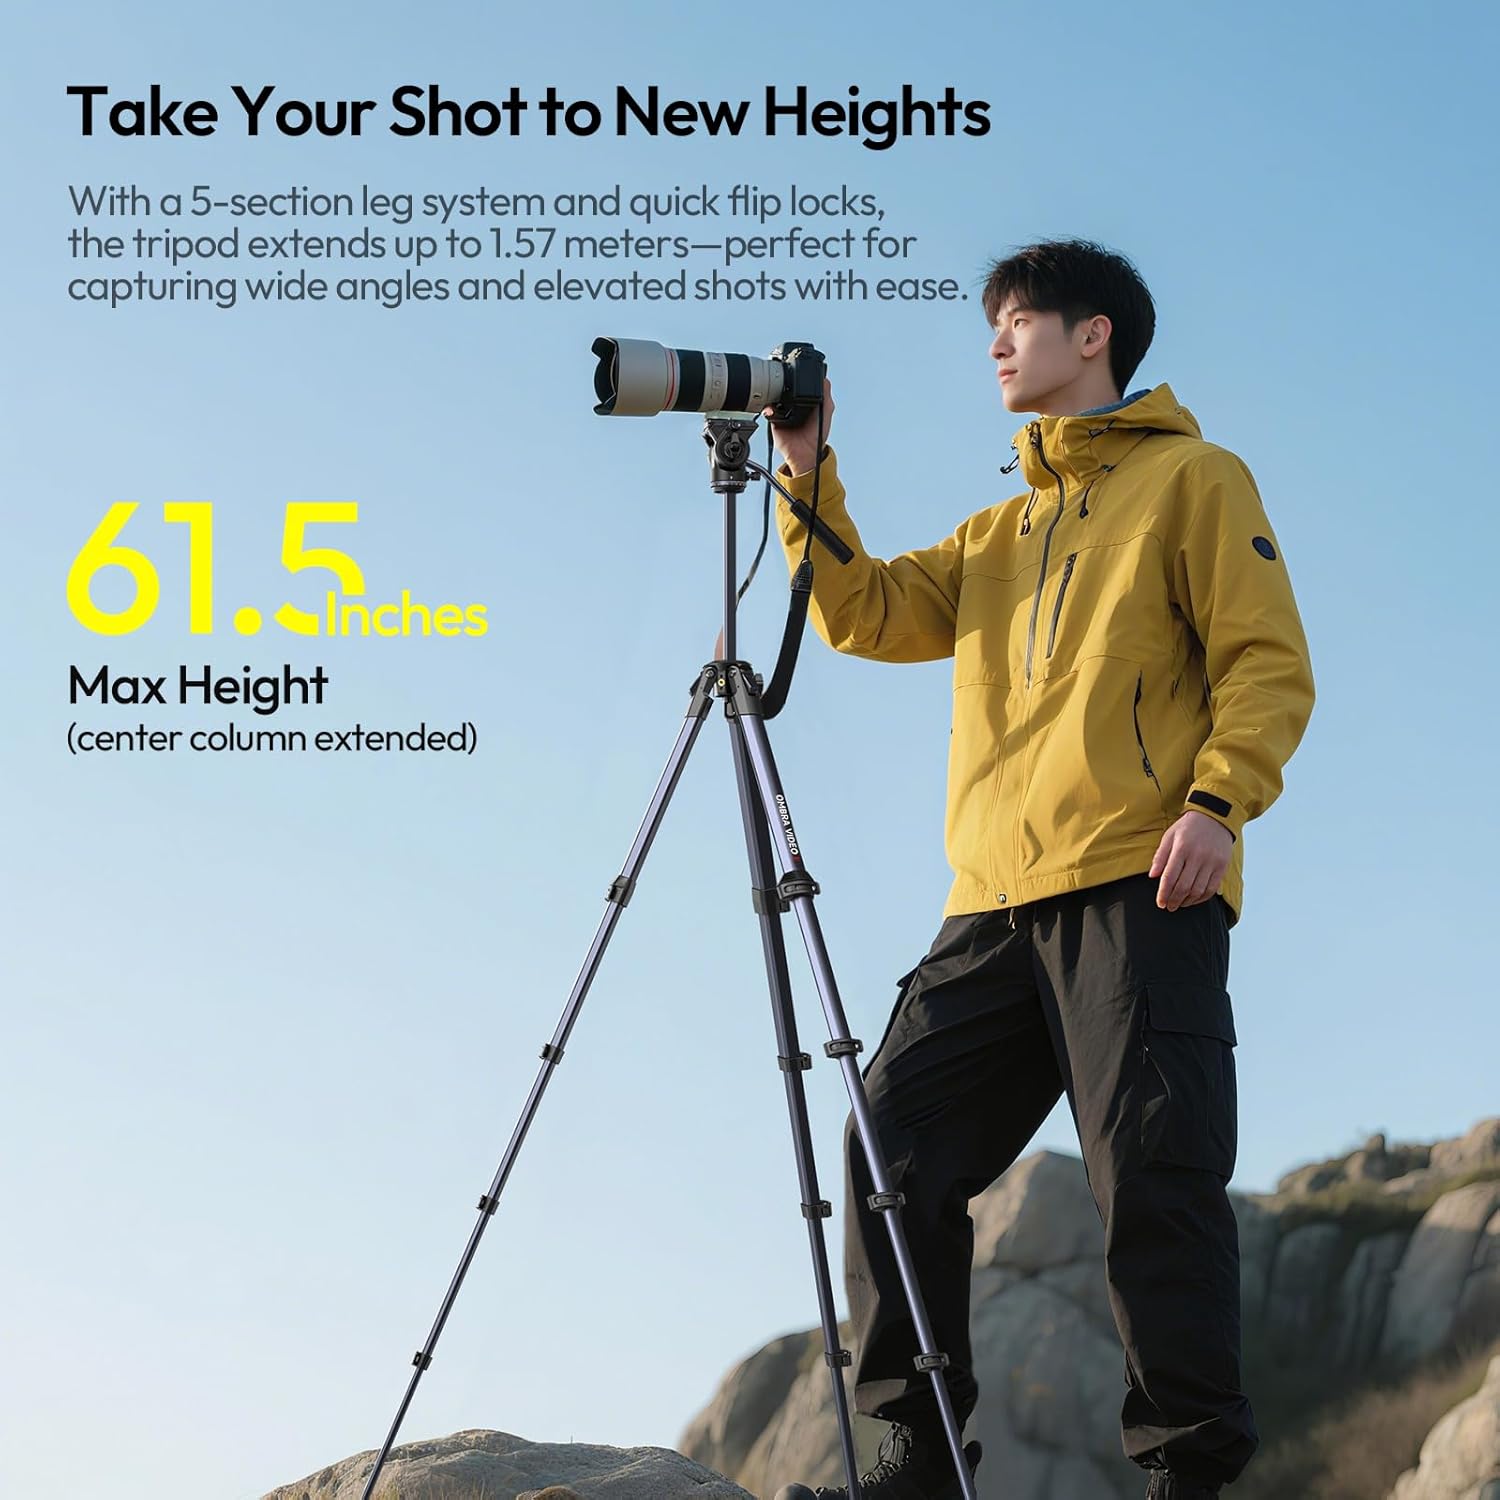
Figure 5.1: Tripod extended to its maximum height of 61.5 inches.

Figure 5.2: Different height configurations of the tripod.
5.2 Obsługa głowicy cieczy
- Panoramowanie (ruch poziomy): Loosen the panning lock knob on the fluid head. Use the pan handle to smoothly rotate the camera horizontally (360°). Tighten the knob to lock the position.
- Pochylenie (ruch pionowy): Loosen the tilting lock knob. Use the pan handle to tilt the camera vertically (from -70° to +90°). Tighten the knob to secure the angle.
- The fluid head is designed to provide smooth, professional movements for video recording, reducing shake and ensuring stable footage.

Figure 5.3: Fluid head demonstrating 360° panning and tilt capabilities.
Video 5.1: Demonstration of the smooth panning and tilting motion of the ULANZI Ombra Video Ⅱ Tripod's fluid head.
6. Konserwacja
Proper maintenance will extend the lifespan of your ULANZI Ombra Video Ⅱ Tripod:
- Czyszczenie: After each use, especially in dusty or sandy environments, wipe down the tripod with a soft, dry, lint-free cloth. For stubborn dirt, a slightly damp Można użyć ściereczki i natychmiast wysuszyć.
- Smarowanie: The fluid head is factory-lubricated and generally does not require additional lubrication. If movements become stiff, consult professional service. Do not apply lubricants to leg sections or locks.
- Składowanie: Store the tripod in its provided carry bag in a cool, dry place away from direct sunlight and extreme temperatures.
- Kontrola: Periodically check all screws, knobs, and locks for tightness. Use the provided hexagon wrenches to tighten any loose screws.
- Unikaj wody: While durable, avoid submerging the tripod in water. If it gets wet, dry it thoroughly before storage to prevent corrosion.
7. Rozwiązywanie Problemów
| Problem | Możliwa przyczyna | Rozwiązanie |
|---|---|---|
| Statyw jest niestabilny. | Leg locks not fully tightened; uneven surface; overloaded. | Ensure all flip locks are securely closed. Adjust leg angles for stability on uneven ground. Do not exceed 22 lbs load capacity. Use counterweight hook. |
| Fluid head movements are not smooth. | Lock knobs are too tight; dirt/debris in head mechanism. | Loosen panning/tilting lock knobs. Clean the head area with a soft cloth. If problem persists, contact support. |
| Camera/device is not secure on quick release plate. | Quick release plate not fully engaged; screw loose. | Ensure the quick release plate is fully inserted and the locking lever is engaged. Tighten the 1/4" screw on the camera securely. |
| Trudności z wysuwaniem/schowywaniem sekcji nóg. | Dirt/sand in leg sections; flip locks are too tight. | Clean leg sections thoroughly. Adjust the tension of the flip locks if they are excessively tight (refer to manufacturer guidelines if available, or use a small screwdriver carefully). |
8. Specyfikacje
| Funkcja | Szczegół |
|---|---|
| Nazwa modelu | OMBRA VIDEO 2 Camera Tripod |
| Wymiary produktu | 3.15 x 4.72 x 19.29 cala (po złożeniu) |
| Waga przedmiotu | 2.87 funtów (1.3 kg) |
| Tworzywo | Aluminium, Plastik |
| Maksymalna wysokość | 61.5 cala (156.2 cm) |
| Ograniczenie wagowe | 22 funtów (10 kg) |
| Typ głowicy statywu | Głowice pan (głowice płynne) |
| Sekcje nóg | 5-section legs |
| System szybkiego uwalniania | Kompatybilny z Arca |
| Telefon Clamp Zgodność | 2.17" - 3.67" devices |

Figure 8.1: The tripod's robust design supports up to 22 lbs.

Figure 8.2: The compact design allows for easy transport.
9. Gwarancja i wsparcie
ULANZI products are designed and manufactured to the highest quality standards. For information regarding warranty coverage, technical support, or service inquiries, please refer to the official ULANZI webodwiedź witrynę lub skontaktuj się bezpośrednio z działem obsługi klienta.
Official ULANZI Webstrona: www.ulanzi.com
For further assistance, please contact the seller or ULANZI customer support with your product model number (OMBRA VIDEO II) and purchase details.
Powiązane dokumenty - OMBRA VIDEO II
 |
Instrukcja obsługi statywu Ulanzi MT93 z automatycznym otwieraniem – przewodnik po konfiguracji i obsłudze Kompleksowa instrukcja obsługi statywu Ulanzi MT93 z automatycznym otwieraniem. Zawiera szczegółowe instrukcje dotyczące konfiguracji, obsługi i przechowywania, a także specyfikację produktu i ważne ostrzeżenia dotyczące bezpieczeństwa. Wśród funkcji statywu znajduje się płytka szybkiego montażu Uka oraz głowica kulowa umożliwiająca wszechstronne ustawienie aparatu. |
 |
SWIT MUF50 Portable Tripod User Manual Comprehensive user manual for the SWIT MUF50 portable tripod, detailing its specifications, features, setup instructions, operational guidance, and troubleshooting for optimal photography and videography use. |
 |
Zestaw statywu SmallRig AD-01S Heavy-Duty Fluid Head: Instrukcja obsługi i specyfikacja Kompleksowa instrukcja obsługi i specyfikacja zestawu statywu SmallRig AD-01S Heavy-Duty Fluid Head (model 4686), przeznaczonego do profesjonalnego filmowania. Wśród jego funkcji znajdują się regulowane nogi, bezstopniowy system regulacji wysokości.ampgłowica z płynem, kompatybilność z płytką szybkiego montażu i solidna konstrukcja ze stopu aluminium. |
 |
SmallRig FSD14 FreeSpeed Heavy-Duty Aluminum Alloy Tripod User Manual User manual for the SmallRig FSD14 FreeSpeed Heavy-Duty Aluminum Alloy Tripod, detailing product features, installation, usage, specifications, and warranty information. |
 |
COMAN T1/T1S Tripod User Manual: Features and Operation Explore the COMAN T1 and T1S tripods with this user manual. Learn about their features, quick setup, angle adjustments, and secure camera mounting for professional photography and videography. |
 |
SmallRig AD14 Heavy-Duty Aluminum Alloy Tripod User Manual: Installation, Specs, Safety & Warranty Detailed user manual for the SmallRig AD14 Heavy-Duty Aluminum Alloy Tripod. Find information on setup, product features, specifications, safety guidelines, and warranty service. |
Ask a question about this manual
Ask about setup, troubleshooting, compatibility, parts, safety, or missing instructions. Manuals+ will review the question and use this page’s manual context to help answer it.