
1. Wprowadzenie
This manual provides detailed instructions for the installation, operation, and maintenance of your UNITOPSCI 9.66 Inch 3 Channel WiFi Mirror Dash Cam. This device is designed to enhance driving safety and provide comprehensive recording capabilities with its front, in-cabin, and rear cameras. Please read this manual thoroughly before using the product to ensure proper functionality and to avoid damage.

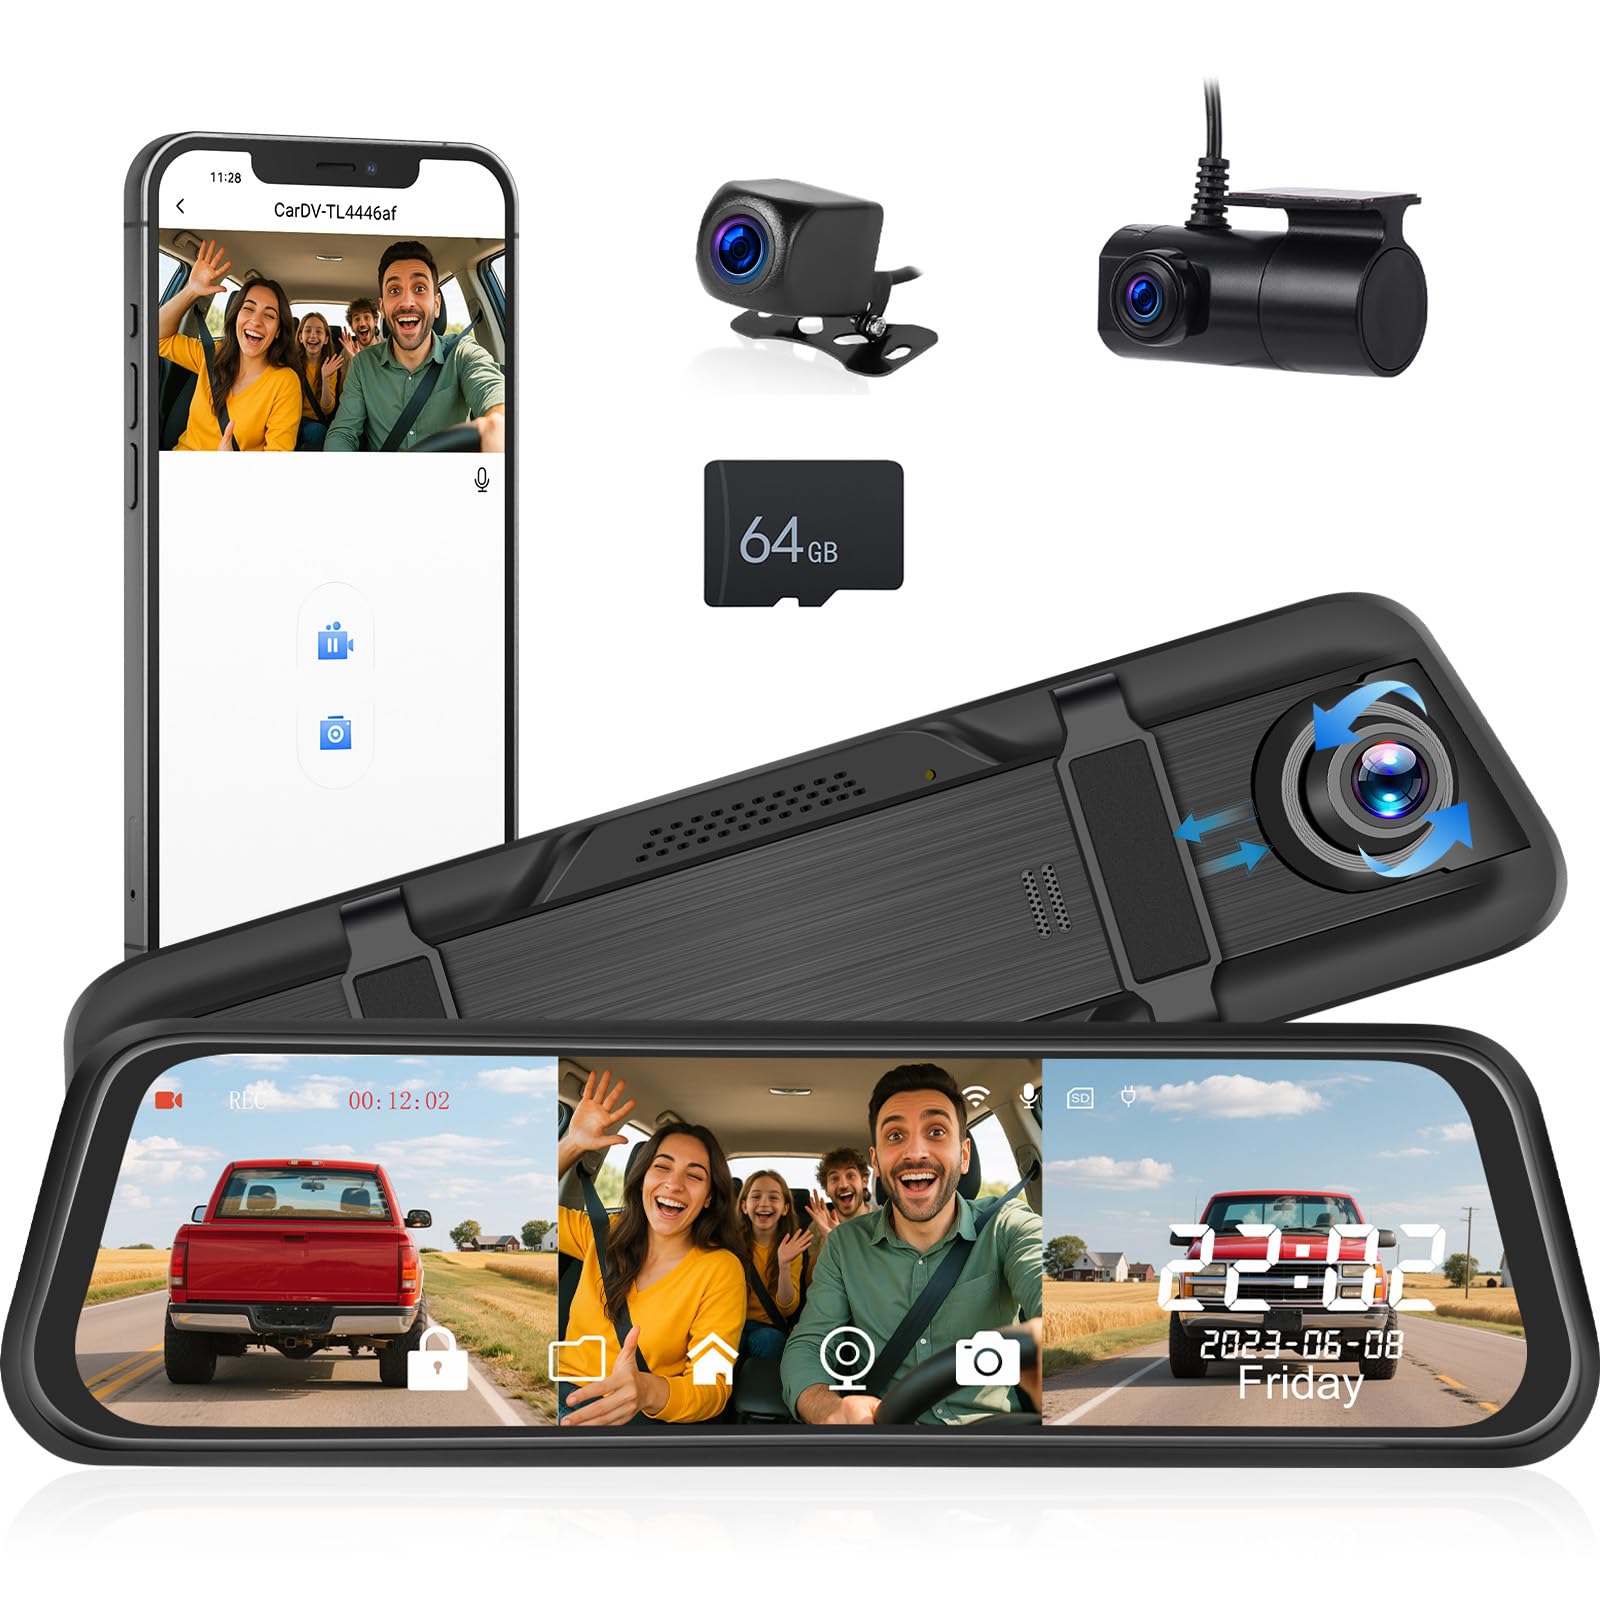
Nadview of the UNITOPSCI 9.66 Inch 3 Channel Mirror Dash Cam with its main features.
2. Zawartość opakowania
Sprawdź, czy wszystkie wymienione poniżej elementy znajdują się w Twojej paczce. Jeśli brakuje któregokolwiek z nich lub jest on uszkodzony, skontaktuj się z obsługą klienta.
- DVR (Mirror Dash Cam) x 1
- Kabel zasilający x 1
- Tył view camera x 2 (Note: The product description mentions 3 channels, but the 'Whats in the box' lists 2 rear view cameras. This implies one is for the rear exterior and one for the interior/cabin, or there's a discrepancy. For clarity, we list as provided.)
- Extended line x 1
- Instrukcja obsługi x 1
- Bandaż x 1
- 64GB TF Card x 1 (Included as per feature bullets)

Visual representation of the package contents and main unit dimensions.
3. Koniec produktuview
3.1 Główne elementy jednostki
- 9.66-calowy ekran dotykowy IPS: Capacitive display for intuitive control and clear viewing.
- Przednia kamera: Records the road ahead at 1440P resolution.
- In-Cabin Camera: Records the vehicle interior at 720P resolution.
- Kamera tylna: Rejestruje view behind the vehicle at 720P resolution.
- Port USB: Do zasilania i przesyłu danych.
- Port AV-IN: For connecting external cameras.
- Gniazdo karty TF: Supports up to 64GB TF card for storage.
- Przycisk resetowania: Aby przywrócić ustawienia fabryczne.
- Prelegenci: Do wyjścia audio.
- Nawiasy: For mounting the mirror dash cam.
Przód view of the mirror dash cam.
4. Główne cechy
4.1 Triple Channel Recording
The dash cam records simultaneously from three perspectives: front (1440P), in-cabin (720P), and rear (720P). This provides comprehensive coverage for incidents and situational awareness.

Illustration of the triple channel recording and wide viewkąty.
4.2 9.66" IPS HD Touch Screen
The large capacitive IPS touch screen offers vibrant colors and details. It allows easy switching between camera views (front, rear, inside) or displaying them simultaneously.

Triple display switching and in-cabin camera functions.
4.3 Super widzenie nocne
Equipped with an upgraded sensor and WDR & HDR technology, the dash cam captures clear videos with enhanced details in low light conditions, making license plates and road signs visible.

Night vision capabilities in various low-light scenarios.
4.4 Wbudowane Wi-Fi i sterowanie aplikacją
Connect the dash cam to your smartphone via Wi-Fi using the "Viidure" app (available for iOS and Android). This allows you to view, playback, and manage recordings directly from your device.

Steps for WiFi connection and app control.
4.5 Nagrywanie w pętli i czujnik G
Nagrywanie w pętli: Automatycznie nadpisuje najstarszy odblokowany plik footage when the 64GB TF card is full, ensuring continuous recording.
Czujnik G: Wykrywa nagłe uderzenia lub kolizje i automatycznie blokuje bieżący film file aby zapobiec nadpisaniu danych i zachować kluczowe dowody.

Explanation of G-Sensor, Parking Monitor, and Loop Recording.
4.6 Monitor parkingowy 24-godzinny
With a dedicated hardwire kit (sold separately), the dash cam can continue recording in time-lapse mode after the car is turned off, providing continuous surveillance against theft or vandalism.

Visual of the 24-hour parking monitoring feature.
4.7 cofanie View Funkcjonować
When reversing, the mirror dash cam automatically displays the backup camera image in full screen with adjustable parking assist lines. You can manually adjust the display range up or down for optimal viewing.

Automatic display of parking lines when reversing.
5. Instrukcja instalacji
Follow these steps to properly install your dash cam system.
5.1 Montaż kamery samochodowej Mirror Dash Cam
- Zamontuj kamerę samochodową w lusterku na istniejącym tylnym lusterkuview lusterko, używając dołączonych bandaży/pasków. Upewnij się, że jest mocno przymocowany i nie zasłania view.
- Dostosuj obiektyw przedniej kamery, aby uchwycić pożądany obraz view drogi przed nami.
5.2 Podłączanie kabla zasilającego
- Plug the power cable into the dash cam's USB port.
- Route the power cable along the edge of the windshield and down to your vehicle's 12V power outlet (cigarette lighter socket).
- Plug the power adapter into the 12V power outlet.
5.3 Instalowanie kamery cofania
- Zamontuj kamerę cofania z tyłu pojazdu, zazwyczaj nad tablicą rejestracyjną lub na tylnej szybie. Upewnij się, że kamera ma zapewnioną wolną przestrzeń. view.
- Podłącz kabel kamery tylnej do portu AV-IN w głównym urządzeniu kamery samochodowej.
- Route the rear camera cable neatly through the vehicle's interior, tucking it under trim panels to conceal it.
- Connect the red wire of the rear camera cable to your vehicle's reverse light power wire. This enables the automatic display of the reversing view podczas zmiany biegu na wsteczny.
5.4 Installing the In-Cabin Camera
The in-cabin camera is integrated into the main unit, requiring no separate installation.

Cable routing and installation diagram.
6. Instrukcja obsługi
6.1 Włączanie/wyłączanie
- Kamera samochodowa włączy się automatycznie i rozpocznie nagrywanie po włączeniu zapłonu pojazdu.
- Urządzenie wyłączy się automatycznie po wyłączeniu zapłonu.
- To manually power on/off, press and hold the power button (if available, otherwise rely on ignition).
6.2 Nawigacja na ekranie
Use the touch screen to navigate menus and settings. Swipe left/right to switch between camera views or display modes.
6.3 Dostosowywanie ustawień
Access the settings menu by tapping the gear icon on the screen. Here you can adjust:
- Rozdzielczość wideo: Set recording quality for each camera.
- Czas trwania nagrywania w pętli: Set segment length (e.g., 1, 3, 5 minutes).
- Czułość czujnika G: Adjust the sensitivity for impact detection.
- Monitor parkowania: Enable/disable and configure settings (requires hardwire kit).
- Kompensacja ekspozycji: Adjust brightness levels for optimal recording in varying light conditions.
- Data/Godzina: Ustaw prawidłową datę i godzinę.
- Wi-Fi: Enable/disable Wi-Fi and view szczegóły sieci.

Adjustable screen settings for lens, field of view, and brightness.

Adjusting exposure compensation for night vision.
7. App Control (Viidure App)
The "Viidure" app allows for convenient control and management of your dash cam via Wi-Fi.
7.1 Pobieranie aplikacji
Szukaj "Viidure" in your smartphone's app store (Google Play Store for Android, Apple App Store for iOS) and download it.
7.2 Łączenie z Wi-Fi
- Włącz Wi-Fi w menu ustawień kamery samochodowej.
- Na smartfonie przejdź do ustawień Wi-Fi i połącz się z siecią Wi-Fi kamery samochodowej (na ekranie kamery samochodowej zostaną wyświetlone identyfikator SSID i hasło).
- Open the "Viidure" app. It should automatically detect and connect to the dash cam.
7.3 Funkcje aplikacji
- Na żywo View: Transmisja strumieniowa na żywo z gry footage from the cameras to your phone.
- Odtwarzanie nagranego dźwięku: Review recorded videos stored on the TF card.
- Pobierać: Save video clips directly to your smartphone.
- Ustawienia: Zdalna zmiana ustawień kamery samochodowej.

Detailed steps for WiFi connection and app control.
8. Rozwiązywanie Problemów
Jeśli masz problemy z kamerą samochodową, zapoznaj się z poniższymi typowymi problemami i ich rozwiązaniami:
| Problem | Możliwa przyczyna | Rozwiązanie |
|---|---|---|
| Kamera samochodowa nie włącza się. | No power supply; faulty power cable/adapter; loose connection. | Check power cable connection to dash cam and 12V outlet. Ensure vehicle's 12V outlet is functional. Try a different power source if available. |
| Nagrywanie zostaje zatrzymane lub zawieszone. | TF card full; faulty TF card; low power. | Ensure loop recording is enabled. Format the TF card regularly. Replace the TF card if it's old or damaged. Ensure stable power supply. |
| Słaba jakość wideo. | Brudny obiektyw, nieprawidłowe ustawienia rozdzielczości, ekstremalne warunki oświetleniowe. | Clean camera lenses with a soft cloth. Check video resolution settings. Adjust exposure compensation in settings. |
| Problemy z połączeniem Wi-Fi. | Nieprawidłowe hasło Wi-Fi; aplikacja nie została zaktualizowana; zakłócenia. | Verify Wi-Fi password. Ensure the "Viidure" app is up to date. Try restarting both the dash cam and your smartphone. |
| Tylna kamera nie jest wyświetlana. | Luźne połączenie kablowe; uszkodzona kamera. | Sprawdź połączenie kabla kamery tylnej z jednostką główną. Upewnij się, że kabel nie jest uszkodzony. |
| Monitor parkowania nie działa. | Hardwire kit not installed; feature disabled in settings. | Install a dedicated hardwire kit for 24-hour parking monitoring. Enable the feature in the dash cam settings. |
9. Specyfikacje
| Funkcja | Szczegół |
|---|---|
| Wymiary produktu | 1 x 10.1 x 2.8 cala |
| Waga przedmiotu | 1.82 funta |
| Wyświetlacz | 9.66-calowy ekran dotykowy IPS |
| Rozdzielczość przedniej kamery | 1440P (1920*1080P@25FPS as per feature bullets, 1440P as per other details. Refer to device for exact resolution.) |
| In-Cabin Camera Resolution | 720P (1080*720P@30FPS as per feature bullets) |
| Rozdzielczość tylnej kamery | 720P (1080*720P@30FPS as per feature bullets) |
| Pole View | Front: 170 degrees, In-Cabin: 120 degrees, Rear: 150 degrees (approximate, based on product images) |
| Składowanie | Obsługuje karty TF (w zestawie 64 GB) |
| Łączność | Bezprzewodowy (Wi-Fi) |
| Cechy specjalne | IPS Touch screen, G-Sensor, Loop Recording, Night Vision, Parking Monitor, App Control |
| Typ montażu | Tyłview Mocowanie lustra |
| Typ serwisu pojazdu | Samochód, ciężarówka |
10. Gwarancja i wsparcie
UNITOPSCI provides customer support and warranty services for its products.
- Wymiana: Available within 24 months.
- Wsparcie techniczne: Dożywotnie konsultacje posprzedażowe i wsparcie techniczne.
- Zwroty: 60-day no-worry return policy.
- Czas reakcji: Quick response within 16 hours for inquiries.
For support, please contact UNITOPSCI via email at UNITOPSCI@126.com.
