
1. Wprowadzenie
This manual provides detailed instructions for the installation, operation, maintenance, and troubleshooting of your GIGABYTE B550M Gaming X WIFI6 AMD AM4 mATX Motherboard. Please read this manual thoroughly before beginning installation to ensure proper setup and optimal performance.

Figure 1: GIGABYTE B550M Gaming X WIFI6 Motherboard Overview
2. Konfiguracja
2.1 Zawartość opakowania
Before proceeding, verify that all items are present in your motherboard package:
- GIGABYTE B550M Gaming X WIFI6 Motherboard
- Kabel SATA
- Magnetic WiFi Antenna
- Wielojęzyczny przewodnik instalacji
- Motherboard Driver CD/USB (if included)
Video 1: GIGABYTE B550M Gaming X WIFI6 Unboxing. This video demonstrates the contents of the motherboard package and initial handling.
2.2 Układ płyty głównej i złącza
Familiarize yourself with the motherboard's layout and various connectors before installation.
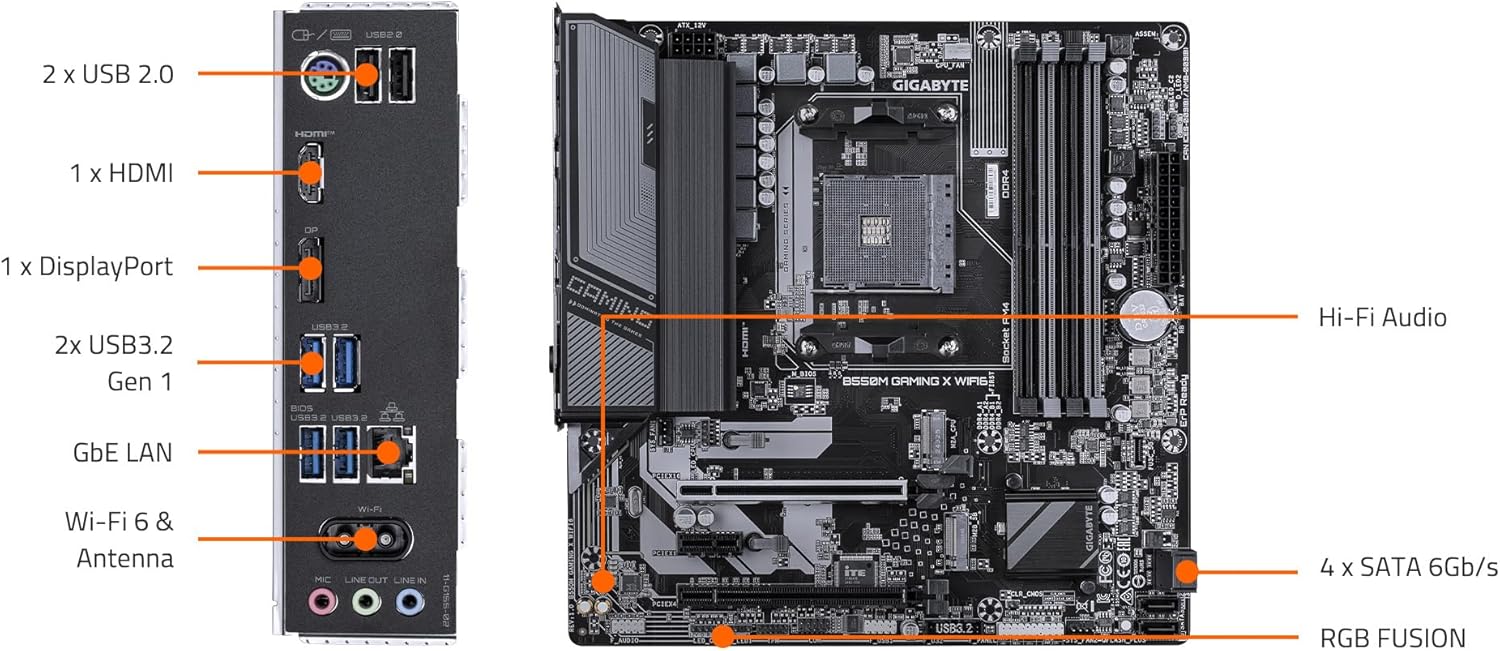
Rysunek 2: Rozmieszczenie komponentów płyty głównej
Rysunek 3: Tylny panel wejścia/wyjścia
2.3 Instalacja komponentów
Aby zainstalować niezbędne komponenty, wykonaj następujące czynności:
- Instalacja procesora: Carefully open the CPU socket lever. Align the triangular mark on the CPU with the mark on the socket. Gently place the CPU into the socket without force. Close the lever to secure the CPU.
- Montaż chłodzenia procesora: Zainstaluj chłodzenie procesora zgodnie z instrukcją producenta. Upewnij się, że pasta termoprzewodząca jest prawidłowo nałożona.
- RAM (Memory) Installation: Open the clips on the DDR4 memory slots. Align the notch on the memory module with the key in the slot. Press down firmly on both ends of the module until the clips snap into place. For dual-channel performance, refer to your motherboard manual for specific slot pairing.
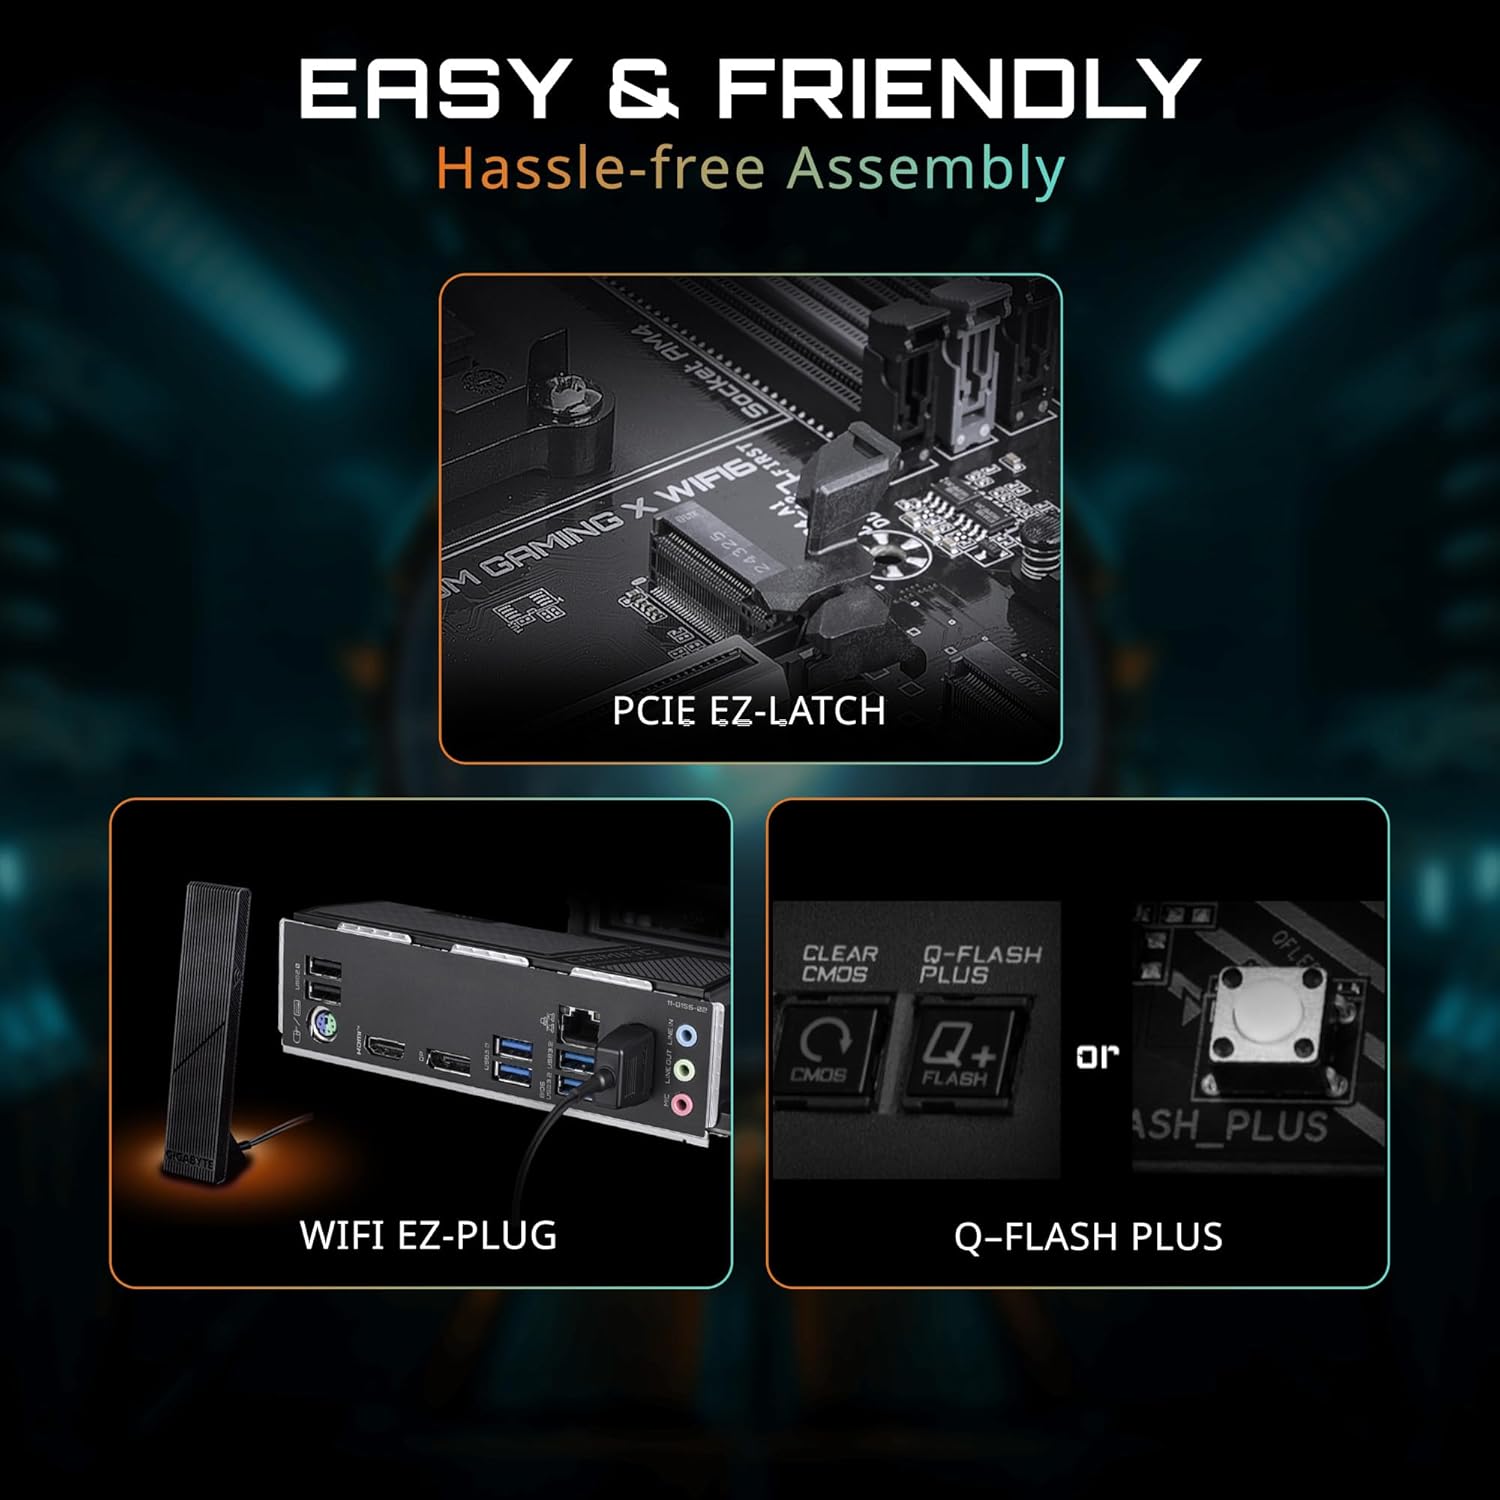
- Instalacja dysku SSD M.2: Locate the M.2 slots. Remove the M.2 screw/standoff. Insert the M.2 SSD at an angle into the slot. Push it down gently and secure it with the screw/standoff. The motherboard features PCIe EZ-Latch for tool-less M.2 installation.
- Instalacja karty graficznej (PCIe): Open the retention clip on the PCIe 4.0 x16 slot. Align your graphics card with the slot and press down firmly until it is seated. The PCIe EZ-Latch simplifies removal. Secure the card to your chassis with screws.
- Instalacja urządzenia SATA: Connect SATA data cables from your storage devices (HDDs/SSDs) to the SATA ports on the motherboard. Connect SATA power cables from your power supply to the devices.
- Podłączenia zasilania: Podłącz 24-pinowe złącze zasilania ATX i 8-pinowe (lub 4+4-pinowe) złącze zasilania procesora zasilacza do odpowiednich portów na płycie głównej.
- Połączenia na panelu przednim: Connect the power button, reset button, HDD LED, power LED, and front panel USB/audio headers to their respective pins on the motherboard. Refer to the motherboard manual for pin assignments.
- WiFi Antenna Connection: Screw the magnetic WiFi antenna onto the designated connectors on the rear I/O panel. The WiFi EZ-Plug design ensures easy connection.

Figure 4: Easy Assembly Features (PCIe EZ-Latch, WiFi EZ-Plug, Q-Flash Plus)
3. Obsługa
3.1 Początkowy rozruch i konfiguracja BIOS-u
After assembling your system, connect a monitor, keyboard, and mouse. Power on your PC. Press the designated key (usually DEL or F2) during startup to enter the BIOS/UEFI setup. Here you can configure boot order, system time, and other advanced settings. The motherboard supports Q Flash Plus for BIOS updates without a CPU, memory, or graphics card installed.
3.2 Instalacja sterownika
Once your operating system is installed, install the necessary drivers for your motherboard components. These can typically be found on the included driver CD/USB or downloaded from the official GIGABYTE website. Essential drivers include chipset, LAN, audio, and Wi-Fi drivers.
3.3 Narzędzia programowe
GIGABYTE provides various software utilities to enhance your user experience:
- Fuzja RGB: Customize the RGB lighting effects on your motherboard and connected compatible devices.
- Inteligentny wentylator 6: Monitor and control your system's fan speeds and temperatures for optimal cooling and noise levels.
- Centrum aplikacji: A centralized platform to manage and update GIGABYTE utilities and drivers.
Video 2: GIGABYTE B550 Motherboards - Overview. Ten film przedstawia ogólny przeglądview of the features and capabilities of GIGABYTE B550 series motherboards.
4. Konserwacja
Regularna konserwacja pomaga zapewnić długowieczność i stabilną pracę płyty głównej.
- Czyszczenie: Periodically clean dust from your PC case and motherboard components using compressed air. Ensure the system is powered off and unplugged before cleaning. Avoid using liquids.
- Aktualizacje BIOS-u: Sprawdź GIGABYTE website for the latest BIOS updates. BIOS updates can improve compatibility, stability, and performance. Use the Q-Flash or Q-Flash Plus utility for safe updating.
- Aktualizacje sterowników: Keep your drivers updated to ensure optimal performance and compatibility with new software and hardware. Download drivers only from the official GIGABYTE webstrona.
5. Rozwiązywanie Problemów
Jeśli masz problemy z płytą główną, rozważ poniższe kroki rozwiązywania problemów:
- Brak zasilania/brak rozruchu:
- Check all power connections (24-pin ATX, 8-pin CPU, GPU, SATA).
- Upewnij się, że zasilanie jest włączone.
- Try booting with minimal components (CPU, one RAM stick, graphics card if no integrated graphics).
- Brak wyświetlacza:
- Verify monitor cable connections and monitor input selection.
- Ponownie zamontuj kartę graficzną i moduły pamięci.
- Jeśli to możliwe, przetestuj na innym monitorze lub karcie graficznej.
- Niestabilność/awarie systemu:
- Sprawdź temperaturę procesora i karty graficznej. Zapewnij odpowiednie chłodzenie.
- Uruchom narzędzia diagnostyczne pamięci RAM, aby sprawdzić, czy występują błędy.
- Zaktualizuj BIOS i wszystkie sterowniki do najnowszych wersji.
- Network Connectivity Issues (Wired/Wireless):
- Ensure LAN cable is properly connected or WiFi antenna is securely attached.
- Zainstaluj lub zaktualizuj sterowniki sieci LAN/WiFi.
- Sprawdź ustawienia sieciowe w swoim systemie operacyjnym.
Jeśli problem nadal występuje, skontaktuj się z pomocą techniczną GIGABYTE webodwiedź witrynę lub skontaktuj się z pomocą techniczną.

