
1. Wprowadzenie
This manual provides detailed instructions for the safe and effective use of the SEEIRIR KKM198 Digital Multimeter. This device is a versatile tool designed for measuring various electrical parameters, including DC/AC voltage, DC/AC current, resistance, capacitance, and temperature. It features a 4.4-inch touch screen for intuitive operation and includes a VFC (Variable Frequency Control) function for accurate measurements in variable frequency environments.
2. Informacje dotyczące bezpieczeństwa
Always adhere to the following safety precautions to prevent personal injury or damage to the multimeter:
- Nie należy przekraczać maksymalnych wartości wejściowych określonych dla każdego zakresu pomiarowego.
- Przed przystąpieniem do pomiarów należy upewnić się, że przewody pomiarowe są w dobrym stanie i prawidłowo podłączone.
- Nie używaj multimetru, jeśli wygląda na uszkodzony lub jeśli pokrywa baterii nie jest szczelnie zamknięta.
- Zachowaj szczególną ostrożność podczas pracy z voltagpowyżej 30 V AC RMS, 42 V szczytowo lub 60 V DC. Te wartościtagStwarzają ryzyko porażenia prądem.
- Zawsze odłączaj zasilanie obwodu i rozładuj wszystkie ładunki wysokiego napięcia.tage capacitors before measuring resistance, capacitance, or continuity.
- Aby zapewnić dokładne odczyty, należy niezwłocznie wymienić baterie, gdy tylko pojawi się wskaźnik niskiego poziomu naładowania.
3. Koniec produktuview
The SEEIRIR KKM198 Digital Multimeter is equipped with a large touch screen display and intuitive controls for ease of use. Below is an image illustrating the device.
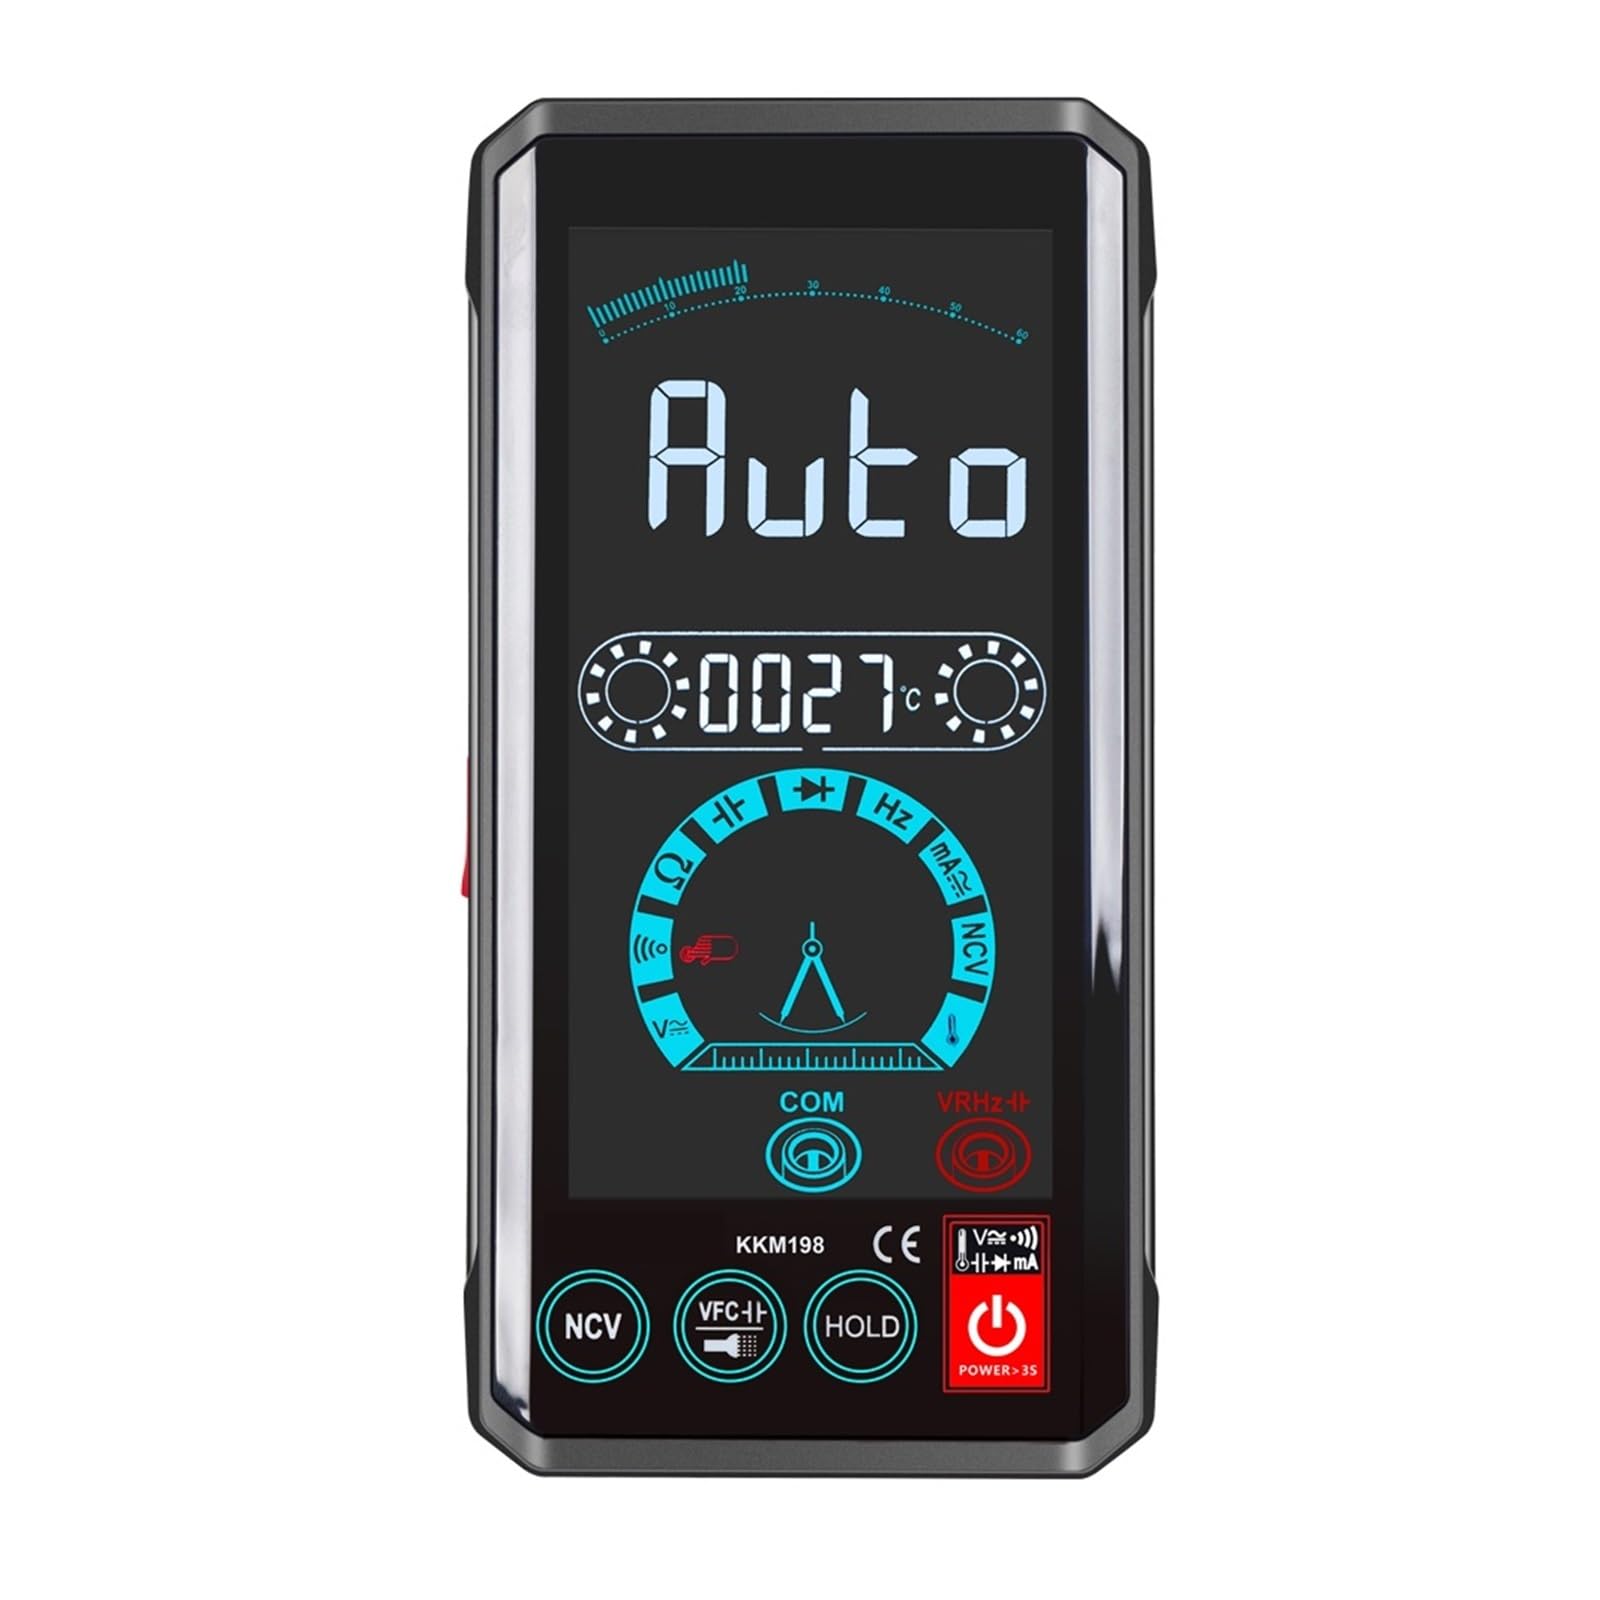
Rysunek 3.1: Przód view of the SEEIRIR KKM198 Digital Multimeter, showing its 4.4-inch touch screen interface and connected test leads.
4. Konfiguracja
4.1. Instalacja baterii
The KKM198 Multimeter requires batteries for operation. To install or replace batteries:
- Upewnij się, że multimetr jest wyłączony i odłącz wszystkie przewody pomiarowe.
- Znajdź komorę baterii z tyłu urządzenia.
- Otwórz pokrywę komory baterii.
- Włóż nowe baterie, zwracając uwagę na prawidłową biegunowość (+ i -).
- Dokładnie zamknij pokrywę komory baterii.
4.2. Podłączanie przewodów pomiarowych
Podłącz przewody pomiarowe do odpowiednich gniazd wejściowych multimetru:
- Włóż czarny przewód pomiarowy do KOM (zwykły) walec.
- Dla większości tomówtage, resistance, capacitance, and temperature measurements, insert the czerwony przewód pomiarowy do VΩCAPHzTemp podnośnik.
- For current measurements (mA), insert the czerwony przewód pomiarowy do mA podnośnik.
5. Instrukcja obsługi
The KKM198 features a touch screen interface for mode selection and function control.
5.1. Włączanie/wyłączanie zasilania
Press and hold the power button on the device to turn it on or off. The 4.4-inch touch screen will illuminate upon power-on.
5.2. Objętość DC/ACtage Pomiar
Do pomiaru objętościtage:
- Podłącz czerwony przewód pomiarowy do VΩCAPHzTemp Jack i czarny przewód do KOM podnośnik.
- Select the DC Voltage (VDC) or AC Voltage (VAC) mode on the touch screen.
- Podłącz sondy pomiarowe równolegle do obwodu lub elementu podlegającego pomiarowi.
- Przeczytaj tomtagwartość wyświetlana na ekranie.
5.3. Pomiar prądu DC/AC
Aby zmierzyć prąd:
- Ważny: Disconnect power to the circuit before connecting the multimeter.
- Podłącz czerwony przewód pomiarowy do mA Jack i czarny przewód do KOM podnośnik.
- Select the DC Current (ADC) or AC Current (AAC) mode on the touch screen.
- Podłącz multimetr do szereg with the circuit where current is to be measured.
- Podłącz zasilanie do obwodu i odczytaj wartość prądu.
5.4. Pomiar rezystancji
Aby zmierzyć rezystancję:
- Upewnij się, że obwód jest odłączony od napięcia i wszystkie kondensatory są rozładowane.
- Podłącz czerwony przewód pomiarowy do VΩCAPHzTemp Jack i czarny przewód do KOM podnośnik.
- Select the Resistance (Ω) mode on the touch screen.
- Podłącz sondy pomiarowe do mierzonego elementu.
- Odczytaj wartość rezystancji.
5.5. Pomiar pojemności
Aby zmierzyć pojemność:
- Przed dokonaniem pomiaru należy upewnić się, że kondensator jest całkowicie rozładowany.
- Podłącz czerwony przewód pomiarowy do VΩCAPHzTemp Jack i czarny przewód do KOM podnośnik.
- Select the Capacitance (CAP) mode on the touch screen.
- Podłącz sondy pomiarowe do zacisków kondensatora.
- Odczytaj wartość pojemności.
5.6. Pomiar temperatury
Aby zmierzyć temperaturę:
- Podłącz czerwony przewód pomiarowy do VΩCAPHzTemp Jack i czarny przewód do KOM podnośnik.
- Select the Temperature (Temp) mode on the touch screen.
- Place the temperature probe (if included and connected) at the desired measurement point.
- Odczytaj wartość temperatury.
5.7. VFC Function
The VFC (Variable Frequency Control) function is designed for accurate voltage and frequency measurements in circuits with variable frequency drives or other non-sinusoidal waveforms. Activate this mode via the touch screen when measuring such signals.
6. Konserwacja
6.1. Czyszczenie
Aby wyczyścić multimetr, przetrzyj obudowę miękką szmatką.amp cloth and a mild detergent. Do not use abrasives or solvents. Ensure the device is powered off and disconnected from all circuits before cleaning.
6.2. Przechowywanie
W przypadku dłuższego nieużywania wyjmij baterie, aby zapobiec wyciekowi. Przechowuj multimetr w chłodnym, suchym miejscu, z dala od bezpośredniego światła słonecznego i ekstremalnych temperatur.
6.3. Wymiana baterii
Replace the batteries as described in Section 4.1 when the low battery indicator appears on the display. Using a multimeter with low batteries can lead to inaccurate readings.
7. Rozwiązywanie Problemów
If you encounter issues with your KKM198 Digital Multimeter, refer to the following common problems and solutions:
- Brak wyświetlacza: Sprawdź instalację baterii i upewnij się, że nie są rozładowane.
- Niedokładne odczyty: Verify correct mode selection, proper test lead connection, and ensure batteries are not low. Calibrate if necessary (refer to service information).
- No Response from Touch Screen: Power cycle the device. If the issue persists, contact support.
- „OL” lub wskaźnik przeciążenia: The measured value exceeds the selected range. Switch to a higher range or verify the circuit conditions.
8. Specyfikacje
| Parametr | Wartość |
|---|---|
| Numer modelu | KKM198 |
| Typ wyświetlacza | Wyświetlacz cyfrowy |
| Rozmiar ekranu | 4.4 cala |
| Typ przycisku | Przycisk dotykowy |
| Sampling Oceń | Około 3 razy na sekundę |
| Objętość DCtage Zakres | 6V / 60V / 600V / 1000V |
| AC Objętośćtage Zakres | 2V / 20V / 200V / 750mV |
| Zakres prądu stałego | 600mA ±(1.2%+10) |
| Zakres prądu AC | 600mA ±(1.2%+10) |
| Zakres oporu | 600Ω / 6kΩ / 60kΩ / 600kΩ / 6MΩ / 60MΩ |
| Zakres pojemności | 10nF / 100nF / 1uF / 10uF / 100uF / 1mF / 10mF / 60mF |
| Temperatura pracy | 0 - 40 °C |
| Wymiary | Wymiary 14 x 7 x 2.2 cm |
| Waga przedmiotu | Około 10.6 uncji (300 gramów) |
| Pomiar indukcyjności | Nieobsługiwane |
9. Gwarancja i wsparcie
The SEEIRIR KKM198 Digital Multimeter is designed for reliability and performance. For warranty information, please refer to the product packaging or the retailer's terms of sale. If you require technical assistance or have questions not covered in this manual, please contact your point of purchase or the manufacturer's customer support for further guidance.