
1. Koniec produktuview
The Longer RAY5 Mini is a compact and portable laser engraver and cutter designed for various materials. It features a 3.5W laser module, a 140x130mm engraving area, and multiple connectivity options for ease of use.
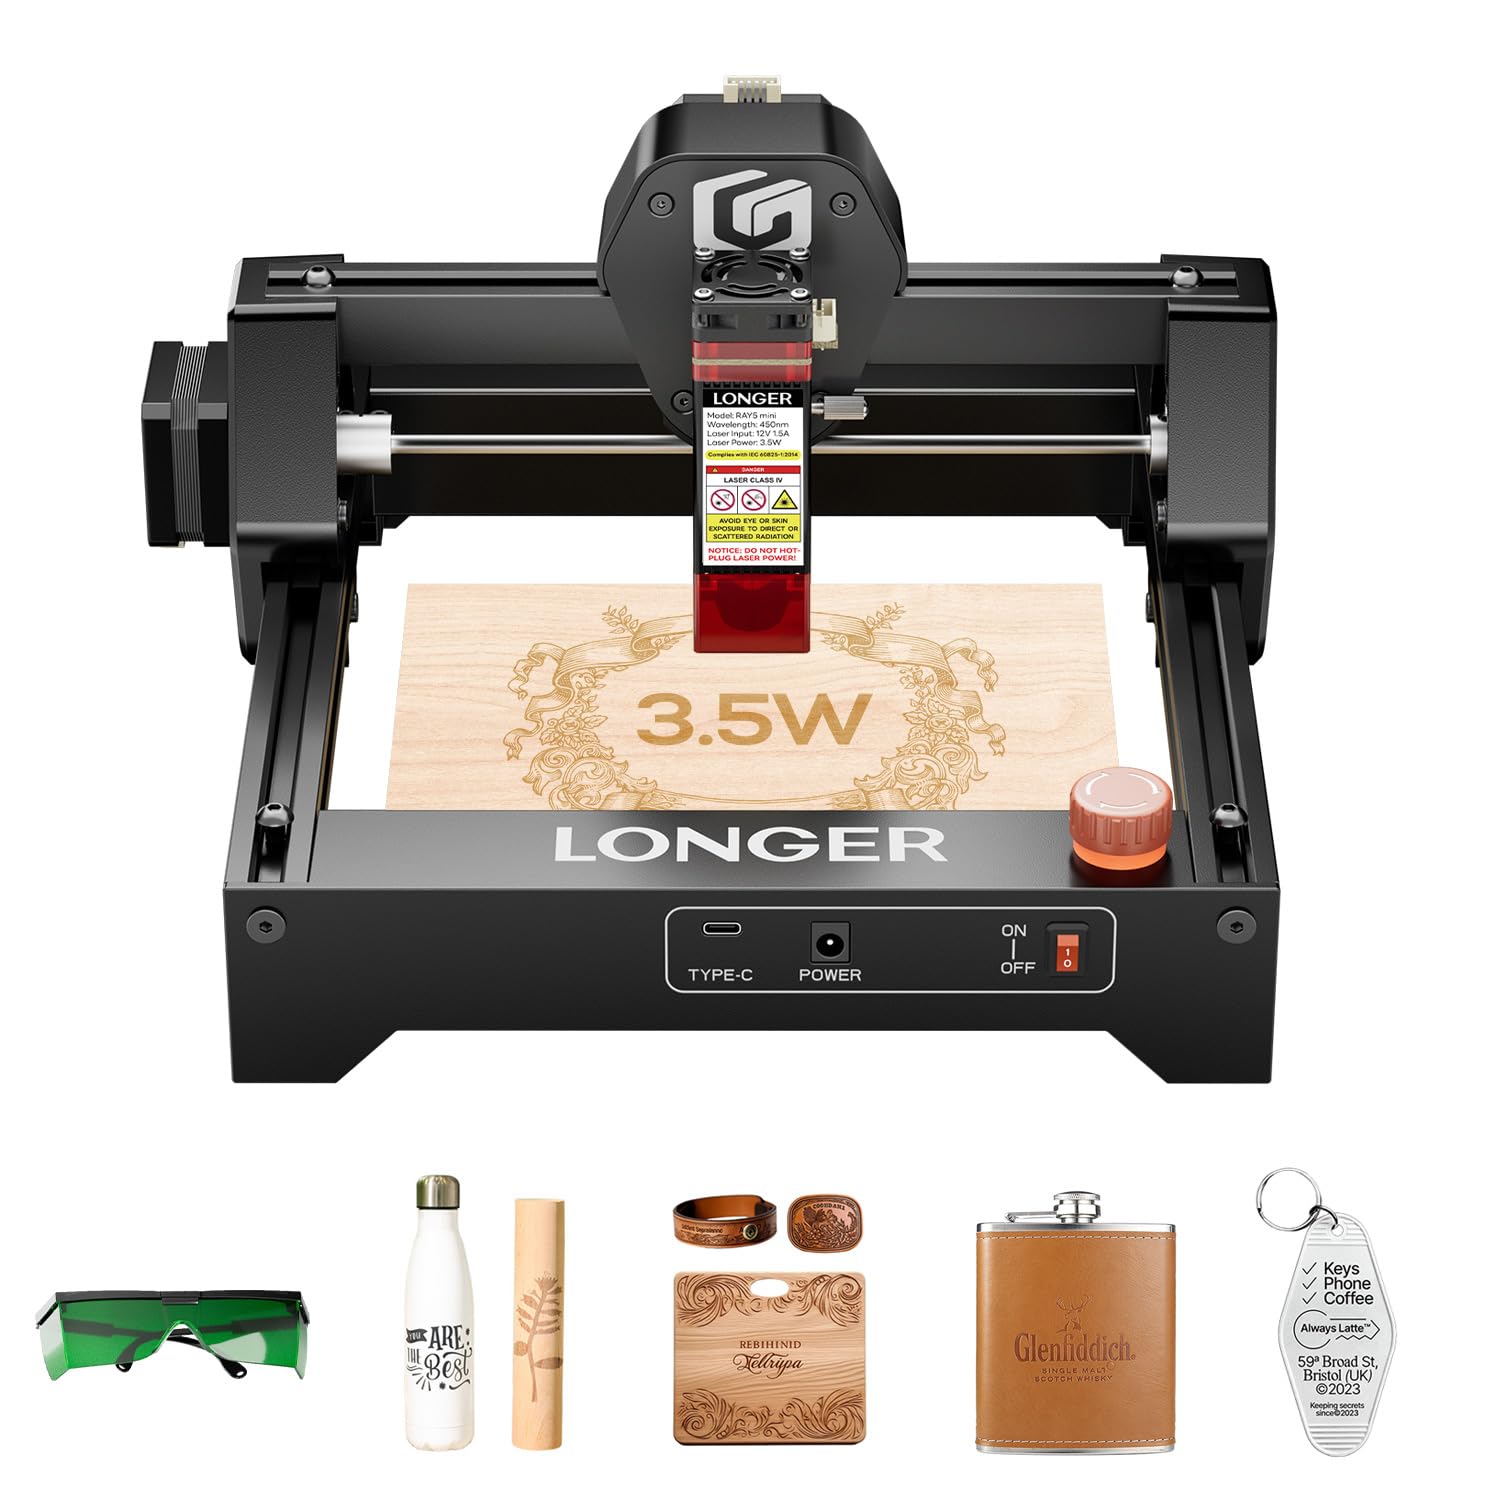
Figure 1: Longer RAY5 Mini Laser Engraver (3.5W) - Overall View
2. Informacje dotyczące bezpieczeństwa
Always prioritize safety when operating the laser engraver. Failure to follow safety guidelines can result in serious injury or damage to the device.
- Ochrona oczu: Always wear the provided laser protective glasses during operation.
- Laser Shield: Ensure the laser shield is properly installed to reduce laser exposure.
- Awaryjny postój: Familiarize yourself with the emergency stop button and its location. Press it immediately in case of any malfunction or hazard.
- Wentylacja: Operate the device in a well-ventilated area to dissipate fumes and smoke generated during engraving/cutting.
- Materiały łatwopalne: Avoid engraving or cutting highly flammable materials without proper precautions.

Rysunek 2: Wielorakie zabezpieczenia
3. Przewodnik konfiguracji
3.1 Rozpakowanie i wstępna inspekcja
The Longer RAY5 Mini comes pre-assembled for quick setup. Carefully remove all components from the packaging and check for any missing items or damage.
Video 1: LONGER RAY5 Mini Laser Engraver Unboxing. This video demonstrates the unboxing process and initial setup of the laser engraver.
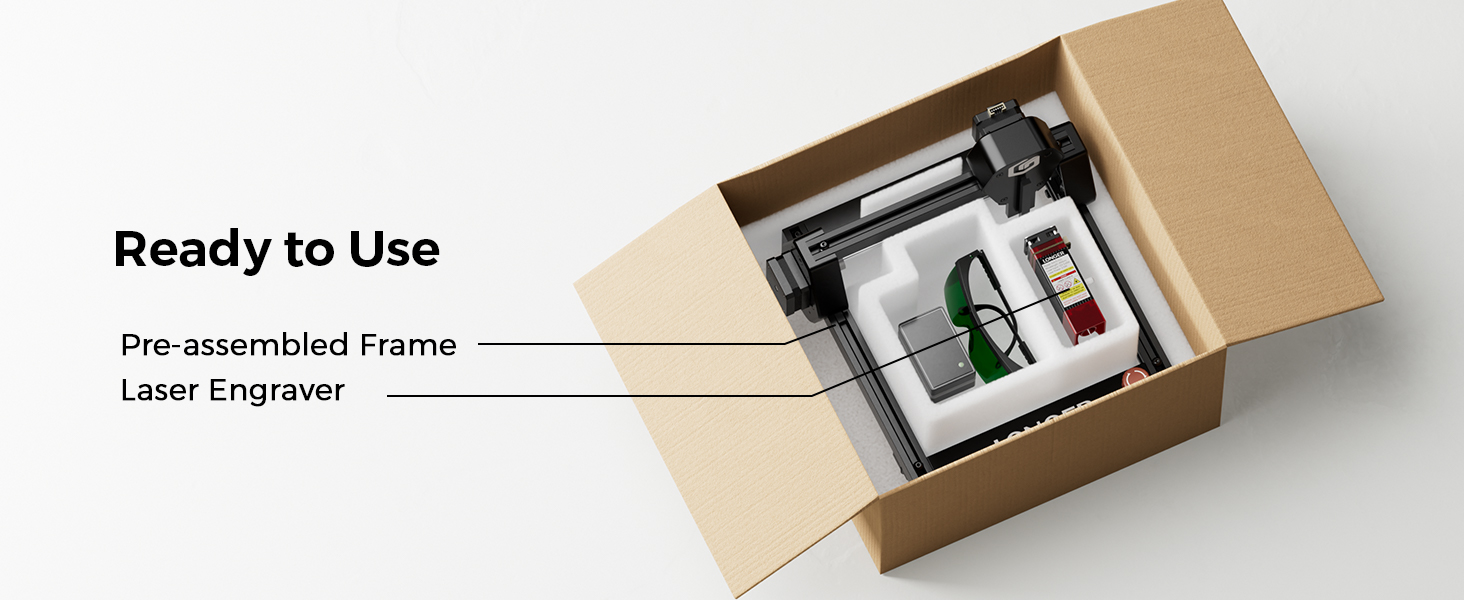
Figure 3: Pre-assembled frame and laser engraver components inside the box.
3.2 Connecting the Laser Module
- Carefully insert the laser module into its designated slot on the machine.
- Secure the laser module using the provided thumb screws.
- Connect all necessary cables from the laser module to the main unit, ensuring they are firmly seated.
3.3 Połączenie zasilania
- Plug the DC power adapter into the machine's power port.
- Podłącz zasilacz do odpowiedniego gniazdka elektrycznego.
- Ensure the emergency stop button is disengaged (turned counter-clockwise) and the rocker switch is in the 'ON' position.
4. Instrukcja obsługi
4.1 Instalacja i podłączenie oprogramowania
The Longer RAY5 Mini supports various software for design and control, including LaserGRBL (free) and LightBurn (paid). It also offers Wi-Fi and APP connectivity.
- LaserGRBL: Download and install LaserGRBL from the official website. Ensure the CH340 driver is installed for USB connection.
- LightBurn: Download and install LightBurn. Import the device configuration file for RAY5 Mini.
- APP/Wi-Fi: Connect your device to the engraver via Wi-Fi using the dedicated app for mobile control.
Video 2: Ray5 mini Laser GRBL Installation and Usage Guide. This video provides a step-by-step guide on installing and using LaserGRBL software.
Video 3: Ray5 mini LightBurn Installation and Usage Guide. This video demonstrates the installation and usage of LightBurn software.
Video 4: Ray5 mini tutorial by using LaserBurn APP in STA mode. This video guides users through using the LaserBurn app in STA mode.
4.2 Ogniskowanie lasera
Accurate focusing is crucial for optimal engraving and cutting results. Use the provided focus block to set the correct distance between the laser module and the material surface.
- Place the material to be engraved/cut on the working area.
- Position the focus block directly under the laser module.
- Loosen the thumb screw on the laser module.
- Lower the laser module until its bottom edge gently touches the top of the focus block.
- Tighten the thumb screw to secure the laser module in place.
- Remove the focus block. The laser is now focused.
4.3 Proces grawerowania i cięcia
Once the laser is focused and connected to your chosen software, you can begin your projects.
- Zgodność materiałów: The RAY5 Mini can engrave over 300 types of materials, including wood, leather, metal, and acrylic.
- Precyzja: Achieve detailed results with a 0.04mm x 0.04mm ultra-fine laser spot and 0.01mm accuracy.
- Prędkość: Engrave at speeds up to 12,000mm/min for efficient project completion.

Figure 4: Key Features of the Longer RAY5 Mini

Figure 5: Comparison of Engraving Precision
Video 5: Ray5 Mini Engraves Wood Panels with Ease & Precision. This short video demonstrates the engraver's ability to create precise designs on wood.
5. Konserwacja
Regular maintenance ensures the longevity and optimal performance of your Longer RAY5 Mini.
- Czyszczenie: Regularly clean the laser lens and the working area to prevent debris buildup. Use a soft, lint-free cloth and appropriate cleaning solutions.
- Smarowanie: Periodically lubricate the guide rails and moving parts as recommended in the detailed manual to ensure smooth operation.
- Kontrola kabla: Check all cables for wear or damage. Replace any damaged cables immediately.
6. Rozwiązywanie Problemów
If you encounter issues with your Longer RAY5 Mini, refer to the following common problems and solutions:
| Problem | Możliwa przyczyna | Rozwiązanie |
|---|---|---|
| Laser nie działa lub jego moc jest słaba | Nieprawidłowa ostrość, brudny obiektyw, zbyt niskie ustawienie mocy, luźny kabel. | Re-focus the laser, clean the lens, increase power setting in software, check cable connections. |
| Maszyna nie łączy się z komputerem/aplikacją | Driver not installed, incorrect COM port, Wi-Fi issues. | Install CH340 driver, select correct COM port, ensure stable Wi-Fi connection. |
| Jakość grawerowania jest słaba lub niespójna | Incorrect speed/power settings, material not flat, loose X/Y axis. | Adjust speed and power settings, ensure material is flat and secure, tighten eccentric nuts if axes are loose. |
| Maszyna wydaje nietypowe dźwięki | Loose components, debris in moving parts. | Inspect and tighten all screws, clean guide rails, lubricate moving parts. |
7. Specyfikacje
- Wymiary produktu: 11.5 x 11.26 x 6.5 cala
- Numer modelu przedmiotu: RAY5 Mini
- Moc lasera: 3.5 W
- Obszar grawerowania: 140x130mm
- Prędkość grawerowania: Do 10 000 mm/min
- Rozmiar plamki lasera: 0.04mm x 0.04mm
- Łączność: USB, Wi-Fi, APP
- Obsługiwane oprogramowanie: LaserGRBL, LightBurn
- Waga przedmiotu: 5.15 funta
- Producent: DŁUŻEJ
8. Gwarancja i wsparcie
Longer provides comprehensive support for your RAY5 Mini Laser Engraver.
- Gwarancja: Please refer to the official Longer webSzczegółowe informacje dotyczące gwarancji można znaleźć na stronie internetowej lub w dokumentacji zakupu.
- Wsparcie techniczne: Lifetime technical support is available. Contact Longer customer service for assistance with any issues or questions.
- Kontakt: Aby uzyskać pomoc, odwiedź stronę Longer Official Store on Amazon or refer to the contact information in your product packaging.


