
Wstęp
The Philips DVT1170 VoiceTracer is a digital audio recorder designed for clear and reliable sound capture. This device features an 8GB internal memory, a 360° microphone for excellent sound quality, and supports voice-activated recording. It records in WAV format and includes a MicroSD card slot for expanded storage. This manual provides essential information for setting up, operating, and maintaining your VoiceTracer.

Figure 1: Philips DVT1170 VoiceTracer Audio Recorder.
Produkt ponadview
The DVT1170 VoiceTracer is equipped with a high-quality 360° microphone to capture sound from all directions, ensuring clear recordings. Its compact design makes it easy to carry, and the intuitive controls simplify operation.

Rycina 2: Przód view of the Philips DVT1170 VoiceTracer, showing the display and control buttons.
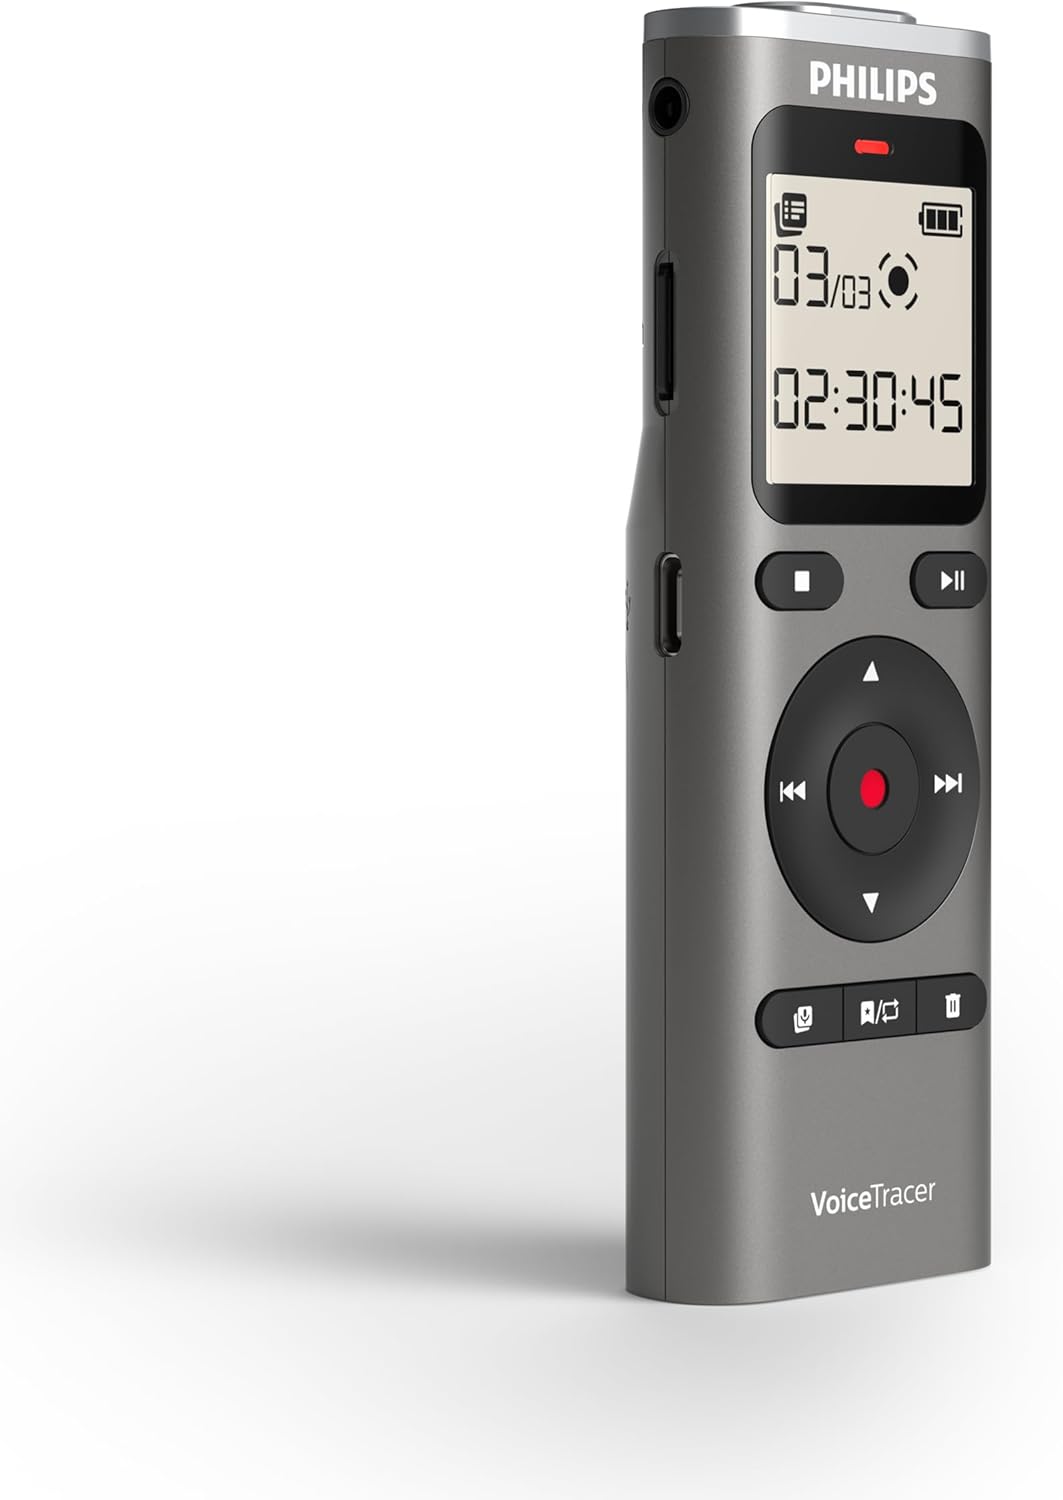
Rysunek 3: Strona view of the Philips DVT1170 VoiceTracer, highlighting the power switch and USB port.
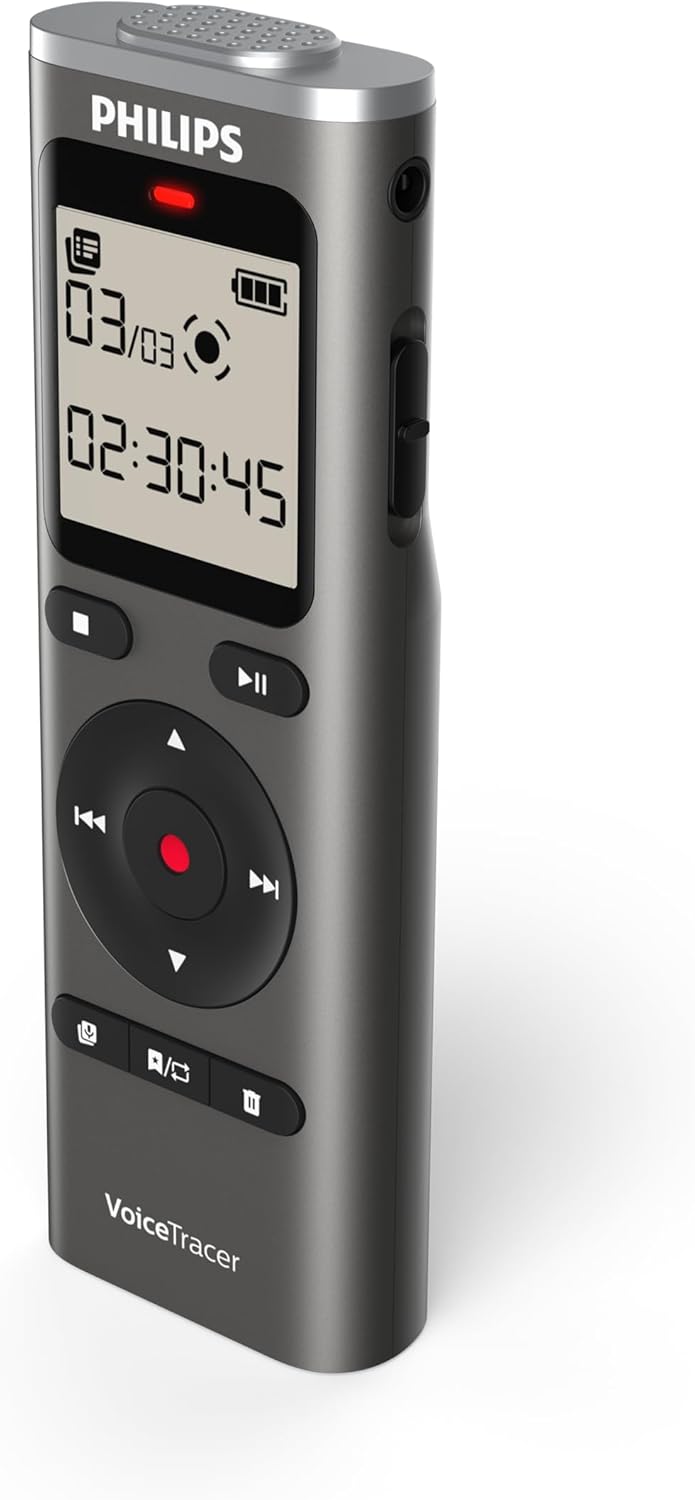
Rysunek 4: Tył view of the Philips DVT1170 VoiceTracer, showing the battery compartment.
Główne cechy:
- High-quality 360° microphone: Captures clear, stereo-quality sound from all directions.
- Clear voice recording in WAV format: Ensures high-fidelity audio capture.
- Nagrywanie aktywowane głosem: Allows for hands-free operation, starting recording automatically when sound is detected.
- Czas-stamped files: For easy organization and navigation of your recordings.
- 8 GB of internal memory: Zapewnia ample space for extended recording sessions.
- Gniazdo kart microSD: For expanding storage capacity beyond the internal 8 GB.
- Extra long battery runtime: Ensures uninterrupted recording sessions.
Co jest w pudełku
Your Philips DVT1170 VoiceTracer package includes:
- Philips DVT1170 VoiceTracer Audio Recorder
- 2 baterie AAA
Organizować coś
1. Instalacja baterii
The Philips DVT1170 VoiceTracer requires 2 AAA batteries for operation. These are included in your package.
- Znajdź komorę baterii z tyłu urządzenia.
- Otwórz pokrywę komory.
- Włóż 2 baterie AAA, zwracając uwagę na prawidłową biegunowość (+/-).
- Dokładnie zamknij pokrywę komory baterii.
2. Karta MicroSD (opcjonalnie)
To expand the storage capacity beyond the internal 8GB, you can insert a MicroSD card.

Figure 5: Philips DVT1170 VoiceTracer showing the MicroSD card slot.
- Znajdź gniazdo karty MicroSD z boku urządzenia.
- Ostrożnie wsuń kartę MicroSD do gniazda, aż zatrzaśnie się na miejscu.
- To remove, gently press the card until it pops out, then pull it out.
3. Ładowanie
The device can be charged or powered via its USB-C port.

Figure 6: Philips DVT1170 VoiceTracer connected to a USB-C cable for charging or data transfer.
- Podłącz kabel USB-C do portu USB-C urządzenia.
- Podłącz drugi koniec kabla USB do zasilacza lub portu USB komputera.
- The device will indicate charging status on the display.
Instrukcja obsługi
1. Włączanie/wyłączanie zasilania
- To turn on the device, slide the power switch located on the side of the recorder upwards.
- To turn off the device, slide the power switch downwards.
2. Podstawowe nagrywanie
The DVT1170 VoiceTracer supports one-touch recording for quick and easy audio capture.

Figure 7: Icon representing one-touch recording functionality.
- Upewnij się, że urządzenie jest włączone.
- Naciśnij REK button to start recording. The recording indicator light will illuminate.
- Naciśnij ZATRZYMYWAĆ SIĘ przycisk, aby zatrzymać nagrywanie. file zostaną automatycznie zapisane.
3. Voice-Activated Recording
Enable voice-activated recording for hands-free operation. The recorder will automatically start recording when sound is detected and pause when silence occurs.

Figure 8: Icon representing voice-activated recording functionality.
- Navigate to the recording settings menu.
- Select and enable the Voice-Activated Recording (VAR) option.
- Adjust the sensitivity level as needed.
- Naciśnij REK button to begin voice-activated recording.
4. Odtwarzanie
To listen to your recorded files:
- Przejdź do file list or recording library.
- Użyj przycisków nawigacyjnych, aby wybrać żądane file.
- Naciśnij GRAĆ przycisk, aby rozpocząć odtwarzanie.
- Użyj przycisków głośności, aby wyregulować głośność odtwarzania.
- Naciśnij ZATRZYMYWAĆ SIĘ przycisk, aby zakończyć odtwarzanie.
5. File Kierownictwo
Recordings are automatically time-stamped for easy organization.

Figure 9: Icon representing time-stamped files for easy organization.
- Uzyskaj dostęp do file list from the main menu.
- Use the navigation buttons to browse through your recordings.
- Aby usunąć file, wybierz file i naciśnij USUWAĆ button, then confirm.
6. Podłączanie do komputera
Przenosić files to and from your computer using the USB-C cable.
- Connect the VoiceTracer to your computer using the provided USB-C cable.
- Urządzenie będzie widoczne na Twoim komputerze jako dysk wymienny.
- Przeciągnij i upuść files, aby je przenieść.
Konserwacja
- Keep the device clean and dry. Avoid immersing it in water or other liquids.
- Do not use organic solvents to clean the device, as this may cause damage.
- Avoid exposing the device to strong magnetic/electromagnetic fields, radio waves, or high voltagśrodowiska.
- If the device is left unused for an extended period, kindly recharge and discharge the product once every 2 months to maintain battery lifespan.
Rozwiązywanie problemów
- Urządzenie nie włącza się: Sprawdź, czy baterie są prawidłowo zainstalowane i naładowane.
- Słaba jakość dźwięku: Check microphone placement. Ensure no obstructions. Consider using the noise reduction feature if available.
- Magazyn pełny: Usuń niepotrzebne files or insert a MicroSD card for more space.
- Urządzenie nie odpowiada: Try turning the device off and on again. If the issue persists, consult the warranty information.
Specyfikacje
| Funkcja | Specyfikacja |
|---|---|
| Marka | Philips |
| Numer modelu | DVT1170 |
| Pojemność pamięci masowej | 8 GB (expandable via MicroSD card slot) |
| Współczynnik kształtu mikrofonu | Built-In (360° microphone) |
| Format | WAV |
| Interfejs sprzętowy | USB 2.0 |
| Gniazdo słuchawkowe | 3.5 milimetra |
| Liczba baterii | Wymagane 2 baterie AAA (w zestawie) |
| Wymiary produktu | 4.4" gł. x 0.6" szer. x 1.4" wys. |
| Waga przedmiotu | 89 gram |
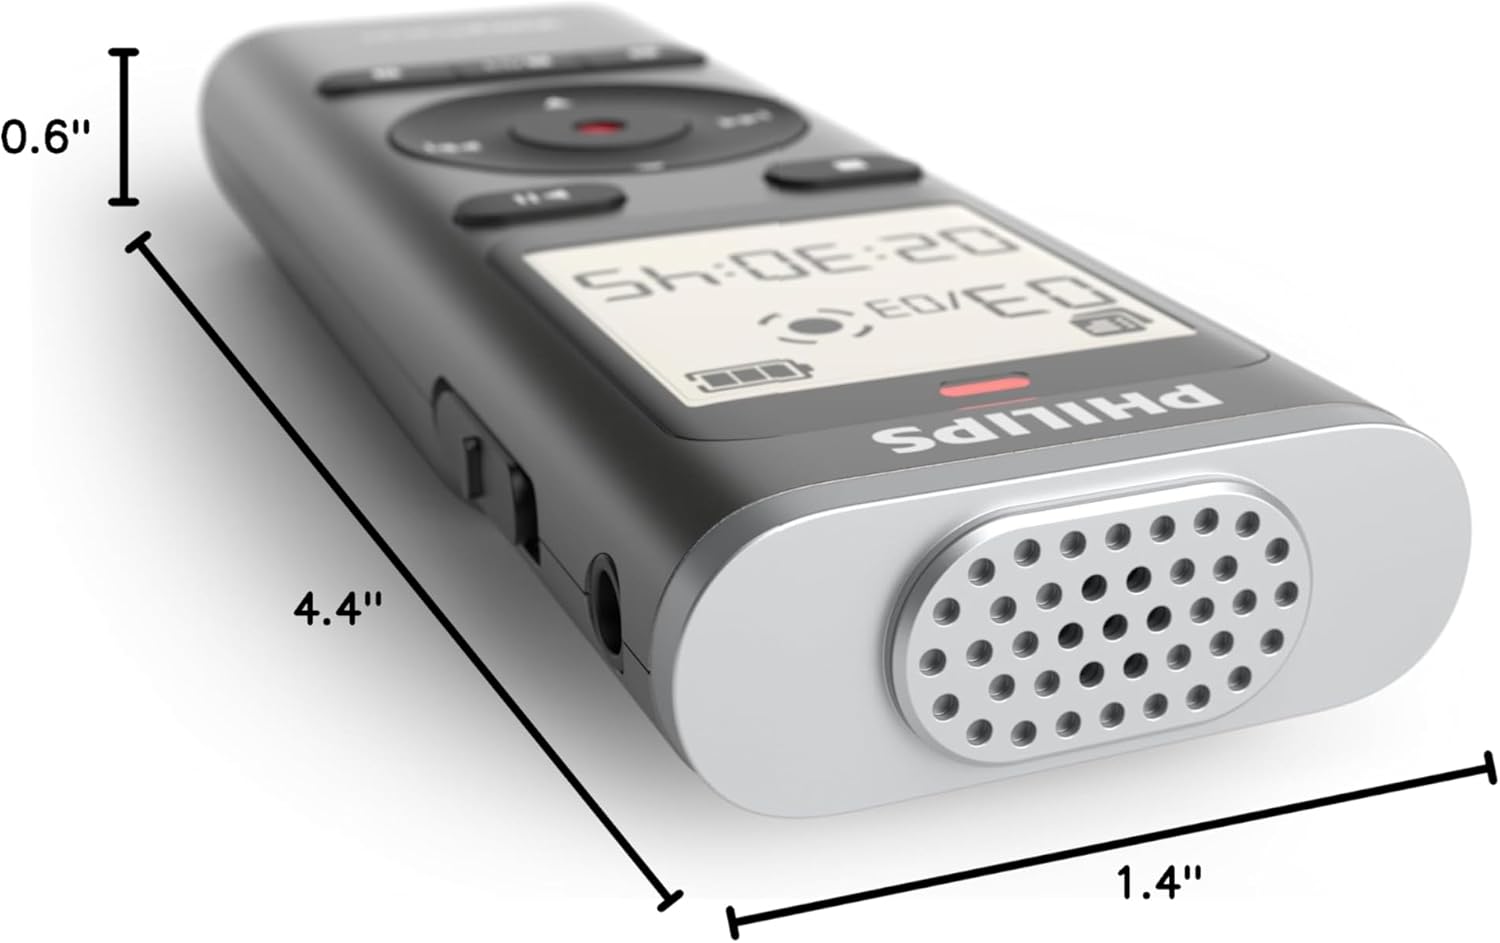
Figure 10: Dimensions of the Philips DVT1170 VoiceTracer.
Gwarancja i wsparcie
The Philips DVT1170 VoiceTracer comes with a 1-letnia gwarancja producenta. For any support or warranty claims, please contact Speech Processing Solutions, the manufacturer, directly.
For additional assistance, you may refer to the official Philips support webwitryny lub skontaktuj się z obsługą klienta.
Film o produkcieview
Film 1: Oficjalny produktview of the Philips DVT1170 VoiceTracer, demonstrating its features and usage.