1. Wprowadzenie
The GAMDIAS Boreas E1-210 LITE is an air cooling solution designed for central processing units (CPUs). It features a 92mm fan with LED illumination, two copper heat pipes, and a hydraulic bearing fan for efficient heat dissipation. This cooler is compatible with a wide range of Intel and AMD motherboard sockets, providing effective thermal management for your system.
2. Zawartość opakowania
Przed przystąpieniem do instalacji sprawdź, czy w opakowaniu znajdują się wszystkie komponenty:
- Boreas E1-210 LITE CPU Cooler Unit (Heatsink and Fan)
- Uniwersalny wspornik montażowy
- Intel Mounting Clips/Screws
- AMD Mounting Clips/Screws
- Thermal Paste (may be pre-applied or in a small tube)
- Instrukcja obsługi (ten dokument)

Rycina 2.1: Przód view of the GAMDIAS Boreas E1-210 LITE CPU Air Cooler.

Figure 2.2: Included mounting kit components for various CPU sockets.
3. Specyfikacje
| Funkcja | Specyfikacja |
|---|---|
| Marka | GAMDIAS |
| Numer modelu | BOREAS E1-210 LITE |
| Rozmiar wentylatora | 92mm |
| Rury cieplne | 2 Copper Heat Pipes with Direct Contact Technology |
| Typ łożyska wentylatora | Łożysko hydrauliczne |
| Prędkość wentylatora | Do 2200 obr./min. |
| Poziom hałasu | 31 dBA |
| Przepływ powietrza | 34.6 stopy sześcienne na minutę |
| Oświetlenie LED | Rainbow LED Illumination |
| Wymiary (dł. x szer. x wys.) | 9.2 x 9.2 x 2.5 cm (Fan), Overall: 9.2 x 9.2 x 2.5 cm (Note: Product dimensions are listed as 9.2 x 9.2 x 2.5 cm; 300 g, which seems to be fan dimensions. Heatsink dimensions are not explicitly separated.) |
| Waga przedmiotu | 300 gramów |
| Supported Sockets | Intel: LGA1700, 1151, 1150, 1155, 1156, 1200 AMD: AM5, AM4, AM3 |
4. Konfiguracja i instalacja
Follow these general steps for installing the GAMDIAS Boreas E1-210 LITE CPU cooler. Specific steps may vary slightly depending on your motherboard and CPU socket type. Always refer to your motherboard's manual for precise instructions on CPU cooler installation.
4.1. Przygotowanie
- Upewnij się, że komputer jest wyłączony i odłączony od gniazdka ściennego.
- Otwórz obudowę komputera, aby uzyskać dostęp do płyty głównej.
- If replacing an existing cooler, carefully remove it and clean any old thermal paste from the CPU surface using isopropyl alcohol and a lint-free cloth.
4.2. Instalacja wspornika montażowego
Identify the correct mounting hardware for your CPU socket (Intel or AMD).
- Dla gniazd Intel: Attach the appropriate Intel mounting clips to the universal mounting bracket. Position the bracket over the CPU socket, aligning the holes with the motherboard's cooler mounting holes. Secure it from the back of the motherboard if a backplate is provided or required.
- Dla gniazd AMD: Attach the appropriate AMD mounting clips to the universal mounting bracket. Position the bracket over the CPU socket, aligning the holes with the motherboard's cooler mounting holes. Secure it.
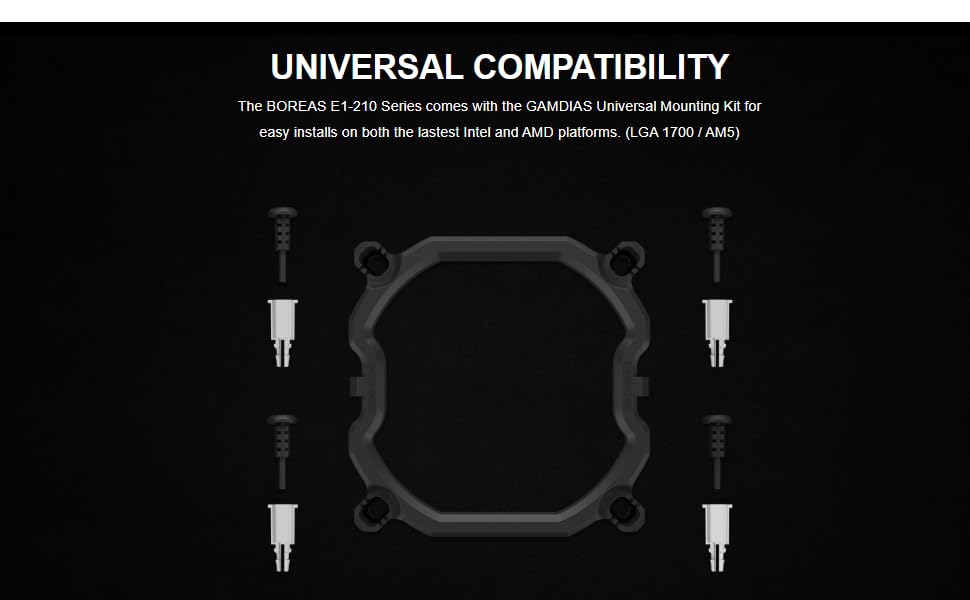
Figure 4.1: Universal mounting kit for Intel and AMD platforms.
4.3. Thermal Paste Application
Apply a small amount of thermal paste to the center of your CPU's integrated heat spreader (IHS). A pea-sized dot is usually sufficient. The cooler's direct contact heat pipes will spread it evenly upon installation.
4.4. Montaż chłodnicy
- Carefully place the heatsink assembly onto the CPU, ensuring the base makes full contact with the thermal paste.
- Align the cooler's mounting clips with the universal mounting bracket.
- Secure the cooler by tightening the screws in a diagonal pattern (e.g., top-left, bottom-right, top-right, bottom-left) until snug. Do not overtighten.
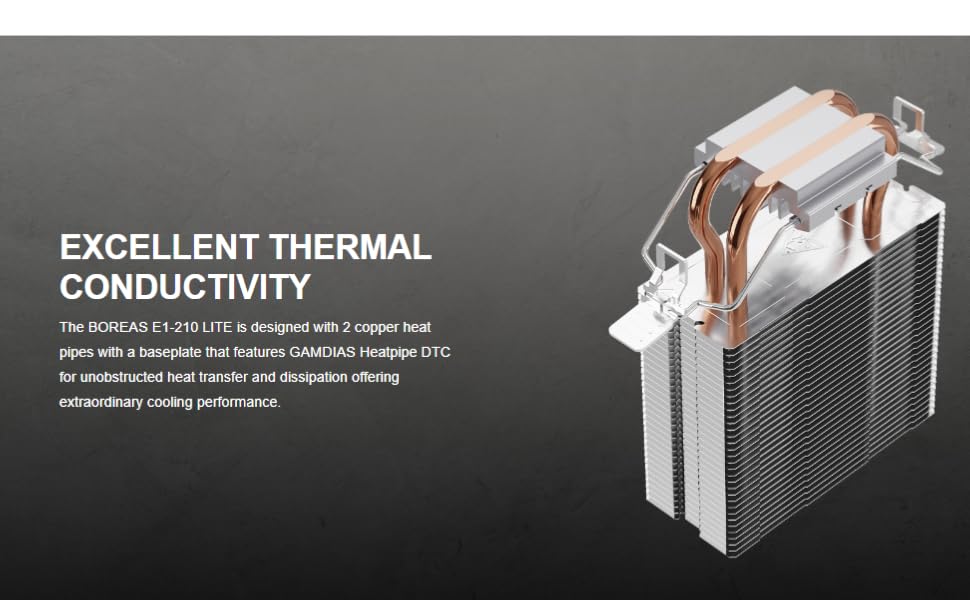
Figure 4.2: Heatsink design with 2 copper heat pipes for efficient thermal conductivity.
4.5. Podłączenie wentylatora
- Locate the 3-pin fan connector on the cooler's fan cable.
- Connect this cable to an available 3-pin or 4-pin CPU Fan header on your motherboard. Refer to your motherboard manual for the exact location of the CPU Fan header.
- The fan features Rainbow LED illumination, which will light up once connected and powered on.
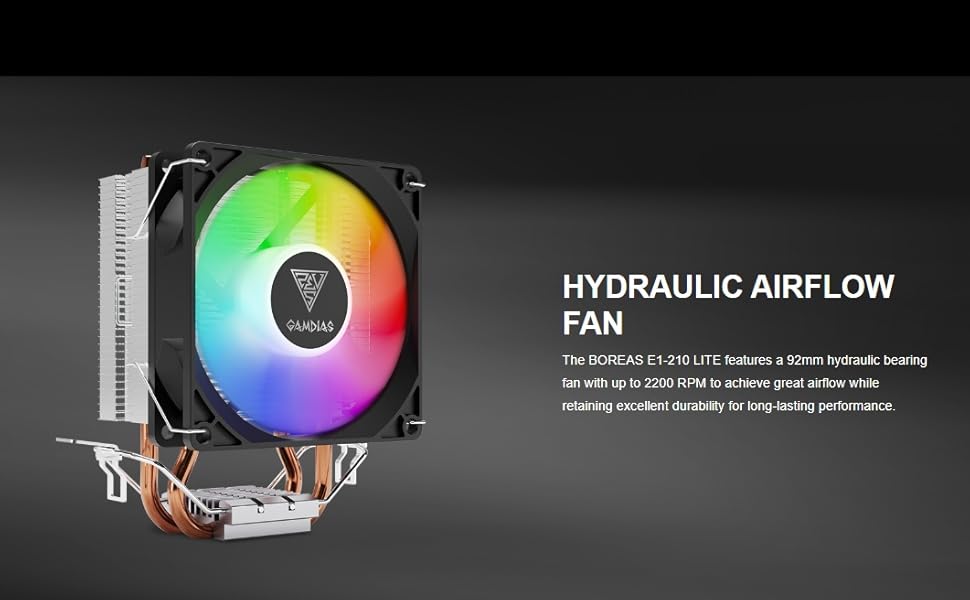
Figure 4.3: The 92mm hydraulic bearing fan provides high airflow.
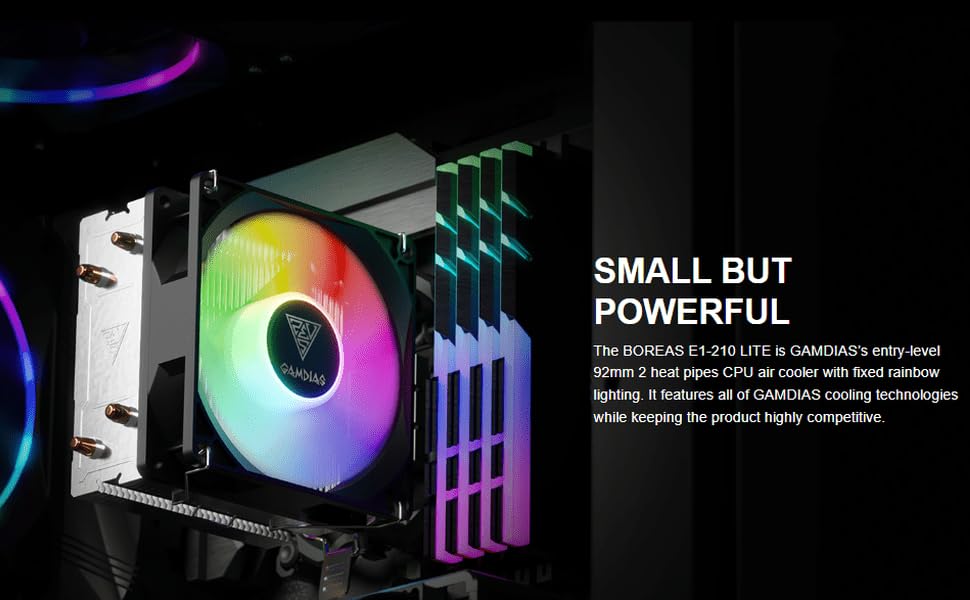
Figure 4.4: The Boreas E1-210 LITE CPU cooler installed in a system.
5. Instrukcja obsługi
Once installed and connected, the GAMDIAS Boreas E1-210 LITE CPU cooler operates automatically based on your motherboard's fan control settings. The fan will spin to cool the CPU, and the Rainbow LED illumination will activate.
- Prędkość wentylatora: The fan operates at up to 2200 RPM. If connected to a 4-pin PWM header, your motherboard's BIOS/UEFI or operating system software may allow for fan speed control based on CPU temperature. If connected to a 3-pin header, the fan will typically run at a constant speed or be voltage-controlled by the motherboard.
- Oświetlenie LED: The fan features fixed Rainbow LED lighting that illuminates when the fan receives power. There are no software controls for the LED effects on this specific model.
6. Konserwacja
Regular maintenance helps ensure optimal cooling performance and extends the lifespan of your CPU cooler.
- Usuwanie kurzu: Periodically (e.g., every 3-6 months), power off your computer and use compressed air to clean dust from the heatsink fins and fan blades. Hold the fan blades gently to prevent them from spinning rapidly during cleaning, which can damage the bearing.
- Pasta termoprzewodząca: Thermal paste typically lasts for several years. If you notice consistently high CPU temperatures, consider reapplying fresh thermal paste. This involves carefully removing the cooler, cleaning old paste from both the CPU and cooler base, and applying new paste.
- Kontrola wentylatora: Check the fan for any signs of wear, unusual noises, or obstructions. Ensure the fan cable is securely connected.
7. Rozwiązywanie Problemów
If you encounter issues with your GAMDIAS Boreas E1-210 LITE CPU cooler, refer to the following common troubleshooting steps:
- Wentylator nie kręci się:
- Check if the fan cable is securely connected to the CPU Fan header on the motherboard.
- Verify that the CPU Fan header is enabled in your motherboard's BIOS/UEFI settings.
- Test the fan by connecting it to a different fan header if available.
- Wysokie temperatury procesora:
- Ensure the cooler is properly seated and making full contact with the CPU.
- Check if sufficient thermal paste was applied and that it is evenly spread. Reapply if necessary.
- Clean any dust buildup from the heatsink fins and fan.
- Verify that the fan is spinning at an appropriate speed. Adjust fan curves in BIOS/UEFI if possible.
- Zapewnij odpowiedni przepływ powietrza wewnątrz obudowy komputera.
- Diody LED nie świecą:
- Confirm the fan is receiving power and spinning. The LEDs are integrated with the fan's power.
- If the fan is spinning but LEDs are off, there might be an issue with the fan's LED component.
8. Gwarancja i wsparcie
For warranty information and technical support, please contact GAMDIAS customer service or the retailer from whom you purchased the product. Keep your proof of purchase for warranty claims.
- Producent: GAMDIAS TAIWAN, No. 113, Jian 2nd Rd., Zhonghe, Dist., New Taipei City 235, Taiwan
- Importer (Indie): Allway Distributions Pvt Ltd, No-49, H.B. Samajha Road, Baswangudi, Bengaluru- 560004, Contact - 8904307700