
Wstęp
This manual provides detailed instructions for the YWYLL EP10 - Pro Electronic Eyepiece Camera. Please read this manual thoroughly before using the device to ensure proper operation and to maximize its capabilities.
Produkt ponadview
The YWYLL EP10 - Pro is a versatile electronic eyepiece camera designed to enhance your viewing experience with monoculars, binoculars, and telescopes. It features high-definition imaging, day and night vision capabilities, and real-time sharing via WiFi.
Główne cechy:
- Uniwersalna kompatybilność: Attaches to optical devices with 34-46mm eyepieces.
- Obrazowanie w wysokiej rozdzielczości: Captures 2K videos and images.
- Day & Night Use: Integrated 850nm infrared light for low-light conditions.
- Real-Time Sharing: WiFi connectivity for live streaming to smartphones.
- Dłuższa żywotność baterii: Up to 6 hours of continuous use with a rechargeable lithium battery.
Komponenty i elementy sterujące
The EP10 - Pro camera features a user-friendly design with essential controls and ports.

Rysunek 1: YWYLL EP10-Pro Electronic Eyepiece Camera connected to an optical device, displaying a moon image on its screen and a connected smartphone. This image illustrates the device's primary function and connectivity.

Rysunek 2: Szczegółowy view of the camera's control panel, highlighting the four function buttons and the integrated display. The buttons are labeled with symbols for Photo, Record, WiFi, and Power.
The device features four primary control buttons on the top panel, a 1.6-inch display screen, an 850nm IR LED, an SD card slot, and a Type-C USB port.
- Button 1 (Leftmost): Photo/Up (in menu)
- Przycisk 2: Record/Down (in menu)
- Przycisk 3: WiFi/Left (in menu)
- Button 4 (Rightmost): Power/Right (in menu)

Rysunek 3: Strona view of the EP10-Pro camera, indicating the location of the 850nm IR illuminator, the SD card slot for storage, and the Type-C USB port for charging and data transfer.
Organizować coś
1. Ładowanie urządzenia
Before first use, fully charge the EP10 - Pro camera. Connect the provided USB Type-C cable to the camera's Type-C port and the other end to a standard USB power adapter (not included) or a computer USB port. The charging indicator will show the charging status.
2. Wkładanie karty pamięci
The device supports 4-64GB SD cards. Open the protective cover on the side of the camera and gently insert a compatible SD card into the slot until it clicks into place. Ensure the card is inserted in the correct orientation.
3. Attaching to Optical Devices
The EP10 - Pro is designed to fit eyepieces with diameters between 34mm and 46mm. Ensure your monocular, binocular, or telescope eyepiece falls within this range.
- Carefully align the camera's eyepiece fixation mechanism with your optical device's eyepiece.
- Gently push the camera onto the eyepiece. The internal clamps will adjust to secure the camera.
- Ensure the camera is firmly attached and stable before use.

Rysunek 4: Illustration demonstrating the universal compatibility of the EP10-Pro camera with various optical devices, highlighting the 34-46mm eyepiece diameter range for secure attachment.

Rysunek 5: Szczegółowy view of the camera's connection interface, showing the flexible clamps that adapt to eyepieces between 34mm and 46mm for secure and stable installation on various optical instruments.
Instrukcja obsługi
1. Włączanie/wyłączanie zasilania
Naciśnij i przytrzymaj Moc button (rightmost) for a few seconds to turn the device on or off.
2. Basic Functions (Photo/Video)
- Robienie zdjęć: Na żywo view mode, short-press the Zdjęcie button (leftmost) to capture an image.
- Nagrywanie filmów wideo: Na żywo view mode, short-press the Nagrywać button (second from left) to start video recording. Press again to stop recording.
3. Night Vision (Infrared)
The EP10 - Pro features an 850nm infrared light for enhanced viewing in low-light or nighttime conditions.
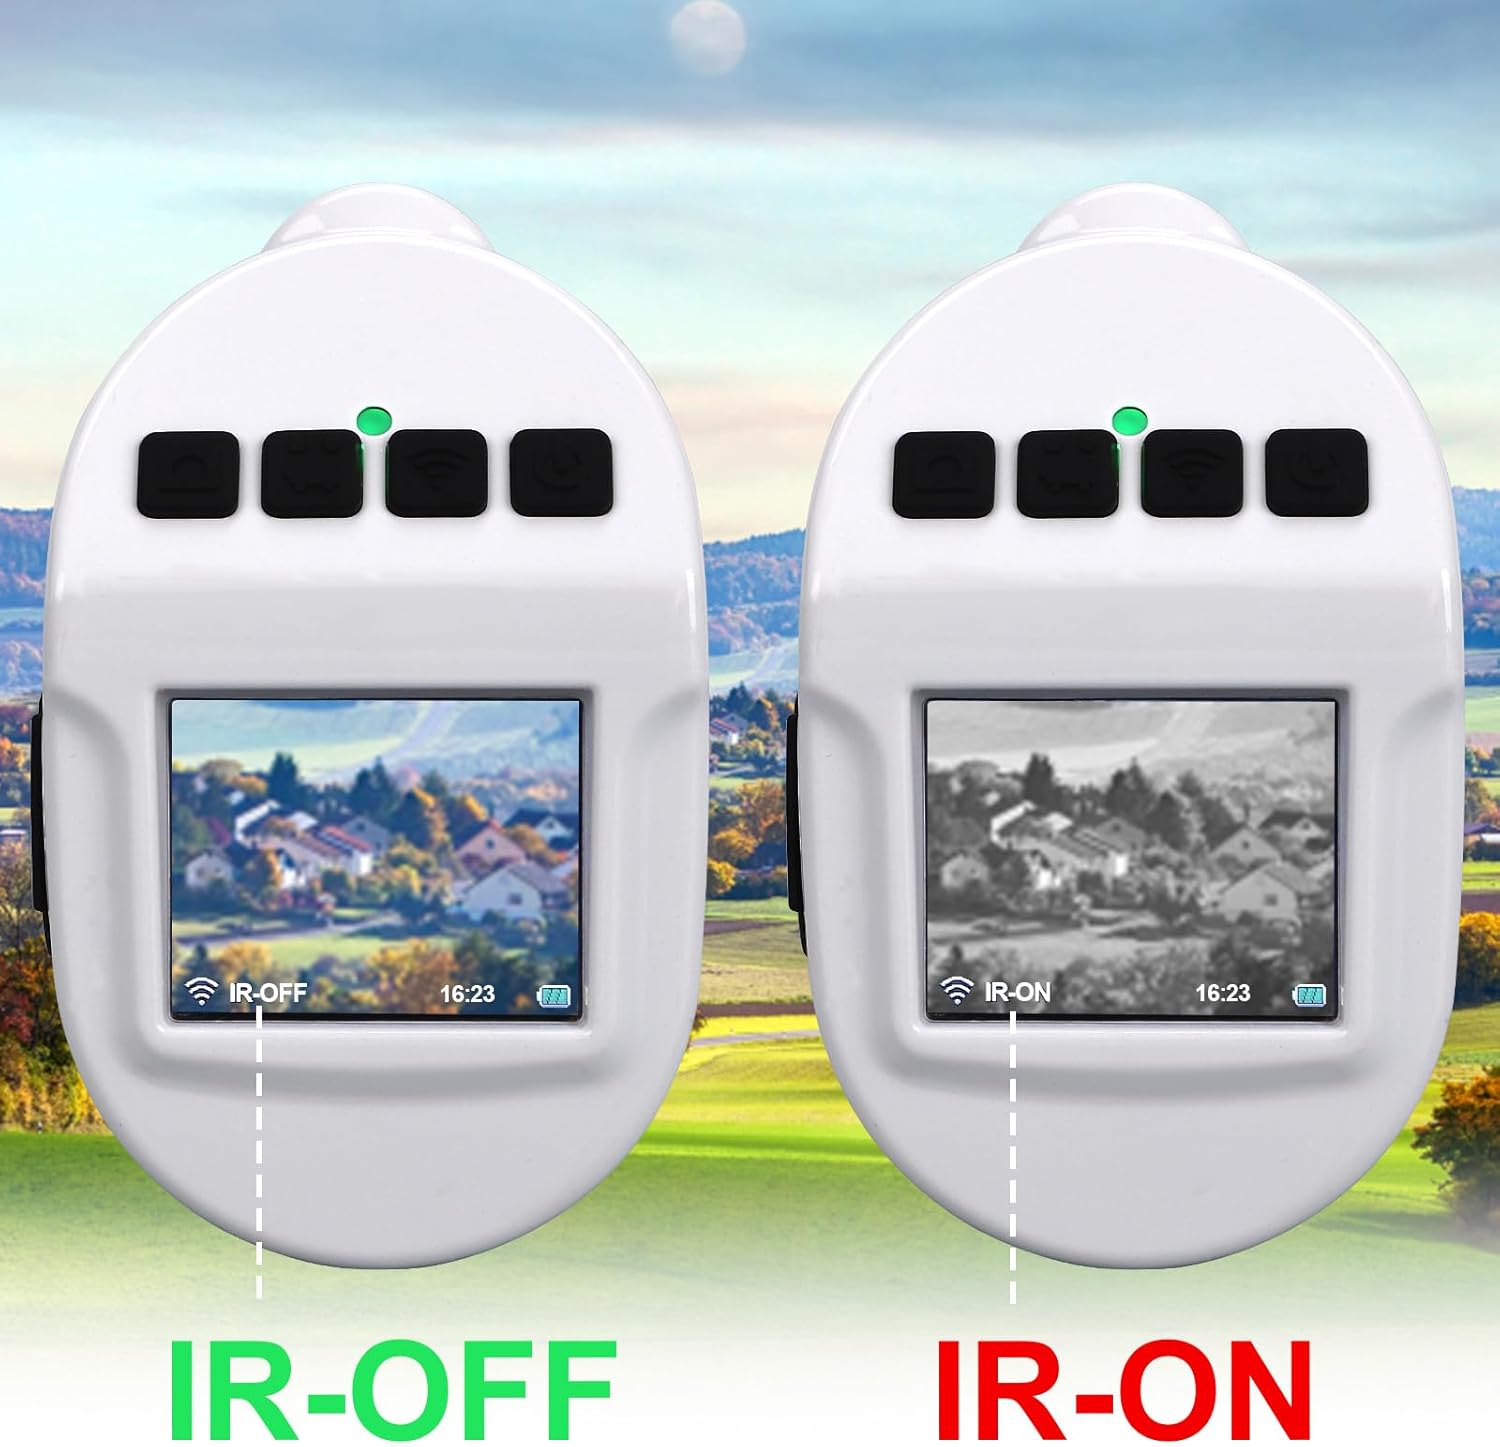
Rysunek 6: A visual comparison of the camera's display in normal (IR-OFF) mode, showing a color landscape, versus night vision (IR-ON) mode, displaying the same scene in black and white with enhanced visibility in darkness.
To activate or adjust night vision:
- From the main interface, short-press the Wi-Fi button (third from left) to cycle through IR intensity levels (IR-1, IR-2, IR-3) or to turn IR off.
- The display will indicate the current IR status (IR-ON/IR-OFF) and intensity.
4. Nawigacja po menu
To access the main menu, press and hold the Moc button. Once in the menu, the buttons function as follows:
- Przycisk Zdjęcie: Nawiguj w górę
- Przycisk nagrywania: Przejdź w dół
- Przycisk Wi-Fi: Navigate Left / Select (depending on context)
- Przycisk zasilania: Navigate Right / Exit (depending on context)
Common menu options include Playback, Date/Time, Format, Language, and LCD Brightness.

Rysunek 7: A representation of the camera's on-screen menu, displaying various settings and functions such as file playback, date/time adjustment, memory card formatting, language selection, LCD brightness control, and firmware version information.
5. Połączenie Wi-Fi i korzystanie z aplikacji
The EP10 - Pro allows real-time viewing, photo taking, and video recording via a smartphone app.
- Pobierz aplikację: Szukaj "TRVCam" or "RoadCam" in your mobile device's app store (available for Android and Apple iOS). Alternatively, you can visit http://www.sunningsoft.com/trvcam.html aby uzyskać linki do pobrania.
- Activate WiFi on Camera: Naciśnij krótko Wi-Fi button on the camera to activate its WiFi hotspot. The WiFi indicator light will illuminate.
- Podłącz swój telefon: On your smartphone, go to WiFi settings and connect to the network named "EP10_XXXXXX" (where XXXXXX is a unique identifier). The default password is 12345678.
- Otwórz aplikację: Launch the TRVCam or RoadCam app.
- Połącz w aplikacji: Within the app, click "Operate" or a similar option to establish a connection and begin real-time image transmission.

Rysunek 8: Step-by-step guide for establishing a WiFi connection between the EP10-Pro camera and a smartphone, detailing app installation, WiFi network identification, password entry, and in-app connection for live viewing.
Konserwacja
- Czyszczenie: Use the provided cleaning cloth or a soft, lint-free cloth to gently wipe the lens and display screen. Do not use abrasive cleaners or solvents.
- Składowanie: When not in use, store the camera in a cool, dry place, away from direct sunlight and extreme temperatures. Use the soft pouch provided to protect it from dust and scratches.
- Pielęgnacja baterii: Aby zapewnić optymalną żywotność baterii, unikaj częstego całkowitego rozładowywania baterii. Regularnie ładuj urządzenie, nawet jeśli nie jest używane przez dłuższy czas.
Rozwiązywanie problemów
If you encounter issues with your YWYLL EP10 - Pro camera, please refer to the following common solutions:
| Problem | Możliwa przyczyna | Rozwiązanie |
|---|---|---|
| Urządzenie nie włącza się. | Niski poziom naładowania baterii lub jej rozładowanie. | Naładuj urządzenie za pomocą kabla typu C. |
| Nie można połączyć się z siecią Wi-Fi. | WiFi not activated on camera; incorrect password; app not open. | Ensure camera WiFi is on. Verify password "12345678". Open TRVCam/RoadCam app and click "Operate". |
| Słaba jakość obrazu lub obraz rozmazany view. | Lens or eyepiece dirty; improper focus of optical device. | Clean the camera lens and your optical device's eyepiece. Adjust the focus of your monocular/telescope. |
| Buttons are unresponsive or confusing. | Misunderstanding button functions in different modes. | Refer to the "Components and Controls" and "Menu Navigation" sections for detailed button functions. Note that button functions change when in menu mode. |
| Nie można zapisywać zdjęć/filmów. | Brak włożonej karty SD; karta SD jest pełna lub uszkodzona. | Insert a compatible SD card. Check available space. Format the SD card via the camera's menu if necessary (this will erase all data). |
Specyfikacje
| Funkcja | Szczegół |
|---|---|
| Rozwiązanie produktu | 2560x1920 (2K) |
| Install Interface Diameter | 34-46mm (for monoculars, binoculars, spotting scopes, astronomical telescopes, and other traditional optical instruments) |
| Rozmiar wyświetlacza | HD 1.6" IPS TFT |
| Szybkość klatek | 30 klatek na sekundę |
| Format wideo | MP4 |
| Format zdjęcia | Plik JPG |
| Storage Card Support | 4-64 GB |
| Funkcja Night Vision | Support (850nm IR) |
| Wi-Fi | Support (2.4GHz) |
| Interfejs USB | Typ C |
| Zoom cyfrowy | Wsparcie |
| Typ baterii | Built-in high-capacity rechargeable lithium battery (up to 6 hours use) |
| Kolor | Fortepian Biały |
| Wymiary (dł. x szer. x wys.) | 3.58 x 2.16 x 3.07 cala (91 x 55 x 78 mm) |
| Waga przedmiotu | 7.8 uncji |
Co jest w pudełku
Po rozpakowaniu należy sprawdzić, czy znajdują się w nim wszystkie poniższe elementy:
- YWYLL EP10 - Pro Eyepiece Camera
- Kabel do ładowania USB typu C.
- Miękka saszetka
- Ściereczka do czyszczenia soczewek
- Instrukcja obsługi (ten dokument)

Rysunek 9: Contents of the YWYLL EP10-Pro package, including the eyepiece camera, a protective soft pouch, a USB data cable for charging and data transfer, and a lens cleaning cloth for maintenance.
Gwarancja i wsparcie
For warranty information and customer support, please refer to the documentation provided with your purchase or contact the manufacturer, YWYLL, directly through their official channels. Specific warranty terms may vary by region and retailer.