Truman TM-I VISION PRO
Instrukcja obsługi odbiornika satelitarnego Truman TM-I VISION PRO
Model: TM-I VISION PRO | Brand: Truman
1. Wprowadzenie
1.1 Produkt powyżejview
The Truman TM-I VISION PRO is a Full HD digital satellite receiver designed to provide a comprehensive entertainment experience. It features a powerful Sunplus 1506HV processor, ensuring smooth performance and high-quality video output. With multiple connectivity options including USB, HDMI, and Ethernet, it offers versatility for various home entertainment setups. The device supports Full HD resolution, multi-language interfaces, and includes parental control features for a family-friendly viewing environment. It also comes with a one-year activated IPTV service.

Rycina 1.1: Przód view of the Truman TM-I VISION PRO Satellite Receiver, showing its compact design and front-facing USB ports.
1.2 Zawartość opakowania
Sprawdź, czy w przesyłce znajdują się wszystkie elementy wymienione poniżej:
- Truman TM-I VISION PRO Satellite Receiver
- Zasilacz
- Standardowy pilot zdalnego sterowania
- Digital LED Lens
- Kabel HDMI
- Instrukcja obsługi

Figure 1.2: Marketing image highlighting key features such as Wi-Fi, Ultra HD support, ISO 9001 certification, and 5G compatibility.
2. Informacje dotyczące bezpieczeństwa
Aby zapewnić bezpieczną obsługę i zapobiec uszkodzeniom, należy zapoznać się z poniższymi wytycznymi bezpieczeństwa i stosować się do nich:
- Nie narażaj urządzenia na działanie wody i wilgoci.
- Avoid placing the receiver in direct sunlight or near heat sources.
- Zapewnij odpowiednią wentylację wokół urządzenia, aby zapobiec przegrzaniu.
- Używaj wyłącznie dołączonego zasilacza.
- Nie próbuj samodzielnie otwierać ani naprawiać urządzenia. Skontaktuj się z wykwalifikowanym personelem serwisowym.
- Przechowuj urządzenie i akcesoria poza zasięgiem dzieci.
- Odłączaj wtyczkę zasilającą podczas burzy z piorunami lub jeśli nie używasz urządzenia przez dłuższy czas.
3. Konfiguracja
3.1 Podłączanie odbiornika
- Connect the Satellite Antenna: Connect your satellite dish cable to the "LNB IN" port on the back of the receiver.
- Podłącz do telewizora (HDMI): Use the provided HDMI cable to connect the receiver's HDMI OUT port to an available HDMI IN port on your television.

Figure 3.1: The included HDMI cable for connecting the receiver to your television.
- Podłącz zasilanie: Connect the power adapter to the DC IN port on the receiver, then plug the adapter into a wall outlet.
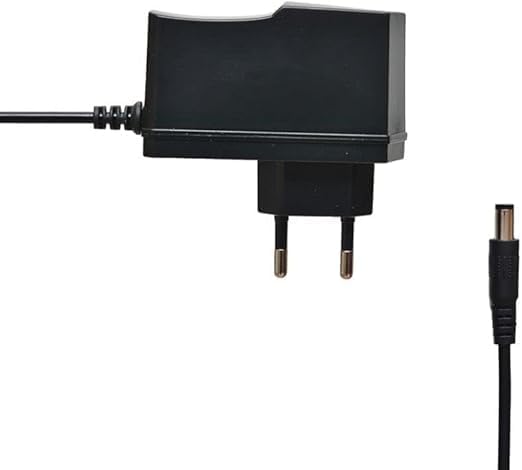
Figure 3.2: The power adapter supplied with the receiver.
- Connect Digital LED Lens: Plug the digital LED lens into its dedicated port on the receiver. This lens displays channel numbers and receives remote control signals.
- Optional: Connect Ethernet/USB: If you plan to use wired internet or external storage, connect an Ethernet cable to the LAN port or a USB drive to one of the USB ports.

Rysunek 3.3: Tył view of the receiver showing the LNB IN, HDMI OUT, USB, Ethernet, and DC IN ports.
3.2 Kreator konfiguracji początkowej
Po pierwszym włączeniu odbiornik poprowadzi Cię przez kreatora konfiguracji początkowej:
- Wybór języka: Wybierz preferowany język komunikatów wyświetlanych na ekranie.
- Ustawienie strefy czasowej: Set the correct time zone for your region.
- Konfiguracja anteny: Select your satellite (e.g., Nilesat, Hotbird) and configure LNB settings if necessary.
- Skanowanie kanałów: Perform an automatic or manual channel scan to find available TV and radio channels.
- Konfiguracja sieci (opcjonalnie): Configure Wi-Fi or Ethernet connection for internet-based features like IPTV.
4. Instrukcja obsługi
4.1 Podstawowe funkcje
- Włączanie/wyłączanie: Naciśnij MOC przycisk na pilocie.
- Nawigacja po kanale: Użyj CH+/CH- buttons to change channels sequentially, or enter the channel number directly using the numeric keypad.
- Regulacja głośności: Użyj GŁOŚNOŚĆ+/GŁOŚNOŚĆ- Przyciski do regulacji głośności.
- Niemy: Naciśnij NIEMY przycisk, aby wyciszyć dźwięk.
- Dostęp do menu: Naciśnij MENU przycisk umożliwiający dostęp do menu głównego w celu uzyskania dostępu do ustawień i funkcji.
- Przycisk OK: Confirms selections in menus or displays channel information during viewing.
- Wyjście: Naciśnij EXIT button to return to the previous screen or live TV.
4.2 Funkcje zaawansowane
- Kontrola rodzicielska: Access the Parental Control menu to set age restrictions for channels or lock specific programs. A default PIN (usually 0000 or 1234) may be required.
- Obsługa wielu języków: Change audio languages (if available) or subtitle languages via the audio/subtitle options in the menu.
- Telewizja IP: The receiver includes a pre-activated IPTV service for one year. Access this feature through the main menu. Ensure your receiver is connected to the internet for IPTV functionality.
- Odtwarzanie multimediów USB: Aby odtwarzać multimedia, podłącz dysk USB do jednego z portów USB files (videos, music, photos) or record TV programs.
- Aktualizacja oprogramowania: Regularly check for software updates via USB or network to ensure optimal performance and access to new features. (Refer to Section 5.2 for details).
5. Konserwacja
5.1 Czyszczenie
To clean the receiver, disconnect it from the power supply. Use a soft, dry cloth to wipe the exterior. Do not use liquid cleaners or abrasive materials.
5.2 Aktualizacje oprogramowania
Keeping your receiver's software updated is crucial for performance and security. Updates can be performed via USB or over the network (if connected to the internet).
- Aktualizacja USB: Download the latest firmware (.bin file) from the official Truman website to a USB flash drive. Insert the USB drive into the receiver and navigate to the "System Update" or "Software Upgrade" option in the menu. Follow the on-screen instructions.
- Aktualizacja sieci: If your receiver is connected to the internet, navigate to the "Network Upgrade" or "Online Update" option in the system settings. The receiver will check for available updates and prompt you to install them.
Ostrożność: Do not power off the receiver during a software update, as this may cause permanent damage.
6. Rozwiązywanie Problemów
If you encounter issues with your Truman TM-I VISION PRO, refer to the following common problems and solutions:
| Problem | Możliwa przyczyna | Rozwiązanie |
|---|---|---|
| Brak zasilania | Zasilacz nie jest podłączony; gniazdko elektryczne jest uszkodzone. | Ensure power adapter is securely connected to the receiver and a working power outlet. |
| Brak sygnału / Czarny ekran | Antenna cable loose; Incorrect satellite selected; TV input not set to HDMI. | Check antenna cable connection. Verify satellite settings in menu. Ensure TV input is set to the correct HDMI port. |
| Pilot nie działa | Batteries low/dead; Obstruction between remote and receiver's LED lens. | Replace remote control batteries. Ensure clear line of sight to the digital LED lens. |
| Frozen Picture / Lagging | Weak signal; Overheating; Software issue. | Check signal strength in menu. Ensure proper ventilation. Try a software update or factory reset (last resort). |
| IPTV Not Working | No internet connection; IPTV service expired. | Verify internet connection (Ethernet or Wi-Fi). Contact support if service is within the one-year period and still not working. |
7. Specyfikacje
| Funkcja | Szczegół |
|---|---|
| Model | TM-I VISION PRO |
| Edytor | Sunplus 1506HV |
| Typ pudełka | Full HD Digital |
| Pamięć Flash | 4 MB (SPI SOP8/SOIC8) |
| Wyjście wideo | HDMI (Full HD Resolution Support) |
| Tryb wyjścia audio | Stereo (Dolby Digital, DTS, PCM supported) |
| Łączność | USB, HDMI, Ethernet |
| Kompatybilne urządzenia | Telewizja, Komputer osobisty |
| Cechy specjalne | User-friendly display, Remote Control, Multi-language support, Parental Control, 1-year IPTV activation. |
| Waga przedmiotu | 10 gramów |
| Producent | Trumana |
8. Gwarancja i wsparcie
For warranty information, please refer to the warranty card included with your product or contact your point of purchase. The receiver includes a 1-year activated IPTV service.
For technical support or further assistance, please contact Truman customer service or visit their official website. Contact details are typically provided in the product packaging or on the manufacturer's webstrona.