1. Koniec produktuview
The TOTAL TIDLI20558 is a compact brushless cordless impact drill designed for various drilling and fastening applications. It features a powerful 20V motor, delivering up to 55Nm of torque, making it suitable for both professional and DIY tasks. This drill combines durability with an ergonomic design for comfortable and efficient operation.
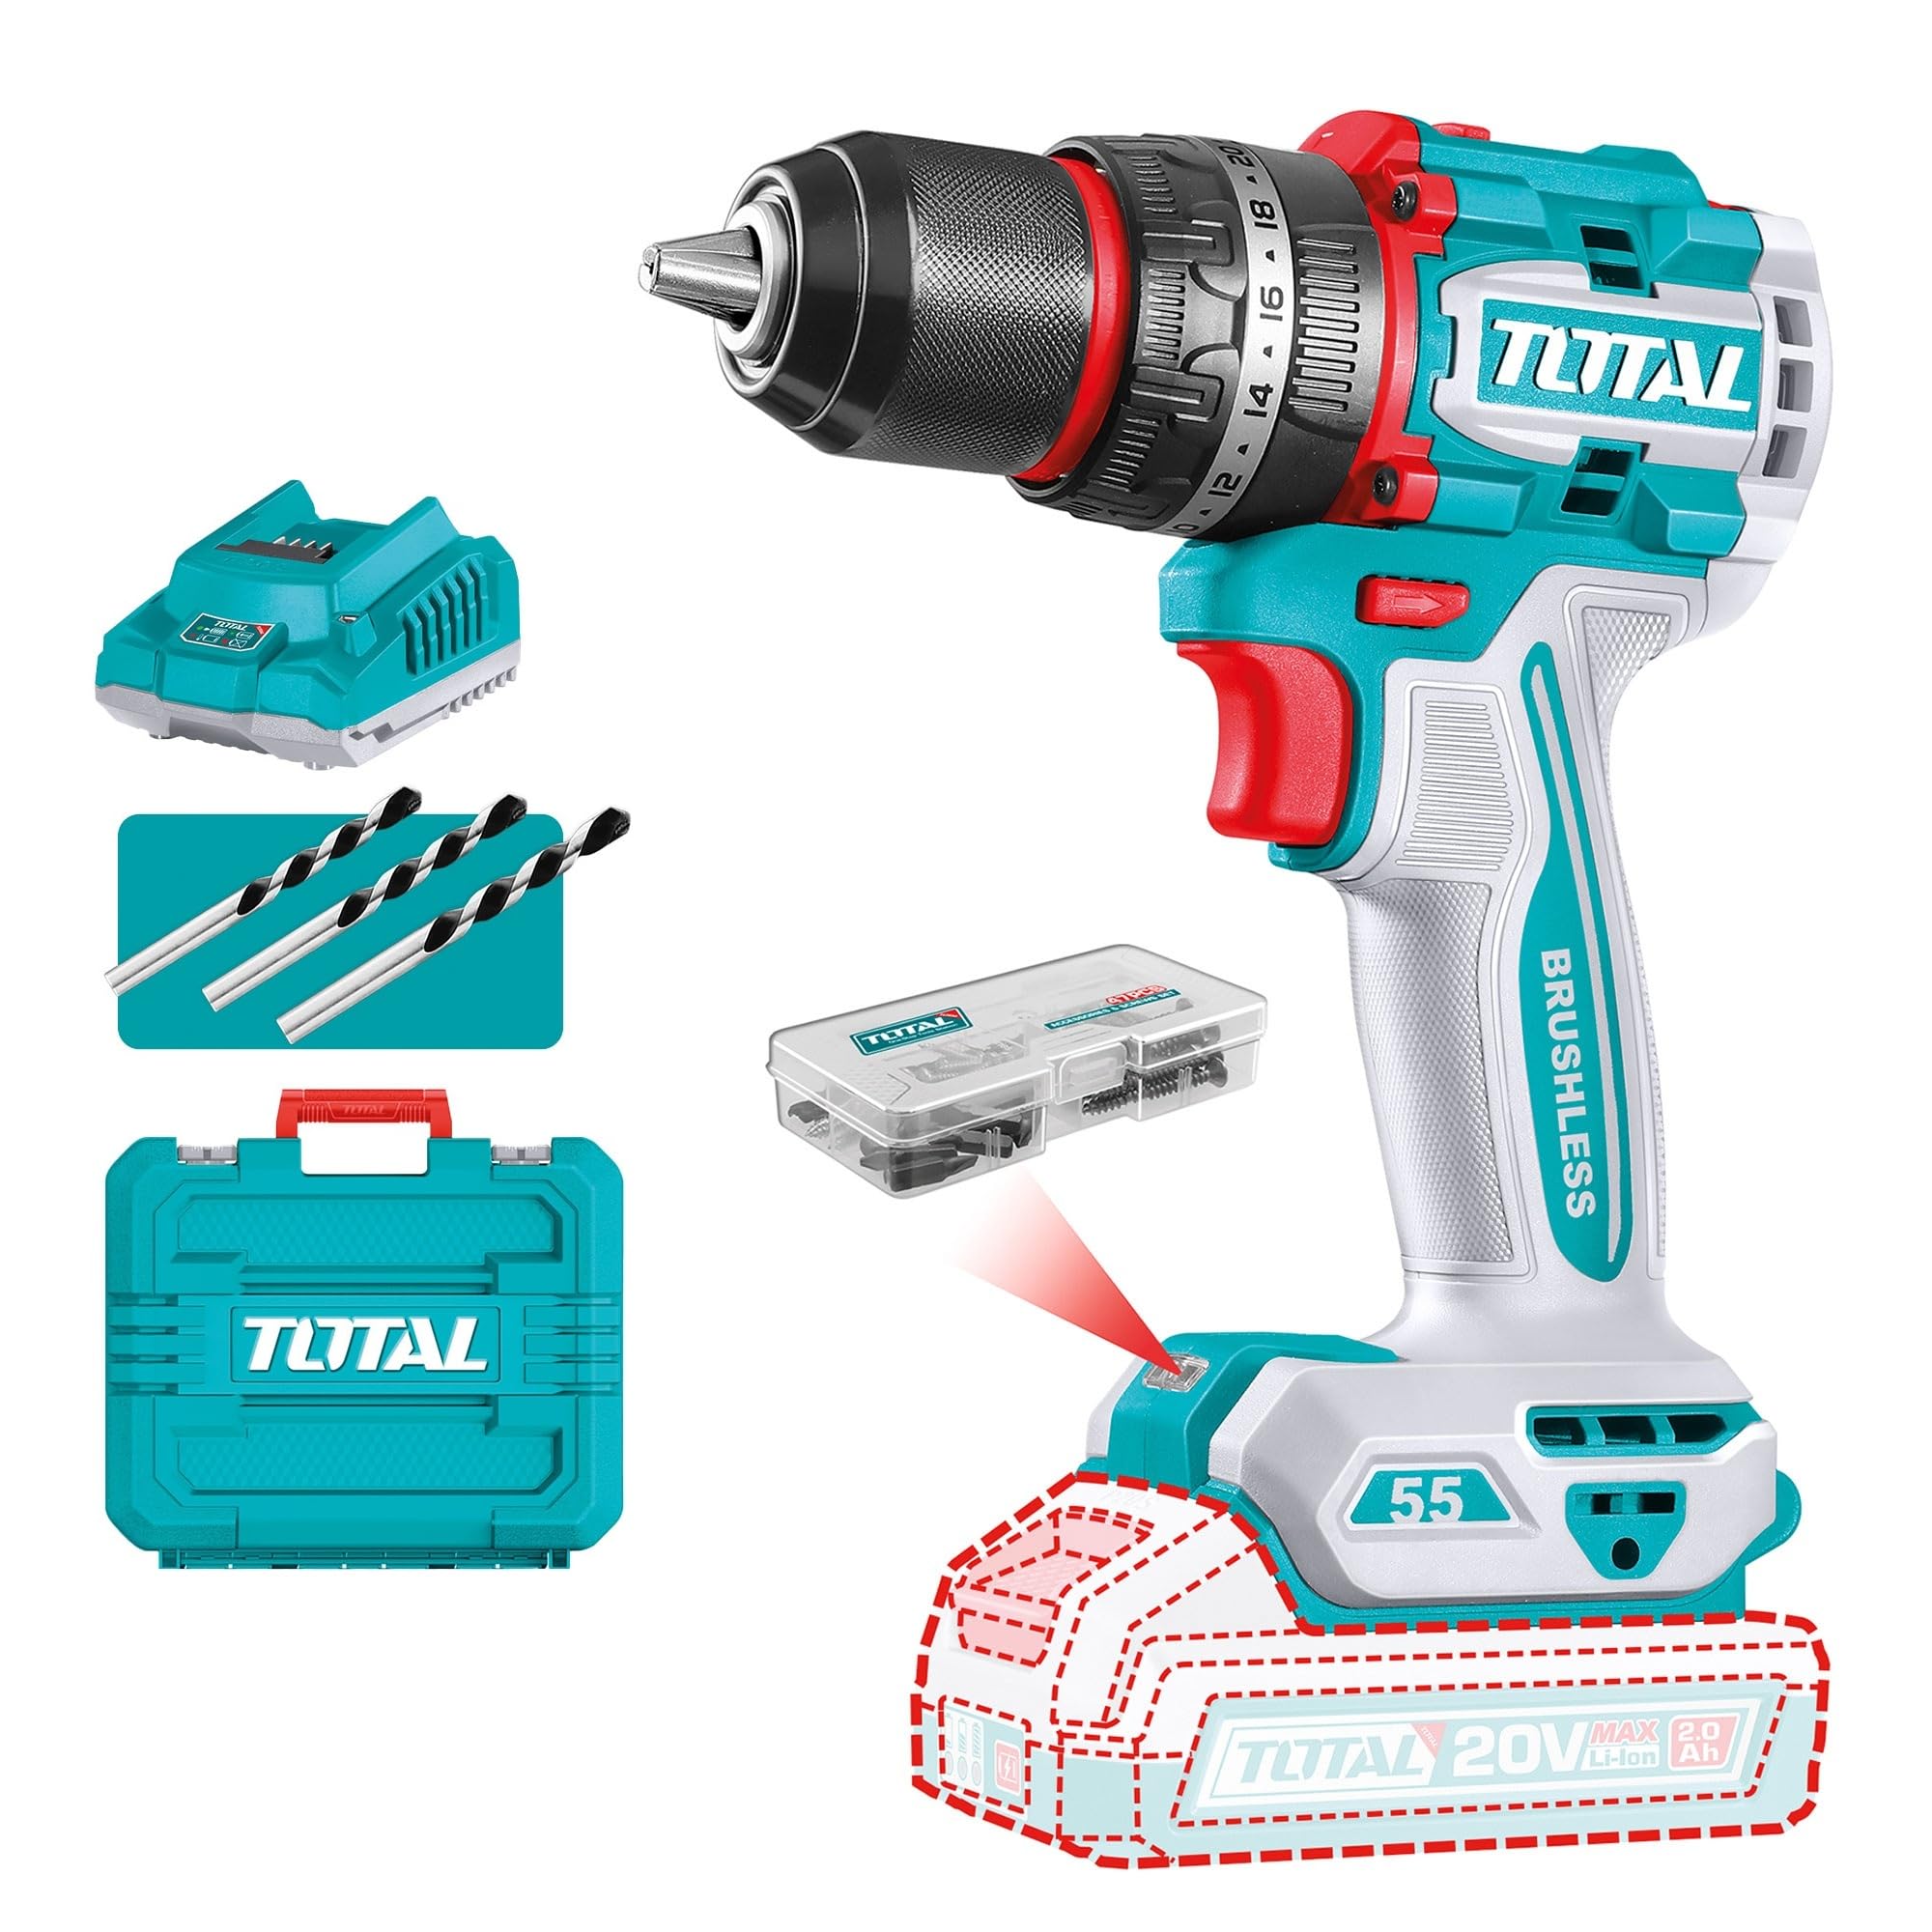
Figure 1: TOTAL TIDLI20558 Compact Brushless Cordless Impact Drill. This image displays the drill unit with a battery attached, showcasing its compact design and main body.
2. Instrukcje bezpieczeństwa
Aby zminimalizować ryzyko pożaru, porażenia prądem i obrażeń ciała, należy zawsze przestrzegać podstawowych zasad bezpieczeństwa podczas korzystania z elektronarzędzi.
- Bezpieczeństwo w miejscu pracy: Utrzymuj swoje miejsce pracy w czystości i dobrym oświetleniu. Zagracone lub ciemne pomieszczenia sprzyjają wypadkom. Nie używaj elektronarzędzi w atmosferach wybuchowych, takich jak łatwopalne ciecze, gazy lub pyły.
- Bezpieczeństwo elektryczne: Unikaj kontaktu ciała z uziemionymi powierzchniami, takimi jak rury, grzejniki, kuchenki i lodówki. Nie wystawiaj elektronarzędzi na działanie deszczu ani wilgoci.
- Bezpieczeństwo osobiste: Always wear eye protection. Use hearing protection when operating the drill for extended periods. Dress properly; avoid loose clothing or jewelry. Secure long hair.
- Używanie i konserwacja narzędzia: Nie używaj elektronarzędzia na siłę. Używaj elektronarzędzia odpowiedniego do danego zastosowania. Odłącz akumulator od elektronarzędzia przed dokonywaniem jakichkolwiek regulacji, wymianą akcesoriów lub przechowywaniem elektronarzędzia.
- Bezpieczeństwo akumulatora: Ładuj wyłącznie za pomocą ładowarki wskazanej przez producenta. Nie używaj akumulatorów z innymi elektronarzędziami. Nie spalaj akumulatora, nawet jeśli jest poważnie uszkodzony.
3. składniki
Familiarize yourself with the main components of your TOTAL TIDLI20558 impact drill:
- Chuck: Przechowuje wiertła i inne akcesoria.
- Pierścień regulacji momentu obrotowego: Allows selection of desired torque setting for screwdriving.
- Wybór trybu: Przełącza między trybami wiercenia, wiercenia z udarem i wkręcania.
- Przełącznik wyboru prędkości: Controls the high/low speed range.
- Przełącznik spustowy: Włącza wiertło i steruje zmienną prędkością.
- Przełącznik kierunku jazdy do przodu/do tyłu: Zmienia kierunek obrotu uchwytu.
- Światło robocze LED: Oświetla miejsce pracy.
- Paczka baterii: Provides power to the drill.
- Przycisk zwalniający baterię: Used to detach the battery pack.
- Uchwyt: Ergonomic grip for user comfort.
4. Konfiguracja
4.1. Montaż i ładowanie akumulatora
- Ładowanie: Connect the charger to a power outlet. Slide the battery pack onto the charger until it clicks into place. The indicator light on the charger will show the charging status. Ensure the battery is fully charged before first use.
- Instalacja: Align the battery pack with the base of the drill handle. Slide the battery pack into the drill until it clicks securely into place. Ensure it is firmly seated before operation.
- Usuwanie: Press the battery release button located on the battery pack and slide the battery out of the drill handle.
4.2. Montaż i demontaż wierteł/akcesoriów
- Instalacja: Rotate the chuck counter-clockwise to open the jaws. Insert the drill bit or accessory fully into the chuck. Rotate the chuck clockwise to tighten the jaws securely around the bit. Ensure the bit is centered and firmly held.
- Usuwanie: Rotate the chuck counter-clockwise to loosen the jaws and remove the drill bit or accessory.
5. Instrukcja obsługi
5.1. Włączanie/wyłączanie i kontrola prędkości
- Włączanie: Press the trigger switch. The drill speed is variable depending on how far the trigger is pressed.
- Aby wyłączyć: Zwolnij spust.
- Selektor prędkości: Use the speed selector switch (typically on top of the drill) to choose between low speed (for high torque applications like screwdriving) and high speed (for drilling).
5.2. Obrót do przodu/do tyłu
The forward/reverse selector switch is located above the trigger. Push it to the left for forward rotation (drilling/tightening) and to the right for reverse rotation (removing screws/backing out bits). Ensure the drill is completely stopped before changing direction.
5.3. Mode Selection (Drilling, Impact, Screwdriving)
Rotate the mode selector ring to choose the appropriate setting:
- Tryb wiercenia: Do wiercenia w drewnie, metalu i tworzywach sztucznych.
- Tryb wiercenia udarowego: For drilling into masonry and concrete (if applicable to this model's capabilities).
- Tryb wkręcania: Use with the torque adjustment ring to prevent over-tightening screws.
5.4. Regulacja momentu obrotowego
In screwdriving mode, rotate the torque adjustment ring to select the desired torque level. Lower numbers indicate lower torque for smaller screws or softer materials, while higher numbers provide more torque for larger screws or harder materials. The drill will stop driving when the selected torque is reached.
6. Konserwacja
6.1. Czyszczenie
- Regularly clean the ventilation openings of the drill to prevent overheating.
- Użyj miękkiego, damp Ściereczką przetrzyj zewnętrzną część narzędzia. Nie używaj silnych środków chemicznych ani ściernych środków czyszczących.
- Keep the chuck jaws free from dust and debris to ensure proper bit gripping.
6.2. Przechowywanie
- Przechowuj wiertarkę i akumulatory w chłodnym i suchym miejscu, z dala od bezpośredniego światła słonecznego i wilgoci.
- Ensure the battery pack is partially charged (around 50%) before long-term storage to prolong its lifespan.
- Przechowywać w miejscu niedostępnym dla dzieci.
6.3. Pielęgnacja baterii
- Nie wystawiaj akumulatorów na działanie ekstremalnych temperatur ani bezpośredniego ciepła.
- Unikaj częstego całkowitego rozładowywania akumulatora, ponieważ może to skrócić jego żywotność.
- If the battery pack is not used for an extended period, recharge it every 3-6 months.
7. Rozwiązywanie Problemów
| Problem | Możliwa przyczyna | Rozwiązanie |
|---|---|---|
| Wiercenie nie rozpoczyna się. | Akumulator nie jest naładowany lub jest nieprawidłowo zainstalowany. | Sprawdź, czy akumulator jest całkowicie naładowany i prawidłowo zainstalowany. |
| Utrata mocy w trakcie pracy. | Poziom naładowania akumulatora jest niski. | Naładuj akumulator. |
| Wiertło ślizga się w uchwycie. | Uchwyt nie jest odpowiednio dokręcony lub szczęki są brudne. | Mocno dokręć uchwyt. W razie potrzeby wyczyść szczęki uchwytu. |
| Przegrzanie. | Zablokowane otwory wentylacyjne lub ciągłe, intensywne użytkowanie. | Clear ventilation slots. Allow the tool to cool down. Reduce load. |
8. Specyfikacje
| Funkcja | Szczegół |
|---|---|
| Numer modelu | TIDLI20558 |
| Tomtage | 20 wolty |
| Maksymalny moment obrotowy | 55 niutonometrów |
| Źródło zasilania | Zasilany bateryjnie |
| Typ silnika | Bezszczotkowy |
| Waga przedmiotu | 3 kilograma |
| Wymiary produktu | Wymiary 46 x 33 x 14 cm |
| Tworzywo | Metal |
| Zawarte komponenty | Drill Attachment (typically includes 2 batteries and charger as per product title) |
9. Gwarancja i wsparcie
For warranty information, technical support, or service inquiries, please refer to the warranty card included with your product or contact TOTAL customer service. Keep your purchase receipt as proof of purchase for warranty claims.
Uwaga: Szczegółowe warunki gwarancji mogą się różnić w zależności od regionu.