1. Koniec produktuview
This manual provides detailed instructions for the installation, operation, and maintenance of your Vikye M-ATX Desktop Motherboard, model Vikyeoaqchmfg32. This motherboard is designed for desktop computers, supporting Intel LGA 1151 CPUs and DDR4 memory, offering a reliable foundation for your computing needs.
Główne cechy:
- Kompatybilność procesora: Supports Intel Core i7, i5, i3, Pentium, and Celeron 14nm CPUs with LGA 1151 socket.
- Obsługa pamięci: Two DDR4 memory slots, supporting dual-channel DDR4 2133MHz memory up to a maximum capacity of 32GB.
- Gniazda rozszerzeń: Features one PCI-E 3.0 X16 slot for graphics cards and two PCI-E 3.0 X1 slots for other expansion cards.
- Wyjście wideo: Equipped with a DVI interface for high-definition video output.
- Łączność sieciowa: Integrated Realtek RTL8111GR Gigabit Ethernet for stable network connection.
- Solidna konstrukcja: Built with premium materials and a 5-phase power mode for stable and long-lasting performance.

Rysunek 1.1: Ogólnie view of the Vikye M-ATX Desktop Motherboard, showcasing its layout and various components.
2. Konfiguracja i instalacja
Wykonaj poniższe kroki ostrożnie, aby zainstalować płytę główną i jej komponenty. Przed rozpoczęciem instalacji upewnij się, że system jest wyłączony i odłączony od zasilania.
2.1 Instalacja procesora
- Znajdź gniazdo procesora LGA 1151 na płycie głównej.
- Gently push down the load lever and pull it sideways to open the CPU socket retention frame.
- Dopasuj trójkątny znak na procesorze Intel LGA 1151 do odpowiadającego mu znaku na gnieździe. Ostrożnie włóż procesor do gniazda, nie wkładając go na siłę.
- Zamknij ramę mocującą i przesuń dźwignię ładowania z powrotem do pozycji zablokowanej.
- Apply a thin, even layer of thermal paste to the top of the CPU and install the CPU cooler according to its manufacturer's instructions.
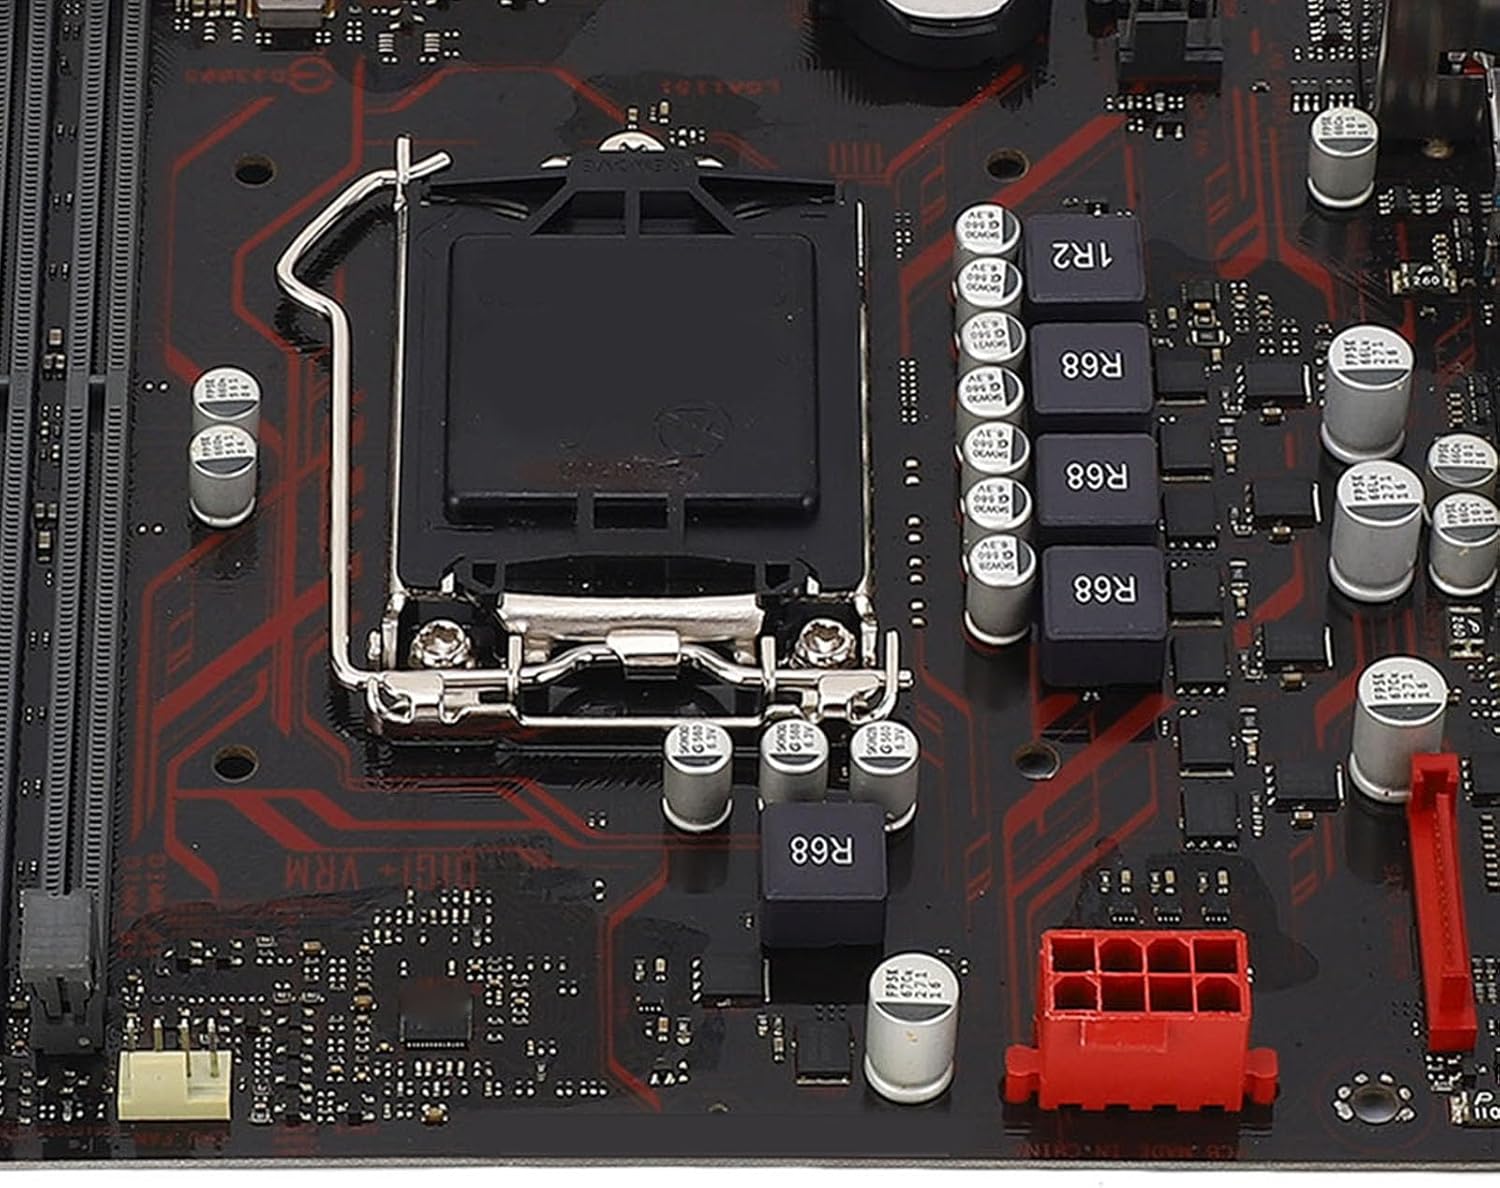
Rysunek 2.1: Zbliżenie view of the LGA 1151 CPU socket, showing the retention mechanism.
2.2 Instalacja pamięci RAM
- Identify the two DDR4 DIMM slots on the motherboard.
- Otwórz zaciski na obu końcach gniazda DIMM.
- Dopasuj wycięcie na module pamięci DDR4 do wypustki w gnieździe DIMM.
- Wsuń moduł pamięci mocno do gniazda, aż zatrzaski zatrzasną się na miejscu. Upewnij się, że oba zatrzaski są całkowicie zamknięte.
- Aby uzyskać pracę dwukanałową, zainstaluj moduły pamięci w obu gniazdach.

Figure 2.2: The motherboard featuring two DDR4 memory slots, designed for dual-channel operation.
2.3 PCI-E Card Installation
- Locate the PCI-E X16 slot (for graphics cards) and PCI-E X1 slots on the motherboard.
- Zdejmij odpowiednią osłonę gniazda rozszerzeń z obudowy komputera.
- Align your PCI-E expansion card with the chosen slot and press it down firmly until it is fully seated.
- Przymocuj kartę do obudowy komputera za pomocą śrubki.
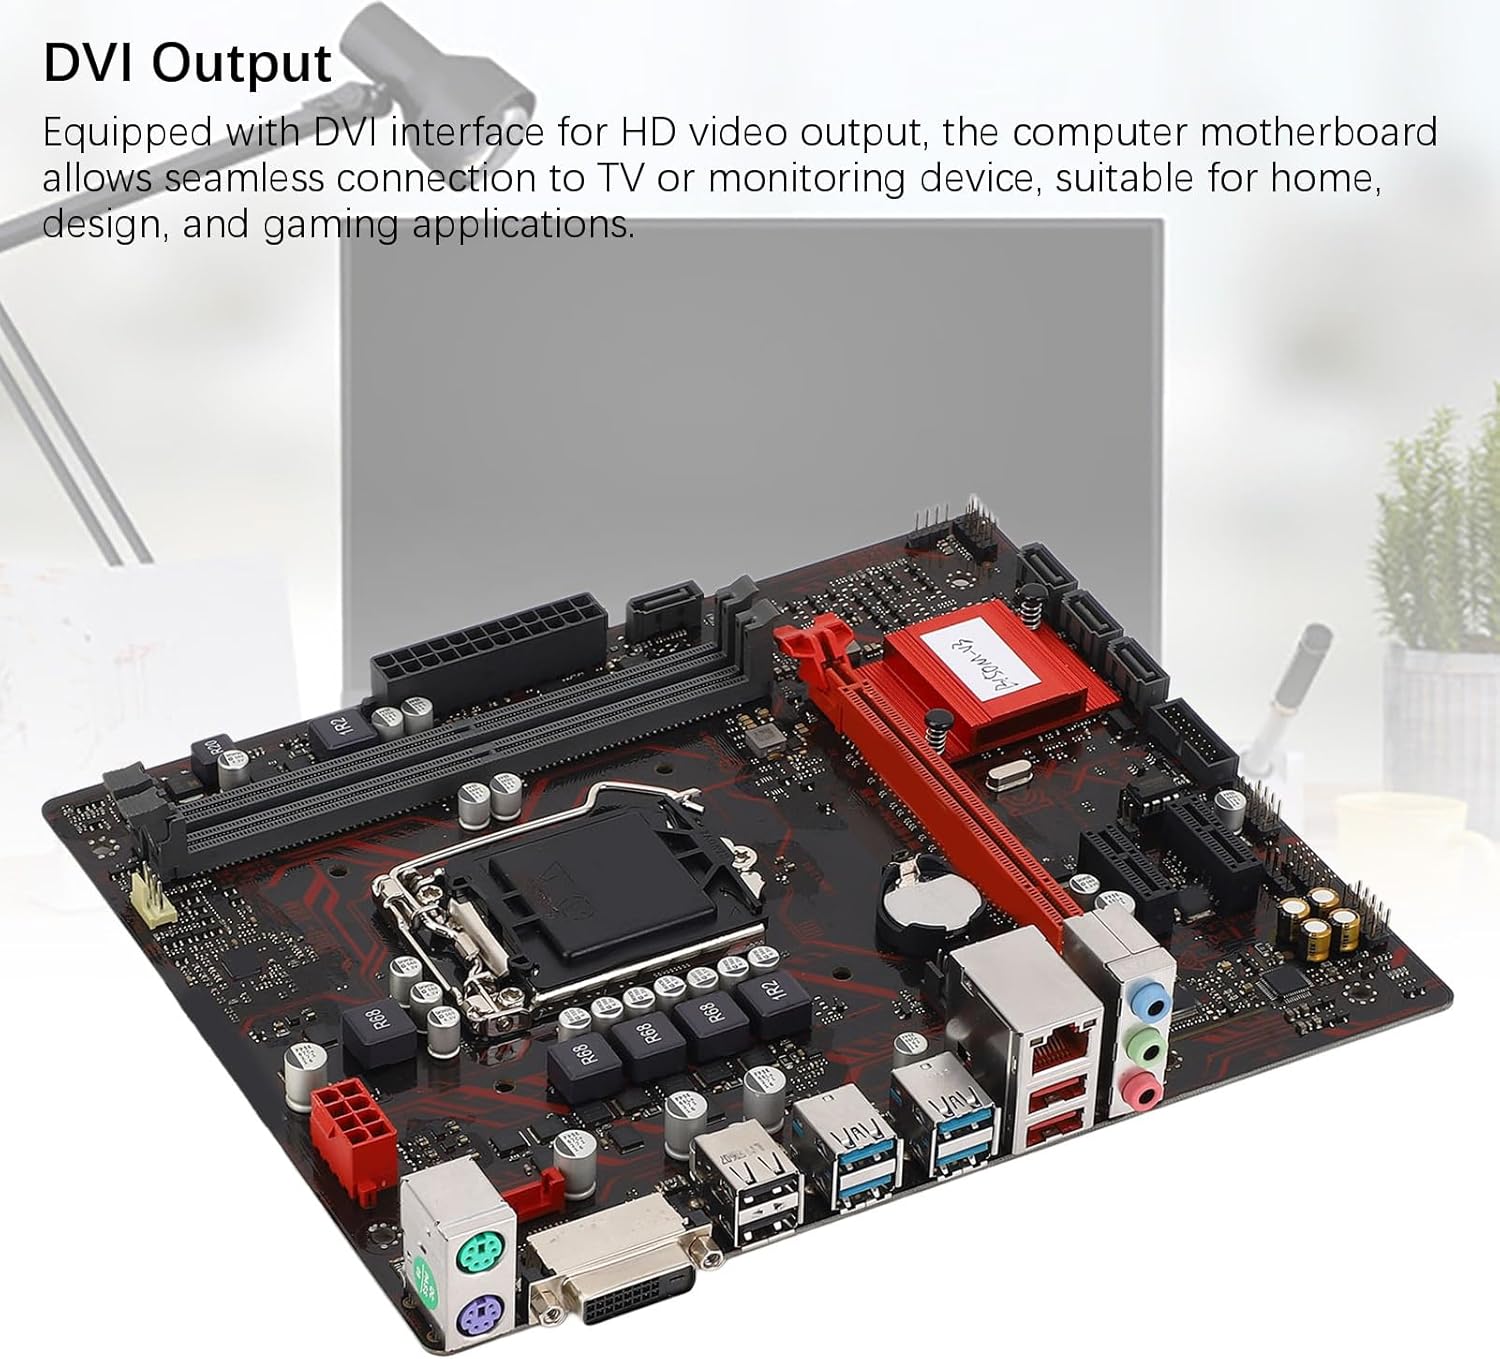
Figure 2.3: The motherboard's PCI-E slots, including one PCI-E X16 and two PCI-E X1 slots for various expansion cards.
2.4 Połączenia zasilania
- Connect the 24-pin ATX power connector from your power supply unit (PSU) to the main power socket on the motherboard.
- Podłącz 8-pinowe złącze zasilania procesora do zasilacza i gniazda zasilania procesora w pobliżu procesora.
2.5 Storage Connections
- Connect SATA data cables from your storage devices (HDDs, SSDs) to the SATA ports on the motherboard.
- Ensure your storage devices are also connected to the power supply unit.

Rysunek 2.4: Szczegółowy view of the rear I/O panel and SATA ports, indicating connection points for peripherals and storage.
2.6 Złącza wejścia/wyjścia na panelu przednim i tylnym
- Connect your PC case's front panel connectors (power button, reset button, USB ports, audio jacks, LED indicators) to the corresponding headers on the motherboard. Refer to your PC case manual for specific pin assignments.
- Connect your monitor to the DVI port on the rear I/O panel.
- Connect USB devices, Ethernet cable, and audio peripherals to the appropriate ports on the rear I/O panel.

Figure 2.5: The motherboard's DVI output interface, enabling connection to HD displays.
3. Instrukcja obsługi
3.1 Pierwsze uruchomienie
- After all components are installed and connected, plug in your power supply and turn on the system.
- System powinien się uruchomić, a na monitorze powinien pojawić się komunikat.
3.2 Dostęp do BIOS-u/UEFI
- During the initial boot sequence, repeatedly press the USUNĄĆ or F2 klawisz, aby wejść do narzędzia konfiguracji BIOS/UEFI.
- In the BIOS/UEFI, you can configure system settings, boot order, and monitor hardware status.
3.3 Driver and Operating System Installation
- Zainstaluj preferowany system operacyjny (np. Windows, Linux) z rozruchowego dysku USB lub płyty DVD.
- After the operating system is installed, install the necessary drivers for the motherboard components (chipset, audio, LAN, etc.). These drivers are typically available on the manufacturer's webwitryny lub dołączonej płyty ze sterownikami.
4. Konserwacja
- Czyszczenie: Regularly clean dust from the motherboard and other components using compressed air. Ensure the system is powered off and unplugged before cleaning. Avoid using liquid cleaners directly on components.
- Aktualizacje BIOS-u: Periodically check the Vikye official website for BIOS/UEFI updates. Updating the BIOS can improve system stability, compatibility, and performance. Follow the update instructions provided by Vikye carefully to avoid damaging the motherboard.
- Sprawdzanie komponentów: Upewnij się, że wszystkie kable są solidnie podłączone i że żaden element nie jest luźny. Sprawdź, czy nie ma śladów uszkodzeń fizycznych lub przegrzania.
5. Rozwiązywanie Problemów
W tej sekcji znajdziesz rozwiązania typowych problemów, na jakie możesz natrafić.
5.1 Brak zasilania / Brak rozruchu
- Ensure the power supply unit (PSU) is switched on and connected correctly to the motherboard (24-pin and 8-pin connectors).
- Verify that the front panel power button connector is correctly attached to the motherboard header.
- Test the PSU with another system or use a PSU tester if available.
5.2 Brak wyjścia wyświetlacza
- Check if the monitor is properly connected to the DVI port on the motherboard or the graphics card (if installed).
- Sprawdź, czy monitor jest włączony i ustawiony na prawidłowe źródło sygnału wejściowego.
- Wymień moduły RAM. Nieprawidłowo zamontowana pamięć RAM jest częstą przyczyną braku obrazu.
- If using a dedicated graphics card, ensure it is properly seated in the PCI-E X16 slot and has adequate power connected.
5.3 Niestabilność systemu / awarie
- Check for overheating. Ensure CPU cooler and case fans are functioning correctly.
- Uruchom narzędzia diagnostyczne pamięci, aby sprawdzić, czy moduły RAM nie są uszkodzone.
- Upewnij się, że wszystkie sterowniki są aktualne.
- Check for BIOS updates that might address stability issues.
6. Specyfikacje
| Funkcja | Specyfikacja |
|---|---|
| Marka | Vikye |
| Model | Vikyeoaqchmfg32 |
| Współczynnik kształtu | M-ATX |
| Gniazdo procesora | LGA 1151 |
| Obsługiwane procesory | Intel Core i7, i5, i3, Pentium, Celeron (14nm) |
| Zestaw układów scalonych | Procesor Intel B150 |
| Gniazda pamięci | 2 x gniazda DDR4 DIMM |
| Typ pamięci | DDR4 2133MHz (Dual Channel) |
| Maksymalna pojemność pamięci | 32 GB |
| PCI-E X16 Slots | 1 x PCI-E 3.0 X16 |
| PCI-E X1 Slots | 2 x PCI-E 3.0 X1 |
| Interfejsy pamięci masowej | SATA ports (number not specified, typically 4-6 on M-ATX) |
| Wyjście wideo | 1x port DVI |
| Porty USB | 6 x USB (total, including rear I/O and internal headers) |
| Sieć lokalna | Realtek RTL8111GR Gigabit Ethernet |
| Audio | Integrated Audio Codec (details not specified) |
| Złącza zasilania | 1 x 24-pinowy ATX, 1 x 8-pinowy procesor |
| Wymiary (pakiet) | Wymiary 29 x 26 x 6 cm |
| Waga (przedmiot) | 566 gramów |
7. Informacje o gwarancji
This Vikye motherboard comes with a standard manufacturer's warranty. For detailed information regarding warranty terms, conditions, and duration, please refer to the official Vikye webOdwiedź witrynę lub skontaktuj się z punktem sprzedaży. Zachowaj dowód zakupu na wypadek roszczeń gwarancyjnych.
8. Wsparcie techniczne
For technical assistance, driver downloads, or further product information, please visit the official Vikye support website. You may also contact their customer service for direct support.
Vikye Official Webstrona: Visit Vikye Store on Amazon (Note: This link directs to the brand's store on Amazon. For official support, search for Vikye's dedicated support page.)