
1. Wprowadzenie
This manual provides essential instructions for the safe assembly, operation, and maintenance of your isinwheel M10 Electric Bike. Please read this manual thoroughly before your first ride to ensure proper usage and to maximize the lifespan of your e-bike. Retain this manual for future reference.
Ostrzeżenie dotyczące bezpieczeństwa: Always wear a helmet and appropriate safety gear when riding. Familiarize yourself with local traffic laws and regulations. Regular maintenance is crucial for safe operation.
2. Zawartość opakowania
Upon unpacking, verify that all components listed below are present and undamaged. If any items are missing or damaged, please contact customer support.
- isinwheel M10 Electric Bike Frame (partially assembled)
- Koło przednie
- Removable Lithium-Ion Battery (36V 10.4AH)
- 42V 2A Fast Charger
- Pedały (lewy i prawy)
- Seat with Seatpost
- Przedni reflektor
- Tylny reflektor
- Toolkit (including Allen wrenches and spanner)
- Pompa do opon
- Instrukcja obsługi

Image: All components included in the isinwheel M10 Electric Bike package.
3. Instalacja i montaż
The isinwheel M10 Electric Bike comes 85% pre-assembled. Follow these steps to complete the assembly:
- Rozpakowywanie: Carefully remove all components from the packaging. Keep the packaging materials until assembly is complete and you are satisfied with the product.
- Montaż kierownicy: Attach the handlebar to the stem using the provided Allen wrenches. Ensure the handlebar is centered and tightened securely.
- Instalacja przedniego koła: Secure the front wheel to the front fork. Ensure the brake rotor aligns correctly with the caliper and the quick-release skewer is properly tightened.
- Instalacja reflektorów: Mount the front headlight onto the designated bracket on the front fork or handlebar, and connect its cable.
- Instalacja pedału: Identify the left (L) and right (R) pedals. The left pedal tightens counter-clockwise, and the right pedal tightens clockwise. Use the spanner to secure them firmly.
- Montaż siedzenia: Insert the seatpost into the frame's seat tube. Adjust the height for comfortable riding and secure it with the quick-release lever.
- Rear Reflector Installation: Attach the rear reflector to the seatpost or rear rack (if applicable) for increased visibility.
- Montaż baterii: Slide the battery into its designated slot on the frame and lock it with the key.
- Zarządzanie kablami: Ensure all cables are neatly routed and secured, away from moving parts.

Image: Installing the handlebar.
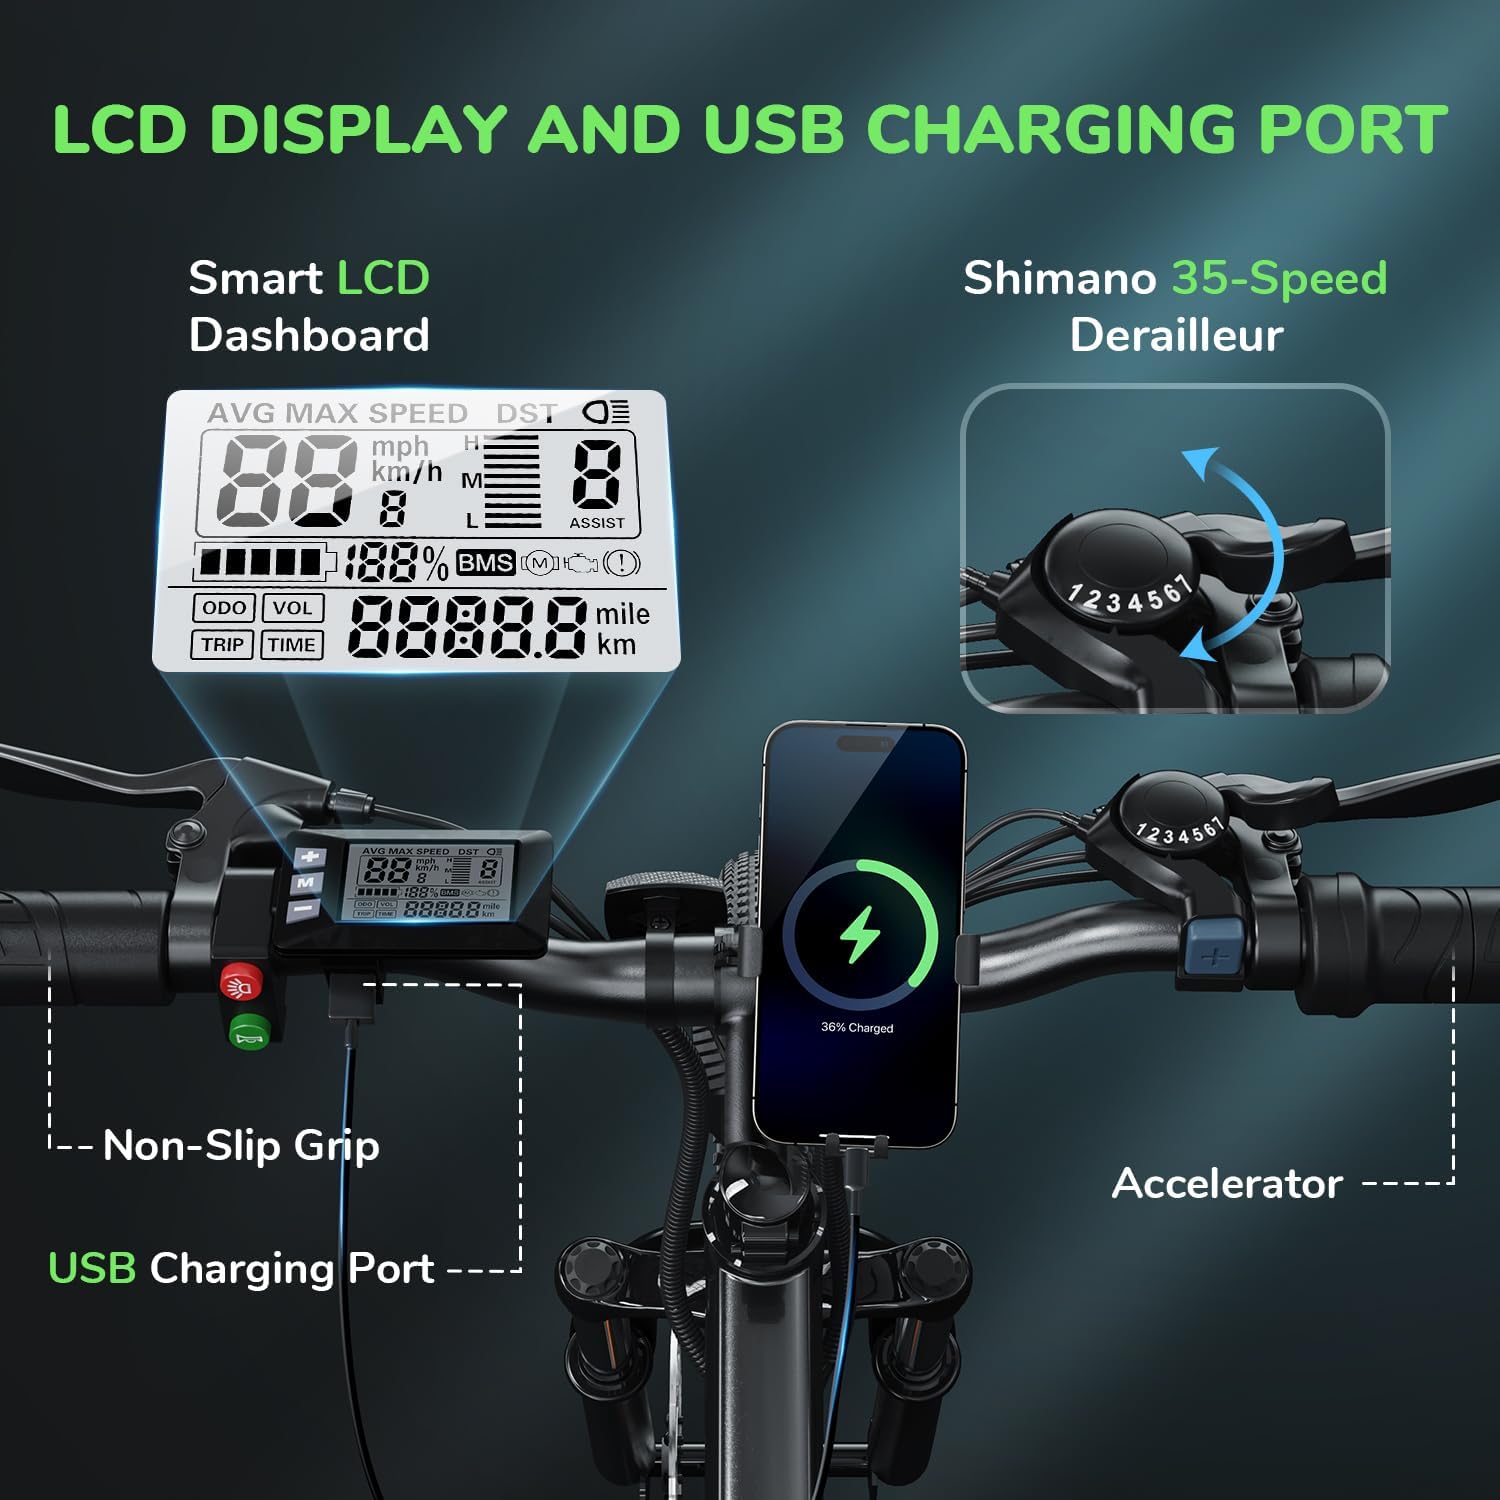
Image: Attaching the front wheel.

Image: Installing the pedals.

Image: Adjusting and securing the seat.

Image: Installing the removable battery.
Instrukcja montażu w formie filmu
Video: A comprehensive guide demonstrating the assembly process of the isinwheel M10 Electric Bike, including handlebar, wheel, pedal, and battery installation.
4. Instrukcja obsługi
4.1 Włączanie/wyłączanie zasilania
- To power on the bike, press and hold the power button on the LCD display for a few seconds until the screen illuminates.
- Aby wyłączyć zasilanie, naciśnij i przytrzymaj przycisk zasilania, aż wyświetlacz się wyłączy.
4.2 Tryby jazdy
The M10 Electric Bike offers multiple riding modes:
- Tryb wspomagania pedałowania (PAS): Provides motor assistance as you pedal. Adjust the assist level (1-5) using the '+' and '-' buttons on the control panel. Higher levels provide more assistance.
- Tryb całkowicie elektryczny (przepustnica): Engage the throttle for motor power without pedaling. This mode is typically used for quick acceleration or when you need a break from pedaling.
- Tryb ręczny: Jeździj na rowerze jak na zwykłym rowerze, bez wspomagania silnikiem.
4.3 Shimano 7-biegowy system przerzutek
The bike is equipped with a Shimano 7-speed transmission system. Use the gear shifter on the handlebar to change gears according to terrain and desired speed. Lower gears are for uphill climbing, and higher gears are for flat terrain or downhill riding.
4.4 Funkcje wyświetlacza LCD
The smart LCD display provides real-time riding data:
- Prędkość: Current, average, and maximum speed.
- Czas jazdy: Czas trwania przejazdu.
- Przebieg: Przebyta odległość i całkowity licznik kilometrów.
- Poziom naładowania baterii: Poziom naładowania akumulatora.
- Poziom asysty: Aktualny poziom wspomagania pedałowania (1-5).
Power On Operation Video
Video: Demonstrates how to power on the isinwheel M10 Electric Bike and navigate the LCD display functions.
5. Zarządzanie baterią
5.1 Demontaż i instalacja baterii
The 36V 10.4AH Lithium-Ion battery is removable for convenient charging or storage.
- Usuwanie: Unlock the battery with the provided key, then slide it out from the frame.
- Instalacja: Align the battery with the frame slot and slide it in until it clicks into place. Lock it with the key to secure.
5.2 Instrukcje ładowania
Use only the provided 42V 2A Fast Charger.
- Upewnij się, że rower jest wyłączony.
- Znajdź port ładowania na akumulatorze.
- Podłącz ładowarkę do portu ładowania.
- Podłącz ładowarkę do standardowego gniazdka ściennego.
- The charger indicator light will show red during charging and turn green when fully charged.
- Pełne naładowanie trwa zazwyczaj 3–4 godziny.
- Odłącz ładowarkę po zakończeniu ładowania.
Battery Removal and Charging Video
Video: Instructions for removing and installing the battery, and connecting the charger to the isinwheel M10 Electric Bike.
6. Konserwacja
Regularna konserwacja gwarantuje długowieczność i bezpieczną eksploatację Twojego roweru elektrycznego.
- Czyszczenie: Wytrzyj rower reklamąamp szmatką. Unikaj mycia elementów elektrycznych pod wysokim ciśnieniem.
- Ciśnienie w oponach: Check tire pressure before each ride. Maintain recommended pressure (usually indicated on the tire sidewall) using the included pump.
- Hamulce: Regularly inspect brake pads and rotors for wear. Ensure brake levers engage smoothly and provide adequate stopping power. Adjust or replace as needed.
- Łańcuch: Utrzymuj łańcuch w czystości i smarowaniu, aby zapobiec rdzewieniu i zapewnić płynną zmianę biegów.
- Elementy złączne: Periodically check all bolts and nuts for tightness, especially on the handlebars, seatpost, and wheels.
- Pielęgnacja baterii: Przechowuj akumulator w chłodnym i suchym miejscu. W przypadku dłuższego przechowywania, ładuj go do 50–70% co 2–3 miesiące.
Air Inflation Instructions Video
Video: Demonstrates how to properly inflate the tires of the isinwheel M10 Electric Bike using the provided pump.
7. Rozwiązywanie Problemów
If you encounter issues with your isinwheel M10 Electric Bike, refer to the following common problems and solutions:
| Problem | Możliwa przyczyna | Rozwiązanie |
|---|---|---|
| Rower nie włącza się | Battery not installed correctly or discharged; loose electrical connection. | Ensure battery is fully inserted and locked. Check battery charge level and charge if necessary. Verify all visible electrical connections are secure. |
| Silnik nie wspomaga | Low battery; assist level set to 0; brake lever engaged; motor cable disconnected. | Charge battery. Increase assist level on the display. Release brake levers. Check motor cable connection. |
| Bateria się nie ładuje | Ładowarka nie jest prawidłowo podłączona; uszkodzona ładowarka/akumulator; problem z gniazdkiem elektrycznym. | Ensure charger is securely plugged into battery and outlet. Check if the outlet is working. Contact support if issues persist. |
| Hamulce są słabe | Zużyte klocki hamulcowe; luźna linka hamulcowa; powietrze w układzie hydraulicznym (jeśli dotyczy). | Inspect and replace worn brake pads. Adjust brake cable tension. For hydraulic brakes, professional service may be required. |
If you cannot resolve an issue using the troubleshooting guide, please contact isinwheel customer support for assistance.
8. Specyfikacje
Key technical specifications for the isinwheel M10 Electric Bike:
| Funkcja | Specyfikacja |
|---|---|
| Model | M10 |
| Silnik | Silnik bezszczotkowy o mocy szczytowej 500 W |
| Maksymalna prędkość | Do 32 km/h (20 mil/h) |
| Bateria | 36V 10.4AH (375WH) Removable Li-ion, IPX5 waterproof |
| Czas ładowania | 3-4 hours (with 42V 2A Fast Charger) |
| Zasięg (w pełni elektryczny) | 39-43 miles (63-70 KM) |
| Zasięg (wspomaganie pedałowania) | 50-60 miles (80-96 KM) |
| Przenoszenie | Shimano 7-biegowa |
| Materiał ramy | Stop aluminium |
| Waga roweru | 21.3 kg (47 funtów) |
| Rozmiar koła | 26 cali |
| Zawieszenie | Zawieszenie przedniego widelca |
| Hamulce | Przednie i tylne mechaniczne hamulce tarczowe |
| Cechy specjalne | Digital LCD Display, Height Adjustable Seat, Lightweight & Portable |
| Certyfikaty | UL 2271 (Li-ion battery), UL 2789 (whole e-bike) |

Image: isinwheel M10 Electric Bike dimensions and rider height guide.
9. Gwarancja i wsparcie
The isinwheel M10 Electric Bike comes with a 12-month warranty from the date of purchase. This warranty covers manufacturing defects in materials and workmanship. It does not cover damage caused by misuse, accidents, unauthorized modifications, or normal wear and tear.
For warranty claims, technical support, or any questions regarding your e-bike, please contact isinwheel customer service. Provide your purchase details and a description of the issue for prompt assistance.
Informacje kontaktowe: Please refer to your purchase documentation or the official isinwheel webstrona zawierająca najnowsze dane kontaktowe działu obsługi klienta.