
1. Wprowadzenie
Welcome to your new Geevon Small Travel Alarm Clock. This compact and versatile digital alarm clock is designed to provide accurate timekeeping, dual alarms, indoor temperature display, and a convenient backlight function. Its portable design makes it ideal for various settings, including bedrooms, home offices, and travel.

Obraz 1.1: Koniecview of the Geevon Small Travel Alarm Clock, highlighting its compact size and key features such as dual alarm, locking function, snooze, backlight, battery power, 12/24 hour display, temperature, and calendar.
2. Konfiguracja
2.1 Instalacja baterii
The Geevon Small Travel Alarm Clock requires two (2) AAA batteries for operation. Batteries are not included with the product.
- Znajdź komorę baterii z tyłu zegara.
- Open the battery cover by sliding it down or lifting the latch.
- Insert two (2) AAA batteries, ensuring correct polarity (+ and - terminals align with the markings inside the compartment).
- Dokładnie zamknij pokrywę baterii.

Image 2.1: The back of the alarm clock with the battery compartment open, illustrating where to insert the two AAA batteries.
2.2 Początkowe ustawienie czasu i daty
After installing batteries, set the current time and date.
- Naciśnij i przytrzymaj USTAWIĆ button (located on the top of the clock) for approximately 3 seconds to enter time setting mode. The hour digit will begin to flash.
- Użyj UP (^) or W DÓŁ (v) buttons (on the back) to adjust the hour.
- Naciśnij krótko USTAWIĆ again to confirm the hour and move to minute setting. Adjust minutes using UP (^) or W DÓŁ (część).
- Continue briefly pressing USTAWIĆ to cycle through and set the year, month, and day, adjusting each value with the UP (^) or W DÓŁ (v) buttons.
- Naciskać USTAWIĆ one last time to exit the setting mode and save your changes.
Video 2.1: Demonstration of setting the time and alarm on the Geevon Small Travel Alarm Clock. This video shows the button locations and the step-by-step process for adjusting time, minutes, and alarm settings.
3. Instrukcja obsługi
3.1 Format 12/24-godzinny
To switch between 12-hour (AM/PM) and 24-hour formats:
- W trybie wyświetlania czasu normalnego naciśnij krótko przycisk UP (^) button. The display will toggle between the two formats.

Image 3.1: The clock display showing both 12-hour (AM/PM) and 24-hour time formats, illustrating the clear digital readout.
3.2 Wyświetlacz temperatury
The clock displays the indoor temperature. To switch between Celsius (°C) and Fahrenheit (°F):
- W trybie wyświetlania czasu normalnego naciśnij krótko przycisk ° C / ° F button (located on the back of the clock).

Image 3.2: The clock display showing the indoor temperature in both Fahrenheit and Celsius, demonstrating the temperature conversion feature.
3.3 Ustawianie alarmów (Alarm 1 i Alarm 2)
The clock features two independent alarms (Alarm 1 and Alarm 2) that can be set for different times or days.
- Aby ustawić alarm 1: Naciśnij i przytrzymaj Budzik 1 button (bell icon) on the back for approximately 3 seconds. The hour digit for Alarm 1 will flash.
- Użyj UP (^) or W DÓŁ (v) buttons to adjust the desired alarm hour.
- Naciśnij krótko Budzik 1 again to confirm the hour and move to minute setting. Adjust minutes using UP (^) or W DÓŁ (część).
- Naciśnij krótko Budzik 1 again to select the alarm repetition mode:
- 1-5: Alarm sounds Monday to Friday.
- 6-7: Alarm sounds Saturday and Sunday.
- 1-7: Alarm sounds every day.
- Naciśnij krótko Budzik 1 one last time to confirm your settings and exit.
- Repeat the entire process for Alarm 2 using the Budzik 2 przycisk.
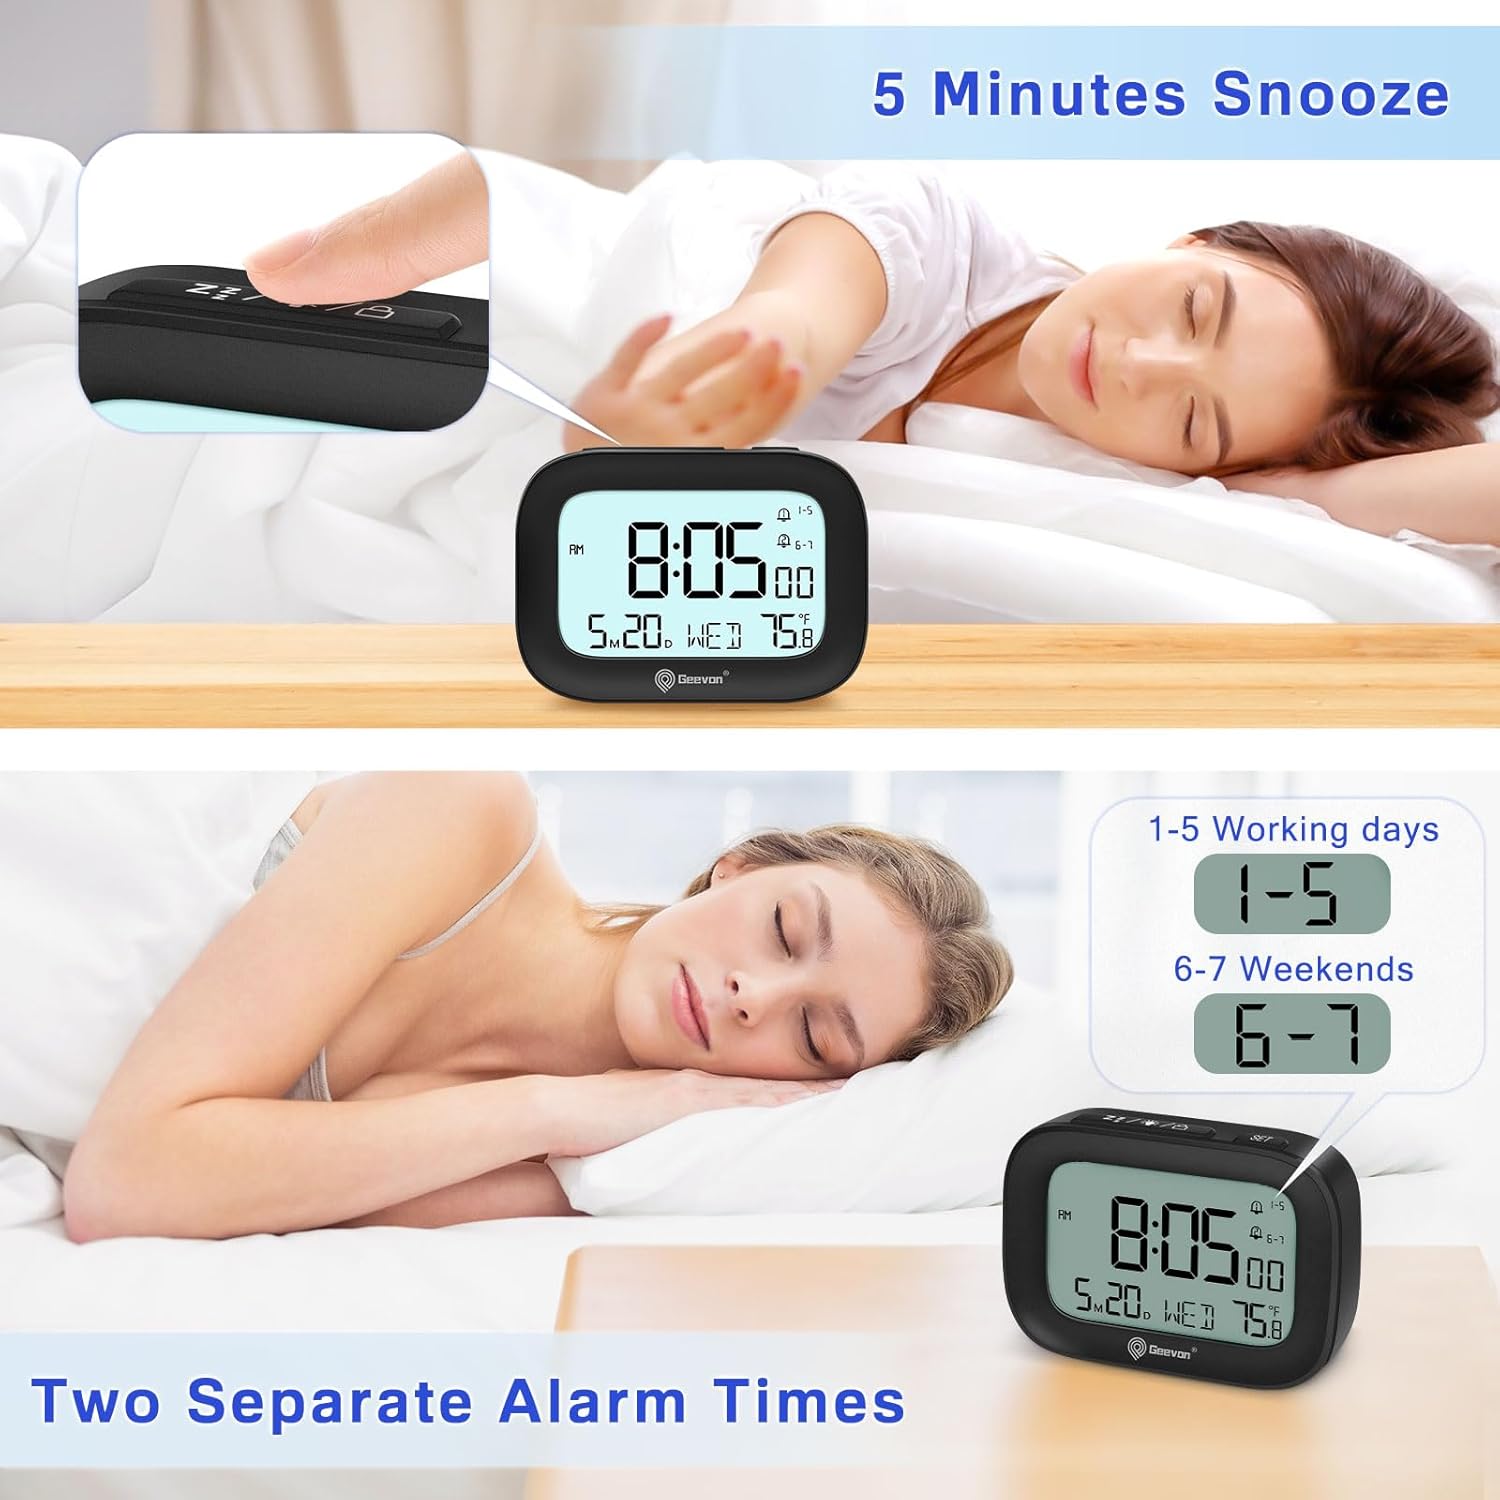
Image 3.3: The clock display illustrating the setup for two separate alarm times, indicating the flexibility for weekday and weekend alarms.
3.4 Aktywowanie/dezaktywowanie alarmów
To turn an alarm ON or OFF:
- W trybie wyświetlania czasu normalnego naciśnij krótko przycisk Budzik 1 or Budzik 2 przycisk.
- An alarm icon will appear on the display when the respective alarm is active. The icon will disappear when the alarm is deactivated.
3.5 Funkcja drzemki
Kiedy rozlegnie się alarm:
- Naciśnij ŚWIATŁO/DRZEMKA button (top of the clock) to activate the snooze function. The alarm will pause for 5 minutes and then sound again.
- The alarm sound is designed to gradually increase in volume over 2 minutes to ensure a gentle waking experience.
3.6 Działanie podświetlenia
To illuminate the display:
- Naciśnij ŚWIATŁO/DRZEMKA button. The backlight will illuminate for 5 seconds.
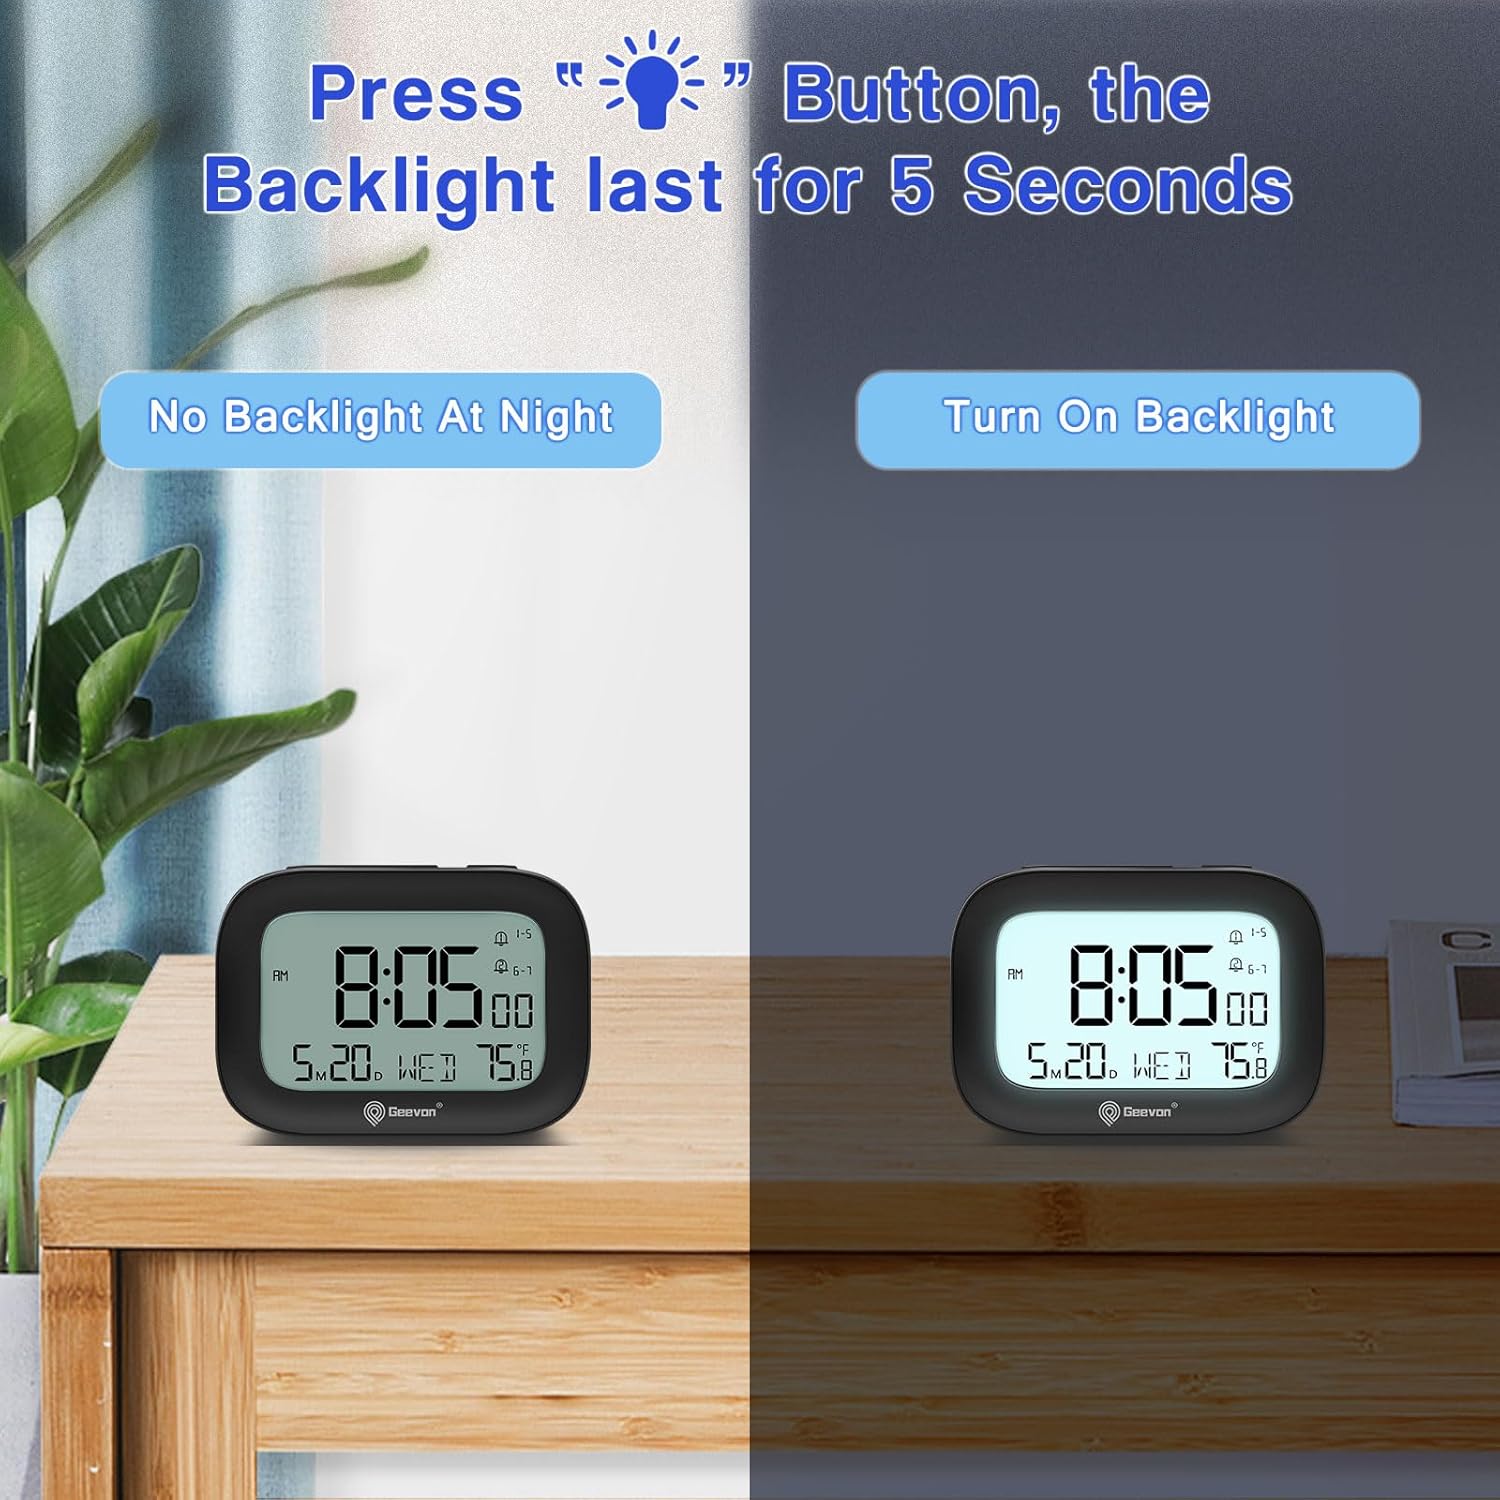
Image 3.4: The clock display with and without the 5-second backlight activated, demonstrating its visibility in low-light conditions.
3.7 Funkcja blokady
To prevent accidental changes to settings or alarms, use the lock function:
- Aby zablokować: Naciśnij i przytrzymaj LIGHT/SNOOZE/LOCK button for approximately 3 seconds until a lock icon appears on the display.
- To unlock: Press and hold the same button for approximately 3 seconds until the lock icon disappears.

Image 3.5: The clock being placed into a bag, illustrating the convenience of the lock function to prevent accidental button presses during travel.
4. Konserwacja
4.1 Czyszczenie
To clean your Geevon Small Travel Alarm Clock:
- Przetrzyj zegar miękką, suchą ściereczką.
- Do not use abrasive cleaners, chemical solvents, or spray directly onto the clock, as these may damage the surface or internal components.
4.2 Wymiana baterii
Replace batteries when the display dims, becomes erratic, or functions become unreliable.
- Follow the steps in Section 2.1 Battery Installation.
- Always replace both AAA batteries simultaneously to ensure optimal performance.
5. Rozwiązywanie Problemów
| Problem | Możliwa przyczyna | Rozwiązanie |
|---|---|---|
| Wyświetlacz jest pusty lub bardzo ciemny. | Baterie są rozładowane lub nieprawidłowo zainstalowane. | Check battery installation and replace with fresh AAA batteries. |
| Alarm nie włącza się. | Alarm is not set or activated; low battery. | Verify the alarm is set correctly and activated (alarm icon visible on display). Replace batteries if low. |
| Czas jest nieprawidłowy. | Time was not set properly or batteries were removed. | Ustaw ponownie godzinę i datę, postępując zgodnie z instrukcjami podanymi w rozdziale 2.2. |
| Przyciski nie reagują. | Funkcja blokady jest aktywna. | Deactivate the lock function by pressing and holding the LIGHT/SNOOZE/LOCK button for 3 seconds. |
6. Specyfikacje
- Model: 250509-B
- Wymiary: 3.5" (szer.) x 2.36" (wys.)
- Waga: 0.26 funtów
- Źródło zasilania: Baterie 2 x AAA (brak w zestawie)
- Wyświetlacz: 3-inch LCD Digital Display
- Cechy: Dual Alarms, Snooze, 5-second Backlight, Indoor Temperature Display, 12/24 Hour Format, Date, Day of Week, Lock Function, Silent Operation
- Przybory: Acrylonitrile Butadiene Styrene (ABS), LCD, Plastic

Obraz 6.1: Różne views of the Geevon Small Travel Alarm Clock, including front, top, side, and back, showcasinze względu na kompaktową konstrukcję i układ przycisków.
7. Gwarancja i wsparcie
7.1 Gwarancja
This Geevon Small Travel Alarm Clock comes with a 12-month warranty from the date of purchase, covering manufacturing defects and malfunctions under normal use.
7.2 Wsparcie
For technical assistance, troubleshooting, or warranty claims, please contact Geevon customer support through the retailer's platform where you purchased the product or visit the official Geevon webwitryna do informacji kontaktowych.


