1. Koniec produktuview
This manual provides detailed instructions for the installation, operation, and maintenance of the maXpeedingrods Adjustable Rear Track Bar. This component is designed to enhance vehicle stability and handling by controlling lateral movement of the rear axle.
The track bar features high-strength carbon steel construction with an anti-corrosion powder-coated surface and durable polyurethane bushings. It is adjustable to accommodate specific vehicle requirements.
2. Zgodność
This adjustable rear track bar is compatible with the following vehicle models and GVWRs:

Image 2.1: Compatibility chart showing supported Ford F53 and Kodiak C4500/5500 models and years.
| Robić | Rok | Model |
|---|---|---|
| Bród | Do 2020 | F53 V10 20-22K GVWR |
| Bród | 2021+ | F53 V8 16-22K GVWR |
| Kodiak | Wszystkie lata | C4500/5500 18-22K GVWR |
3. Funkcje produktu
3.1 Trwała konstrukcja
The track bar is constructed from high-strength carbon steel, ensuring durability and resistance to wear. The entire surface is powder-coated for enhanced anti-corrosion properties, extending the lifespan of the component.
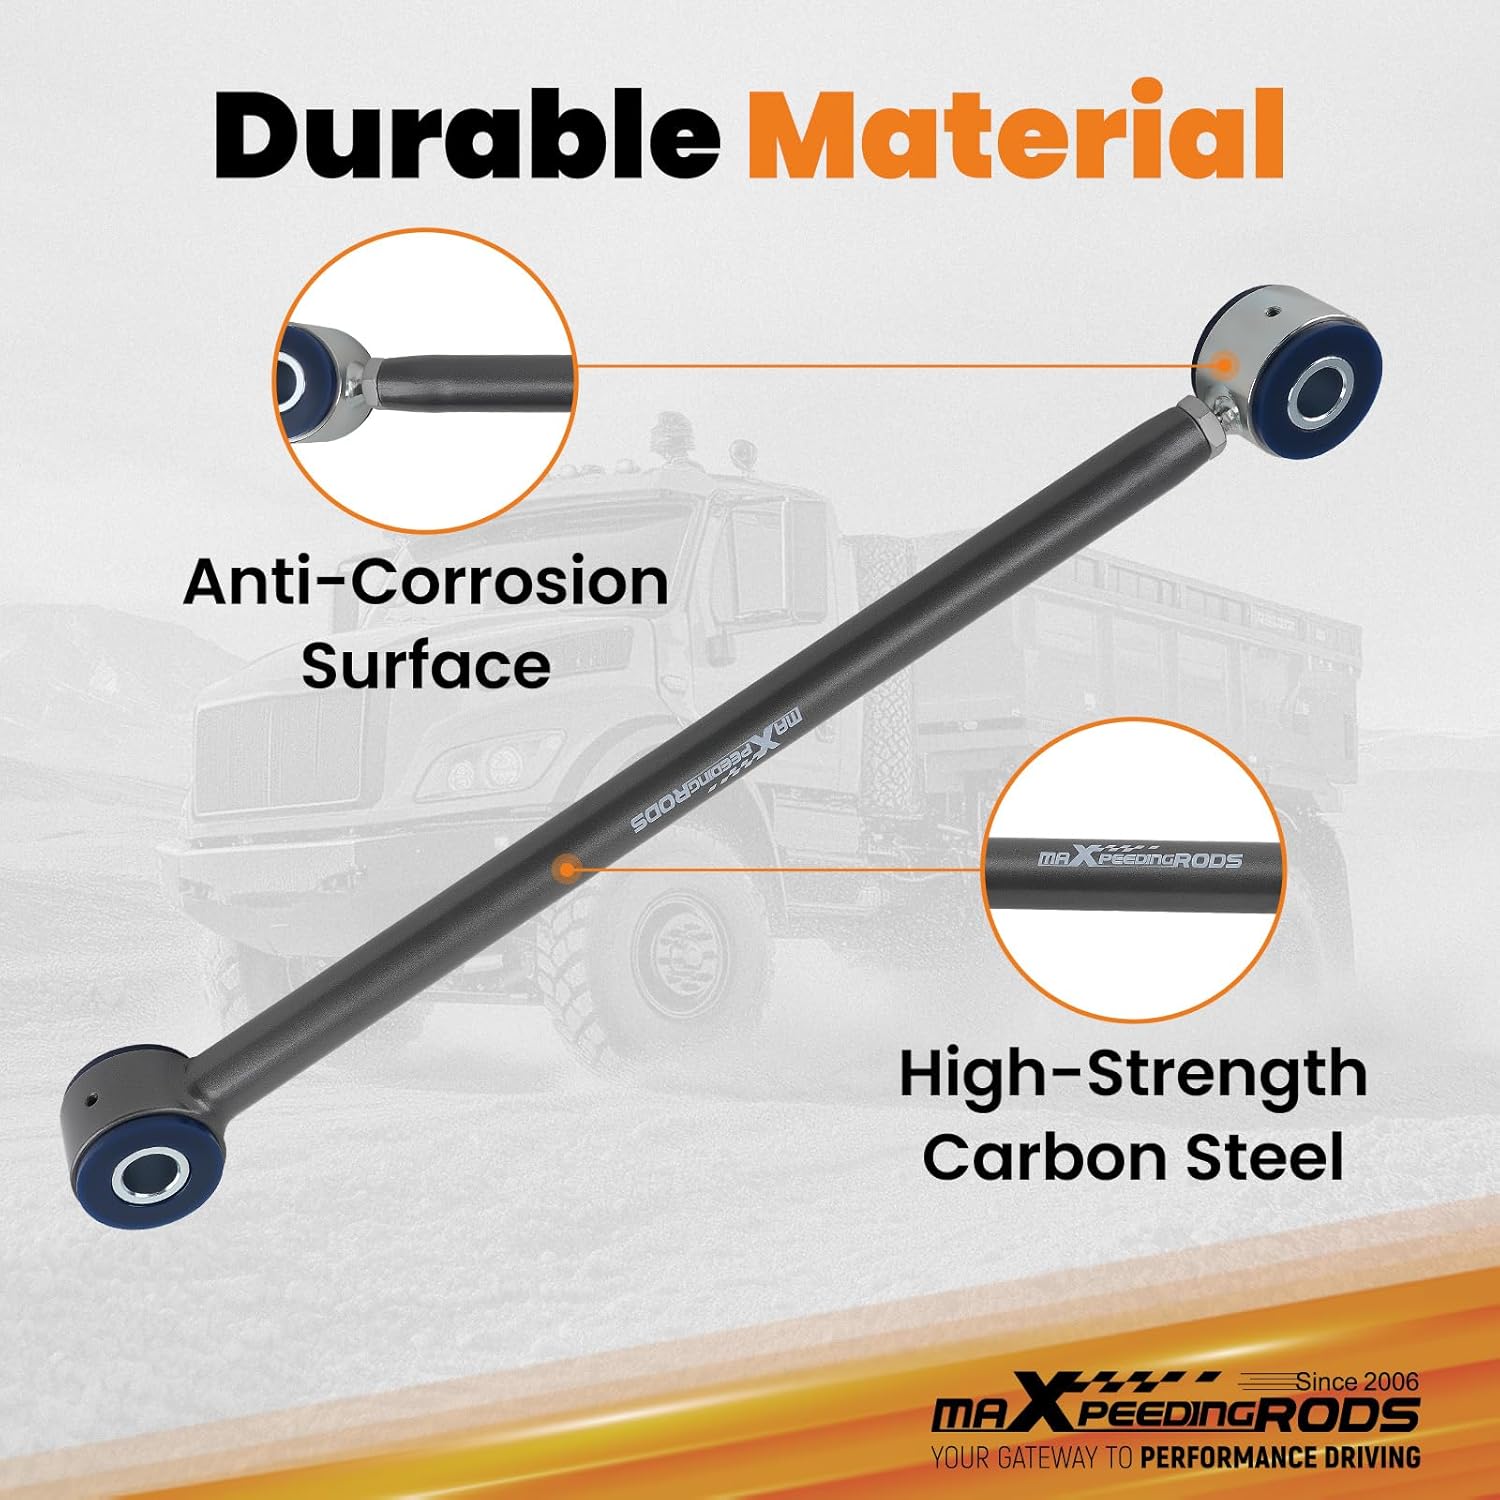
Image 3.1: Illustration of the track bar's high-strength carbon steel and anti-corrosion surface.
3.2 Polyurethane Bushings
Equipped with polyurethane bushings, this track bar offers superior wear resistance compared to standard rubber bushings. These bushings contribute to better handling and a more controlled driving experience by reducing unwanted movement.

Image 3.2: Detail of the wear-resistant polyurethane bushing.
3.3 Zerk Fittings for Maintenance
The bushings are designed with zerk fittings, allowing for easier lubrication and extending the life of the bushings. Regular greasing helps maintain optimal performance and prevents premature wear.

Image 3.3: Illustration of the zerk fitting for lubrication. Do not over-tighten grease zerks to prevent damage.
3.4 Regulowana konstrukcja
The track bar features an adjustable design, allowing for precise length adjustments to suit specific vehicle setups. The eye-to-eye length can be adjusted within a range of 540mm to 570mm (21.26" to 22.44").
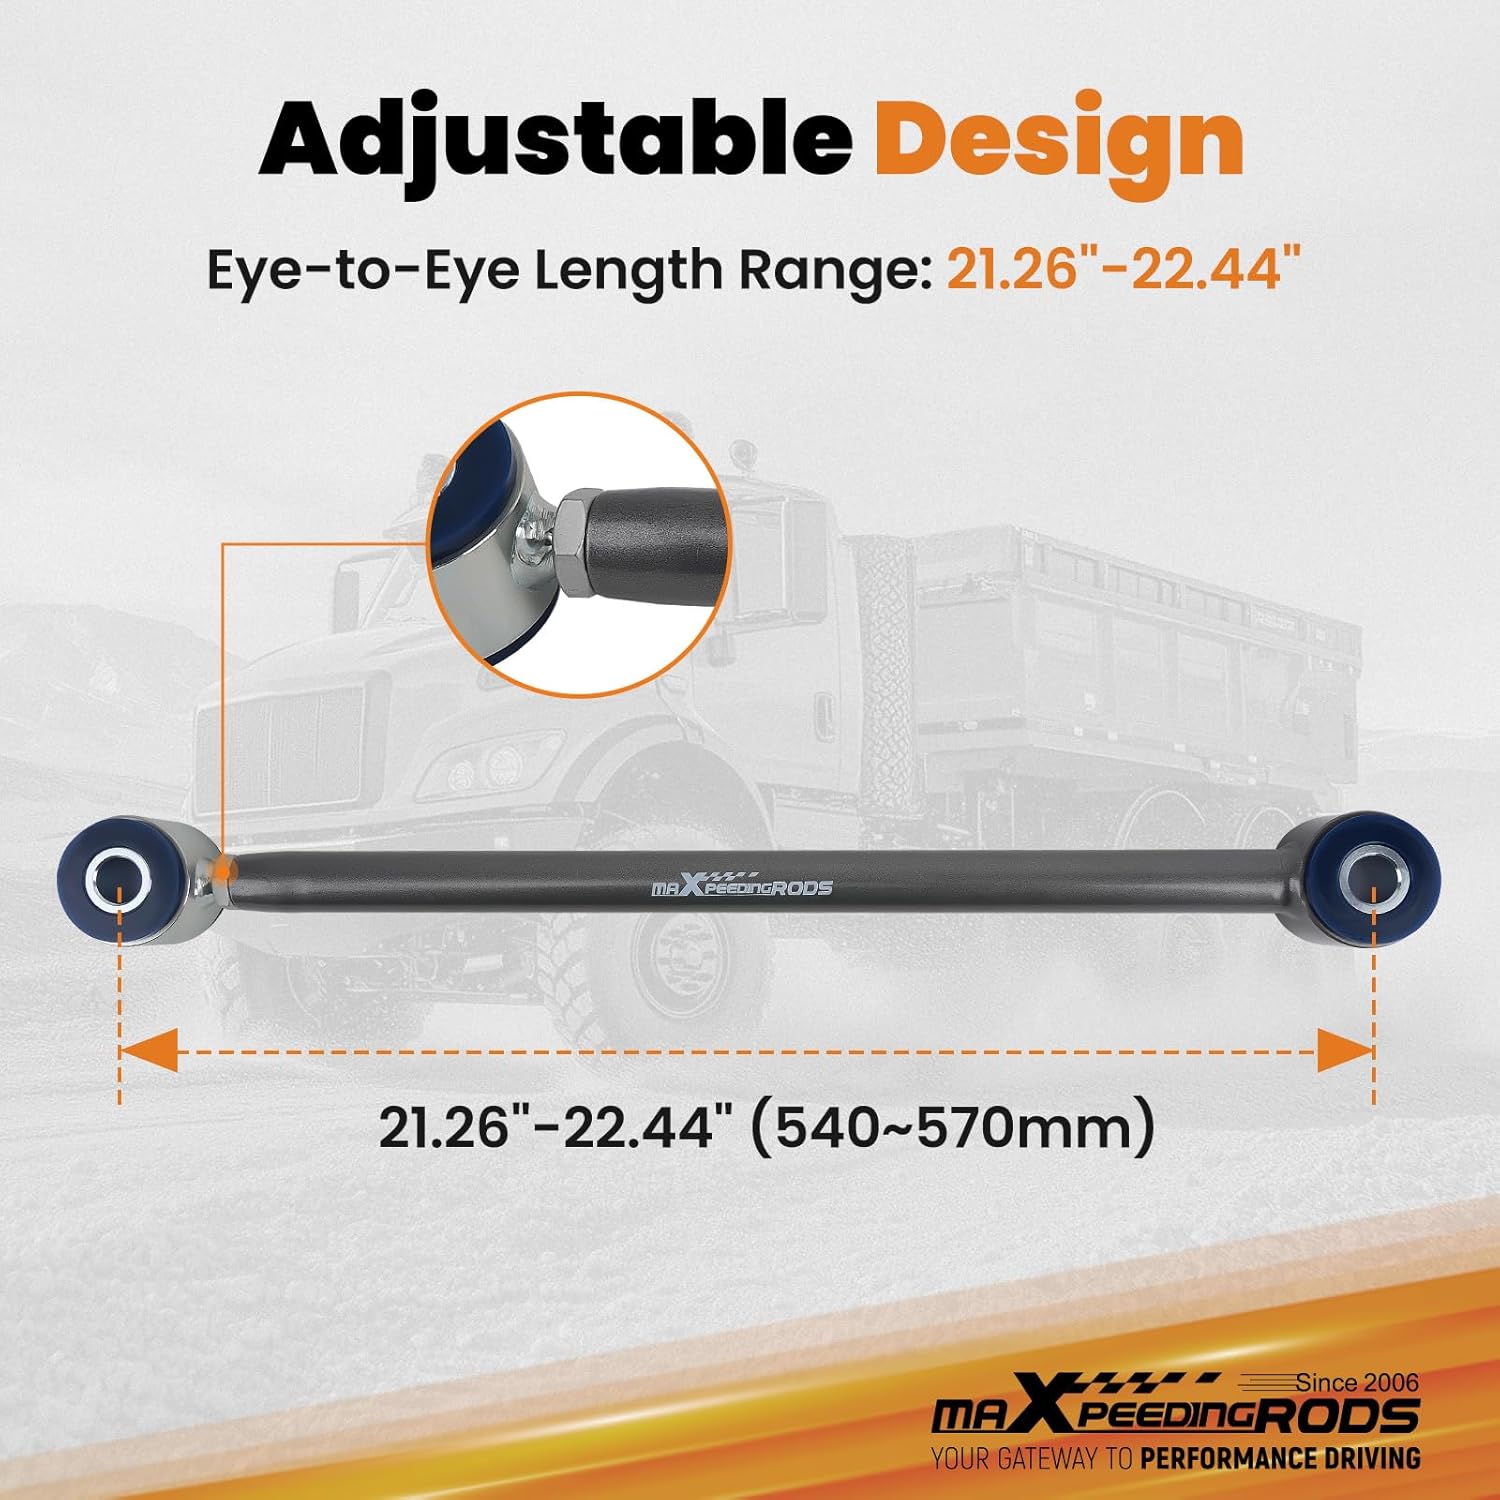
Image 3.4: The adjustable design allows for an eye-to-eye length range of 21.26"-22.44" (540-570mm).
3.5 Zawarte komponenty
The package includes the adjustable rear track bar and necessary mounting brackets for installation. Two different differential brackets are provided to fit either Metric or American axles.

Image 3.5: All components included in the kit, including the track bar and various mounting brackets.
4. Konfiguracja i instalacja
Bezpieczeństwo przede wszystkim: Always ensure the vehicle is securely supported on jack stands or a lift before beginning any work. Wear appropriate personal protective equipment (PPE) including safety glasses and gloves. If you are unsure about any step, consult a qualified mechanic.
- Przygotuj pojazd: Park the vehicle on a level surface, engage the parking brake, and block the wheels. Raise the vehicle and support it securely.
- Zidentyfikuj punkty montażowe: Locate the mounting points on the vehicle's frame and the rear axle. The kit includes different differential brackets; select the one appropriate for your vehicle's axle type (Metric or American).
- Montaż wsporników: Attach the frame bracket and the appropriate differential bracket to their respective locations. Ensure all bolts are finger-tight at this stage.
- Mount the Track Bar: Connect the adjustable track bar between the installed frame bracket and the differential bracket.
- Dostosuj długość: Adjust the eye-to-eye length of the track bar to ensure proper alignment and fitment. The adjustable range is 540mm to 570mm (21.26" to 22.44"). This adjustment helps center the axle.
- Dokręć elementy złączne: Once the track bar is correctly positioned and adjusted, tighten all bolts to the manufacturer's specified torque settings. It is recommended to use a torque wrench for accuracy.
- Kontrola końcowa: Double-check all connections to ensure they are secure. Lower the vehicle carefully.
Notatka: Detailed torque specifications may vary by vehicle. Refer to your vehicle's service manual for precise torque values for suspension components.
5. Charakterystyka działania
After proper installation, the maXpeedingrods Adjustable Rear Track Bar is designed to significantly improve the handling characteristics of your vehicle, particularly in situations involving crosswinds or uneven road surfaces. Users may experience:
- Reduced rear sway and body roll.
- Improved steering response and control.
- Enhanced stability, especially at highway speeds.
The track bar works by preventing lateral movement of the rear axle relative to the chassis, which is crucial for maintaining predictable handling and reducing the need for constant steering corrections.
6. Konserwacja
To ensure the longevity and optimal performance of your adjustable rear track bar, regular maintenance is recommended:
- Smarowanie: The polyurethane bushings are equipped with zerk fittings for easy greasing. Periodically (e.g., every 5,000-10,000 miles or during routine vehicle service), apply a suitable grease using a grease gun. Be careful not to over-tighten the grease zerks to avoid twisting or damaging them.
- Kontrola: Regularly inspect the track bar, bushings, and mounting hardware for any signs of wear, damage, or looseness. Check for cracks in the bushings, corrosion on the bar, or loose bolts.
- Czyszczenie: Keep the track bar and its components clean from excessive dirt and debris, especially around the zerk fittings.
7. Rozwiązywanie Problemów
Jeżeli w trakcie lub po instalacji wystąpią problemy, należy wziąć pod uwagę następujące kwestie:
- Difficulty with Bolt Installation: If the drilled and tapped holes in the frame bracket are obstructed (e.g., by powder coat), it may be necessary to clean the threads. A tap of the correct size can be used to clear the threads before attempting to install bolts. Avoid forcing bolts, as this can cause thread galling.
- Washer Deformation: If washers deform when tightening bolts through slots in the frame bracket, ensure you are using appropriate hardened washers. If the slots are wider than ideal, consider using larger diameter washers or thicker, hardened washers to provide better surface area and prevent deformation.
- Continued Sway/Poor Handling: Ensure the track bar is correctly installed and all fasteners are torqued to specification. Verify that the track bar's length is properly adjusted to center the axle. Other suspension components (e.g., sway bars, shocks) should also be in good condition.
If problems persist, it is recommended to consult a professional mechanic.
8. Specyfikacje
| Specyfikacja | Wartość |
|---|---|
| Tworzywo | Stal |
| Wykończenie powierzchni | Malowane proszkowo |
| Typ tulei | Poliuretan |
| Umieszczenie na pojeździe | Tył |
| Adjustable Length Range (Eye-to-Eye) | 540 mm - 570 mm (21.26" - 22.44") |
| Waga przedmiotu | 13.5 kilogramów |
| Wymiary produktu (dł. x szer. x wys.) | Wymiary 70.3 x 31.7 x 17.2 cm |
| Numer części | LB48FP |
9. Informacje o gwarancji
Specific warranty details for the maXpeedingrods Adjustable Rear Track Bar are not provided in this manual. For information regarding product warranty, please refer to the product packaging, the seller's website, or contact maXpeedingrods customer support directly.
10. Obsługa klienta
For further assistance, technical support, or inquiries regarding this product, please visit the official maXpeedingrods store or contact their customer service department.
maXpeedingrods Store: Odwiedź sklep