TECXERLLON WBCAT71
Instrukcja obsługi systemu kamery cofania TECXERLLON WBCAT71 do kamperów
Model: WBCAT71 | Brand: TECXERLLON
Wstęp
This manual provides detailed instructions for the installation, operation, and maintenance of your TECXERLLON WBCAT71 RV Backup Camera System. This system is designed to enhance safety and visibility for various large vehicles, including RVs, trucks, vans, SUVs, and trailers.

Image: TECXERLLON RV Backup Camera System components including the 7-inch monitor, camera, and mounting hardware.
Główne cechy:
- 7-Inch Touchscreen Monitor: Intuitive control for settings and features.
- Wireless HD 1080P: High-definition video transmission for clear visuals.
- System 4-kanałowy: Expandable to connect up to four cameras for comprehensive coverage.
- IR Night Vision: Enhanced visibility in low-light conditions with 18 infrared lights.
- AI Detection with Real-Time Alerts: Advanced technology to detect pedestrians, vehicles, and obstacles.
- 2.4GHz Ultra-Strong Wireless Transmission: Stable signal up to 320 feet (97.5 meters) with zero frame loss.
- Nagrywanie DVR: Built-in capability to record footage (SD card not included).
- IP69K Waterproof Rating: Trwała konstrukcja sprawdzająca się w każdych warunkach pogodowych.
Zawartość opakowania
Sprawdź, czy w przesyłce znajdują się wszystkie elementy wymienione poniżej:

Obraz: Szczegółowy view of all items included in the TECXERLLON RV Backup Camera System package.
- Camera Body (x1)
- Display Screen (7-inch Monitor) (x1)
- Sun Shade & U-bracket (x1)
- Śruby (różne rozmiary)
- U-bracket Sticker (x1)
- RV Fittings (x1 set)
- Ładowarka samochodowa (x1)
- Antena (x2)
- Suction Holder (x1)
- 3m Cable (x1)
- Adapter Splitter (x1)
- Installation Kit (x1)
- Instrukcja obsługi (x1)
Konfiguracja i instalacja
1. Instalacja kamery
The camera is designed for quick and easy installation, compatible with Furrion pre-wired systems and general vehicle setups.
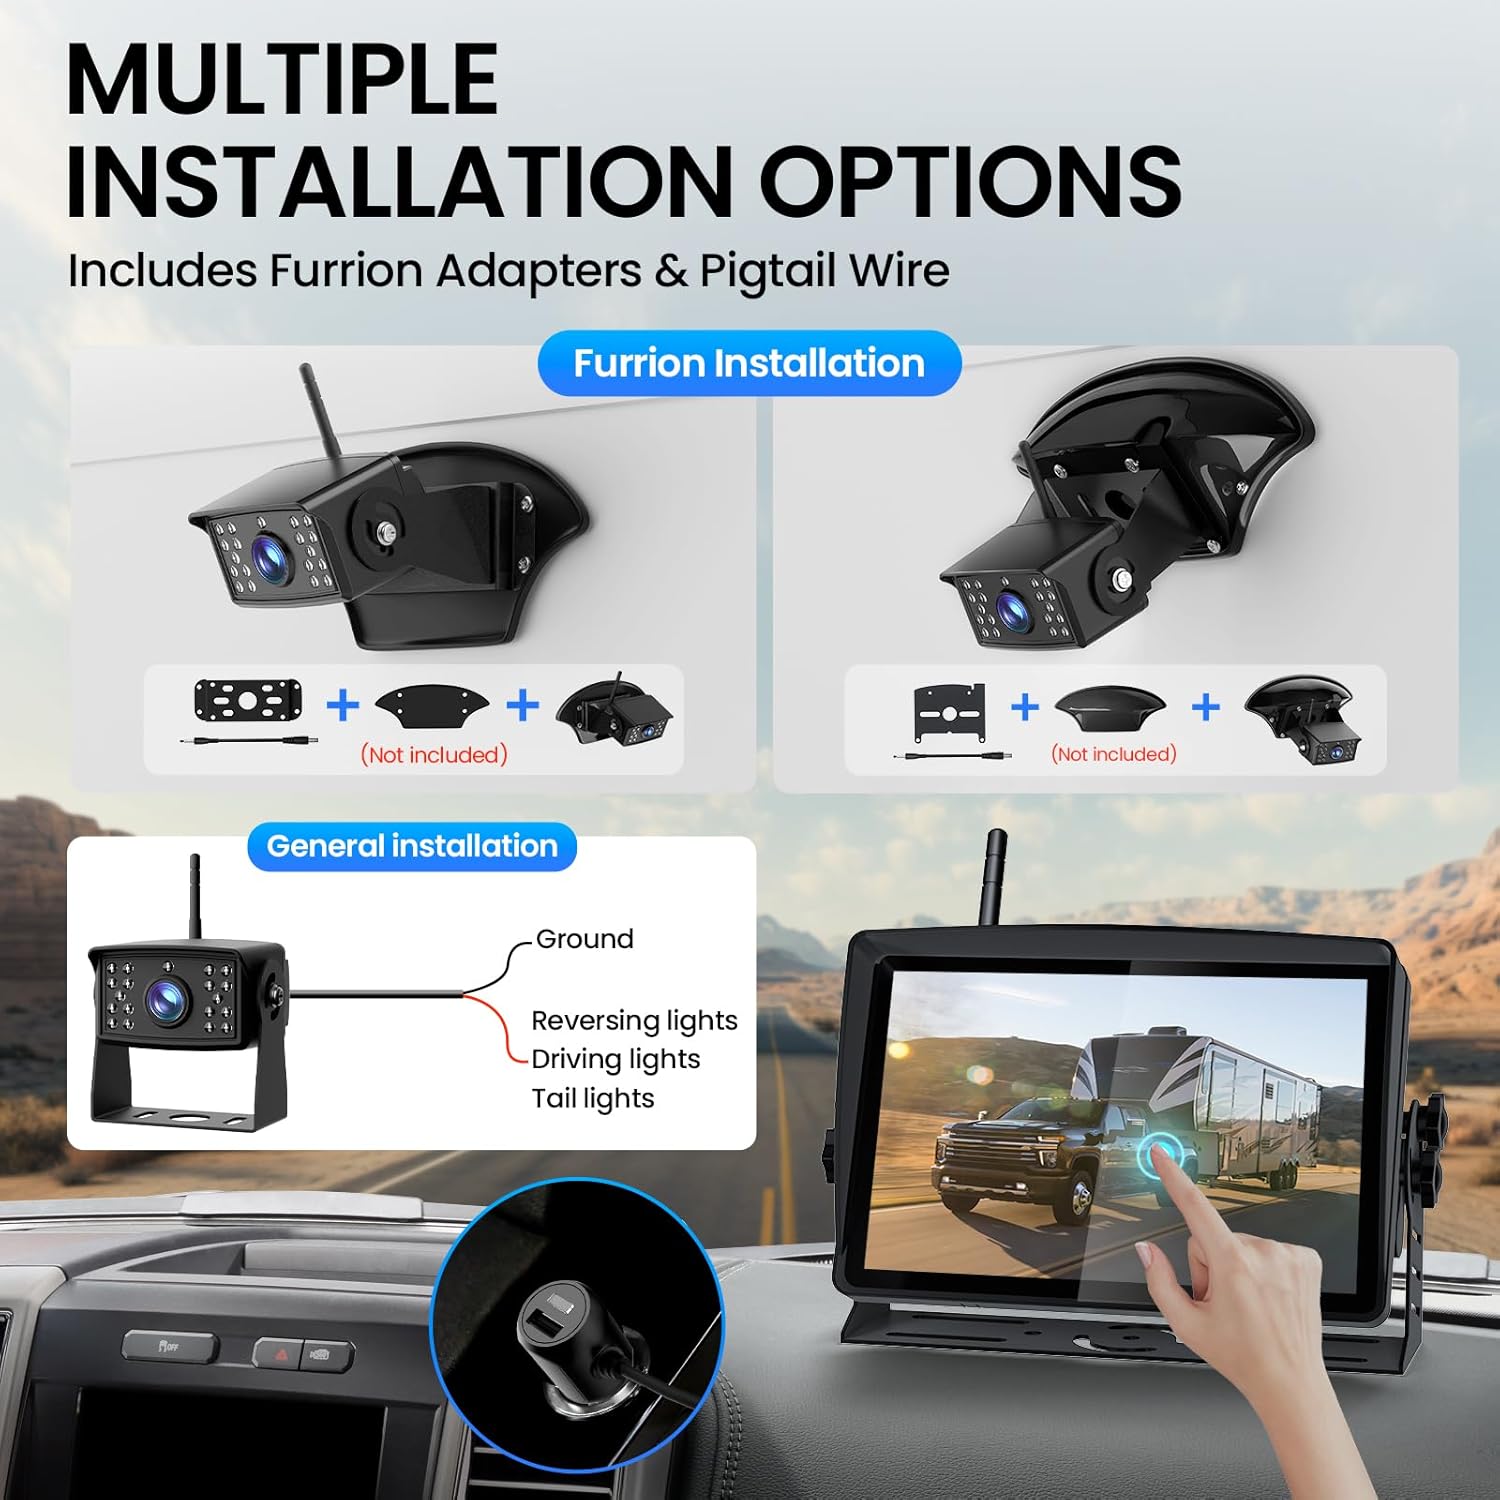
Image: Illustration of various camera installation methods, showing Furrion adapters and general wiring to vehicle lights.
- Wybierz miejsce montażu: Select a position at the rear of your RV or vehicle that provides an optimal view. Ensure the antenna can be pointed upwards for best signal reception.
- Furrion Pre-wired System: If your RV is pre-wired for a Furrion system, remove the existing cover. Connect the camera using the provided Furrion adapters and pigtail wire.
- Ogólna instalacja: For vehicles without a Furrion pre-wire, connect the camera's power cable to a 12V/24V power source (e.g., reversing lights, driving lights, or tail lights). Ensure proper grounding.
- Bezpieczna kamera: Use the appropriate bracket and screws from the installation kit to firmly attach the camera. Adjust the camera angle to point straight down towards the rear of the vehicle.
2. Instalacja monitora
The 7-inch touchscreen monitor can be mounted on your dashboard or windshield.

Image: The 7-inch monitor displayed on a dashboard and attached to a windshield using different mounting options.
- Attach Suction Holder: Secure the suction holder to the back of the monitor.
- Wyczyść powierzchnię montażową: Clean the desired area on your dashboard or windshield with rubbing alcohol and a clean rag. Allow it to dry completely.
- Monitor montażowy: Dociśnij mocno przyssawkę do czyszczonej powierzchni i zablokuj ją za pomocą mechanizmu blokującego.
- Podłącz zasilanie: Plug the monitor's power cord into your vehicle's cigarette lighter outlet.
- Instalacja anten: Screw both antennas onto the designated ports on the monitor and camera.
Wideo: Szybki przeglądview of the TECXERLLON RV Backup Camera System, demonstrating its components and basic functionality.
Instrukcja obsługi
1. Włączanie/wyłączanie zasilania
Once the monitor is connected to power and the camera is installed, turn on your vehicle. The monitor should automatically power on and display the camera feed.
2. Sterowanie za pomocą ekranu dotykowego
The 7-inch touchscreen allows for easy navigation of settings and features. Swipe to access various options.
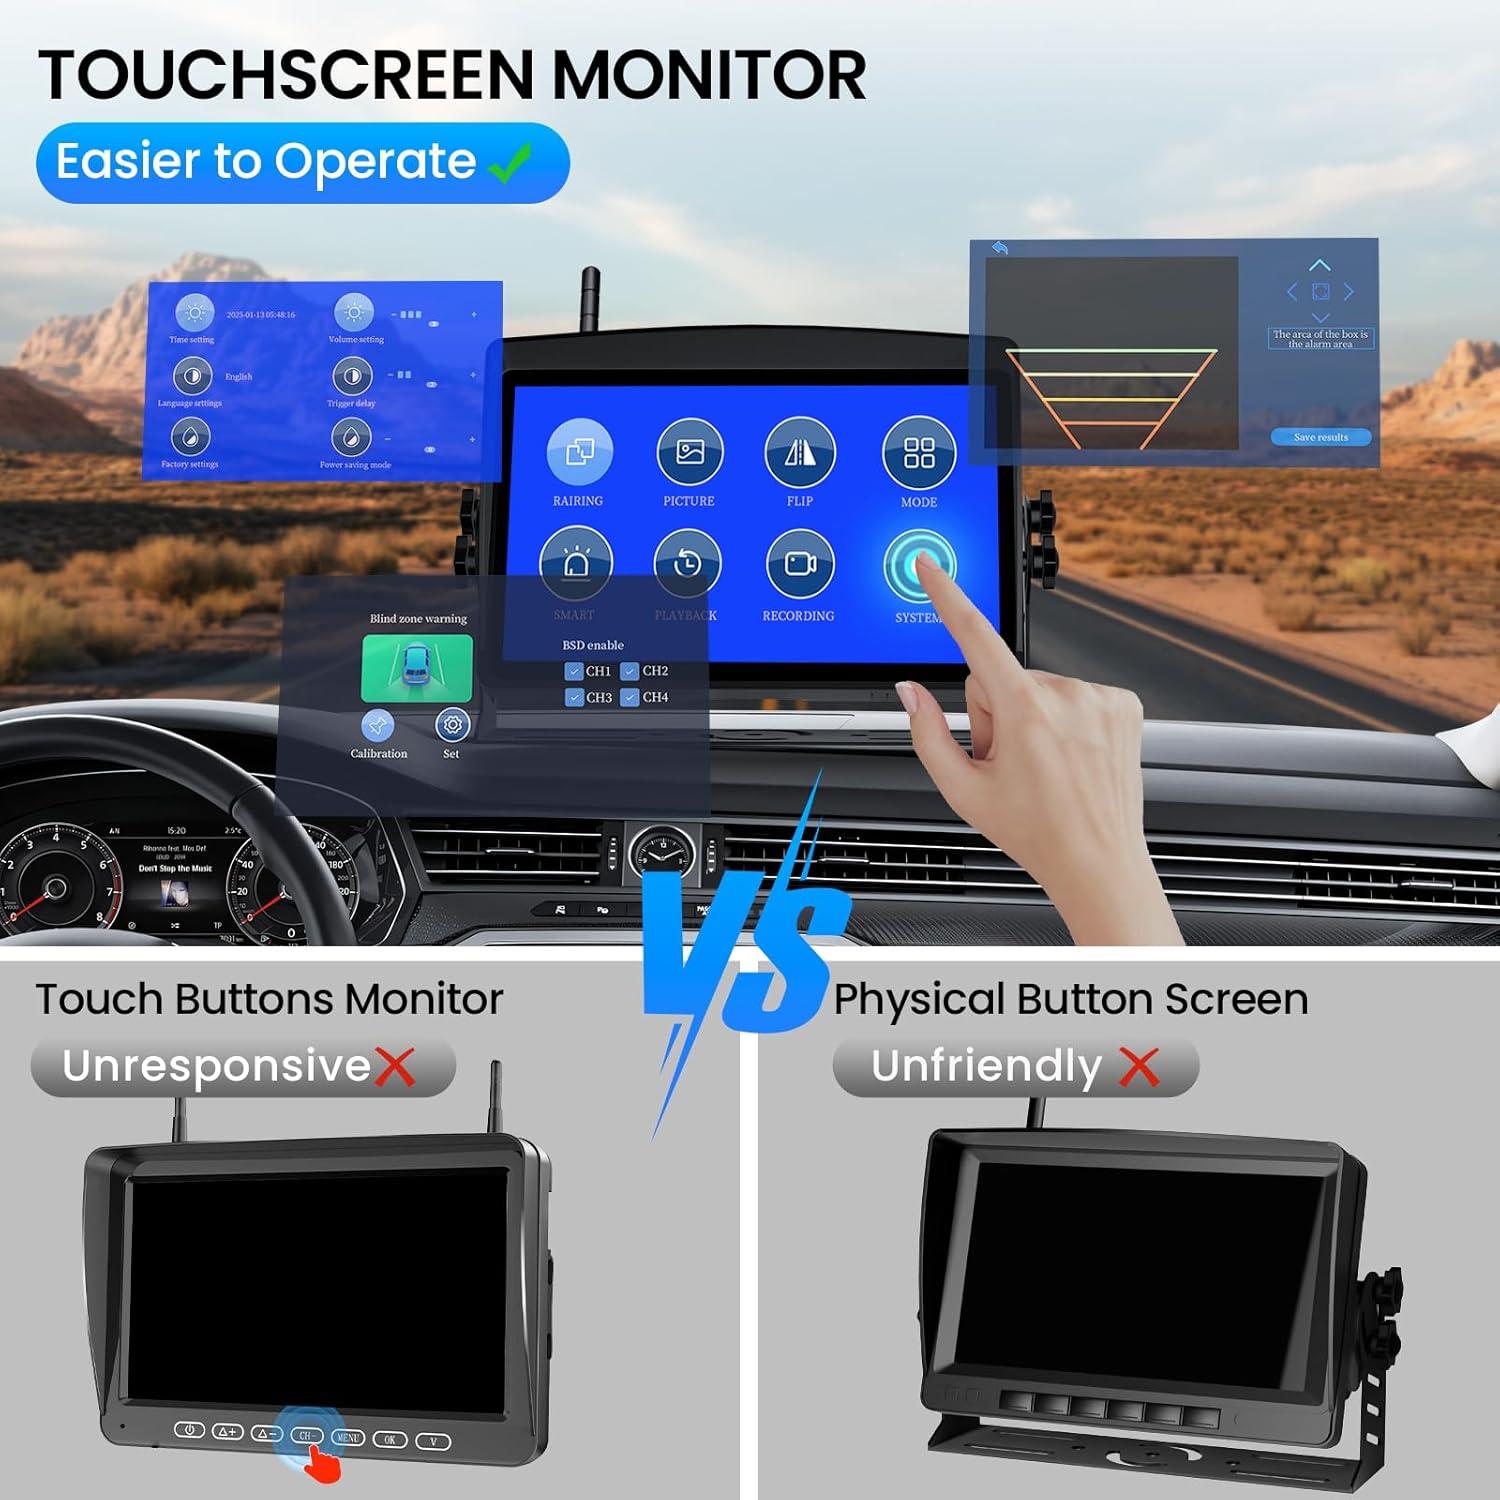
Image: The touchscreen monitor interface, highlighting its ease of use compared to traditional physical button screens.
3. Wykrywanie i alerty AI
The system features advanced AI technology to detect pedestrians, vehicles, and obstacles. Real-time alerts will notify you of potential hazards.

Image: Visual representation of the AI detection system identifying a vehicle and a person with an alarm alert on the monitor.
4. Wizja nocna
The camera is equipped with 18 infrared lights for clear night vision, even in total darkness.
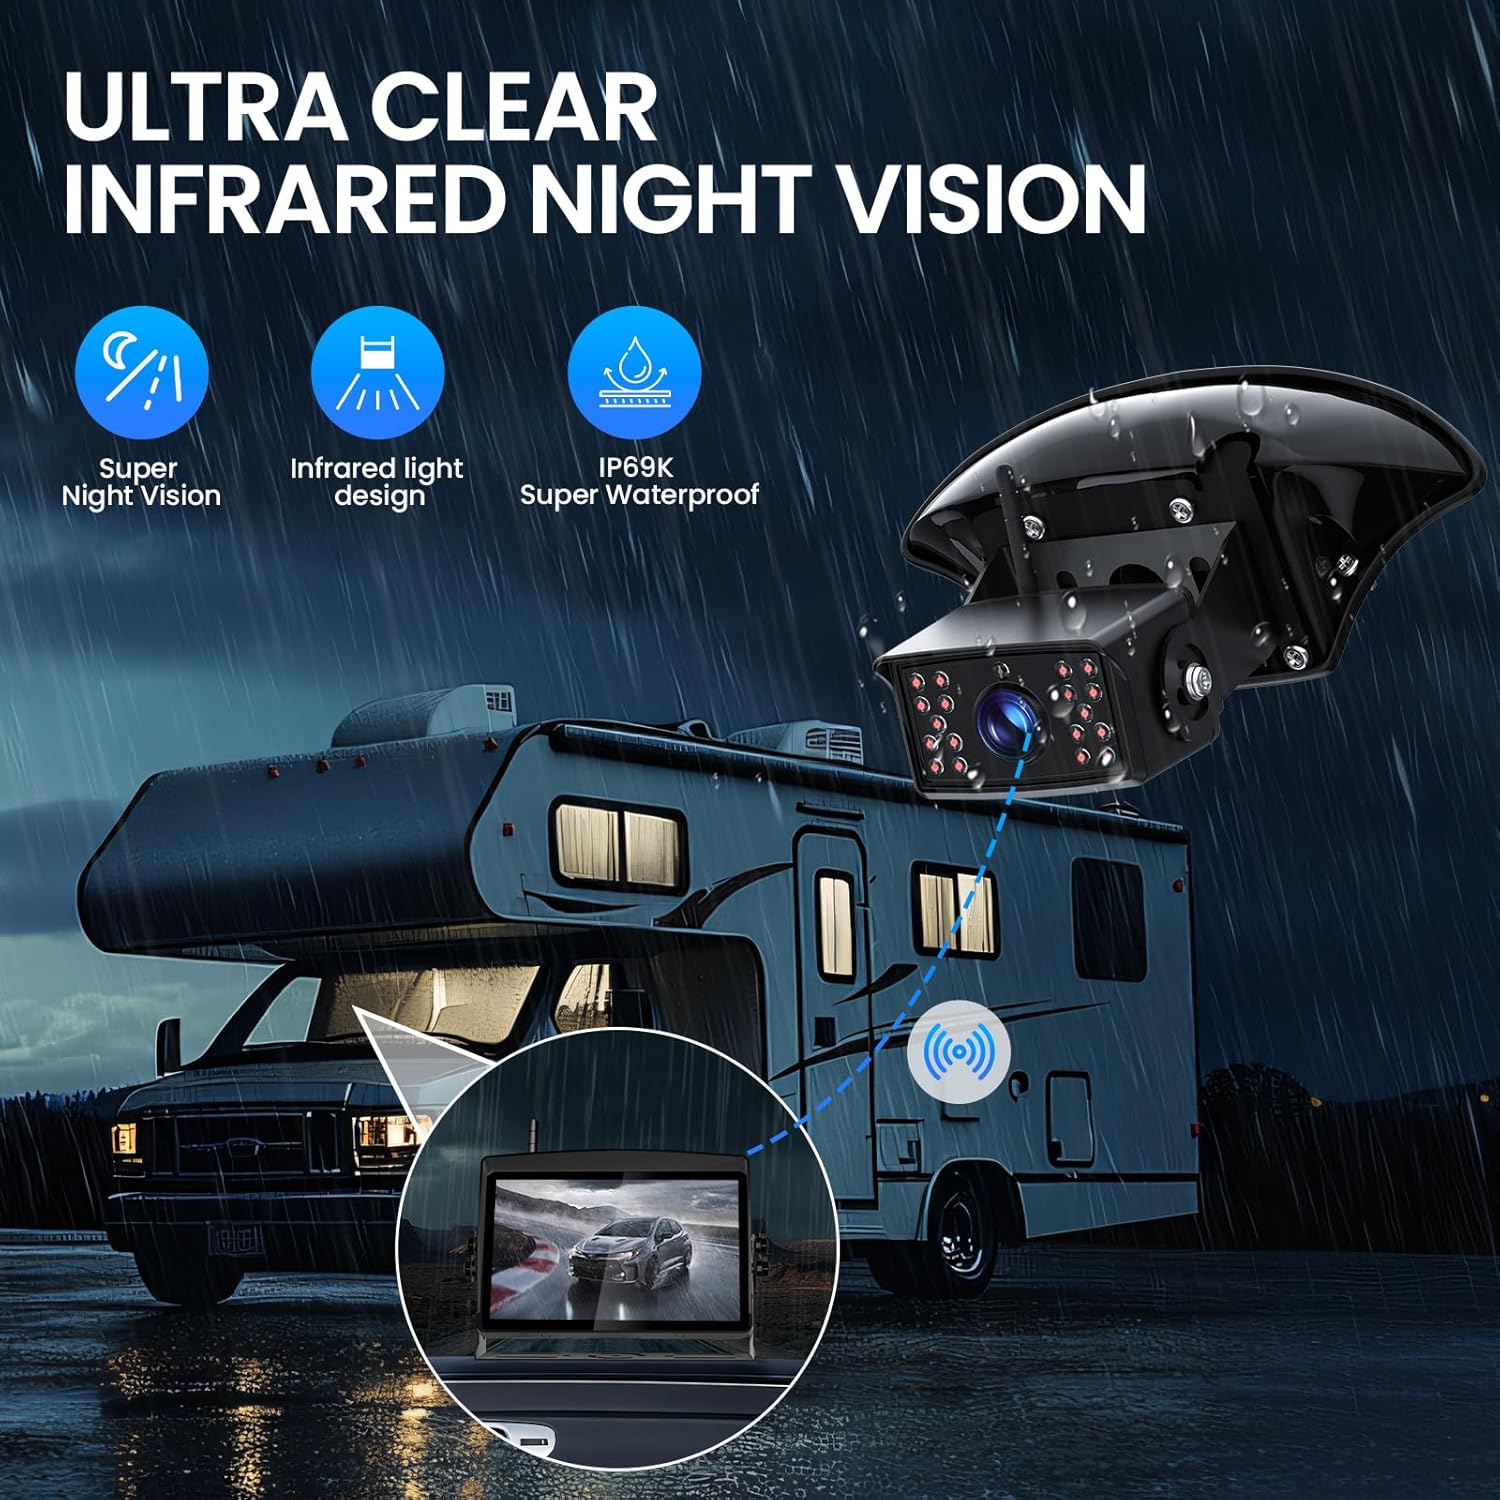
Image: An RV at night with the backup camera's infrared night vision active, showing clear visibility on the monitor.
5. Wielokanałowy View
Connect up to four cameras to the HD 1080P monitor. Easily switch between cameras or view multiple feeds simultaneously using the versatile display mode options (single, split, triple, or quad screen).

Obraz: Wyświetlacz monitoraasing different multi-channel display modes: single, split, triple, and quad screen viewz podłączonych kamer.
Zaawansowane funkcje
Transmisja bezprzewodowa
The system utilizes 2.4GHz technology with a high-performance chip, ensuring a stable, crystal-clear signal up to 320 feet (97.5 meters) with zero frame loss. This provides seamless video streaming and a clear view Twojego otoczenia.

Image: Visual representation of the 2.4GHz wireless signal transmission between the camera and monitor, highlighting stable signal and no frame loss.
Nagrywanie DVR
Record every drive with the built-in DVR function. The system supports loop recording and local playback. An SD card is required for recording and is not included in the package.

Image: The monitor displaying recorded footage, with an SD card slot indicated for DVR functionality.
Wodoodporna konstrukcja
The camera boasts an IP69K waterproof rating, ensuring durability and reliable performance in all weather conditions, including heavy rain and extreme temperatures.
Specyfikacje
| Funkcja | Szczegół |
|---|---|
| Wymiary produktu | 8.2 x 2.4 x 5.3 cala |
| Waga przedmiotu | 3.61 funta |
| Technologia wyświetlania | LCD |
| Rozmiar ekranu | 7 cali |
| Kolor | Czarny |
| Kompatybilne urządzenia | Compatible with any vehicle |
| Typ instalacji | Montaż powierzchniowy |
| Technologia czujnika optycznego | Podczerwony |
| Typ soczewki | Szeroki kąt |
| Kąt rzeczywisty View | 120 stopni |
| Typ złącza | Bezprzewodowy |
| Rozmiar czujnika optycznego | 1/3 cala |
Rozwiązywanie problemów
If you encounter any issues with your TECXERLLON WBCAT71 system, please refer to the following common solutions:
- Brak sygnału:
- Upewnij się, że zarówno kamera, jak i monitor są włączone.
- Sprawdź, czy anteny są solidnie przymocowane do obu jednostek.
- Verify that there are no major obstructions blocking the wireless signal path.
- Try re-pairing the camera and monitor through the monitor's settings menu.
- Słaba jakość obrazu:
- Wyczyść obiektyw aparatu.
- Adjust brightness and contrast settings on the monitor.
- Upewnij się, że kamera jest solidnie zamontowana i nie wibruje.
- Monitor się nie włącza:
- Check the cigarette lighter connection and ensure it's receiving power.
- Verify the power cable is correctly plugged into the monitor.
- AI Alerts Not Functioning:
- Ensure AI detection is enabled in the monitor's settings.
- Check the sensitivity settings for AI detection.
Konserwacja
Regular maintenance will ensure the longevity and optimal performance of your backup camera system:
- Obiektyw aparatu: Regularnie czyść obiektyw aparatu miękką,amp szmatką, aby usunąć brud, kurz lub plamy wodne, które mogą blokować view. Unikaj środków czyszczących o działaniu ściernym.
- Ekran monitora: Wipe the monitor screen with a microfiber cloth. For stubborn smudges, use a screen-safe cleaning solution.
- Znajomości: Periodically check all cable connections (power, antenna) to ensure they are secure and free from corrosion.
- Montowanie: Verify that the camera and monitor mounts are tight and stable, especially after long trips or exposure to rough terrain.
- Wodoodporne uszczelki: Although the camera is IP69K rated, inspect the seals around the camera housing for any signs of damage or wear, particularly if exposed to extreme weather.
Gwarancja i wsparcie
Your TECXERLLON WBCAT71 RV Backup Camera System comes with a manufacturer's warranty. Please refer to the warranty card included in your package for specific terms and conditions.
For technical support, troubleshooting assistance, or warranty claims, please contact TECXERLLON customer service:
- E-mail: support@tecxerllon.com
- Wsparcie online: Visit the official TECXERLLON webStrona z odpowiedziami na często zadawane pytania i dodatkowymi zasobami.
Można zakupić dodatkowe plany ochrony:
- 2-letni plan ochrony
- 3-letni plan ochrony
- Pełna ochrona: Jeden plan obejmuje wszystkie kwalifikujące się zakupy dokonane w przeszłości i w przyszłości (dostępna jest opcja rozliczeń miesięcznych).
Powiązane dokumenty - WBCAT71
 |
Instrukcja obsługi systemu serii XTL – szczegółowe instrukcje W niniejszej instrukcji użytkownika znajdują się szczegółowe instrukcje i informacje dotyczące konfiguracji systemu bezpieczeństwa serii XTL, obejmujące obsługę klawiatury, uzbrajanie/rozbrajanie systemu, integrację urządzeń Z-Wave, łączność Wi-Fi i zarządzanie użytkownikami. |
 |
Instrukcja obsługi zestawu kamery cofania True Wireless This user manual provides comprehensive instructions for the Truly Wireless Backup Camera Kit, covering installation, operation, and maintenance. It includes details on monitor setup, camera mounting, solar panel integration, and basic functions for optimal use. |
 |
VECLESUS WM1 HD User Manual: Car Wireless Backup Camera System Installation & Operation Comprehensive user manual for the VECLESUS WM1 HD Car Wireless Backup Camera System. Learn about installation, setup, system controls, and troubleshooting for your vehicle's rear view kamera. |
 |
Instrukcja obsługi radia samochodowego Hippcron & SINOVCLE: ekran dotykowy HD, CarPlay, Android Auto Instrukcja obsługi przenośnych samochodowych systemów stereo Hippcron i SINOVCLE z ekranami dotykowymi HD (7, 9, 9.3 i 10.26 cala). W tym przewodniku omówiono środki ostrożności dotyczące instalacji, funkcje produktu, procedury konfiguracji oraz instrukcje obsługi Apple CarPlay, Android Auto, łączności Bluetooth, radia FM, odtwarzania multimediów, ustawień oraz integracji z kamerą cofania. |
 |
Instrukcja obsługi kamery samochodowej VSYSTO V7M Truck Dash Cam – Instrukcja instalacji i obsługi Kompleksowa instrukcja obsługi kamery samochodowej VSYSTO V7M Truck Dash Cam, obejmująca instalację, funkcje, obsługę, instrukcje bezpieczeństwa oraz łączność z aplikacją mobilną. Kamera posiada 7-calowy wyświetlacz HD, przednią kamerę 1080P oraz opcjonalne kamery lewą/prawą. |
 |
Instrukcja obsługi odbiornika stereo Pyle PLDNANDVR695 z systemem Android i podwójnym aparatem Kompleksowa instrukcja obsługi odbiornika stereo z systemem Android i dwoma kamerami Pyle PLDNANDVR695, obejmująca informacje na temat instalacji, funkcji, obsługi, rozwiązywania problemów i możliwości łączenia z telefonem. |
Ask a question about this manual
Ask about setup, troubleshooting, compatibility, parts, safety, or missing instructions. Manuals+ will review the question and use this page’s manual context to help answer it.