
1. Wprowadzenie
This manual provides detailed instructions for the installation, operation, and maintenance of your Locstar LS-8015FM Keyless Entry Door Lock. Please read this manual thoroughly before installation and use to ensure proper function and safety.
2. Informacje dotyczące bezpieczeństwa
- Nie próbuj samodzielnie demontować ani naprawiać zamka. Skontaktuj się z obsługą klienta, aby uzyskać pomoc.
- Używaj wyłącznie baterii określonego typu (4 baterie alkaliczne AA). Nie mieszaj starych i nowych baterii ani baterii różnych typów.
- Przechowuj klucze mechaniczne w bezpiecznym miejscu poza posesją, aby zapobiec zamknięciu się drzwi w przypadku awarii elektroniki lub rozładowania baterii.
- Protect your passcode from unauthorized access.
3. Zawartość opakowania
Przed rozpoczęciem instalacji sprawdź, czy wszystkie komponenty są obecne:
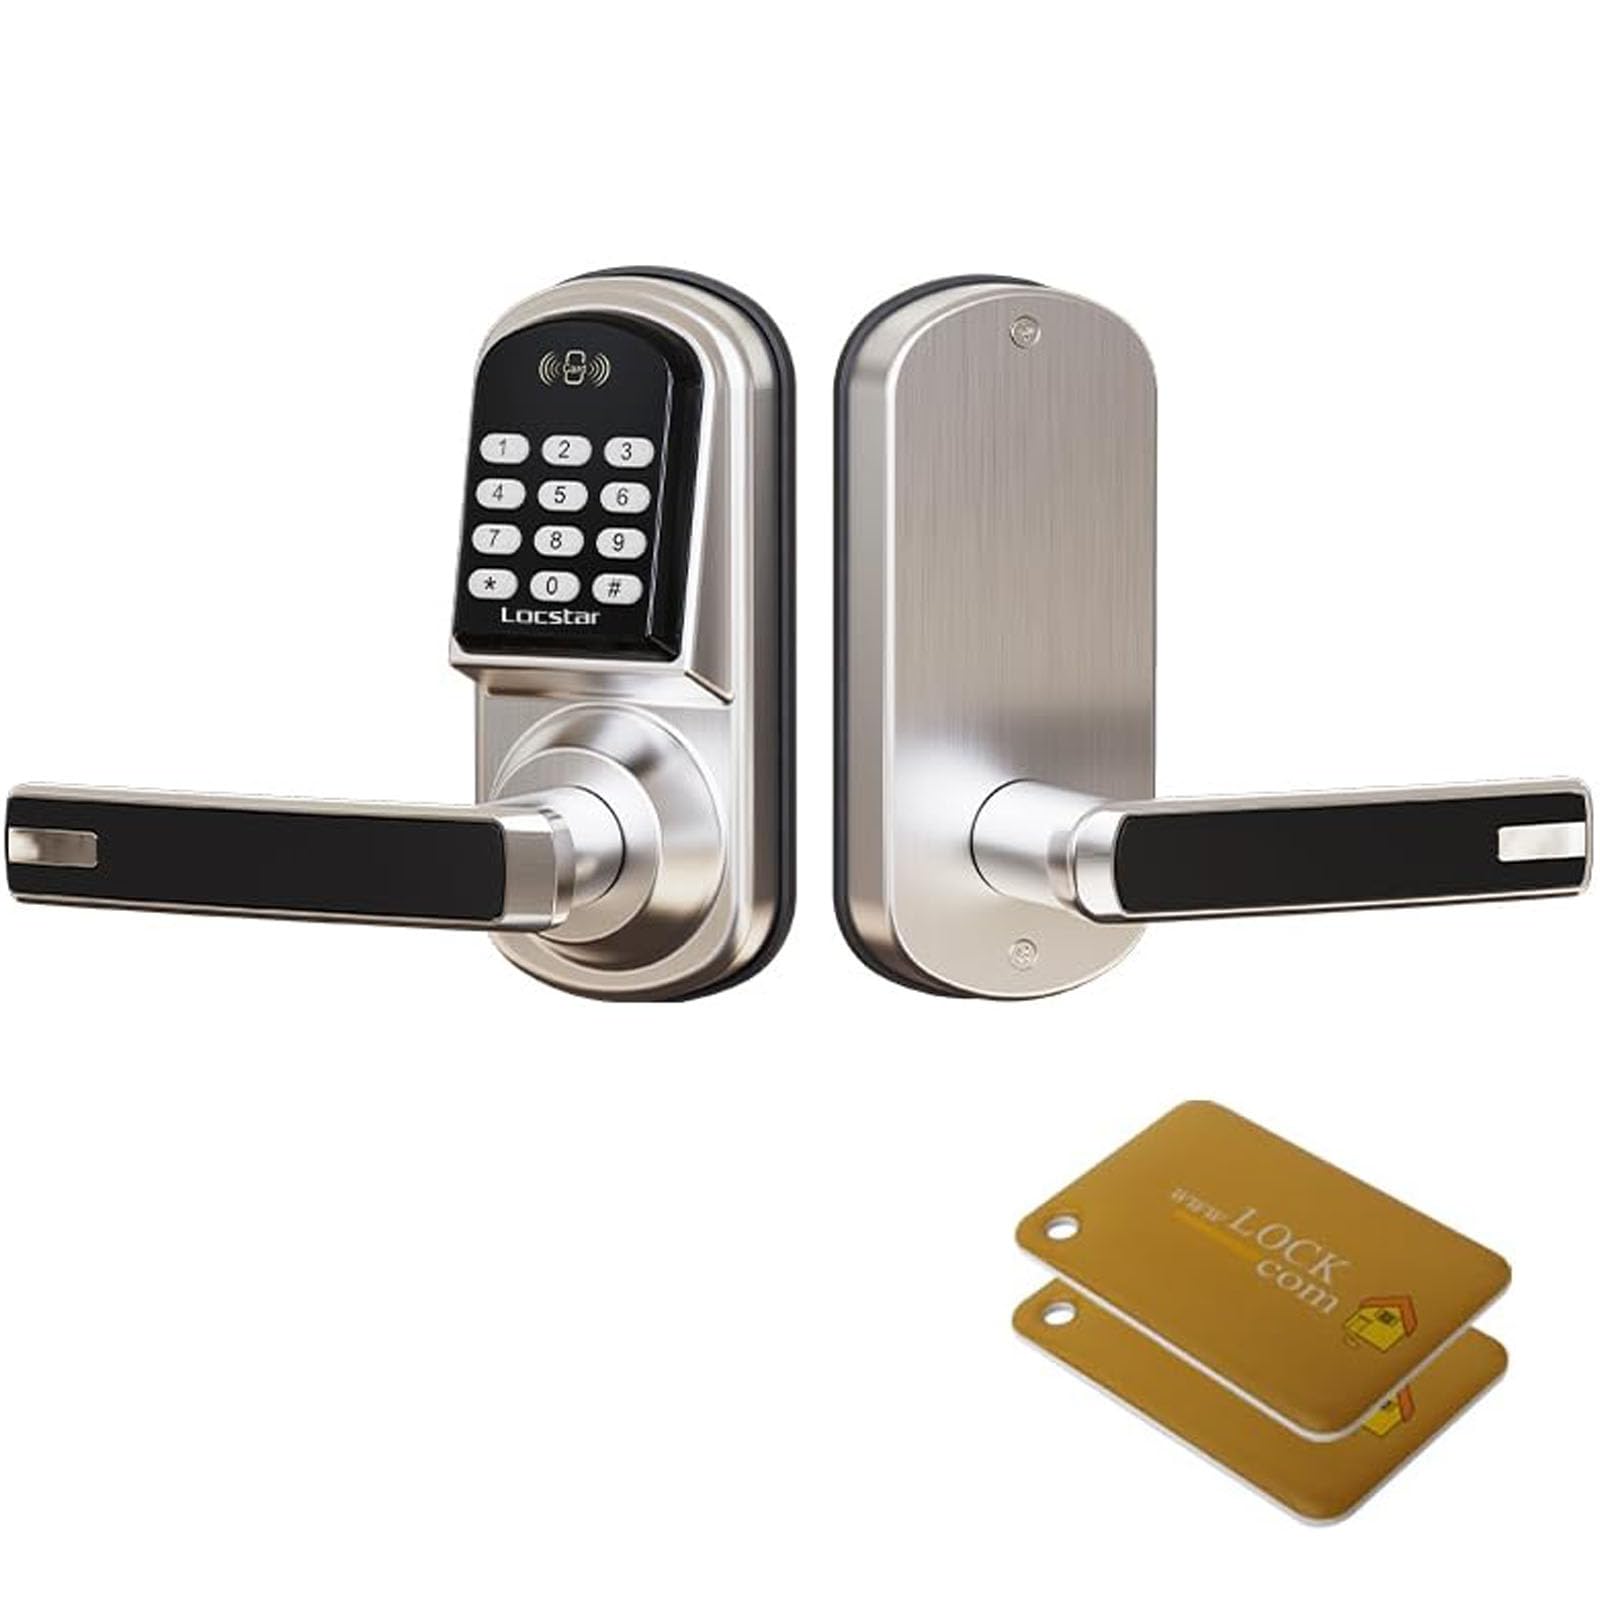
- Smart Lock Assembly (Exterior and Interior Handles)
- Lock Body / Latch
- Instrukcja użytkownika
- Śruby montażowe i akcesoria
- Klucze mechaniczne

Image: Complete set of accessories for the Locstar LS-8015FM smart lock.
4. Specyfikacje
| Marka | Gwiazda Locstar |
| Nazwa modelu | LS-8015FM |
| Funkcja specjalna | Automatyczna blokada |
| Typ zamka | Left (Handed) |
| Tworzywo | Cynk |
| Pozycja Wymiary (dł. x szer. x wys.) | 2.7 x 3.38 x 6.11 cala |
| Waga przedmiotu | 4.62 funta |
| Wymagane baterie | Yes (4 AA alkaline batteries, not included) |

Image: Detailed dimensions for the Locstar LS-8015FM lock and its latch, suitable for DIY installation.
5. Konfiguracja i instalacja
The Locstar LS-8015FM lock is designed for easy DIY installation, typically requiring only a Phillips screwdriver. It is compatible with most standard door types and thicknesses (1.5 to 2.1 inches).
5.1 Przygotowanie
- Ensure your door is within the specified thickness range.
- Gather a Phillips head screwdriver.
- Zdemontuj wszystkie istniejące elementy mocujące drzwi.

Image: The Locstar LS-8015FM smart lock ready for DIY installation on a door.
5.2 Kroki instalacji
- Install the lock tongue: Włóż zatrzask do krawędzi drzwi i przymocuj go śrubami.
- Zainstaluj panel przedni: Connect the front panel to the lock tongue, rotate, and tighten the insertion holes.
- Secure the center shaft: Install the center shaft and insert the pin into the fork, ensuring it is secure.
- Align and insert: Align the holes and insert the lock assembly into the door.
- Thread the cable: Carefully thread the connecting cable through the back panel of the door.
- Secure the back panel: Attach the back panel to the door with screws.
- Podłącz przewód: Podłącz kabel od panelu przedniego do panelu tylnego.
- Zainstaluj baterie: Insert four AA alkaline batteries into the battery compartment.
- Zresetuj (jeśli to konieczne): Press and hold the reset button for 10 seconds to restore default settings. (Press 0# for default unlocking).
- Cover the back panel: Attach the cover to the back panel and tighten the screws to complete installation.
Image: Installation steps 1-6 for the Locstar LS-8015FM smart lock.

Image: Installation steps 7-12 for the Locstar LS-8015FM smart lock, including battery installation and final cover attachment.
6. Instrukcja obsługi
The Locstar LS-8015FM offers multiple convenient ways to unlock your door.
Obraz: Ponadview of unlocking methods: Card, Passcode, and Key, along with the lock's aluminum alloy construction and battery box location.
6.1 Metody odblokowywania
- Odblokowanie kodem dostępu: Enter your programmed passcode on the keypad, then press '#'. The lock will provide audible and visual feedback upon successful entry.
- Odblokowanie karty: Present a registered IC card to the card reader area on the lock. The lock will unlock automatically.
- Odblokowanie kluczem: Insert the mechanical key into the keyway and turn to unlock the door. This is a backup method for emergencies or battery depletion.

Image: Visual representation of IC card and password unlock options for the Locstar smart lock.
6.2 Programming Passcodes and Cards
Refer to the specific programming section in your detailed user guide for initial setup and modification of user passcodes and IC cards. This typically involves entering a master code followed by specific commands to add or delete user credentials.
6.3 Funkcja automatycznej blokady
The lock is equipped with an auto-lock feature that automatically re-locks the door after a set period once it has been unlocked. This feature enhances security and can usually be configured or disabled through the lock's programming menu.
6.4 Backlit Keypad
The keypad features backlighting, allowing for clear visibility and operation even in low-light conditions or at night.
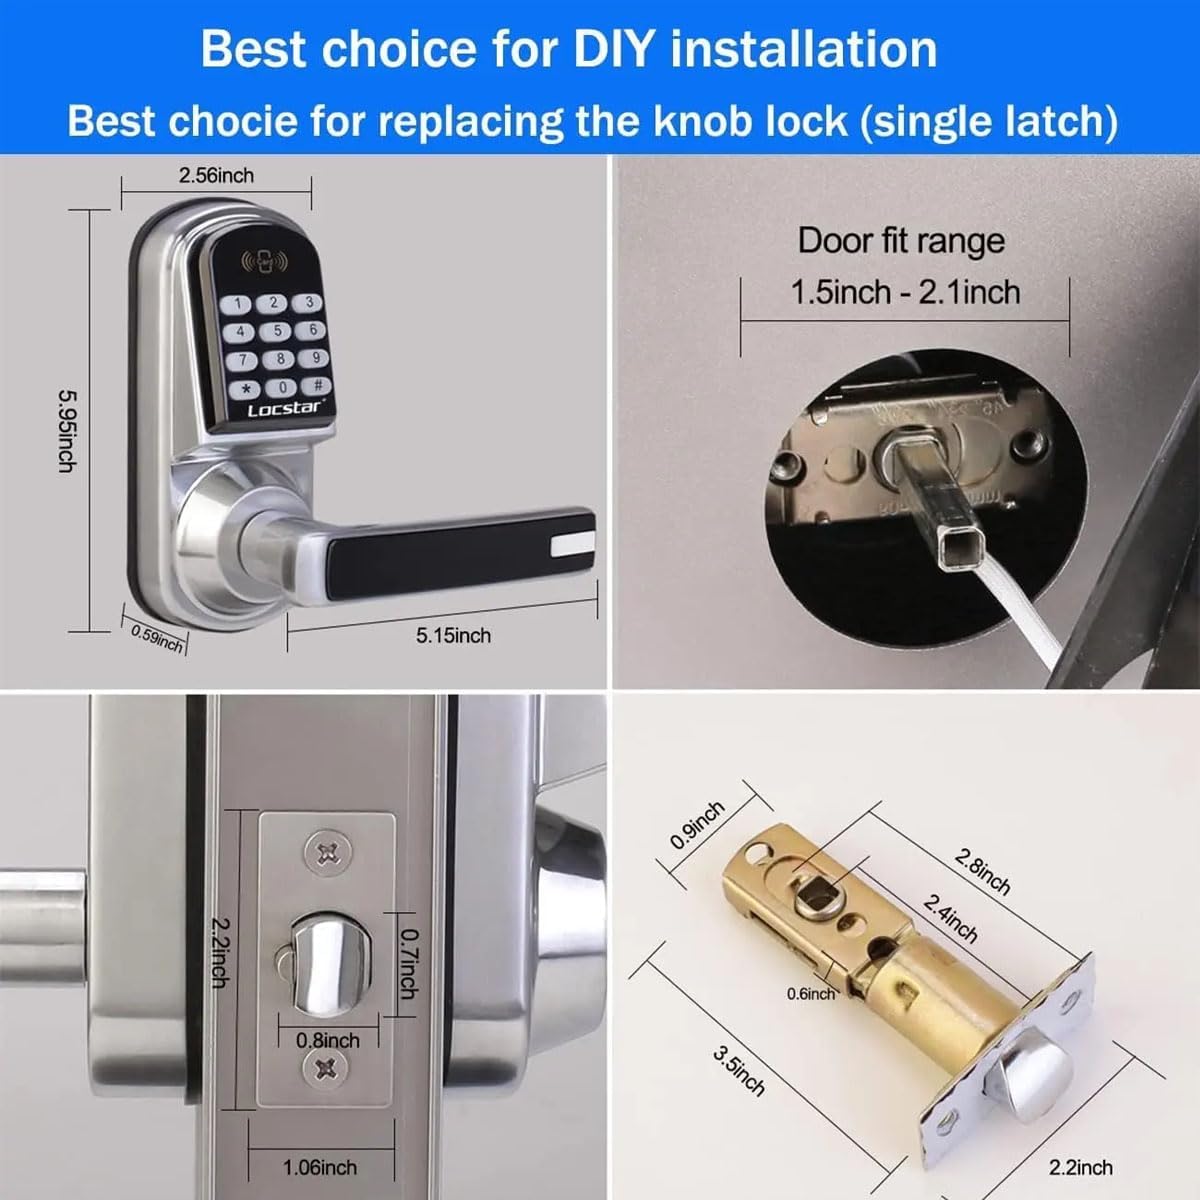
Image: The Locstar LS-8015FM smart lock with its backlit keypad clearly visible at night.
7. Konserwacja
7.1 Wymiana baterii
The lock requires 4 AA alkaline batteries. When the batteries are low, the lock will typically provide an audible or visual low-battery warning. Replace all four batteries simultaneously to ensure optimal performance.
- Open the battery compartment cover on the interior side of the lock.
- Wyjmij stare baterie.
- Włóż nowe baterie alkaliczne AA, zwracając uwagę na prawidłową biegunowość (+/-).
- Zamknij pokrywę komory baterii.
7.2 Czyszczenie
Wyczyść zewnętrzną część zamka miękką szmatką.amp ściereczką. Unikaj stosowania środków czyszczących o działaniu ściernym, rozpuszczalników i środków chemicznych w sprayu, ponieważ mogą one uszkodzić wykończenie i elementy elektroniczne.
8. Rozwiązywanie Problemów
If you encounter issues with your Locstar LS-8015FM lock, refer to the following common problems and solutions:
- Zamek nie odpowiada: Check battery levels. Replace batteries if necessary. Ensure the cable connection between the front and back panels is secure.
- Kod dostępu nie działa: Verify that you are entering the correct passcode. Ensure the lock is not in a 'locked out' state due to multiple incorrect entries. Try resetting the lock to factory settings (refer to installation step 5.2, point 9).
- Klucz mechaniczny nie działa: Ensure the key is fully inserted and turned correctly. If the key is bent or damaged, do not force it.
- Auto-lock not engaging: Check the lock's programming settings to ensure the auto-lock feature is enabled and configured with the desired delay.
- Difficulty turning handle: Ensure the lock body/latch is properly aligned and installed. Check for any obstructions in the door frame or strike plate.
W przypadku powtarzających się problemów skontaktuj się z obsługą klienta.
9. Gwarancja i wsparcie
Locstar provides a comprehensive warranty that covers defects in materials and workmanship for the LS-8015FM Keyless Entry Door Lock. For specific warranty terms and conditions, please refer to the warranty card included with your product or contact Locstar customer support.
Obsługa klienta
If you have any questions, require technical assistance, or need to report an issue, please contact Locstar customer support through the retailer where the product was purchased or via the official Locstar webstrona.