LUUCCO 1
LUUCCO AirWave K2 Combo Wireless Microphone User Manual
Model: K2 | Brand: LUUCCO
Wstęp
Thank you for choosing the LUUCCO AirWave K2 Combo Wireless Microphone. This system is designed to provide high-quality audio recording for a variety of applications, including live streaming, YouTube recording, vlogging, and more. Its magnetic design offers versatile wearing options, and wide compatibility ensures seamless integration with iPhone, Android devices, and cameras. Please read this manual carefully to ensure proper use and maintenance of your device.
Co jest w pudełku
Sprawdź, czy w pakiecie znajdują się wszystkie komponenty:
- LUUCCO AirWave K2 Transmitters (TX)
- LUUCCO AirWave K2 Receiver (RX) (USB-C or Lightning, depending on model)
- Etui ładujące
- Kabel ładujący
- Instrukcja obsługi
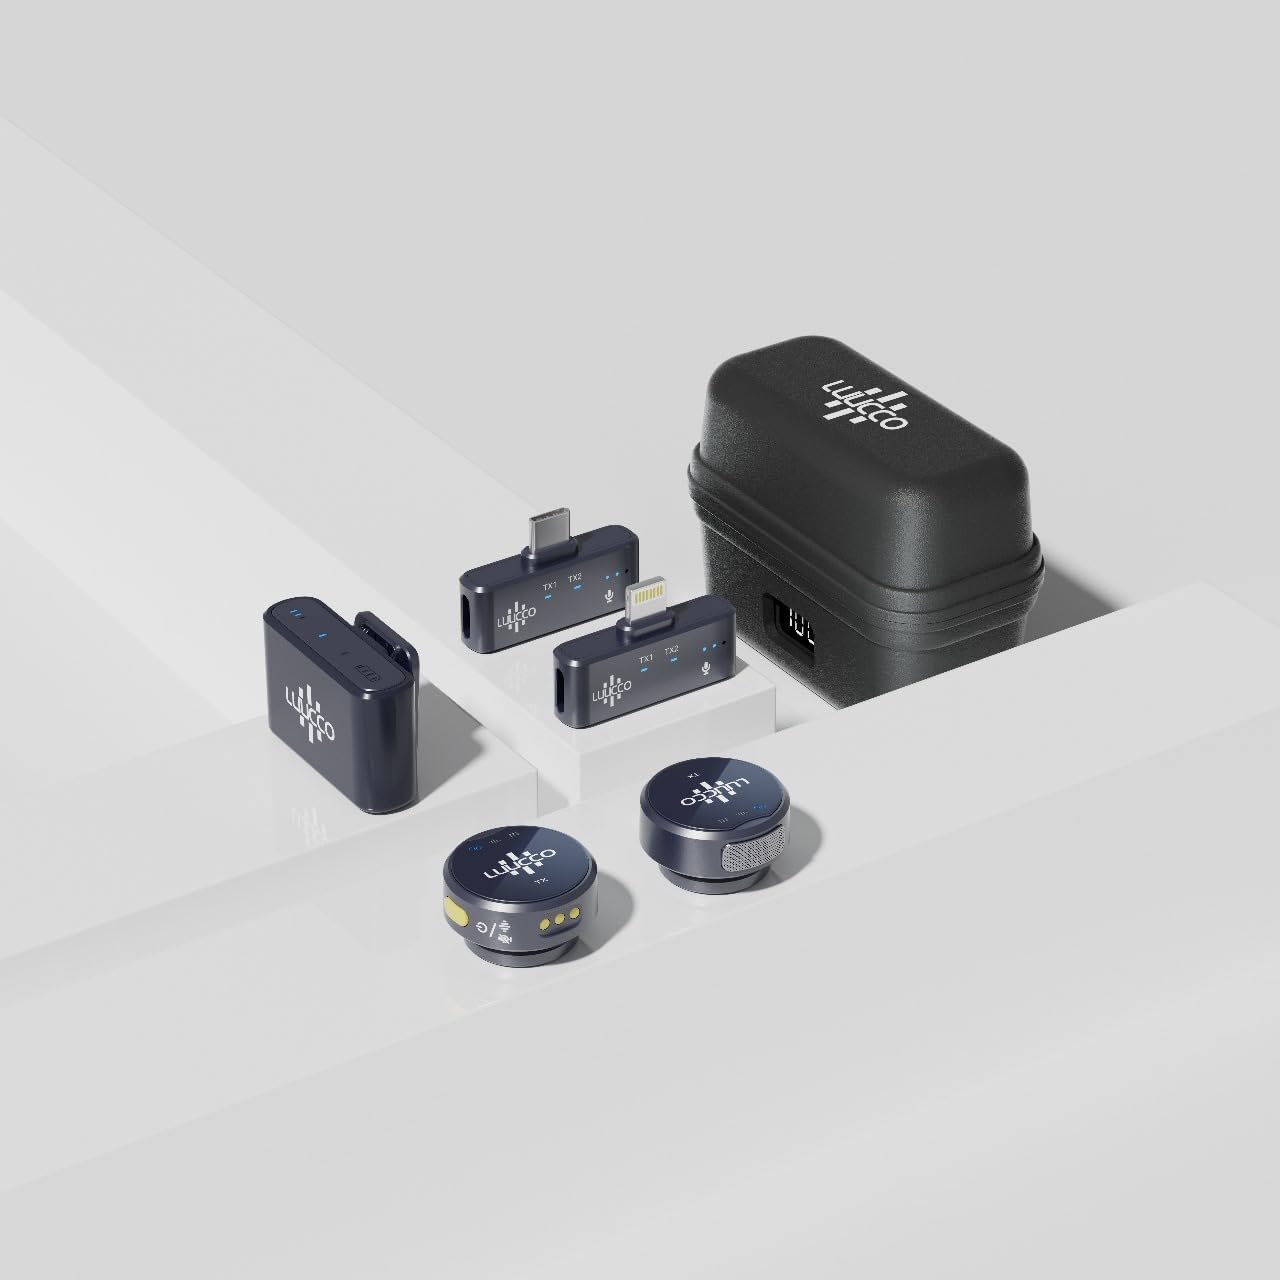
Image: The complete LUUCCO AirWave K2 Combo Wireless Microphone kit, including transmitters, receiver, and charging case.

Obraz: szczegółowy view of the individual components of the LUUCCO AirWave K2 Combo, showing the charging case, receiver, and two transmitters.
Przewodnik po konfiguracji
1. Ładowanie urządzeń
Before first use, ensure both the transmitters (TX) and the charging case are fully charged.
- Place the transmitters into the charging case.
- Podłącz etui ładujące do źródła zasilania za pomocą dostarczonego kabla USB.
- Cyfrowy wyświetlacz na etui ładującym pokaże procent naładowania bateriitage.
- A full charge typically takes less than 1.5 hours. The charging case provides over 1.5 full charges for the transmitters, offering up to 15 hours of total battery life.

Image: The LUUCCO AirWave K2 charging case displaying its digital power percentage, highlighting its long battery life and quick charging capabilities.
2. Podłączenie odbiornika
The receiver (RX) is plug-and-play. Simply connect it to your recording device.
- Dla smartfonów (iPhone/Android): Plug the appropriate receiver (Lightning for iPhone, USB-C for Android) directly into your phone's charging port.
- For Cameras/Computers: Use the 3.5mm jack receiver (if included with your specific model) or a compatible adapter to connect to your camera's microphone input or computer's audio input.
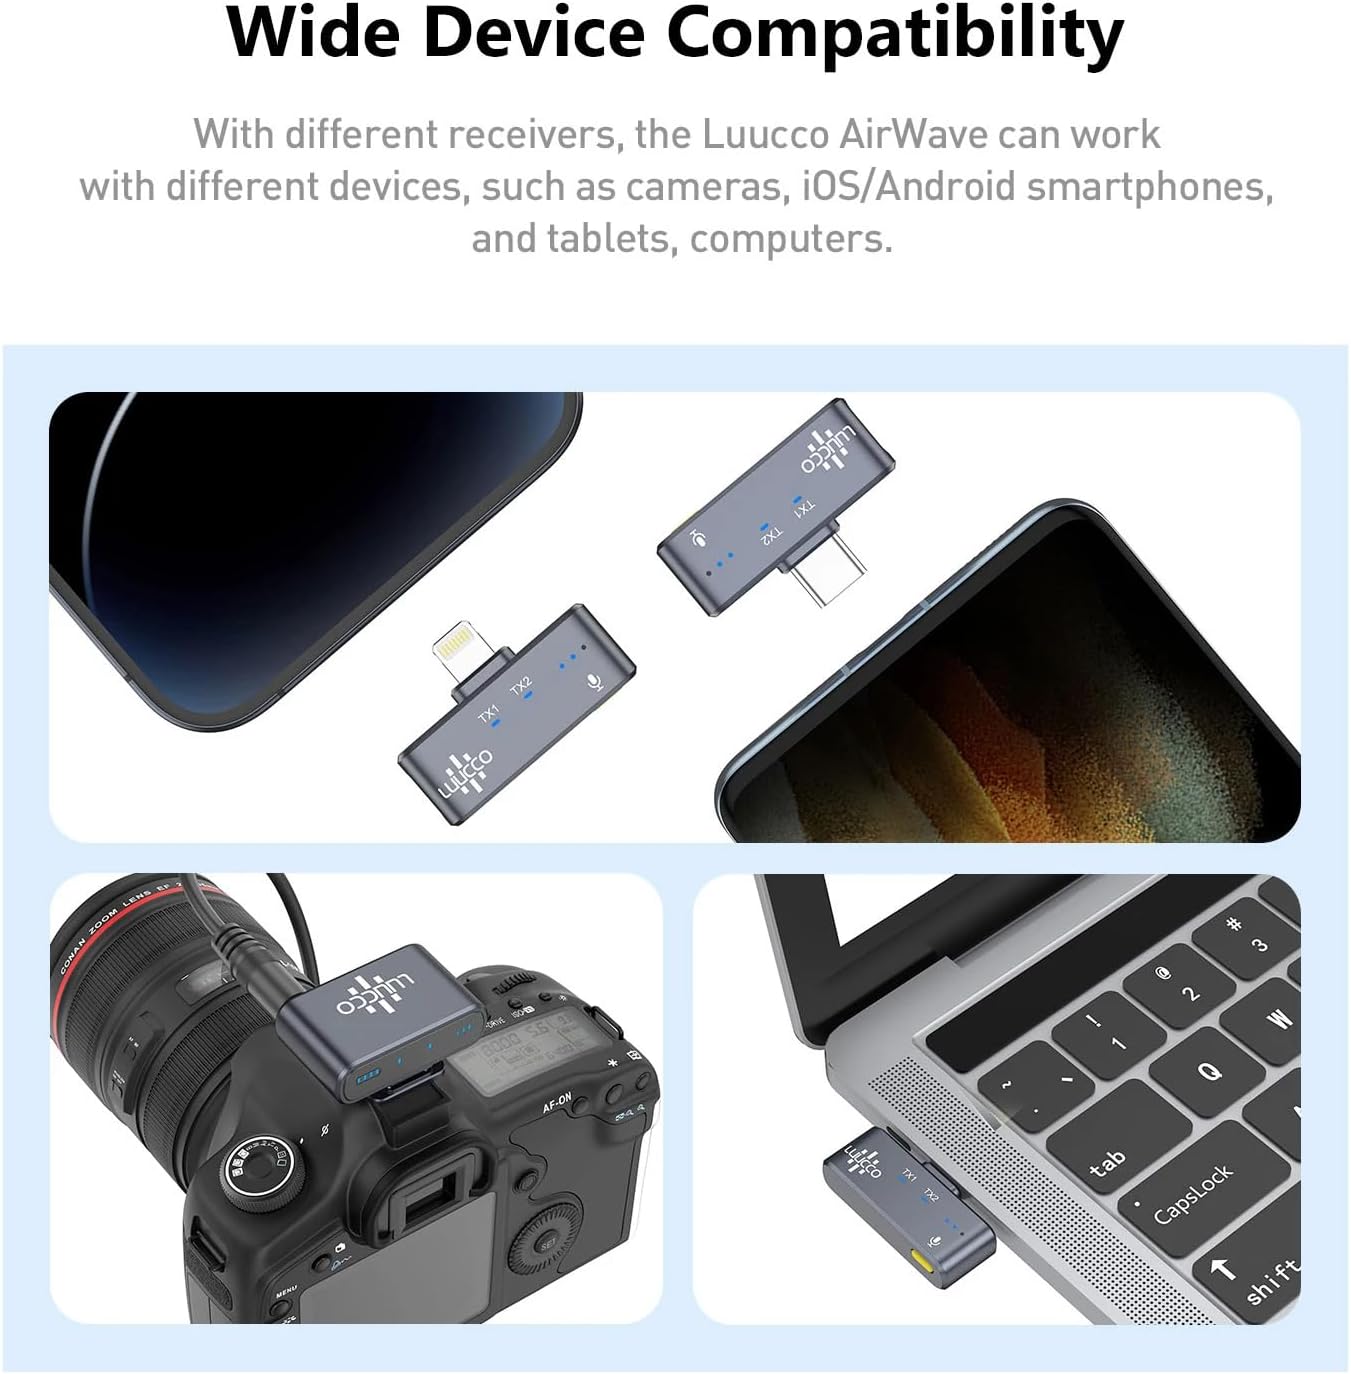
Image: Demonstrates the wide compatibility of the LUUCCO AirWave K2, showing its receivers connected to an iPhone, Android phone, camera, and laptop.
3. Powering On Transmitters
Once the receiver is connected, take the transmitters out of the charging case. They will automatically power on and attempt to pair with the receiver.
- The indicator light on the transmitter will blink while searching for a connection and turn solid when successfully paired.
Instrukcja obsługi
1. Noszenie nadajnika
The LUUCCO AirWave K2 features a magnetic design for versatile wearing options:
- Zapinane na zatrzask: Use the integrated clip to attach the transmitter to clothing, such as a collar or lapel.
- Mocowanie magnetyczne: The magnetic back allows it to be attached to any magnetic surface or used with a magnetic necklace (not included) for discreet placement.
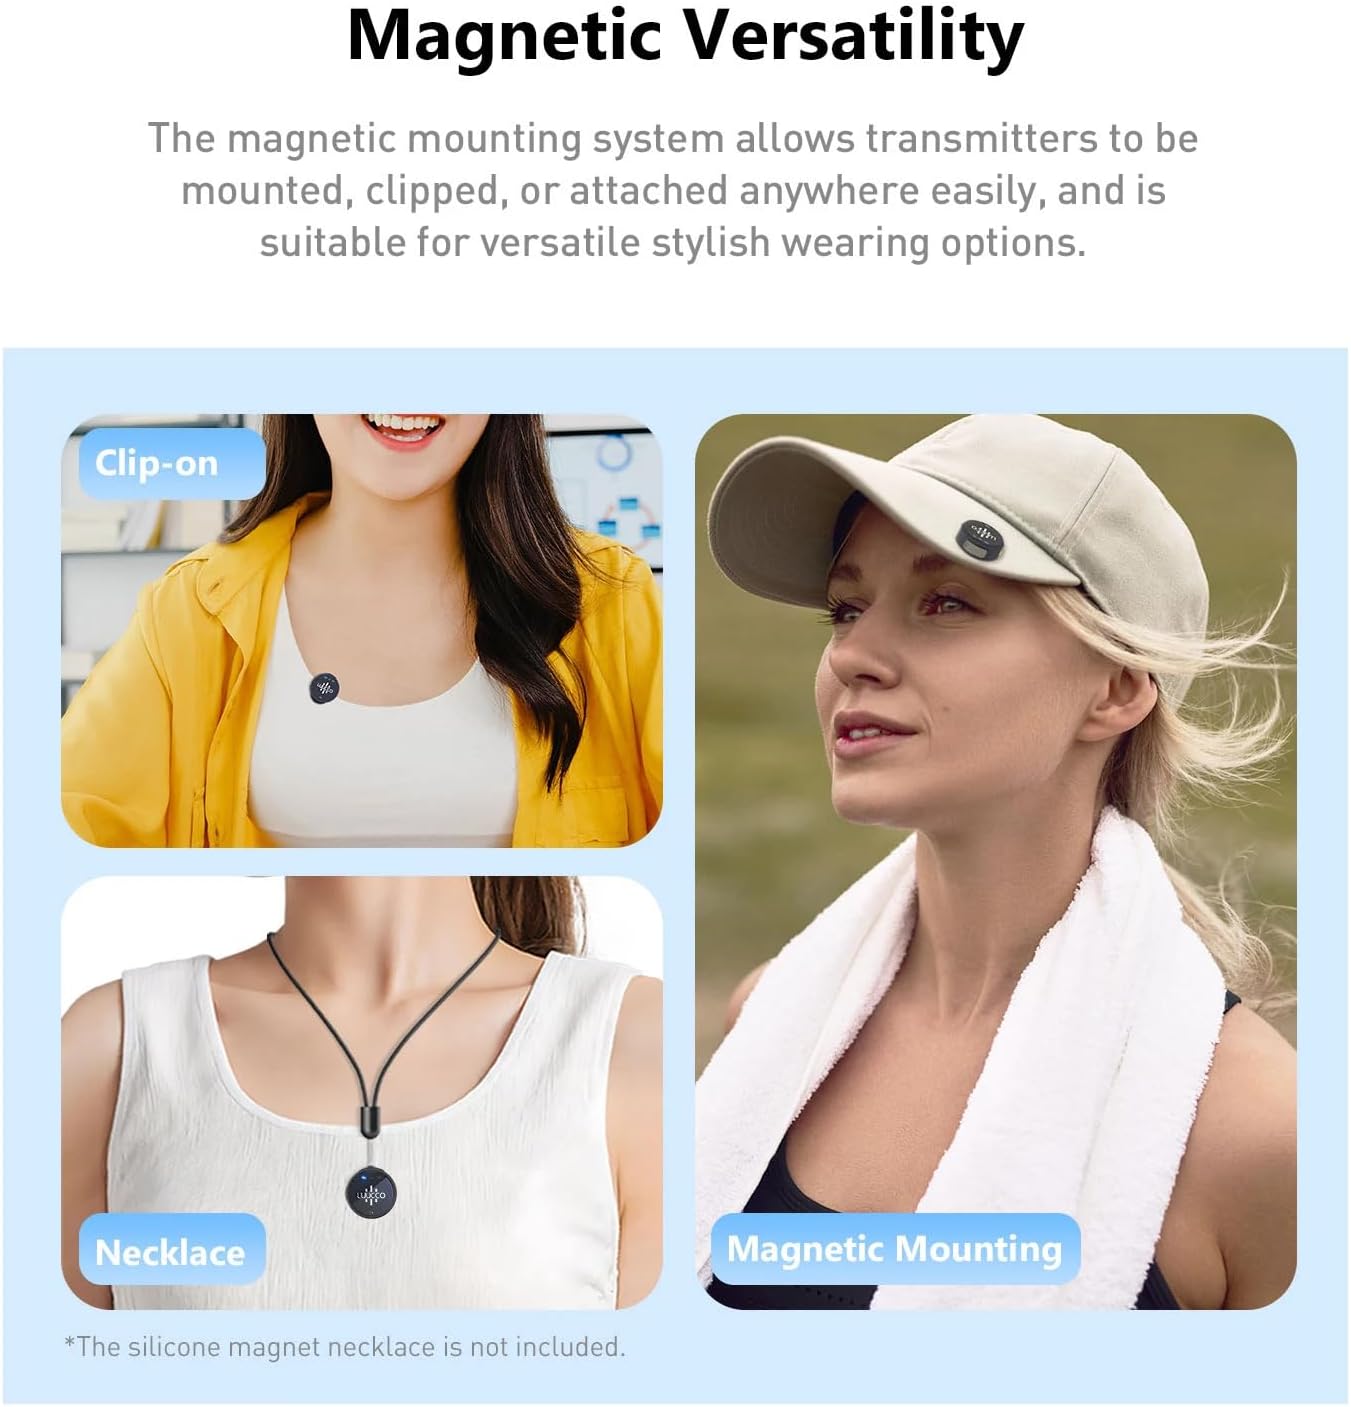
Image: Illustrates the magnetic versatility of the LUUCCO AirWave K2, showing it used as a clip-on microphone, attached magnetically to a hat, and worn with a magnetic necklace.
2. Nagrywanie dźwięku
Once the receiver is connected and transmitters are paired, you can begin recording.
- Open your preferred recording application (e.g., camera app, voice recorder, live streaming app) on your smartphone or camera.
- Ensure the external microphone input is selected if your device requires it.
- Start recording. The microphone will capture clear audio from up to 100 meters (328 feet) away using 2.4GHz wireless transmission.

Image: Depicts the 100m wireless transmission capability of the LUUCCO AirWave K2, showing a person recording outdoors with a smartphone and the microphone.

Image: Shows various usage scenarios for the LUUCCO AirWave K2, including interviews, podcasts, vlogs, and fitness recording, demonstrating its versatility for different content creation needs.
3. Volume Control (if applicable)
Some models of the AirWave K2 may feature volume control directly on the transmitter. Refer to your specific product variant for details.
Konserwacja
To ensure the longevity and optimal performance of your LUUCCO AirWave K2, follow these maintenance guidelines:
- Czyszczenie: Wipe the devices with a soft, dry cloth. Do not use liquid cleaners or solvents.
- Składowanie: Store the microphone system in its charging case when not in use to protect it from dust and physical damage. Store in a cool, dry place.
- Pielęgnacja baterii: For long-term storage, charge the devices to about 50% every three months to preserve battery health.
- Unikaj ekstremalnych warunków: Nie wystawiaj urządzeń na działanie ekstremalnych temperatur, wilgoci ani bezpośredniego światła słonecznego.
Rozwiązywanie problemów
| Problem | Możliwa przyczyna | Rozwiązanie |
|---|---|---|
| Brak nagrania audio | Microphone not paired; Receiver not properly connected; Low battery; App settings. |
|
| Słaba jakość dźwięku / Szum | Interference; Distance too far; Obstructions. |
|
| Nadajnik nie ładuje się | Improper placement in case; Dirty charging contacts; Faulty cable/power source. |
|
Specyfikacje
| Funkcja | Szczegół |
|---|---|
| Marka | LUUCCO |
| Model | AirWave K2 Combo |
| Technologia łączności | UHF (2.4GHz Wireless) |
| Zasięg transmisji bezprzewodowej | Do 100 m (328 stóp) |
| Kompatybilne urządzenia | iPhone, Android, Camera, Computer |
| Battery Life (Transmitters) | Approx. 6 hours (per charge) |
| Żywotność baterii etui ładującego | Provides >1.5 full charges (up to 15 hours total) |
| Czas ładowania | Mniej niż 1.5 godziny |
| Cechy specjalne | Magnetic Design, Digital Power Display (on case), Volume Control (on some models) |
| Waga przedmiotu | 210 gramów |
| Wymiary opakowania | Wymiary 13.5 x 11.4 x 5.9 cm |
Gwarancja i wsparcie
LUUCCO products are designed for reliability and performance. This product comes with a standard manufacturer's warranty against defects in materials and workmanship from the date of purchase.
- Okres gwarancji: Please refer to your purchase receipt or product packaging for specific warranty duration.
- Roszczenia gwarancyjne: For warranty service, please contact the retailer where you purchased the product or visit the official LUUCCO webwitryna zawierająca informacje kontaktowe pomocy technicznej.
- Rozszerzona gwarancja: Extended warranty options may be available from third-party providers. (e.g., 1-Year Extended Warranty by Salama Care, 2-Year Extended Warranty by Salama Care).
For technical support, troubleshooting assistance, or general inquiries, please contact LUUCCO customer service through their official channels.
Ask a question about this manual
Ask about setup, troubleshooting, compatibility, parts, safety, or missing instructions. Manuals+ will review the question and use this page’s manual context to help answer it.