1. Informacje dotyczące bezpieczeństwa
Always prioritize safety when operating this snow blower. Read and understand all instructions before use.
- Unikaj obrażeń: Trzymaj ręce, stopy i odzież z dala od obracających się części.
- Tlenek węgla: Operate the engine in a well-ventilated area to prevent carbon monoxide poisoning. Never operate indoors.
- Sprzęt ochronny: Always wear appropriate personal protective equipment, including safety glasses or goggles and hearing protection. Wear sturdy footwear that provides good traction.
- Wyczyść obszar: Before starting, clear the area of any objects that could be thrown by the auger.
- Obsługa paliwa: Handle gasoline with extreme care. It is highly flammable. Store fuel in an approved container in a well-ventilated area away from ignition sources.
2. Koniec produktuview & Kluczowe cechy
The PowerSmart HB7109A is a robust two-stage gas snow blower designed for efficient snow removal in various conditions.
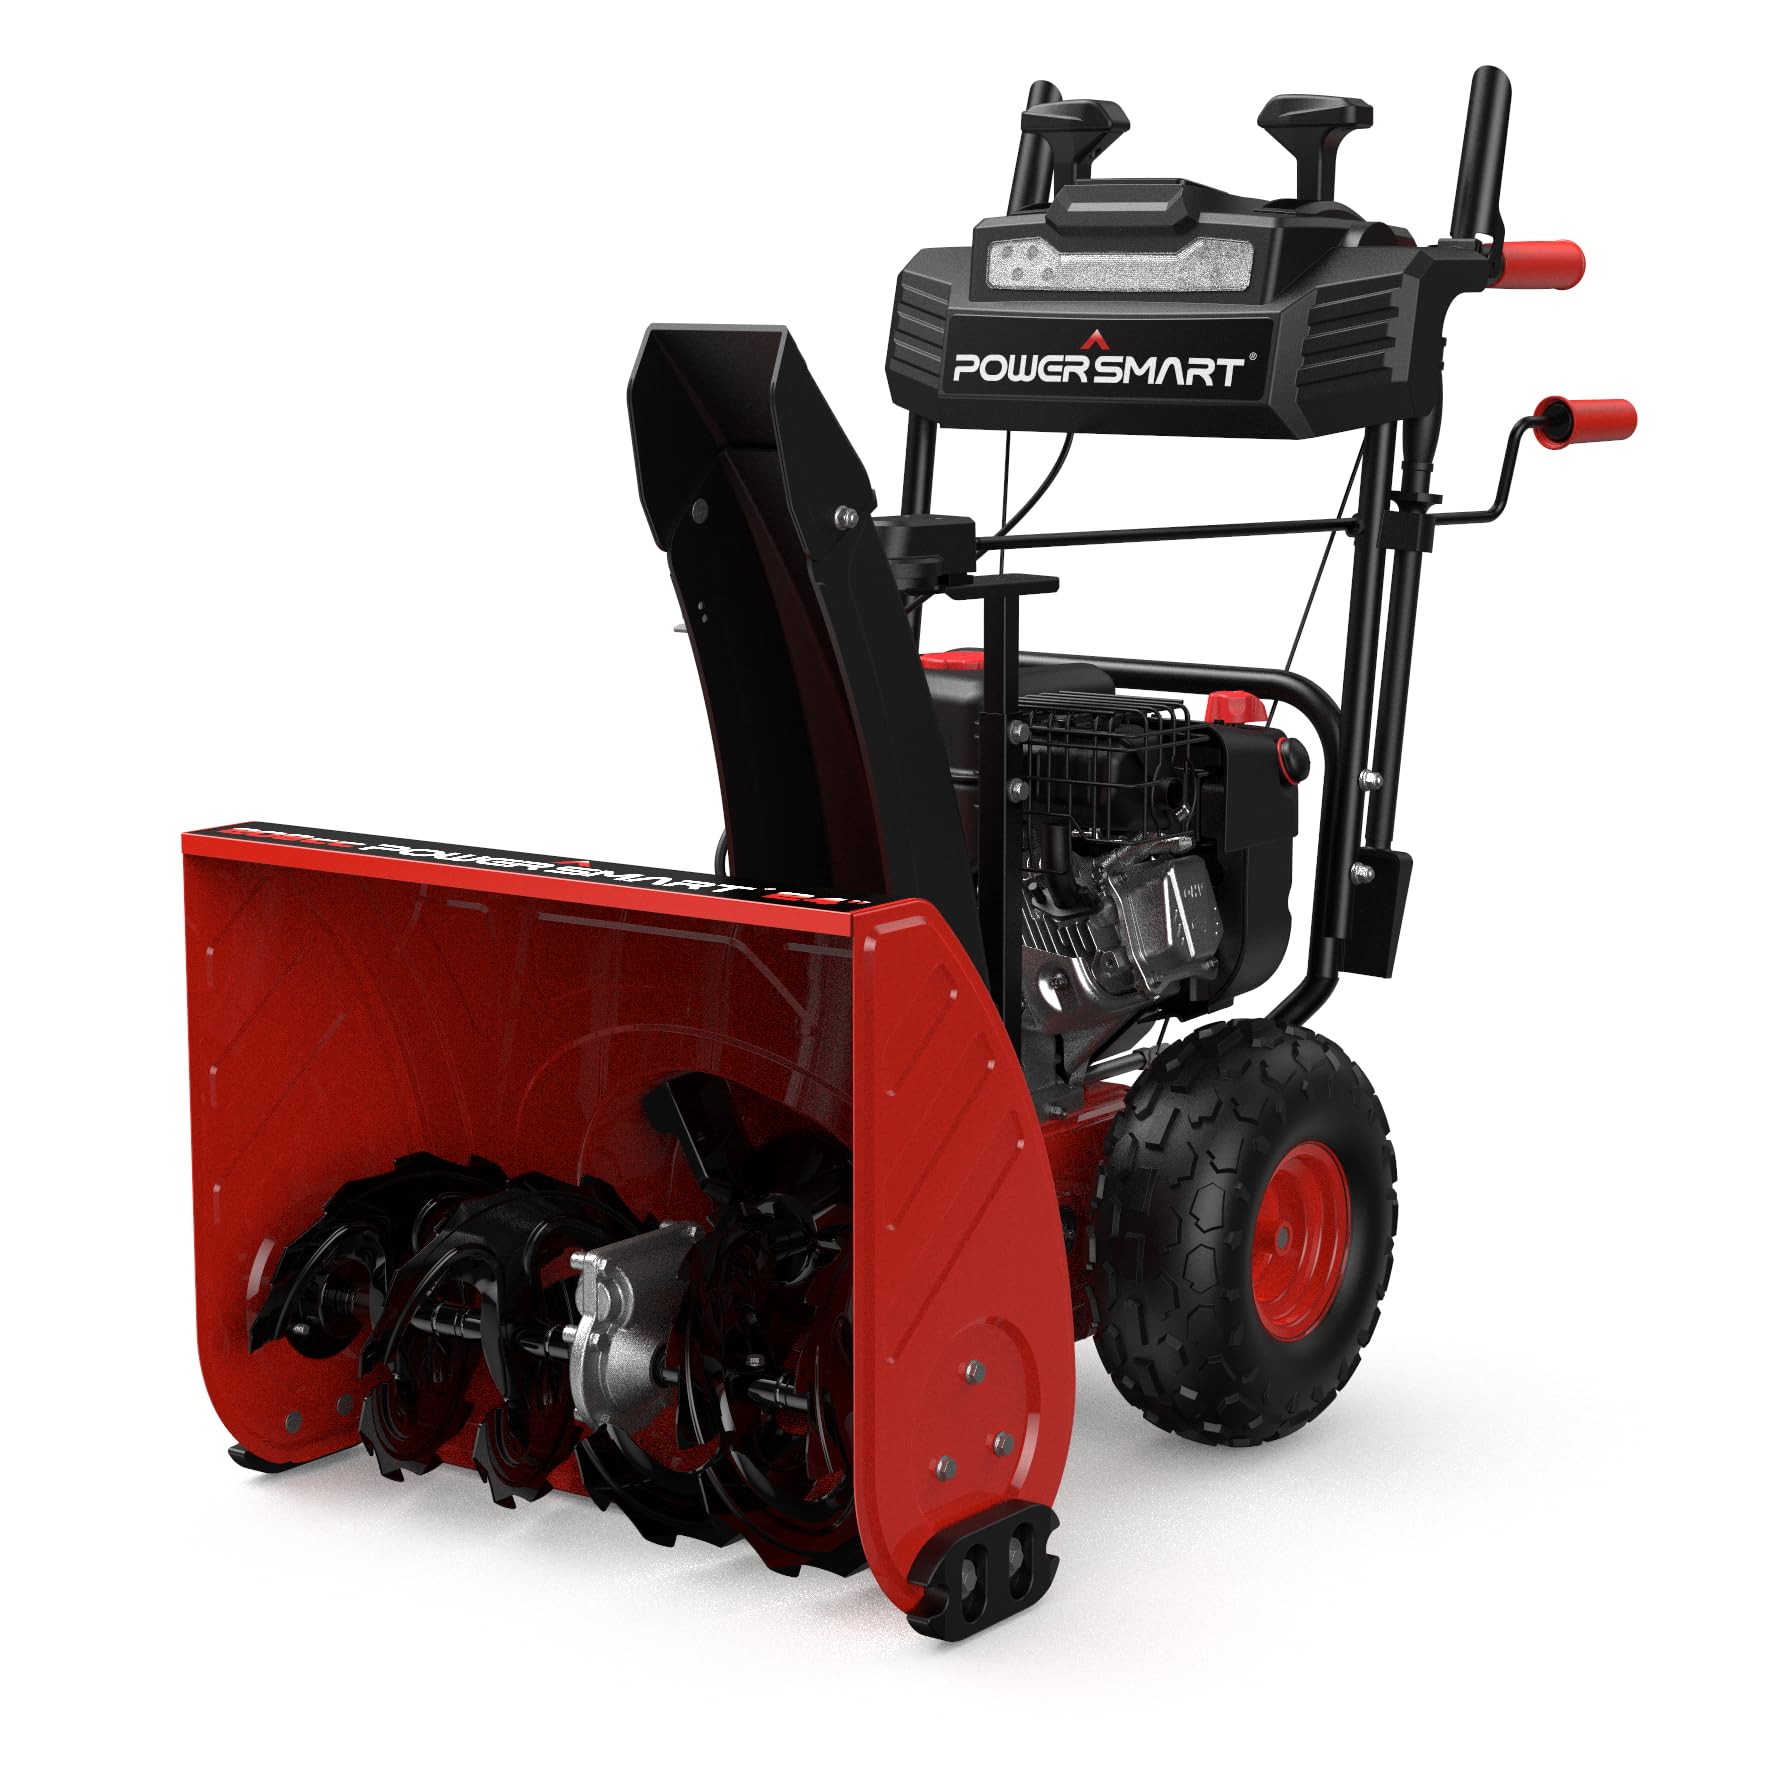
Ogólnie view of the PowerSmart 24-Inch Self-Propelled Two-Stage Gas Snow Blower.
- 24-Inch Clearing Width with Two-Stage System: Efficiently clears wide paths and handles heavy, wet snow with ease, ideal for large driveways and walkways.
- Powerful 208cc Briggs & Stratton Engine: Delivers reliable and robust performance for tackling tough winter conditions.
- Self-Propelled with 13-Inch Snow Tires: Provides superior traction and maneuverability on slippery surfaces, reducing user effort.
- Electric Start and Handle Warmer: Ensures quick, hassle-free ignition and keeps your hands warm during extended use in cold weather.
- Wbudowane światła LED: Enhances visibility for early morning or late-night snow removal, ensuring safety and convenience.

The snow blower is capable of clearing a 24-inch width and up to 20 inches of snow depth.

Z bliska view of the durable 12-inch all-steel augers designed for effective snow breakdown.
3. Instalacja i montaż
Follow these steps to assemble your PowerSmart snow blower. Refer to the included videos for visual guidance.
3.1 Attaching the Upper Handle
Secure the upper handle to the main unit using the provided bolts and nuts. Ensure all connections are tight.
3.2 Connecting Speed Control Rods and Cables
Attach the speed control connection rod and route the upper auger and drive cables as per the diagram. Ensure proper tension for smooth operation.
3.3 Installing the Chute Assembly
Mount the chute assembly and attach the chute control handle. This allows you to adjust the snow discharge direction.
Video: Detailed installation guide for the PowerSmart 24-Inch Gas Snow Blower, demonstrating step-by-step assembly.
Video: Assembly process for the PowerSmart Snow Blower, highlighting ease of setup.
Wideo: Review and assembly instructions for the PowerSmart Gas Snow Thrower.
4. Instrukcja obsługi
Familiarize yourself with the controls and operating procedures before using the snow blower.
4.1 Uruchomienie silnika
The snow blower features both electric start and recoil start options. Ensure the fuel tank is filled with fresh gasoline and the oil reservoir has the correct type and amount of oil.
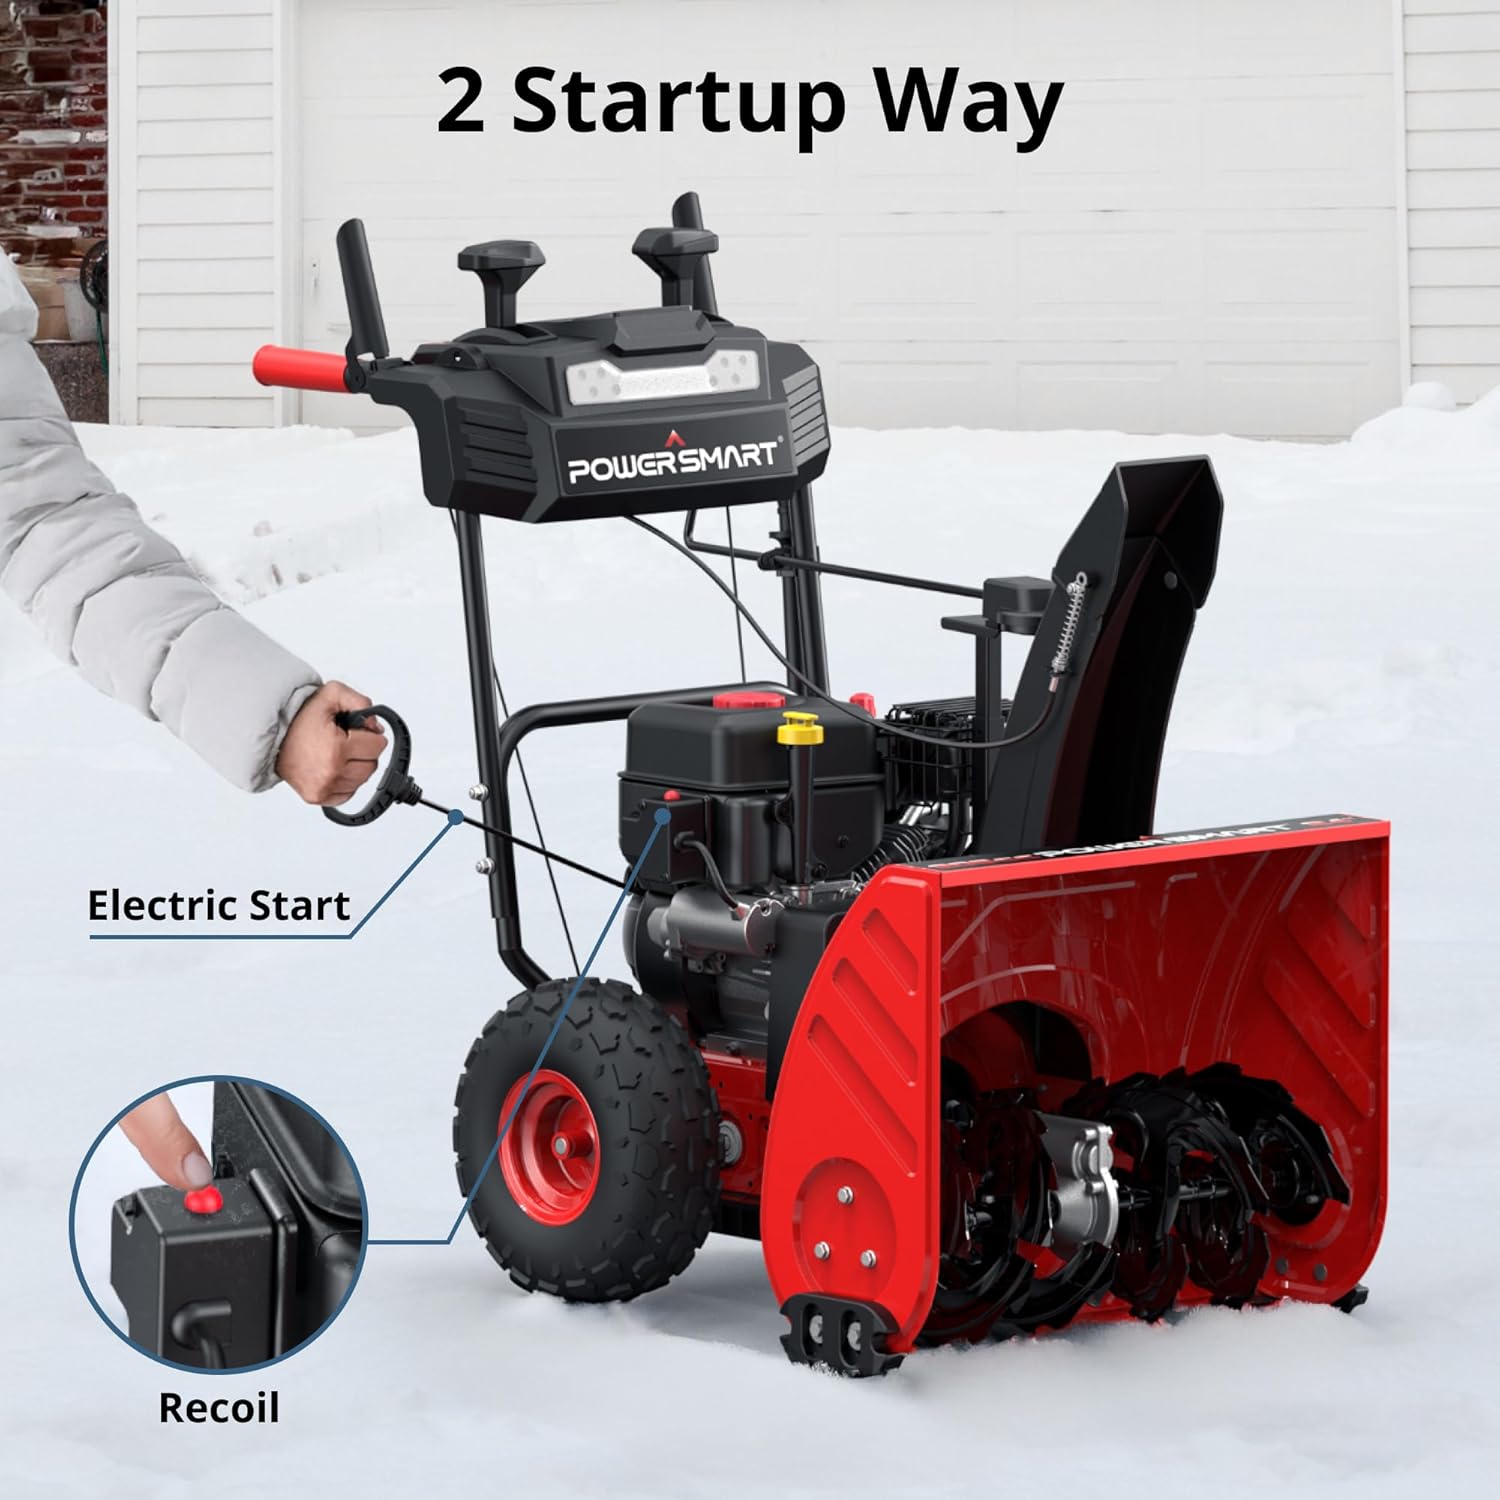
Illustration of the two startup methods: electric start (plug-in) and manual recoil start.
4.2 Engaging Drive and Augers
Use the self-propelled drive system for easier maneuverability. Engage the auger control to begin clearing snow.
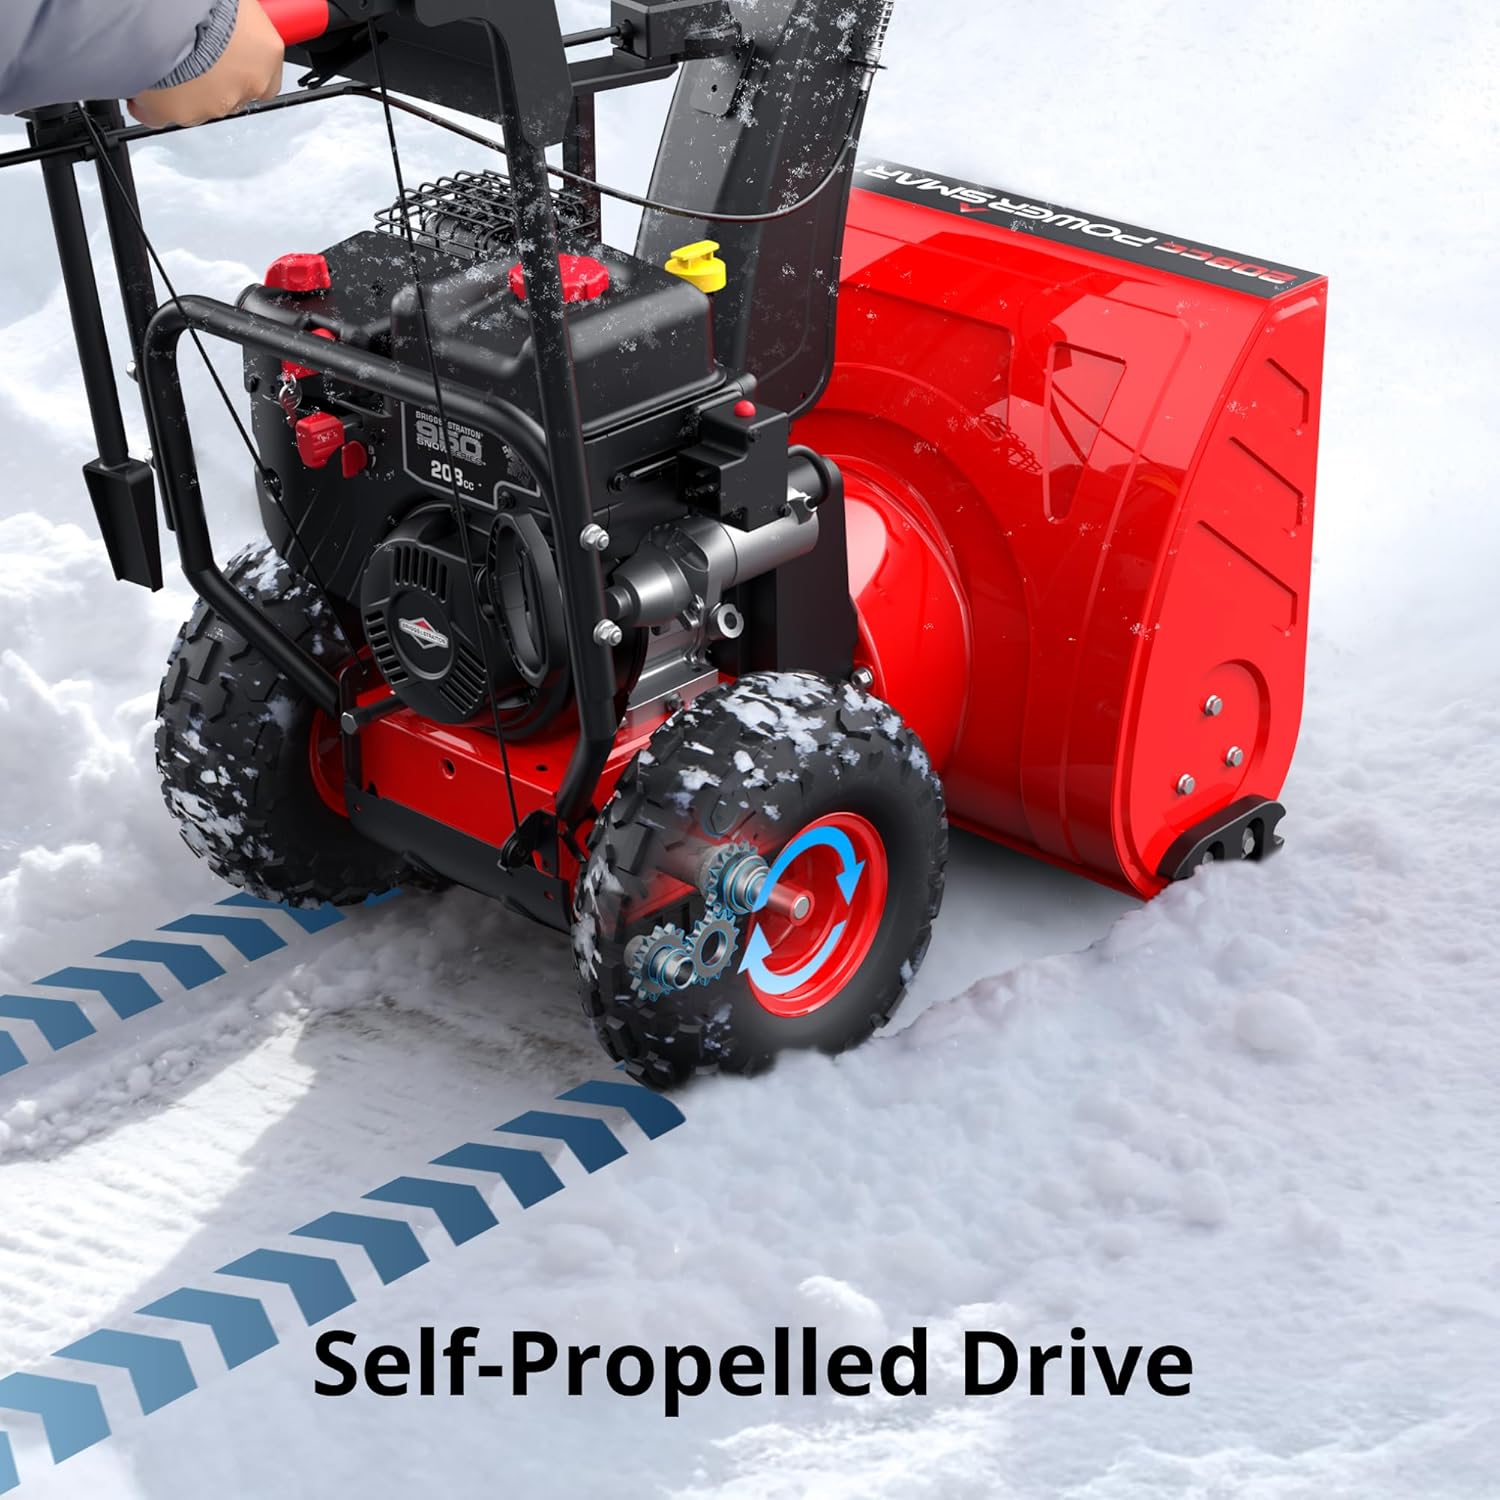
The self-propelled drive system provides assistance, reducing physical effort during operation.
4.3 Adjusting Snow Chute and Features
Adjust the 180-degree rotating chute to direct snow away from cleared areas. Utilize the built-in LED lights for visibility and the handle warmers for comfort in cold conditions.

Key operational features: bright LED light for visibility, heated handles for comfort, and a chute that rotates 180 degrees for precise snow discharge.
Video: Demonstrates the powerful snow clearing capabilities of the gas snow blower in heavy snow conditions.
Video: Shows the PowerSmart 24-Inch Self-Propelled Gas Snow Blower in action, clearing snow effectively.
Video: User testing and demonstration of the snow thrower's performance.
Video: Test of the PowerSmart Gas Snow Blower, showcasing its operational capabilities.
5. Konserwacja
Regularna konserwacja gwarantuje optymalną wydajność i długowieczność odśnieżarki.

Diagram showing essential maintenance parts including engine oil, auger drive belt, wheel drive belt, shear pins, key switch, shave plate, skid shoes, tires, heated hand grips, plastic chute, spark plug, and clean out tool.
- Olej silnikowy: Check oil level before each use. Use 5W-30 engine oil.
- Paliwo: Use fresh, clean gasoline. Avoid old or contaminated fuel.
- Świeca: Inspect and clean or replace the spark plug as needed for reliable starting.
- Paski: Regularly inspect the auger drive belt and wheel drive belt for wear and tear. Replace if damaged.
- Kołki ścinające: Keep spare shear pins on hand. These are designed to break to protect the auger and gearbox from damage if an object is struck.
- Buty poślizgowe: Adjust or replace skid shoes to maintain proper clearing height and protect the auger housing.
- Clean Out Tool: Use the provided clean out tool to remove clogs from the discharge chute. Never use hands.
6. Rozwiązywanie Problemów
If you encounter issues with your snow blower, refer to the following common troubleshooting tips:
- Silnik nie uruchamia się:
- Check fuel level and ensure it's fresh.
- Sprawdź poziom oleju.
- Ensure the spark plug is clean and properly connected.
- Confirm choke and primer settings are correct for starting.
- Check the on/off switch is in the 'ON' position.
- Silnik pracuje nieprawidłowo lub gaśnie:
- Check for stale fuel; drain and refill if necessary.
- Sprawdź, czy filtr powietrza nie jest zapchany.
- Ensure the spark plug is clean and gapped correctly.
- Snow Blower Not Clearing Effectively:
- Check for clogged discharge chute (use clean out tool).
- Inspect auger and impeller for obstructions or damage.
- Verify shear pins are intact.
- Adjust skid shoes for appropriate clearing height.
- Wyciek paliwa:
- Inspect fuel lines and connections for damage.
- If leakage is from the carburetor, it may require adjustment or repair by a qualified technician.
7. Specyfikacje
| Marka | PowerSmart |
| Numer modelu | HB7109A |
| Źródło zasilania | Zasilany gazem |
| Typ silnika | 4 Cykl |
| Pojemność silnika | 208 centymetrów sześciennych |
| Szerokość czyszczenia | 24 cali |
| Idealna głębokość śniegu | 12 cali |
| Rozmiar koła | 13 cali |
| Waga przedmiotu | 150.7 funta |
| Wymiary produktu | 32.3" gł. x 23.6" szer. x 24.78" wys. |
8. Gwarancja i wsparcie
For warranty information, technical support, or to order replacement parts, please contact PowerSmart customer support.
- Obsługa klienta: Refer to your product packaging or the official PowerSmart webna tej stronie znajdziesz najbardziej aktualne dane kontaktowe.
- Dostępność części: All parts are available. Contact customer service for specific part inquiries.
- Wsparcie telefoniczne: 1-888-293-0024 (as indicated on maintenance key image).