
SUVCON M02
Instrukcja obsługi kamery samochodowej SUVCON M02 4K
Model: M02
Wstęp
Thank you for choosing the SUVCON M02 4K Dash Cam. This manual provides detailed instructions for the installation, operation, and maintenance of your dash cam. Please read this manual thoroughly before using the product to ensure proper functionality and safety.
Ważne informacje dotyczące bezpieczeństwa
- Nie używaj kamery samochodowej podczas jazdy. Dostosuj ustawienia tylko wtedy, gdy pojazd jest bezpiecznie zaparkowany.
- Upewnij się, że kamera samochodowa jest bezpiecznie zamontowana i nie przeszkadza kierowcy. view lub wyzwolenie poduszki powietrznej.
- Use only the original power cable provided to prevent damage to the device or vehicle.
- Unikaj wystawiania kamery samochodowej na działanie ekstremalnych temperatur, długotrwałego bezpośredniego światła słonecznego i nadmiernej wilgoci.
- Do not attempt to disassemble or repair the dash cam yourself. Contact customer support for assistance.
- Format the memory card regularly to ensure optimal performance and prevent data corruption.
Zawartość opakowania
Proszę sprawdzić, czy w paczce znajdują się następujące elementy:
- SUVCON M02 4K Dash Cam (Front Camera)
- Kamera tylna (jeśli jest w zestawie)
- Car Charger with Power Cable
- Mocowanie przyssawki
- Zaciski kablowe
- Instrukcja obsługi
- 32GB MicroSD Card (if included in your package)
Produkt ponadview
Familiarize yourself with the components of your SUVCON M02 Dash Cam.
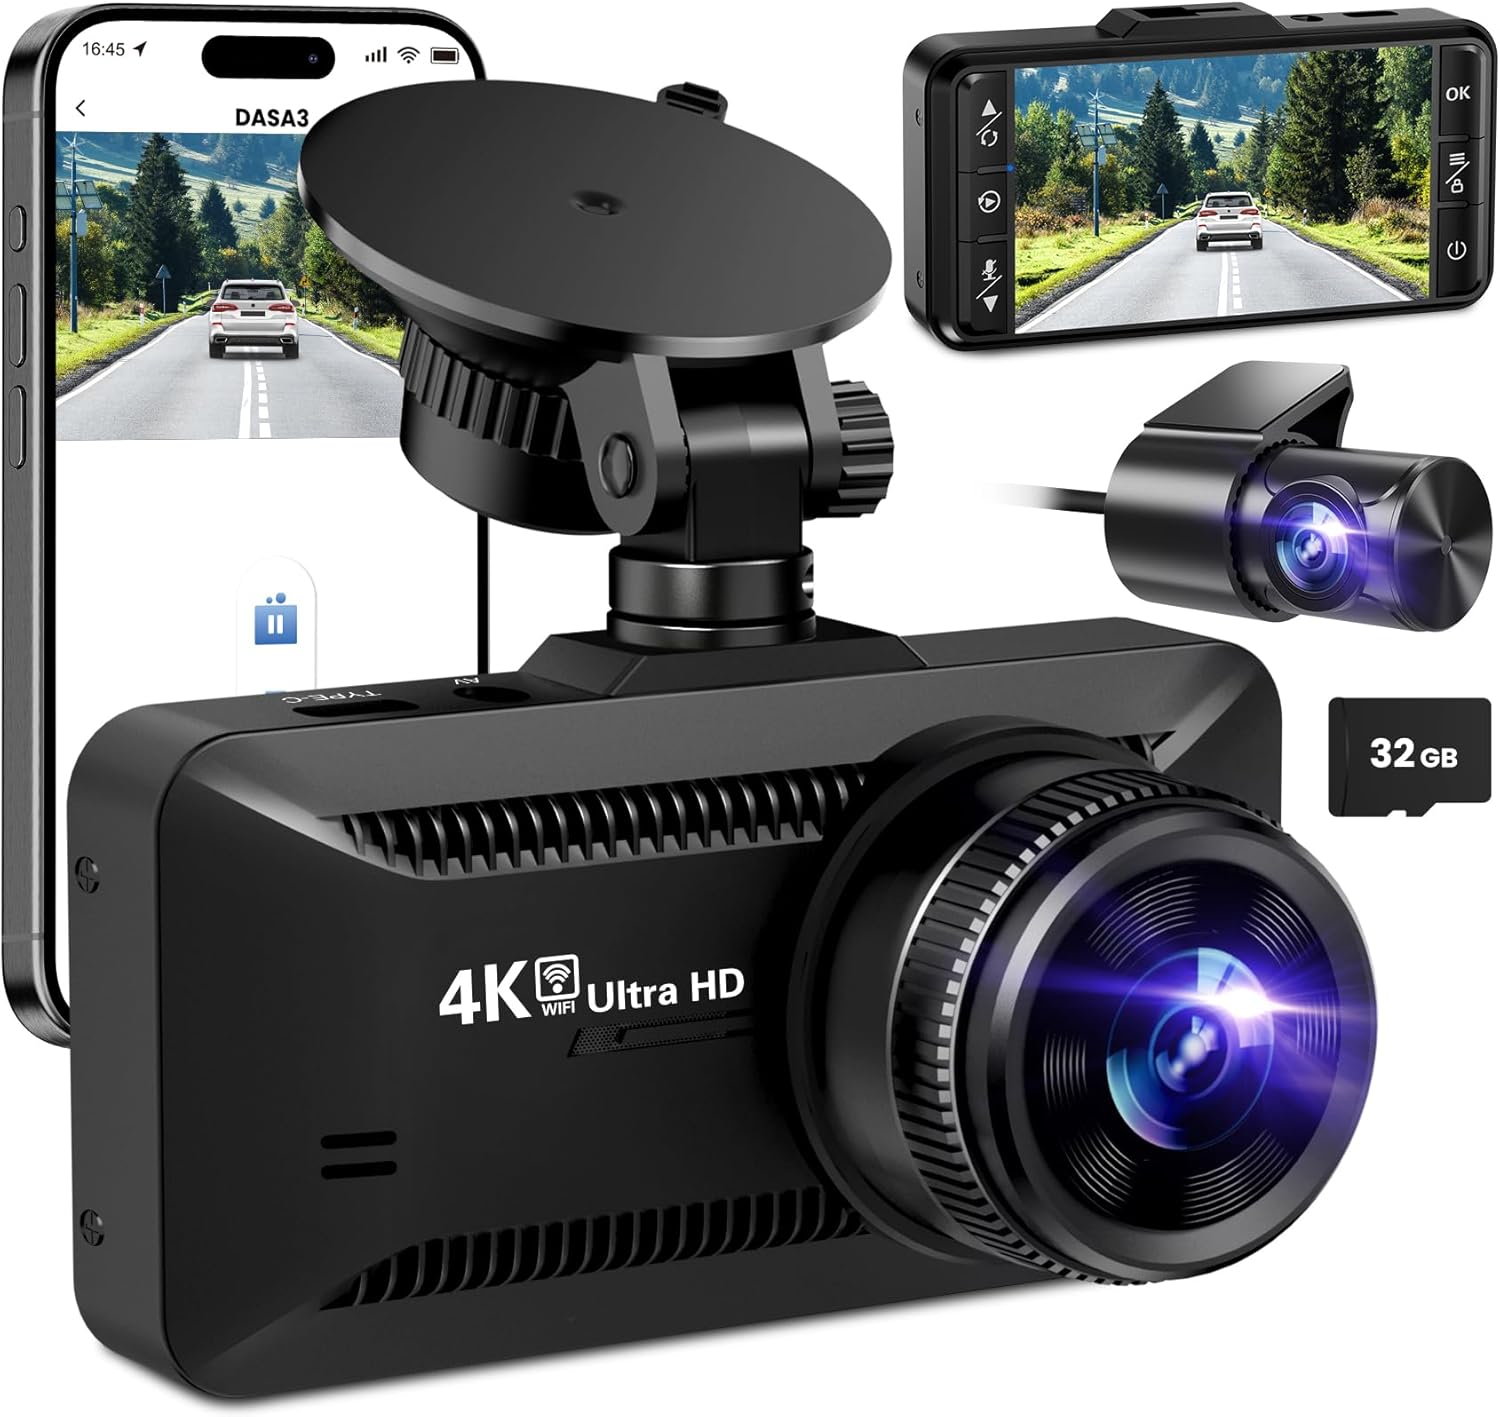
Obraz: The SUVCON M02 4K Dash Cam is shown with its main front camera unit, a separate rear camera, a smartphone displaying the dash cam's app interface, and a 32GB microSD card. The main unit features a prominent lens, a display screen on the back (not fully visible in this angle), and a suction cup mount. The rear camera is compact with its own lens. The smartphone screen shows a live view from the dash cam, indicating Wi-Fi connectivity.
Jednostka kamery przedniej
- Obiektyw: Nagrywa wideo w rozdzielczości 4K.
- Ekran wyświetlacza: Dla viewna żywotage, odtwarzanie i nawigacja po menu.
- Przyciski sterujące: Power, Menu, Up, Down, OK.
- Gniazdo kart microSD: Do wkładania karty pamięci.
- Port zasilania USB (typ C): Do podłączenia ładowarki samochodowej.
- Port kamery tylnej: For connecting the rear camera cable.
- Głośnik/Mikrofon: Do nagrywania i odtwarzania dźwięku.
Tylna kamera
- Obiektyw: Captures rear view wideo.
- Kabel: Connects to the main dash cam unit.
Konfiguracja i instalacja
1. Wkładanie karty MicroSD
- Sprawdź, czy kamera samochodowa jest wyłączona.
- Znajdź gniazdo karty MicroSD z boku kamery samochodowej.
- Insert the MicroSD card with the gold contacts facing the back of the dash cam until it clicks into place.
- Aby wyjąć kartę, delikatnie wciśnij ją, aż usłyszysz kliknięcie, a następnie puść.
Notatka: A Class 10 or higher MicroSD card (up to 128GB recommended) is required. Format the card in the dash cam's settings before first use.
2. Montaż kamery samochodowej
- Wyczyść obszar przedniej szyby w miejscu, w którym zamierzasz zamontować kamerę samochodową.
- Przymocuj uchwyt z przyssawką do kamery samochodowej.
- Mocno dociśnij przyssawkę do przedniej szyby, najlepiej za tylną szybą.view mirror, and flip the lever to secure it.
- Adjust the angle of the dash cam lens to ensure it captures the road ahead clearly, avoiding obstruction from the hood or dashboard.
3. Podłączanie zasilania
- Connect the small end of the car charger cable to the USB Type-C port on the dash cam.
- Podłącz większy koniec ładowarki samochodowej do gniazda zasilania 12 V w pojeździe (gniazdo zapalniczki).
- Route the power cable neatly along the edge of the windshield and dashboard using the provided cable clips to avoid obstructing your view.
4. Montaż tylnej kamery (opcjonalnie)
- Connect the rear camera cable to the dedicated rear camera port on the main dash cam unit.
- Route the cable from the front unit to the rear of the vehicle, typically along the headliner and side panels.
- Mount the rear camera on the rear windshield using its adhesive or screws, ensuring a clear view drogi z tyłu.
- Connect the red wire of the rear camera cable to the vehicle's reverse light positive wire if you wish to enable parking assist lines when reversing.
Instrukcja obsługi
Włączanie/wyłączanie zasilania
- Automatyczny: The dash cam will automatically power on and begin recording when connected to power and the vehicle engine starts. It will power off automatically when the engine is turned off.
- Manual: Naciśnij i przytrzymaj przycisk zasilania, aby ręcznie włączyć lub wyłączyć kamerę samochodową.
Tryby nagrywania
- Nagrywanie w pętli: The dash cam records video in continuous loops (e.g., 1, 3, or 5 minutes). When the memory card is full, the oldest unlocked files zostaną nadpisane.
- Czujnik G (nagrywanie awaryjne): Wbudowany czujnik G wykrywa nagłe uderzenia lub kolizje. Po jego uruchomieniu bieżący fragment wideo jest automatycznie blokowany i zapisywany, aby zapobiec jego nadpisaniu przez nagrywanie w pętli.
- Monitor parkowania: With a hardwire kit (sold separately) or continuous power, the dash cam can monitor your vehicle while parked. If a vibration or impact is detected, it will automatically record a short video.
Nawigacja po menu
Use the control buttons on the dash cam to navigate the menu:
- Przycisk menu: Press to enter the settings menu. Press again to switch between video settings, system settings, and playback mode.
- Przyciski w górę/w dół: Poruszaj się po opcjach menu.
- Przycisk OK: Confirm selection or start/stop recording in recording mode.
Łączność Wi-Fi i korzystanie z aplikacji
The SUVCON M02 features Wi-Fi connectivity for easy access to recordings and settings via a smartphone app.
- Download the recommended app (e.g., "DASA3" or similar, check packaging for exact app name) from your smartphone's app store.
- On the dash cam, enable Wi-Fi from the system settings. The dash cam's Wi-Fi SSID and password will be displayed on the screen.
- Na swoim smartfonie przejdź do ustawień Wi-Fi i połącz się z siecią Wi-Fi kamery samochodowej, korzystając z podanego hasła.
- Otwórz aplikację. Teraz możesz view żyćtage, download recorded videos, change settings, and format the SD card directly from your phone.
Odtwarzanie nagranego dźwięku
- Na kamerze samochodowej: In recording mode, press the Menu button twice to enter playback mode. Use Up/Down buttons to select files and OK to play.
- Za pośrednictwem aplikacji: Connect your smartphone via Wi-Fi and use the app's playback feature to view i pobieraj filmy.
- Na komputerze: Remove the MicroSD card from the dash cam and insert it into a computer's card reader. Videos can be played using standard media players.
Konserwacja
Cleaning the Dash Cam
- Do czyszczenia obudowy kamery samochodowej należy używać miękkiej, suchej ściereczki.
- Do czyszczenia soczewek należy używać ściereczki i specjalnego środka czyszczącego, aby uniknąć zarysowań.
- Nie należy używać środków czyszczących o właściwościach ściernych ani rozpuszczalników.
Formatowanie karty MicroSD
It is recommended to format the MicroSD card every 2-4 weeks to maintain optimal recording performance and prevent data corruption. This can be done through the dash cam's menu settings or via the smartphone app.
Aktualizacje oprogramowania układowego
Periodically check the SUVCON official website for available firmware updates. Firmware updates can improve performance, add new features, or fix bugs. Follow the instructions provided with the firmware file ostrożnie.
Rozwiązywanie problemów
| Problem | Możliwe rozwiązanie |
|---|---|
| Kamera samochodowa nie włącza się. |
|
| Dash cam stops recording or freezes. |
|
| Wideotage jest niewyraźne lub niejasne. |
|
| Problemy z połączeniem Wi-Fi. |
|
Specyfikacje
| Funkcja | Szczegół |
|---|---|
| Model | M02 |
| Marka | SUVCON |
| Rozdzielczość przechwytywania wideo | 4K (Front), 1080P (Rear, if applicable) |
| Cechy specjalne | G-Sensor, Loop Recording, Parking Monitor, Wi-Fi Connectivity |
| Technologia łączności | Wi-Fi |
| Typ montażu | Uchwyt na deskę rozdzielczą (przyssawka) |
| Składowanie | Karta MicroSD (klasa 10 lub wyższa, zalecana pojemność do 128 GB) |
| Źródło zasilania | Ładowarka samochodowa (12 V) |
| Wymiary produktu | 2.54 x 2.54 x 2.54 cm (w przybliżeniu, zgodnie z danymi produktu) |
Gwarancja i obsługa klienta
For warranty information, technical support, or any inquiries regarding your SUVCON M02 Dash Cam, please refer to the warranty card included in your package or visit the official SUVCON webStrona. Kontaktując się z pomocą techniczną, przygotuj numer modelu (M02) i dane dotyczące zakupu.
Webstrona: www.suvcon.com (Byłyample URL(proszę zapoznać się z dokumentacją produktu)
E-mail: support@suvcon.com (Byłyample Email, please refer to actual product documentation)
Ask a question about this manual
Ask about setup, troubleshooting, compatibility, parts, safety, or missing instructions. Manuals+ will review the question and use this page’s manual context to help answer it.