1. Wprowadzenie
Dziękujemy za zakupasing the sainlogic S-M-1 Video Baby Monitor. This device is designed to provide a secure and reliable way to monitor your baby. Featuring a 1080P FHD 5-inch display, two-way audio, night vision, and temperature monitoring, it offers comprehensive surveillance for your peace of mind. Please read this manual thoroughly before use to ensure proper operation and safety.
2. Informacje dotyczące bezpieczeństwa
- Ryzyko uduszenia: Keep all cables out of reach of children (at least 1 meter / 3 feet away). Never place the camera or monitor within reach of the baby's crib or playpen.
- Ryzyko zadławienia: This product contains small parts. Keep them away from children.
- Źródło zasilania: Używaj wyłącznie dostarczonych zasilaczy. Używanie nieautoryzowanych zasilaczy może spowodować uszkodzenie urządzenia i unieważnienie gwarancji.
- Woda i wilgoć: Do not expose the product to water or moisture. Do not use near bathtubs, sinks, or other wet areas.
- Źródła ciepła: Keep the product away from heat sources such as radiators, heat registers, stoves, or other heat-producing appliances.
- Wentylacja: Zapewnij odpowiednią wentylację. Nie blokuj żadnych otworów wentylacyjnych.
- Ingerencja: This product operates on 2.4 GHz FHSS technology. Avoid placing it near other 2.4 GHz devices (e.g., Wi-Fi routers, microwaves) to prevent interference.
- Nadzór osoby dorosłej: This product is intended to assist in monitoring your baby and should not replace proper adult supervision.
3. Zawartość opakowania
Please check the package contents. If any items are missing or damaged, contact your retailer.
- Baby Monitor Unit (Parent Unit)
- Baby Camera Unit (Baby Unit)
- Zasilacz do monitora
- Power Adapter for Camera
- Instrukcja obsługi
- Wall Mount Kit (optional, if included)
4. Koniec produktuview
4.1 Jednostka rodzicielska (monitor)
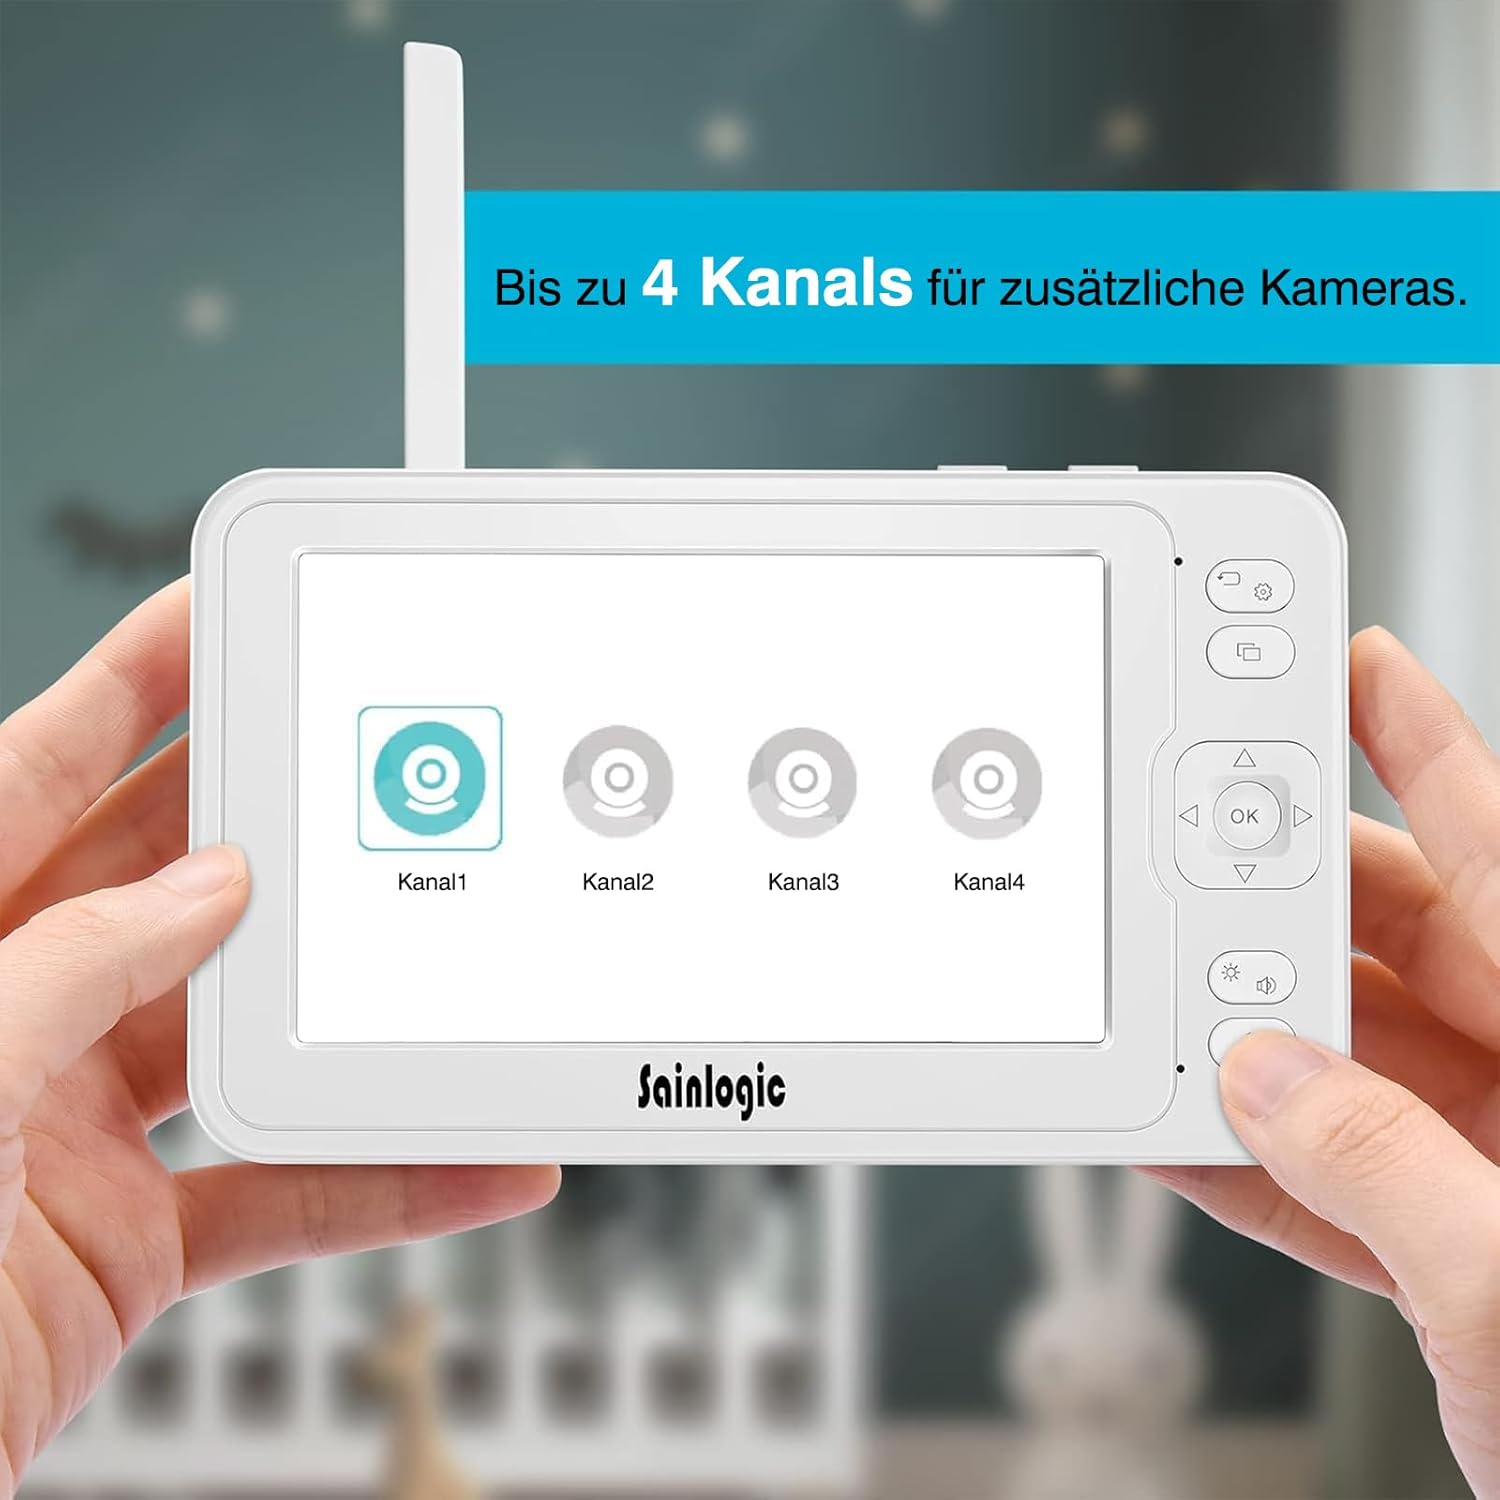
Rysunek 4.1: The parent unit (monitor) displaying options for connecting up to four camera channels.
- 5-calowy ekran HD LCD: Wyświetla obraz na żywo z kamery.
- Antena: Do odbioru sygnału bezprzewodowego.
- Przycisk zasilania: Turns the monitor ON/OFF.
- Przycisk menu: Dostęp do ustawień i funkcji monitora.
- Przyciski nawigacyjne (góra/dół/lewo/prawo): For menu navigation and camera pan/tilt control.
- Przycisk OK: Potwierdza wybór.
- Przycisk rozmowy: Activates two-way intercom.
- Przyciski głośności: Adjusts monitor speaker volume.
- Mikrofon: Do komunikacji dwukierunkowej.
- Głośnik: Outputs audio from the baby unit.
- Pobór mocy: Łączy się z zasilaczem.
- Gniazdo kart microSD: For video recording storage (MicroSD card not included).
4.2 Jednostka dziecka (kamera)

Rysunek 4.2: The baby unit (camera) providing a clear 1080P Full HD view of a baby, demonstrating high-quality image capture.
- Obiektyw aparatu: Przechwytuje wideo.
- Diody podczerwieni: Do widzenia w nocy.
- Czujnik światła: Wykrywa światło otoczenia w celu automatycznej aktywacji widzenia nocnego.
- Mikrofon: Odbiera dźwięki z pokoju dziecięcego.
- Głośnik: Outputs audio from the parent unit (lullabies, two-way talk).
- Czujnik temperatury: Monitoruje temperaturę w pomieszczeniu.
- Przycisk parowania: For pairing the camera with the monitor.
- Pobór mocy: Łączy się z zasilaczem.
- Otwór montażowy: Do montażu na ścianie.
5. Konfiguracja
5.1 Zasilanie niani (kamery)
- Umieść jednostkę dla dziecka w miejscu zapewniającym swobodny dostęp view of your baby. Ensure it is at least 1 meter (3 feet) away from the baby's crib or playpen to prevent strangulation hazards from the power cable.
- Connect the small plug of the camera power adapter to the camera's power input.
- Podłącz drugi koniec zasilacza do odpowiedniego gniazdka elektrycznego.
- The camera will automatically power on.
5.2 Powering the Parent Unit (Monitor)
- Connect the small plug of the monitor power adapter to the monitor's power input.
- Podłącz drugi koniec zasilacza do odpowiedniego gniazdka elektrycznego.
- Press and hold the Power button on the monitor for a few seconds to turn it on.
- The monitor has a built-in rechargeable battery for portable use. Charge it fully before initial use.
5.3 Pairing the Camera and Monitor
The baby unit and parent unit are pre-paired at the factory. If you lose connection or add additional cameras, follow these steps:
- Upewnij się, że zarówno kamera, jak i monitor są włączone.
- Na monitorze naciśnij Menu przycisk.
- Przejdź do Kamera or Dodaj kamerę option and select it.
- Choose an available channel (e.g., Camera 1, Camera 2).
- The monitor will display a message indicating it is searching for a camera.
- W ciągu 10 sekund naciśnij i przytrzymaj Para button on the back of the baby unit until the monitor displays the video feed.
- Once paired, the video feed will appear on the monitor.

Rysunek 5.3: The monitor interface illustrating the capability to connect and switch between up to four camera channels for expanded monitoring.
6. Instrukcja obsługi
6.1 Podstawowe monitorowanie
Once the camera and monitor are powered on and paired, the monitor will automatically display the live video feed from the camera. Adjust the volume using the Tom buttons on the side of the monitor.
6.2 Camera Control (Pan/Tilt/Zoom)
- Użyj Nawigacja buttons (Up/Down/Left/Right) on the monitor to remotely pan (355° horizontally) and tilt (90° vertically) the camera lens to get the desired view.
- To zoom in/out, press the Brzęczenie button (often integrated with a navigation button or a dedicated button, refer to monitor button layout).
6.3 Dwukierunkowy domofon
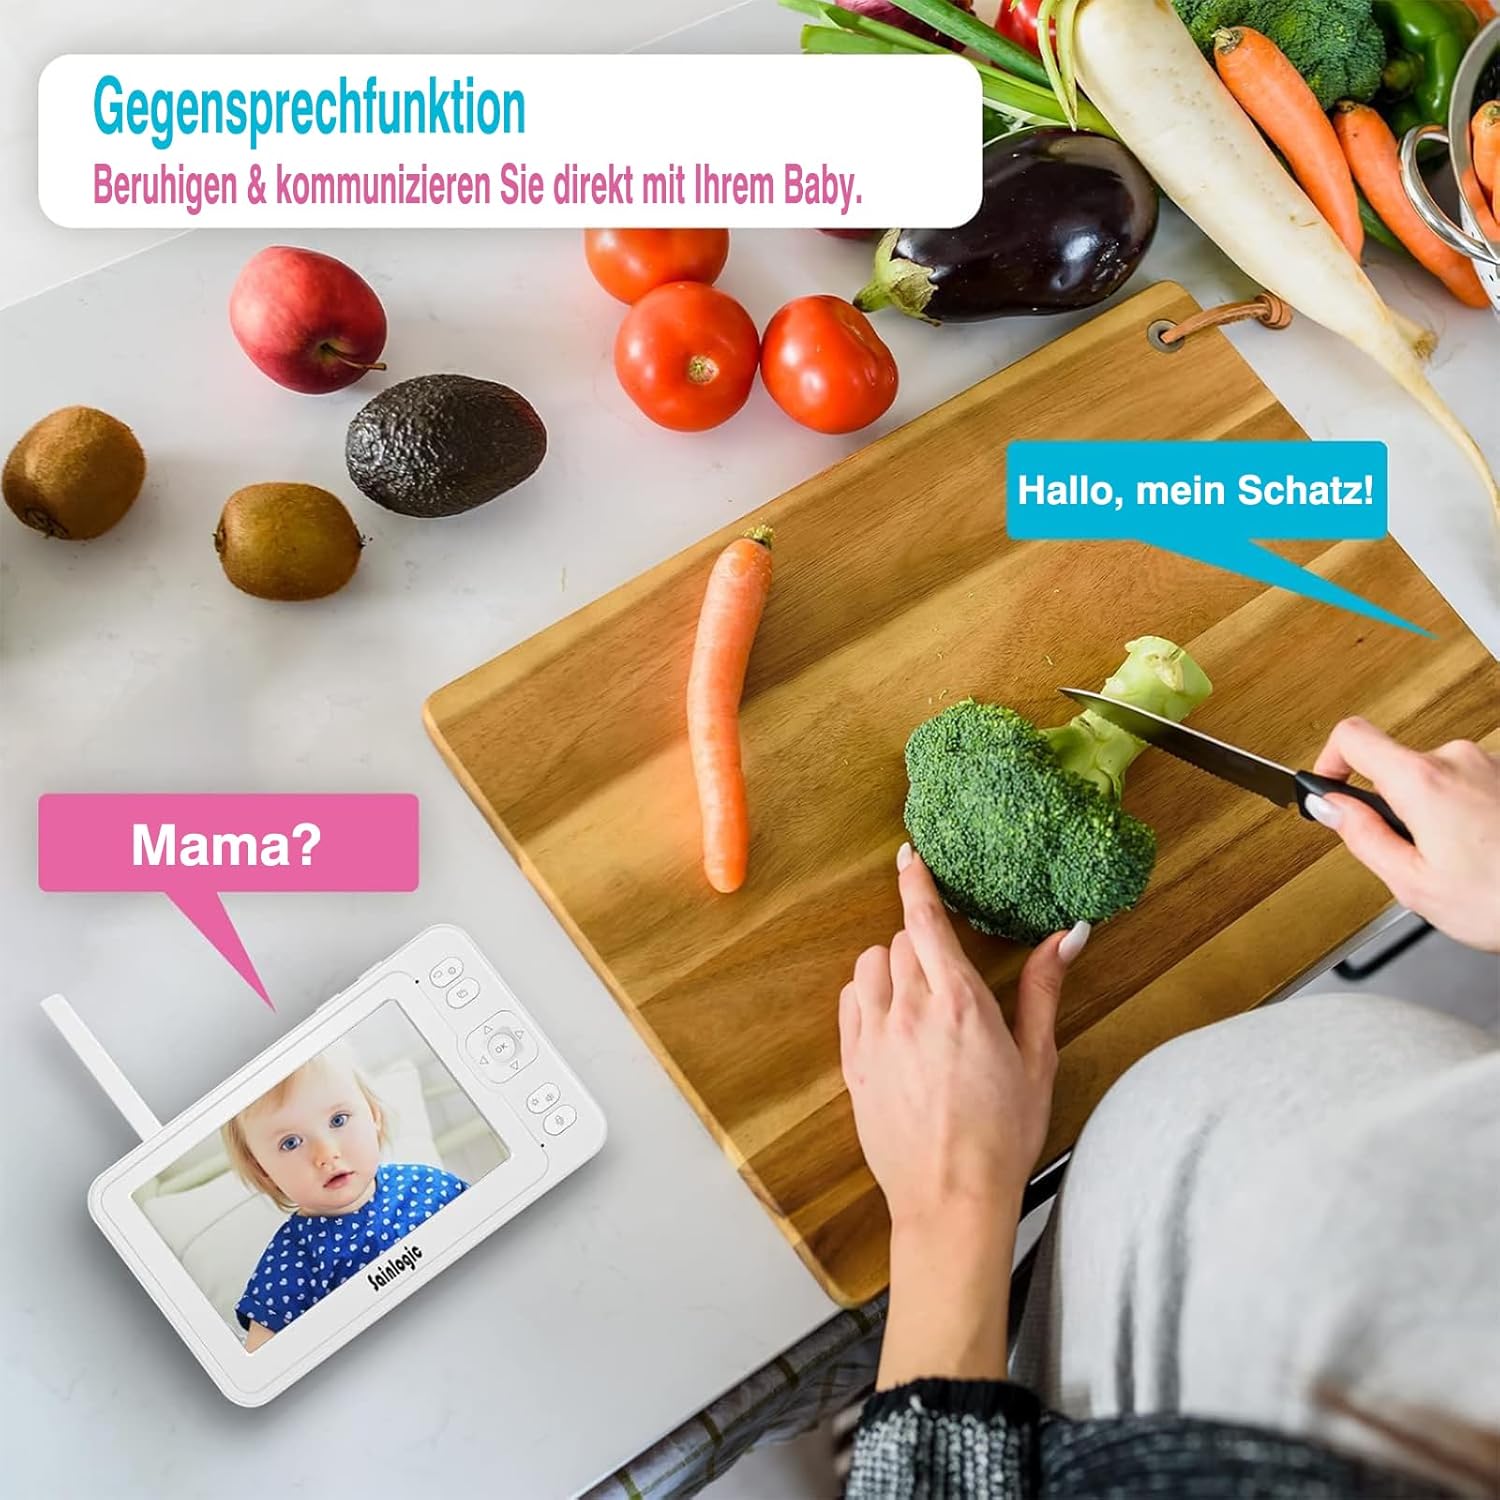
Rysunek 6.3: Demonstrating the two-way intercom function, allowing a parent to speak to their baby through the monitor.
Aby mówić do dziecka, naciśnij i przytrzymaj Rozmawiać button on the monitor. Release the button to hear your baby's sounds.
6.4 Funkcja VOX (wymiana sterowana głosem)

Rysunek 6.4: The monitor displaying a crying baby, indicating the activation of the sound detection alarm via integrated VOX technology and auto-wake feature.
The VOX function automatically activates the monitor screen and sound when it detects noise above a certain level in the baby's room. You can adjust the VOX sensitivity level in the monitor's menu settings.
- Wysoka czułość: Detects even soft sounds.
- Niska czułość: Only activates for louder sounds.
6.5 kołysanki
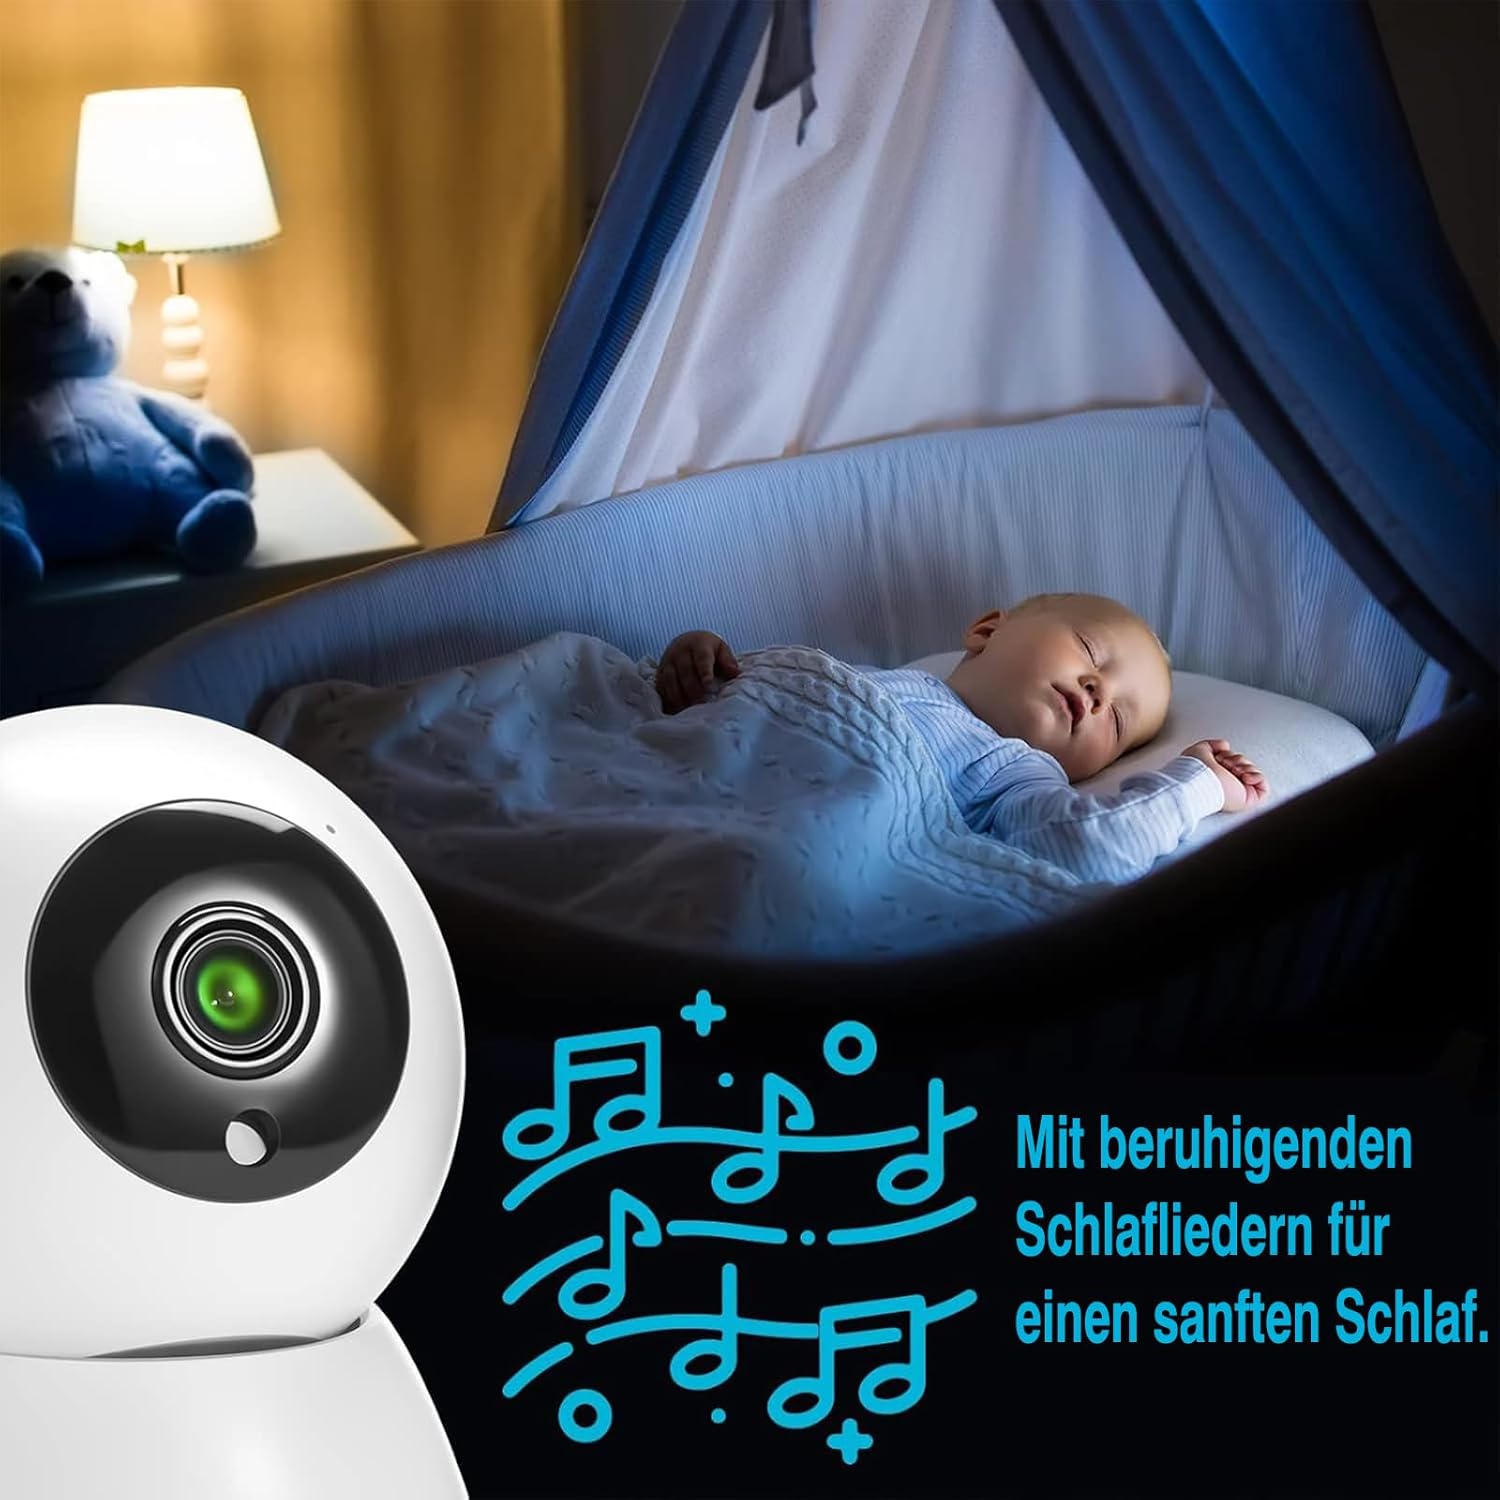
Rysunek 6.5: A baby sleeping soundly, accompanied by musical notes, illustrating the monitor's lullaby feature for soothing sleep.
The monitor includes 8 soothing lullabies. To play a lullaby, access the menu, navigate to the Kołysanka option, and select your desired tune. You can also set a timer for how long the lullaby plays.
6.6 Monitorowanie temperatury

Rysunek 6.6: The baby monitor displaying a baby, with an overlay indicating both temperature and sound alarms, ensuring a safe environment.
The baby unit has a built-in temperature sensor that displays the room temperature on the parent unit. You can set high and low temperature alerts in the menu to be notified if the room becomes too hot or too cold.
6.7 Feeding Reminders
Set up feeding reminders through the monitor's menu. This feature allows you to schedule alerts to help maintain your baby's feeding schedule.
6.8 MicroSD Recording
Insert a MicroSD card (not included) into the designated slot on the monitor to record video footage. Access recording options and playback through the monitor's menu.
6.9 Nawigacja po menu

Rysunek 6.9: The monitor screen displaying a range of menu icons, including options for cameras, feeding reminders, sound alarms, temperature alarms, lullabies, display settings, recording, playback, system settings, and language.
Naciśnij Menu przycisk umożliwiający dostęp do menu głównego. Użyj Nawigacja buttons to scroll through options and the OK button to select. Common menu options include:
- Ustawienia aparatu: Add/delete cameras, switch camera views.
- VOX Settings: Adjust sensitivity, enable/disable.
- Ustawienia alarmu: Temperature alerts, feeding reminders.
- Kołysanki: Select and play melodies.
- Ustawienia wyświetlania: Brightness, sleep mode.
- Ustawienia systemowe: Time, date, language, factory reset.
7. Konserwacja
- Czyszczenie: Clean the monitor and camera with a soft, dry cloth. Do not use cleaning agents or solvents.
- Pielęgnacja baterii: Aby zapewnić optymalną żywotność baterii, unikaj częstego całkowitego rozładowywania baterii monitora. Regularnie ją ładuj.
- Składowanie: If storing the device for an extended period, ensure the battery is partially charged and store it in a cool, dry place.
8. Rozwiązywanie Problemów
| Problem | Możliwa przyczyna | Rozwiązanie |
|---|---|---|
| No picture/sound on monitor. |
|
|
| Picture is blurry or distorted. |
|
|
| VOX not working or too sensitive. |
|
|
| Two-way talk not functioning. |
|
|
9. Specyfikacje
| Numer modelu | SM-1 |
| Marka | sainlogic |
| Rozmiar ekranu | 5-calowy wyświetlacz HD LCD |
| Rozdzielczość wideo | 1080P FHD (Recording and Effective Video Resolution) |
| Protokół łączności | FHSS 2.4 GHz (No Wi-Fi required) |
| Moc wejściowa | 5 woltów, 10 wata |
| Monitoruj baterię | 1 Non-standard battery (rechargeable) |
| Wymiary produktu (dł. x szer. x wys.) | Wymiary 16 x 1.5 x 10 cm |
| Waga produktu | 830 gramów |
| Typ montażu | Montaż ścienny |
| Typy alertów | Audio and Motion, Temperature |
| Lullabies | 8 wbudowanych melodii |
| Obsługa wielu kamer | Do 4 kamer |
| Środowisko użytkowania | Wnętrz |
| GTIN/UPC | 734257140072 |
10. Gwarancja i wsparcie
For warranty information or technical support, please refer to the warranty card included in your package or visit the official sainlogic webZachowaj paragon jako dowód zakupu.