
1. Wprowadzenie
This manual provides detailed instructions for the setup, operation, maintenance, and troubleshooting of your ACASIS DS-0202 14-in-1 USB C Docking Station. Please read this manual thoroughly before using the product to ensure optimal performance and longevity.

Image 1.1: The ACASIS DS-0202 14-in-1 USB C Docking Station, showcasing its compact design and multiple connectivity options including USB-C, USB-A, HDMI, DisplayPort, Ethernet, and card readers.
2. Główne cechy
- Łączność 14 w 1: Expands a single USB-C/Thunderbolt 3/4 port into 14 ports, including 2 HDMI, 1 DisplayPort, 3 USB-C 3.1 (10Gbps), 2 USB-A 3.1 (10Gbps), 1 USB 2.0, SD/TF card reader, 1Gbps Ethernet, 3.5mm audio, and 100W Power Delivery.
- Obsługa trzech wyświetlaczy: Supports single 4K@60Hz display and triple 4K@30Hz displays (under DP1.4). Windows systems support both MST (Multi-Stream Transport) and SST (Single-Stream Transport) for mirror and extend modes. macOS systems do not support MST.
- Szybki transfer danych: Features 3 USB-C 3.1 and 2 USB-A 3.1 ports, all offering 10Gbps data transfer speeds for rapid file przelewy.
- Dostawa mocy 100 W: Provides up to 100W Power Delivery through the dedicated USB-C port to charge compatible laptops, tablets, and phones.
- Gigabit Ethernet: Integrated 1000Mbps Ethernet port ensures stable and fast wired network connectivity.
- Łączność audio: Includes a 3.5mm audio and microphone port for headset connection.
- Czytniki kart SD/TF: Built-in SD and TF card slots for convenient data access.
3. Układ portów
Familiarize yourself with the various ports on the ACASIS DS-0202 docking station:

Rysunek 3.1: Szczegółowy view of the docking station's ports, including RJ45 (Ethernet), DisplayPort, HDMI 1, HDMI 2, USB 2.0, USB-A 3.1, PD 3.0 (Max 100W), 3.5mm Audio, and three USB-C 3.1, two USB-A 3.1, SD/TF 3.0 ports.
- Porty przednie/boczne:
- 3 x USB-C 3.1 (10Gbps)
- 2 x USB-A 3.1 (10 Gb/s)
- 1 x SD Card Reader (SD 3.0)
- 1 x TF Card Reader (TF 3.0)
- Porty tylne:
- 1 x RJ45 Gigabit Ethernet (1000 Mb/s)
- 1 x DisplayPort (4K@60Hz)
- 2 x HDMI 2.0 (4K@60Hz)
- 1 x USB 2.0 (480Mbps)
- 1 x USB-A 3.1 (10 Gb/s)
- 1 x USB-C PD 3.0 (Max 100W input)
- 1 x 3.5mm Audio & Mic In
4. Instrukcje konfiguracji
Before connecting the docking station, ensure your laptop's USB-C port supports Power Delivery, DisplayPort Alt Mode, and Data Transfer. Refer to your laptop's specifications or manufacturer for details.

Image 4.1: USB-C port compatibility check. Ensure your laptop's USB-C port supports Thunderbolt 3/4 or USB-C with Power Delivery, DisplayPort Alt Mode, and Data Transfer for full functionality.
- Podłącz zasilacz (opcjonalny, ale zalecany): If you wish to charge your laptop via the docking station, connect your laptop's USB-C power adapter (up to 100W) to the "PD 100W" USB-C port on the docking station.
- Połącz z laptopem: Connect the integrated USB-C cable from the docking station to a compatible USB-C/Thunderbolt 3/4 port on your laptop.
- Podłącz zewnętrzne wyświetlacze:
- For single or dual monitors: Connect your monitors using HDMI cables to the HDMI 1 and HDMI 2 ports, or a DisplayPort cable to the DP port.
- For triple monitors: Connect your monitors to the HDMI 1, HDMI 2, and DP ports.
Note: Ensure your display cables are securely connected.
- Podłącz urządzenia peryferyjne: Connect your USB devices (keyboard, mouse, external drives, etc.) to the available USB-A and USB-C data ports.
- Podłącz Ethernet (opcjonalnie): For a wired network connection, connect an Ethernet cable from your router/modem to the RJ45 port on the docking station.
- Podłącz urządzenia audio (opcjonalnie): Plug your headphones or speakers into the 3.5mm audio jack.
The docking station is plug-and-play and should be automatically recognized by your operating system. You may need to configure display settings manually.
5. Instrukcja obsługi
5.1 Konfiguracja wyświetlania (Windows)
Windows operating systems support both Mirror Mode (SST) and Extend Mode (MST) for multiple displays. You can configure these settings via your display settings.

Image 5.1: Triple display setup examples for Windows, illustrating Mirror Mode (A-BBB) and Extend Mode (A-BCD, A-BC, A-BD) with various monitor arrangements and resolutions.
- Mirror Mode (SST): Wszystkie podłączone wyświetlacze wyświetlają tę samą treść, co ekran Twojego laptopa.
- Extend Mode (MST): Each connected display can show different content, extending your desktop across multiple screens.
- Rezolucja: Supports up to 4K@60Hz for a single display and 4K@30Hz for triple displays (under DP1.4).
To adjust display settings in Windows:
- Kliknij prawym przyciskiem myszy na pulpicie i wybierz „Ustawienia wyświetlania”.
- Identify and arrange your displays.
- Select the desired display mode (Extend these displays, Duplicate these displays).
- Dostosuj rozdzielczość i orientację według potrzeb.
5.2 Konfiguracja wyświetlacza (macOS)
macOS systems do not support Multi-Stream Transport (MST). Therefore, when multiple external monitors are connected, they will either mirror each other or extend the laptop display, but cannot extend independently to three unique displays.

Image 5.2: Triple display setup examples for macOS, illustrating Mirror Mode (A-AAA) where all displays show the same content, and Extend Mode (A-BBB) where external displays mirror each other while extending the laptop screen.
- Tryb lustrzany: All connected displays show the same content as your MacBook screen.
- Tryb rozszerzania: The external displays will mirror each other, extending your desktop from the MacBook screen. You cannot have three independent extended displays.
- Rezolucja: Supports up to 4K@30Hz for triple displays.
To adjust display settings in macOS:
- Go to "System Settings" (or "System Preferences" on older macOS versions).
- Select "Displays".
- Arrange your displays and select the desired mode (Mirror Displays or Use as separate display).
5.3 Przesyłanie danych
The docking station features 3 USB-C 3.1 and 2 USB-A 3.1 ports, all capable of 10Gbps data transfer. Connect your high-speed storage devices to these ports for optimal performance.

Image 5.3: The docking station's 10Gbps USB-C and USB-A ports enable ultra-fast data transfer for large files and high-bandwidth peripherals.
5.4 Dostarczanie mocy
The dedicated USB-C PD port supports up to 100W power input. Connect your laptop's power adapter to this port to charge your laptop while using the docking station.

Image 5.4: The 100W Power Delivery port allows for fast charging of your laptop while connected to the docking station, with an example showing 100W input and 85W output to the laptop.
5.5 gigabitowy Ethernet
The RJ45 port provides a stable and fast 1000Mbps (1 Gigabit) Ethernet connection. This is ideal for reliable internet access and large file transfers over a local network.

Image 5.5: The Gigabit Ethernet port provides a fast and stable wired network connection, supporting speeds up to 1000Mbps.
5.6 SD/TF Card Readers
Insert your SD or TF (Micro SD) cards into the respective slots for quick access to photos and other data. Both slots can be used simultaneously.
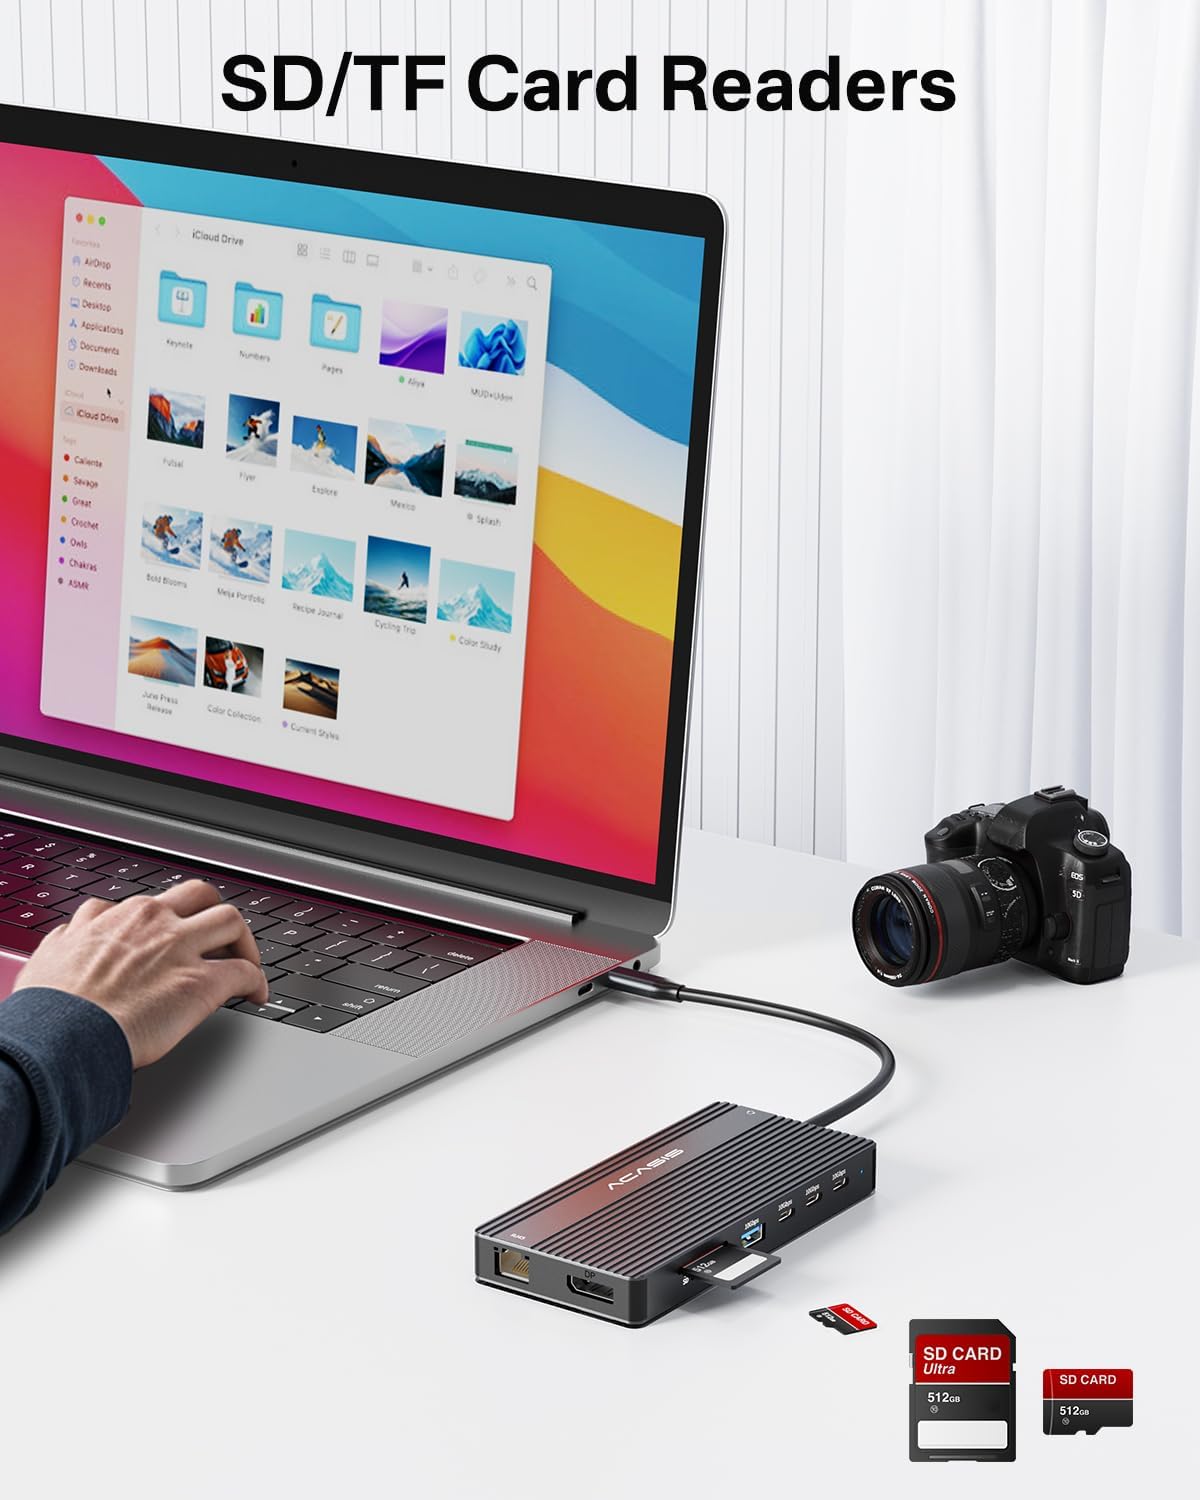
Image 5.6: The integrated SD and TF card readers allow for convenient and fast access to memory card data, useful for photographers and content creators.
6. Konserwacja
- Czyszczenie: Do czyszczenia powierzchni stacji dokującej używaj miękkiej, suchej ściereczki. Unikaj płynnych środków czyszczących i materiałów ściernych.
- Składowanie: Przechowuj stację dokującą w chłodnym, suchym miejscu, z dala od bezpośredniego światła słonecznego i ekstremalnych temperatur.
- Obsługiwanie: Unikaj upuszczania urządzenia i narażania go na silne uderzenia. Nie zginaj nadmiernie zintegrowanego kabla USB-C.
- Wentylacja: Upewnij się, że stacja dokująca ma odpowiednią wentylację, aby zapobiec przegrzaniu, zwłaszcza podczas długotrwałego korzystania z wielu podłączonych urządzeń.
7. Rozwiązywanie Problemów
| Problem | Możliwa przyczyna | Rozwiązanie |
|---|---|---|
| No display output / Flickering screen |
|
|
| Laptop się nie ładuje |
|
|
| USB devices not recognized / Slow data transfer |
|
|
| Połączenie Ethernet jest niestabilne lub nie działa |
|
|
8. Specyfikacje
| Funkcja | Szczegół |
|---|---|
| Numer modelu | DS-0202 |
| Marka | AKAZ |
| Łączność | USB-C (Host connection) |
| Wyjście wideo | 2 x HDMI 2.0 (4K@60Hz), 1 x DisplayPort (4K@60Hz) |
| Porty danych USB | 3 x USB-C 3.1 (10Gbps), 2 x USB-A 3.1 (10Gbps), 1 x USB 2.0 (480Mbps) |
| Sieć Ethernetowa | 1 x RJ45 Gigabit Ethernet (1000 Mb/s) |
| Czytnik kart | SD 3.0, TF 3.0 (simultaneous use) |
| Audio | 1 x 3.5mm Audio & Mic In |
| Dostarczanie mocy | USB-C PD 3.0, up to 100W input |
| Kompatybilne urządzenia | Laptops with full-featured USB-C/Thunderbolt 3/4 ports (Dell, HP, Lenovo, ThinkPad, Surface, MacBook, etc.) |
| Systemy operacyjne | Windows, macOS, Linux, iPadOS |
| Wymiary produktu | 1 x 1 x 1 cale (w przybliżeniu) |
| Waga przedmiotu | 5 uncji (w przybliżeniu) |
| Kolor | Czarny |
9. Informacje o gwarancji
ACASIS products typically come with a standard manufacturer's warranty. For specific warranty terms and conditions, please refer to the warranty card included with your product or visit the official ACASIS webZachowaj paragon jako dowód zakupu na wypadek reklamacji.
Plany ochrony można również zakupić osobno:
- 3-letni plan ochrony
- 4-letni plan ochrony
- Complete Protect (plan miesięczny)
Plany te zapewniają rozszerzony zakres ochrony wykraczający poza standardową gwarancję producenta.
10. Obsługa klienta
If you encounter any issues or have questions regarding your ACASIS DS-0202 14-in-1 USB C Docking Station, please contact ACASIS customer support through the following channels:
- Urzędnik Webstrona: Odwiedź ACASIS Store on Amazon Aby uzyskać informacje o produkcie i zasoby pomocy technicznej.
- Wsparcie e-mailowe: Refer to your product packaging or the ACASIS webodwiedź witrynę, aby uzyskać najnowszy adres e-mail pomocy technicznej.
- Formularz kontaktowy online: Many manufacturers provide a contact form on their webwitryna pomocy technicznej.
When contacting support, please have your product model number (DS-0202) and purchase details ready.