1. Wprowadzenie
The Sailnovo 12-Egg Digital Incubator is designed for hatching various types of poultry eggs, including chicken, duck, and quail. It features automatic temperature control, humidity monitoring, automatic egg turning, and a built-in egg candler to support successful incubation. This manual provides detailed instructions for setting up, operating, and maintaining your incubator.
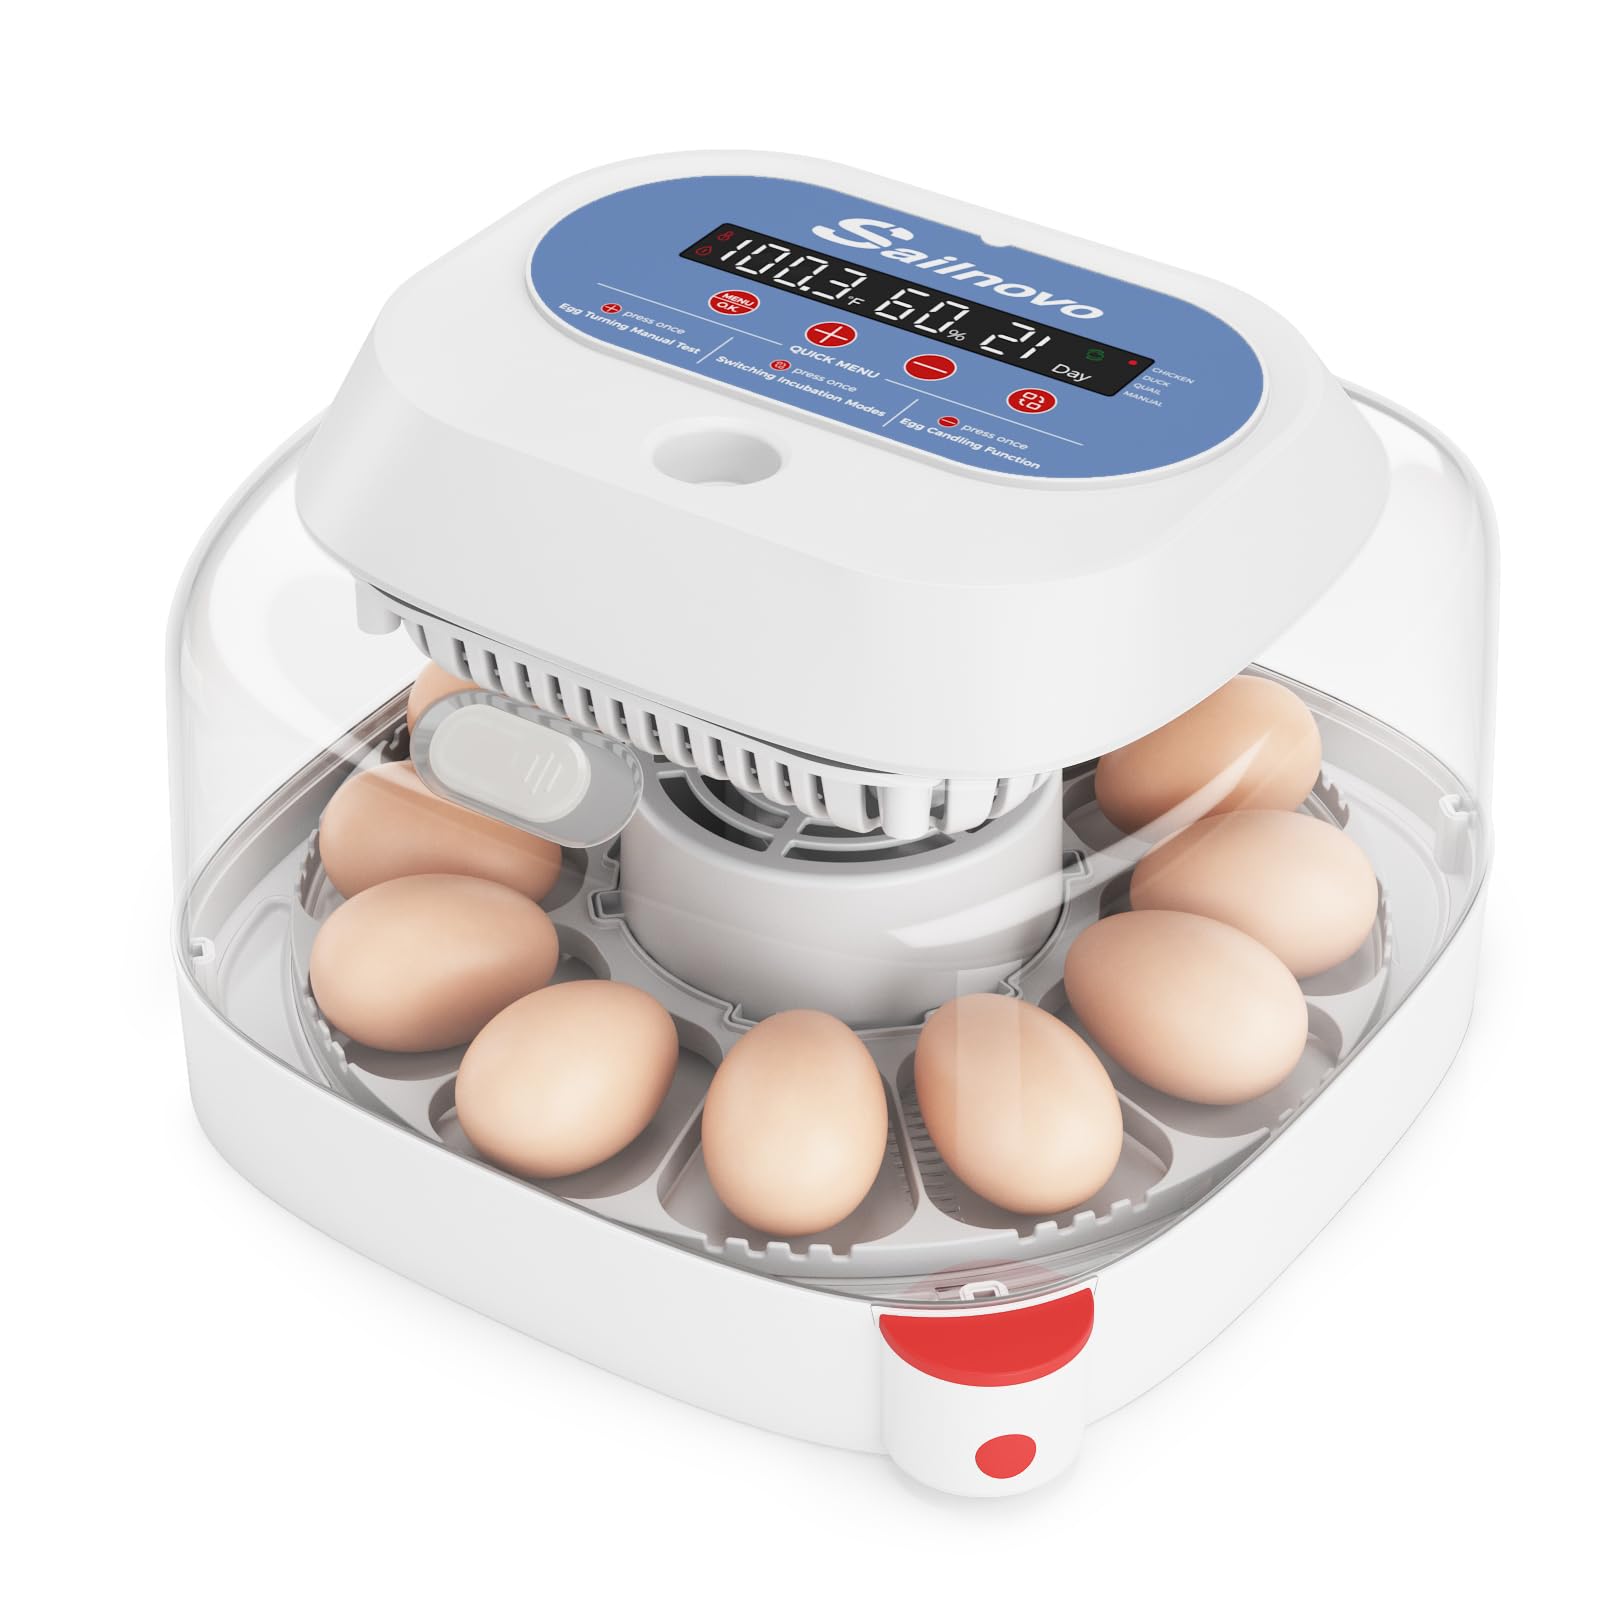
Image 1: Sailnovo 12-Egg Digital Incubator with transparent lid.
2. Konfiguracja
- Rozpakowywanie: Carefully remove all components from the packaging. Ensure all parts, including the incubator base, transparent lid, power cord, water bottle, and instruction manual, are present.
- Umieszczenie: Place the incubator on a stable, flat surface away from direct sunlight, drafts, and extreme temperature fluctuations.
- Montaż:
- Connect the power cord to the designated port on the top unit of the incubator.
- Ensure the egg turning mechanism is properly seated in the base.
- Place the transparent lid securely on the base.
- Pierwsze włączenie: Plug the incubator into a power outlet. The LED display will illuminate, showing current temperature, humidity, and incubation day.
- Napełnianie wodą: Use the provided water bottle to add water through the external water inlet on the side of the incubator. This allows for humidity adjustment without opening the lid.
Video 1: Demonstrates the setup and features of the Sailnovo 12-Egg Incubator, including connecting the power, adding water, and placing eggs.
3. Instrukcja obsługi
3.1. Wybór trybu
The incubator offers 4 versatile modes: 3 preset modes for chicken, duck, and quail eggs, and 1 manual mode for custom settings. Each preset mode suggests recommended temperature settings and provides an incubation period countdown.
- Przełączanie trybów: Press the 'MENU/OK' button once to enter mode switching. Use the '+' or '-' buttons to cycle through 'CHICKEN', 'DUCK', 'QUAIL', and 'MANUAL' modes.
- Confirming Mode: After selecting your desired mode, press and hold the 'MENU/OK' button for 3 seconds to confirm. The incubation mode is successfully activated when the incubation days are displayed.
Video 2: Demonstrates how to select and confirm incubation modes on the Sailnovo incubator's digital display.
3.2. Kontrola temperatury
The incubator is equipped with a circulating fan and airflow system to maintain stable temperatures. The LED display shows real-time temperature readings. In manual mode, you can adjust temperature settings to meet specific requirements.
- If ambient temperature falls below 18°C (64.4°F), the incubator may struggle to reach preset temperatures. Switch to manual mode and gradually increase the temperature setting until the internal temperature reaches the suitable range for incubation.
3.3. Humidity Adjustment & Monitoring
A built-in humidity sensor provides real-time readings on the display. The side water inlet allows for convenient water addition without disturbing the incubation environment. Adjustable vents help manage humidity levels.
- Zalecenie ogólne: Maintain humidity levels above 55% for the first 18 days.
- Okres wylęgu: Increase humidity to 70-80% for the final 3 days of incubation.
- Levels below 40% or above 90% may affect hatching results. Optimal levels may vary by species and conditions.
3.4. Automatyczne obracanie jajek
The automatic turning system rotates eggs every 2 hours to simulate natural conditions. This feature is crucial for proper embryo development and is programmed to stop during the final days of incubation (lockdown period).
3.5. Built-in Egg Candler
An integrated LED candling light allows you to observe embryo development. Simply place eggs in the designated area and use the candler button to check progress.
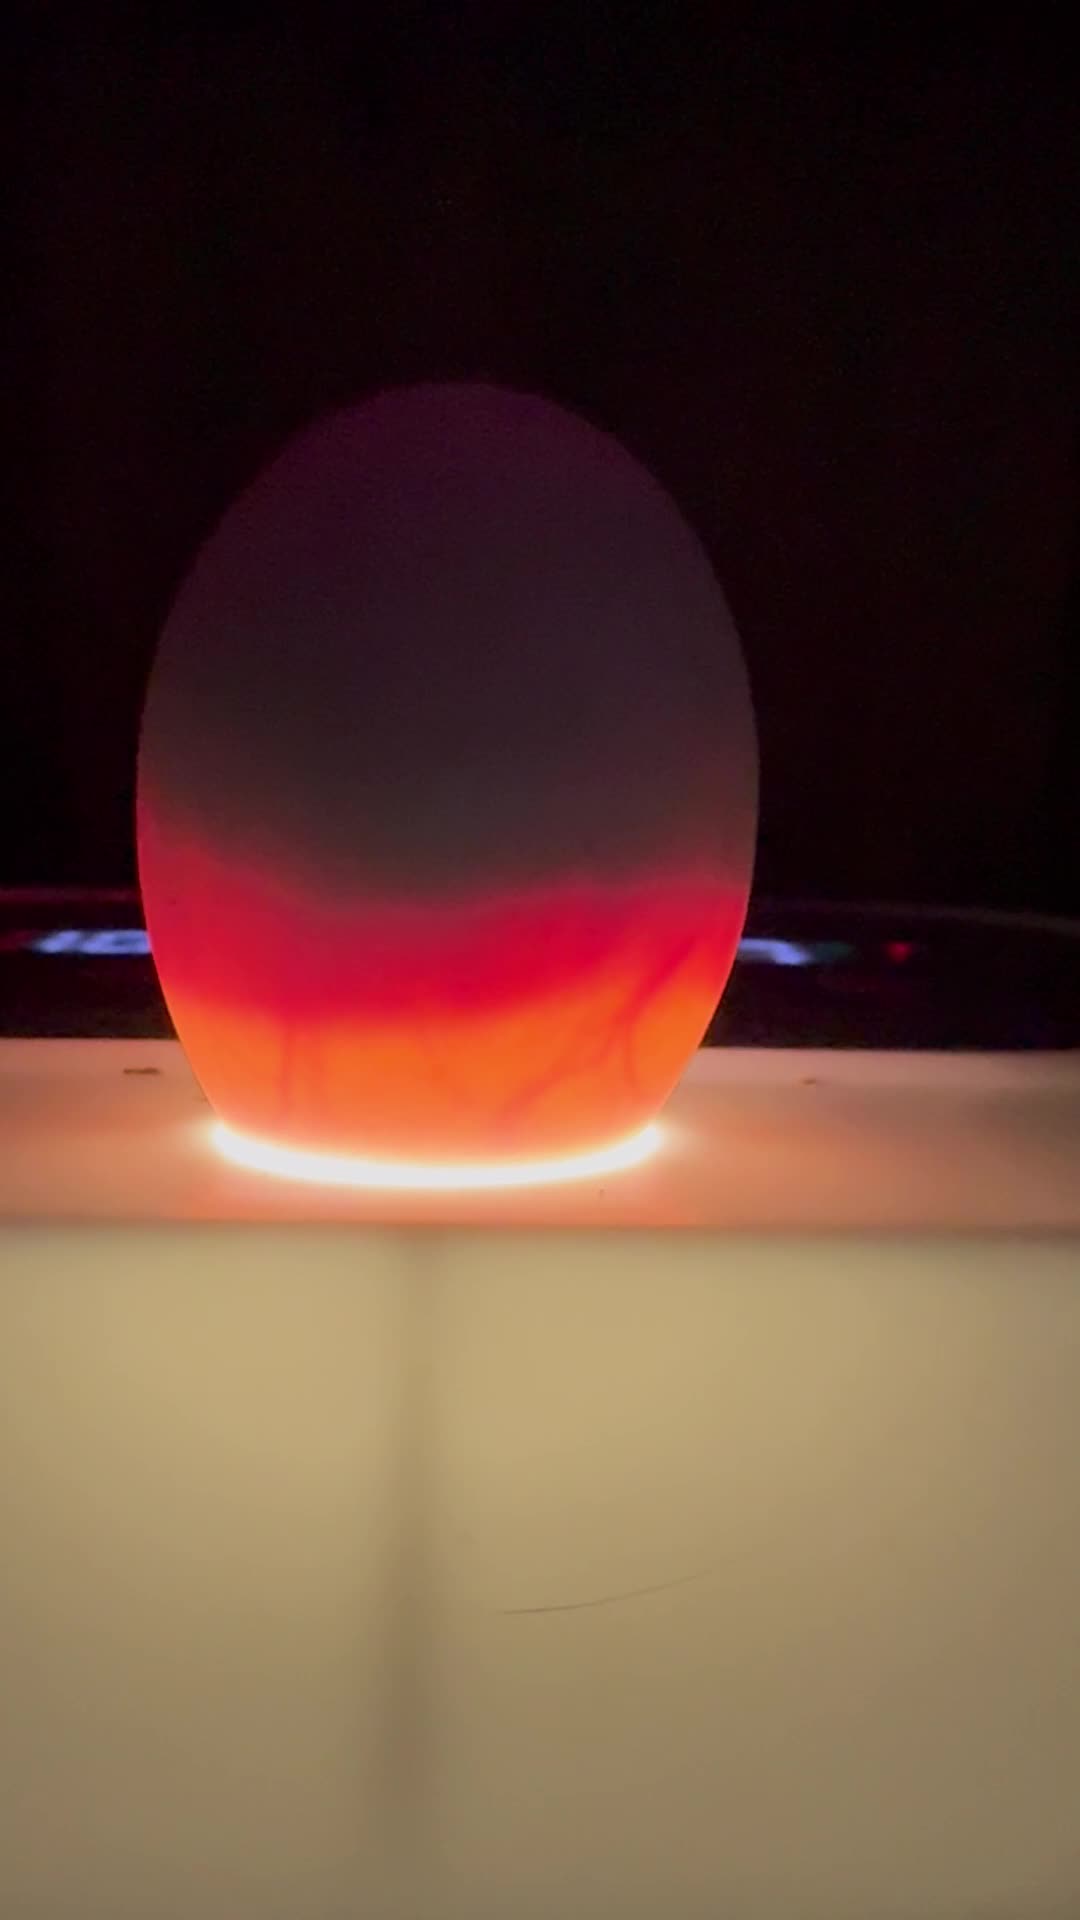
Image 2: An egg being candled using the built-in LED light to observe embryo development.
4. Konserwacja
Regularne czyszczenie jest niezbędne dla zachowania higieny i optymalnej wydajności.
- Demontaż: Unplug the incubator. Carefully remove the transparent lid and the egg turning tray.
- Czyszczenie: Wash all removable parts (lid, tray, water channels) with mild soap and warm water. Ensure all components are thoroughly rinsed and dried before reassembly. Avoid submerging the top unit with electronic components in water.
- Sanityzacja: For best results, sanitize the incubator components with a diluted disinfectant solution before and after each incubation cycle.
- Składowanie: Store the clean and dry incubator in a cool, dry place when not in use.
Image 3: The incubator with the transparent lid removed, showing the egg tray and internal components for easy cleaning.
5. Rozwiązywanie Problemów
If you encounter issues with your incubator, please refer to the following general advice:
- Wahania temperatury: Ensure the incubator is placed in a stable environment. Check that the lid is securely closed and the fan is operating correctly. If ambient temperature is too low, consider using the provided styrofoam packaging for additional insulation.
- Problemy z wilgotnością: Verify that the water reservoir is adequately filled. Adjust the ventilation vents to control humidity levels.
- Egg Turning Malfunction: Check that the egg turning mechanism is properly connected and free from obstructions.
- Wyświetlane błędy: If the display shows unusual readings, try performing a factory reset by pressing and holding the '+' and '-' buttons simultaneously for 3 seconds.
For specific error codes or persistent problems, consult the detailed troubleshooting section in the included printed manual or contact customer support.
6. Specyfikacje
| Funkcja | Szczegół |
|---|---|
| Wymiary produktu | 11.2 x 7.67 x 11.2 cala |
| Waga przedmiotu | 4.5 funta |
| Pojemność jajek | 12 (Chicken, Duck, Quail eggs) |
| Kontrola temperatury | Automatic with LED display, manual adjustment option |
| Kontrola wilgotności | Built-in sensor, external water inlet, adjustable vents |
| Obracanie jajek | Automatic (rotates every 2 hours), stops during lockdown |
| Candling Function | Integrated LED candling light |
| Producent | Żaglowiec |
| Numer modelu | ONLD005388_1 |
7. Gwarancja i wsparcie
For warranty information, please refer to the documentation included with your product. For technical support or inquiries, you may contact Sailnovo customer service at support@sailnovo.com.