
1. Informacje dotyczące bezpieczeństwa
Przed instalacją i uruchomieniem należy uważnie przeczytać wszystkie instrukcje. Nieprzestrzeganie tych instrukcji może spowodować porażenie prądem, pożar lub poważne obrażenia.
- Przed przystąpieniem do wykonywania jakichkolwiek prac okablowania lub prac konserwacyjnych należy upewnić się, że zasilanie jest odłączone.
- This device operates on 12-24V DC. Do not connect to AC power.
- All electrical connections should be made by a qualified professional.
- Install the controller in a dry, protected environment, away from direct sunlight, rain, and extreme temperatures.
- Keep children and unauthorized personnel away from the solar tracking system during operation.
2. Koniec produktuview
The WVCLTVJA XMYC-1 is a single-axis solar tracker controller designed to maximize solar panel efficiency by automatically positioning panels towards the sun. It features intelligent light sensing, an optional wind speed sensor for protection, and remote control capabilities for manual adjustments.
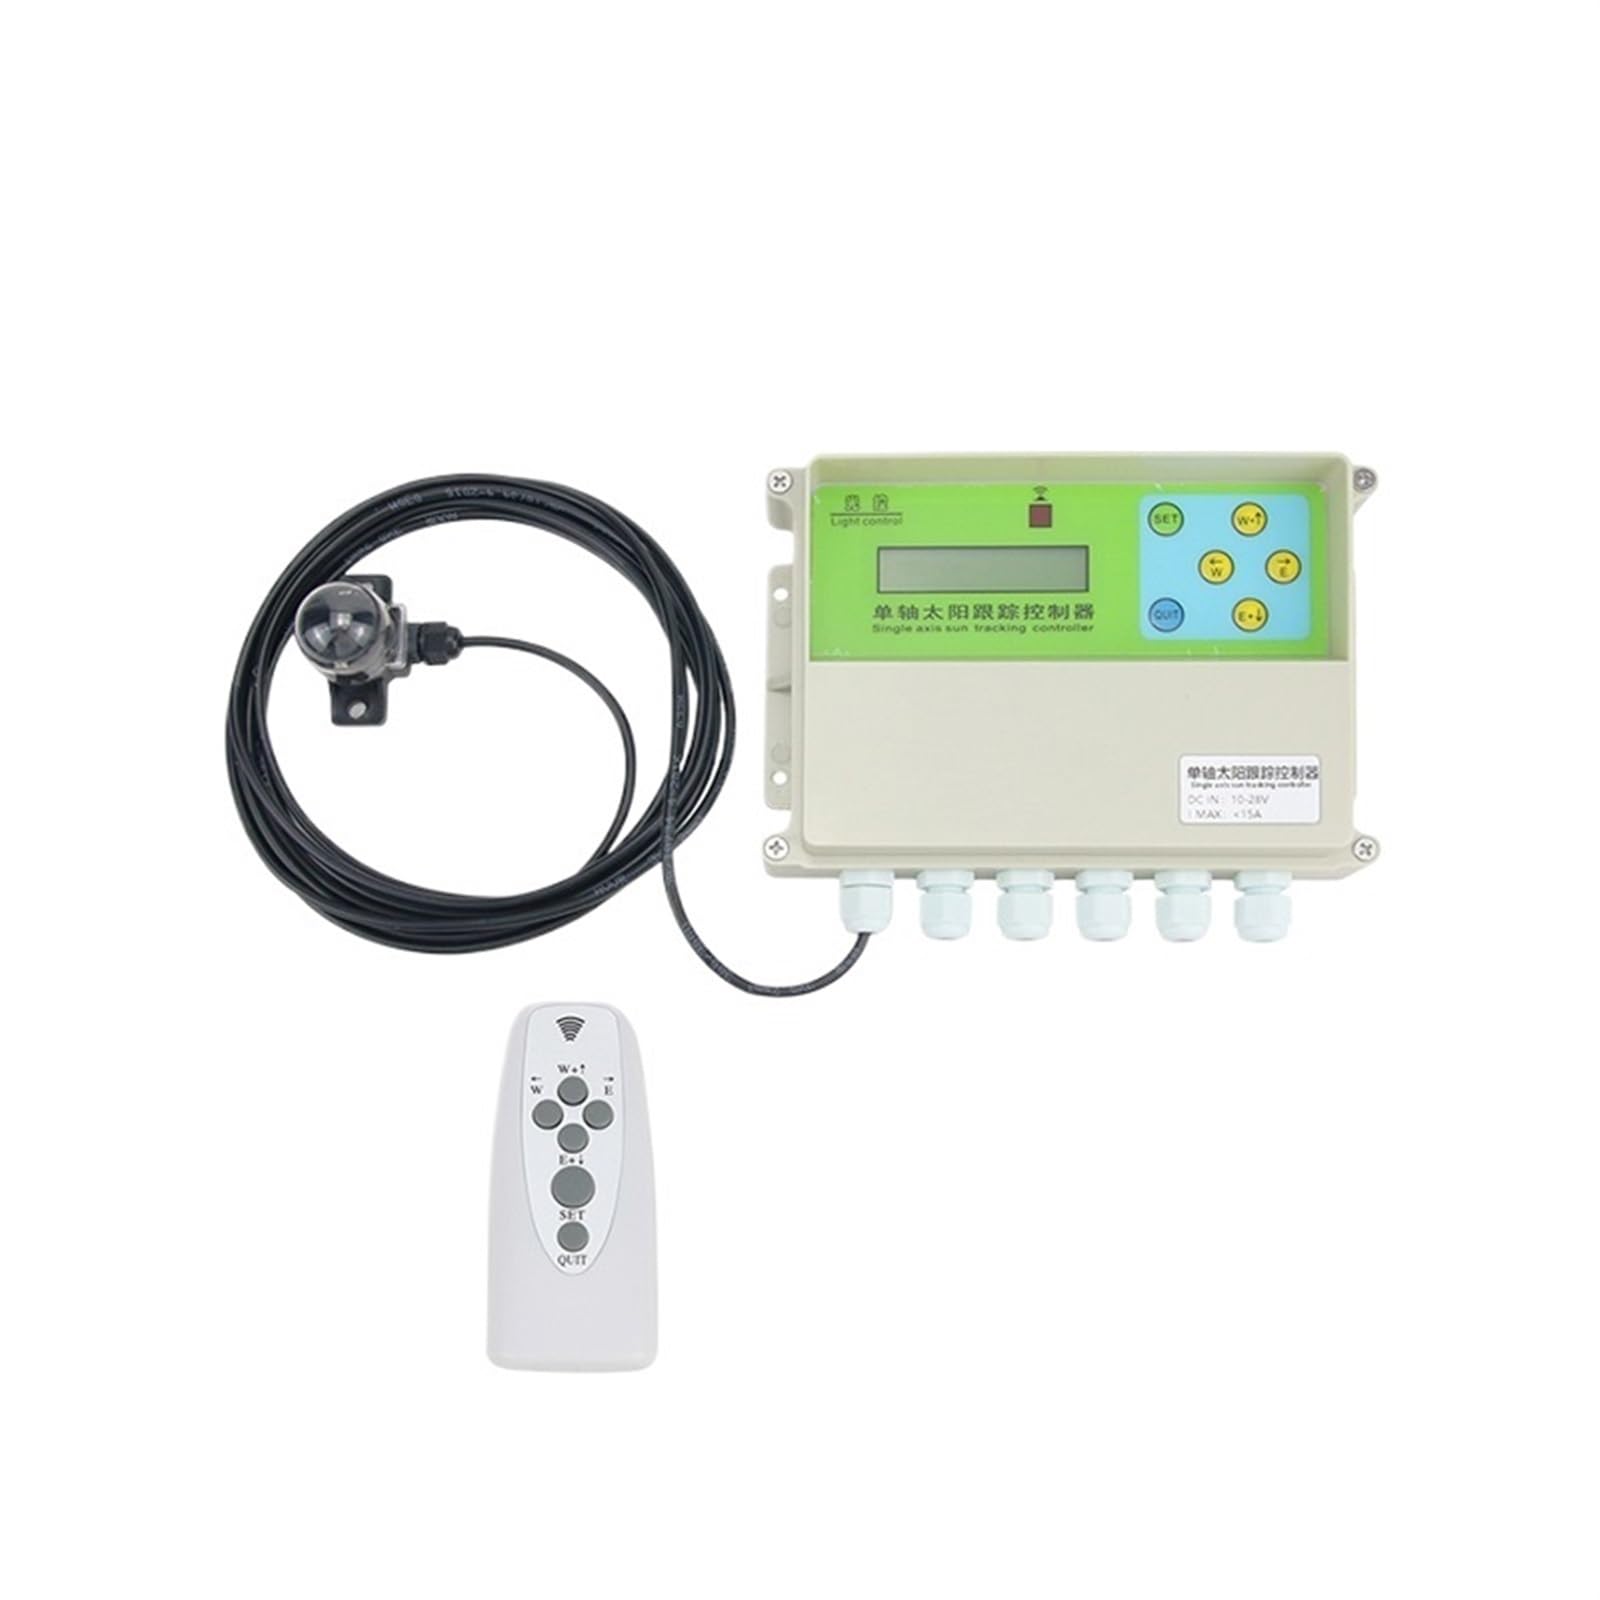
Image 1: WVCLTVJA XMYC-1 Single Axis Solar Tracker Controller. This image shows the main controller unit with various connection ports.
2.1 Główne cechy
- Single-axis solar tracking for optimal sun exposure.
- Automatic light sensor tracking.
- Optional wind speed sensor input for high wind protection.
- Remote control for manual operation and calibration.
- Szeroka objętość operacyjnatagZakres: 12-24V DC.
3. Specyfikacje
| Parametr | Wartość |
|---|---|
| Model | XMYC-1 |
| Objętość operacyjnatage | 12-24V DC |
| Typ śledzenia | Pojedyncza oś |
| Metoda kontroli | Light Sensor, Remote Control |
| Funkcje opcjonalne | Wind Speed Sensor Input |
| Waga przedmiotu | 50 gramów (1.76 uncji) |
| Wymiary opakowania | 1.18 x 0.79 x 0.39 cala |
4. Konfiguracja i instalacja
4.1 Montaż kontrolera
Mount the XMYC-1 controller in a secure, weather-protected enclosure. Ensure it is easily accessible for wiring and maintenance. Avoid locations with excessive vibration or direct exposure to extreme elements.
4.2 połączeń przewodów
Refer to the wiring diagram provided with your product for precise connections. The general connections are as follows:
- Pobór mocy: Connect the 12-24V DC power supply to the designated positive (+) and negative (-) terminals on the controller. Observe correct polarity.
- Podłączenie silnika: Connect your single-axis DC motor to the motor output terminals. The controller will reverse polarity to move the motor in different directions.
- Czujnik światła: Connect the light sensor cable to the dedicated light sensor port. Ensure the sensor is mounted in a location where it can accurately detect sunlight without obstruction from the solar panel itself.
- Wind Speed Sensor (Optional): If using, connect the wind speed sensor to its designated input port. This sensor provides data for automatic panel flattening during high winds.
Ważny: Double-check all connections before applying power to prevent damage to the controller or connected components.
5. Instrukcja obsługi
5.1 Automatic Tracking Mode
Once powered on and all sensors are connected, the controller will automatically enter tracking mode. The light sensor will detect the brightest point and command the motor to move the solar panel towards it. This process is continuous throughout the day.
5.2 Manual Control (Remote)
The included remote control allows for manual adjustment of the solar panel's position. This is useful for initial setup, calibration, or specific positioning needs.
- Naciśnij LEWY button to move the panel westward.
- Naciśnij PRAWIDŁOWY button to move the panel eastward.
- Release the button to stop movement.
- The remote may also have a DOM or NASTAWIĆ button to return the panel to a default position (refer to specific remote instructions).
5.3 Wind Speed Protection (If Applicable)
If a wind speed sensor is connected, the controller will monitor wind conditions. When wind speed exceeds a pre-set threshold, the controller will automatically move the solar panel to a horizontal or safe position to prevent damage. Tracking will resume once wind speeds return to safe levels.
5.4 Light Sensor Calibration
For optimal tracking, the light sensor may require calibration. This typically involves adjusting the sensor's sensitivity or physical orientation to ensure it accurately detects the sun's position. Refer to the specific instructions provided with your light sensor for detailed calibration steps.
6. Konserwacja
Regular maintenance ensures the longevity and optimal performance of your solar tracker controller.
- Czystość: Periodically clean the light sensor and wind speed sensor (if installed) to ensure accurate readings. Use a soft, damp płótno.
- Znajomości: Annually inspect all wiring connections for corrosion, looseness, or damage. Tighten any loose connections.
- Załącznik: Ensure the controller's enclosure remains sealed and free from moisture ingress.
- Silnik: Check the solar panel's motor and mechanical components for smooth operation and lubrication as per the motor manufacturer's recommendations.
7. Rozwiązywanie Problemów
| Problem | Możliwa przyczyna | Rozwiązanie |
|---|---|---|
| Kontroler nie włącza się. | No power supply; incorrect polarity; faulty wiring. | Check 12-24V DC power input; verify polarity; inspect all power connections. |
| Panel not tracking the sun. | Light sensor obstructed or dirty; motor not connected; motor fault; incorrect sensor calibration. | Clean light sensor; check motor wiring; test motor manually; recalibrate light sensor. |
| Panel moves erratically. | Light sensor interference; faulty sensor; loose motor connection. | Ensure light sensor has clear view; check sensor cable; secure motor connections. |
| Pilot nie działa. | Remote battery low/dead; remote out of range; IR receiver blocked. | Replace remote battery; operate within range; ensure clear line of sight to controller's IR receiver. |
| Panel stuck in safe position (wind protection). | High wind conditions; faulty wind sensor. | Wait for wind to subside; check wind sensor connection and functionality. |
8. Gwarancja i wsparcie
For warranty information, please refer to the documentation provided at the time of purchase or contact your seller directly. WVCLTVJA stands behind its products and offers technical support for any operational issues.
If you encounter problems not covered in this manual, please contact WVCLTVJA customer support through the retailer's platform or the official brand webaby uzyskać pomoc.