
1. Wprowadzenie
Dziękujemy za zakupasing the WVCLTVJA 318C Digital Microscope Camera. This device is designed for detailed observation and analysis, featuring a 12MP camera, up to 1600X magnification, and a 7-inch IPS touch screen for intuitive control. This manual provides essential information for the safe and effective use of your microscope. Please read it thoroughly before operation and retain it for future reference.
2. Informacje dotyczące bezpieczeństwa
To ensure safe operation and prolong the lifespan of your device, please observe the following precautions:
- Do not expose the microscope to extreme temperatures, humidity, or corrosive substances.
- Unikaj bezpośredniego wystawiania obiektywu na działanie silnych źródeł światła, gdyż może to uszkodzić czujnik.
- Use only the provided power adapter. Using an incorrect adapter may damage the device or pose a fire hazard.
- Trzymaj urządzenie z dala od dzieci, aby zapobiec wypadkom.
- Nie próbuj demontować ani modyfikować mikroskopu. Wszelkie prace serwisowe zlecaj wykwalifikowanemu personelowi.
- Clean the device with a soft, dry cloth. Avoid liquid cleaners directly on the screen or lens.
3. Zawartość opakowania
Please check the package contents upon receipt. If any items are missing or damaged, contact your retailer immediately.
- WVCLTVJA 318C Digital Microscope Camera
- Ordinary Lens
- Regulowana podstawka
- Kabel zasilający USB
- Zasilacz
- Linijka kalibracyjna
- Instrukcja obsługi (ten dokument)
4. Koniec produktuview
Familiarize yourself with the main components and controls of your WVCLTVJA 318C Digital Microscope.
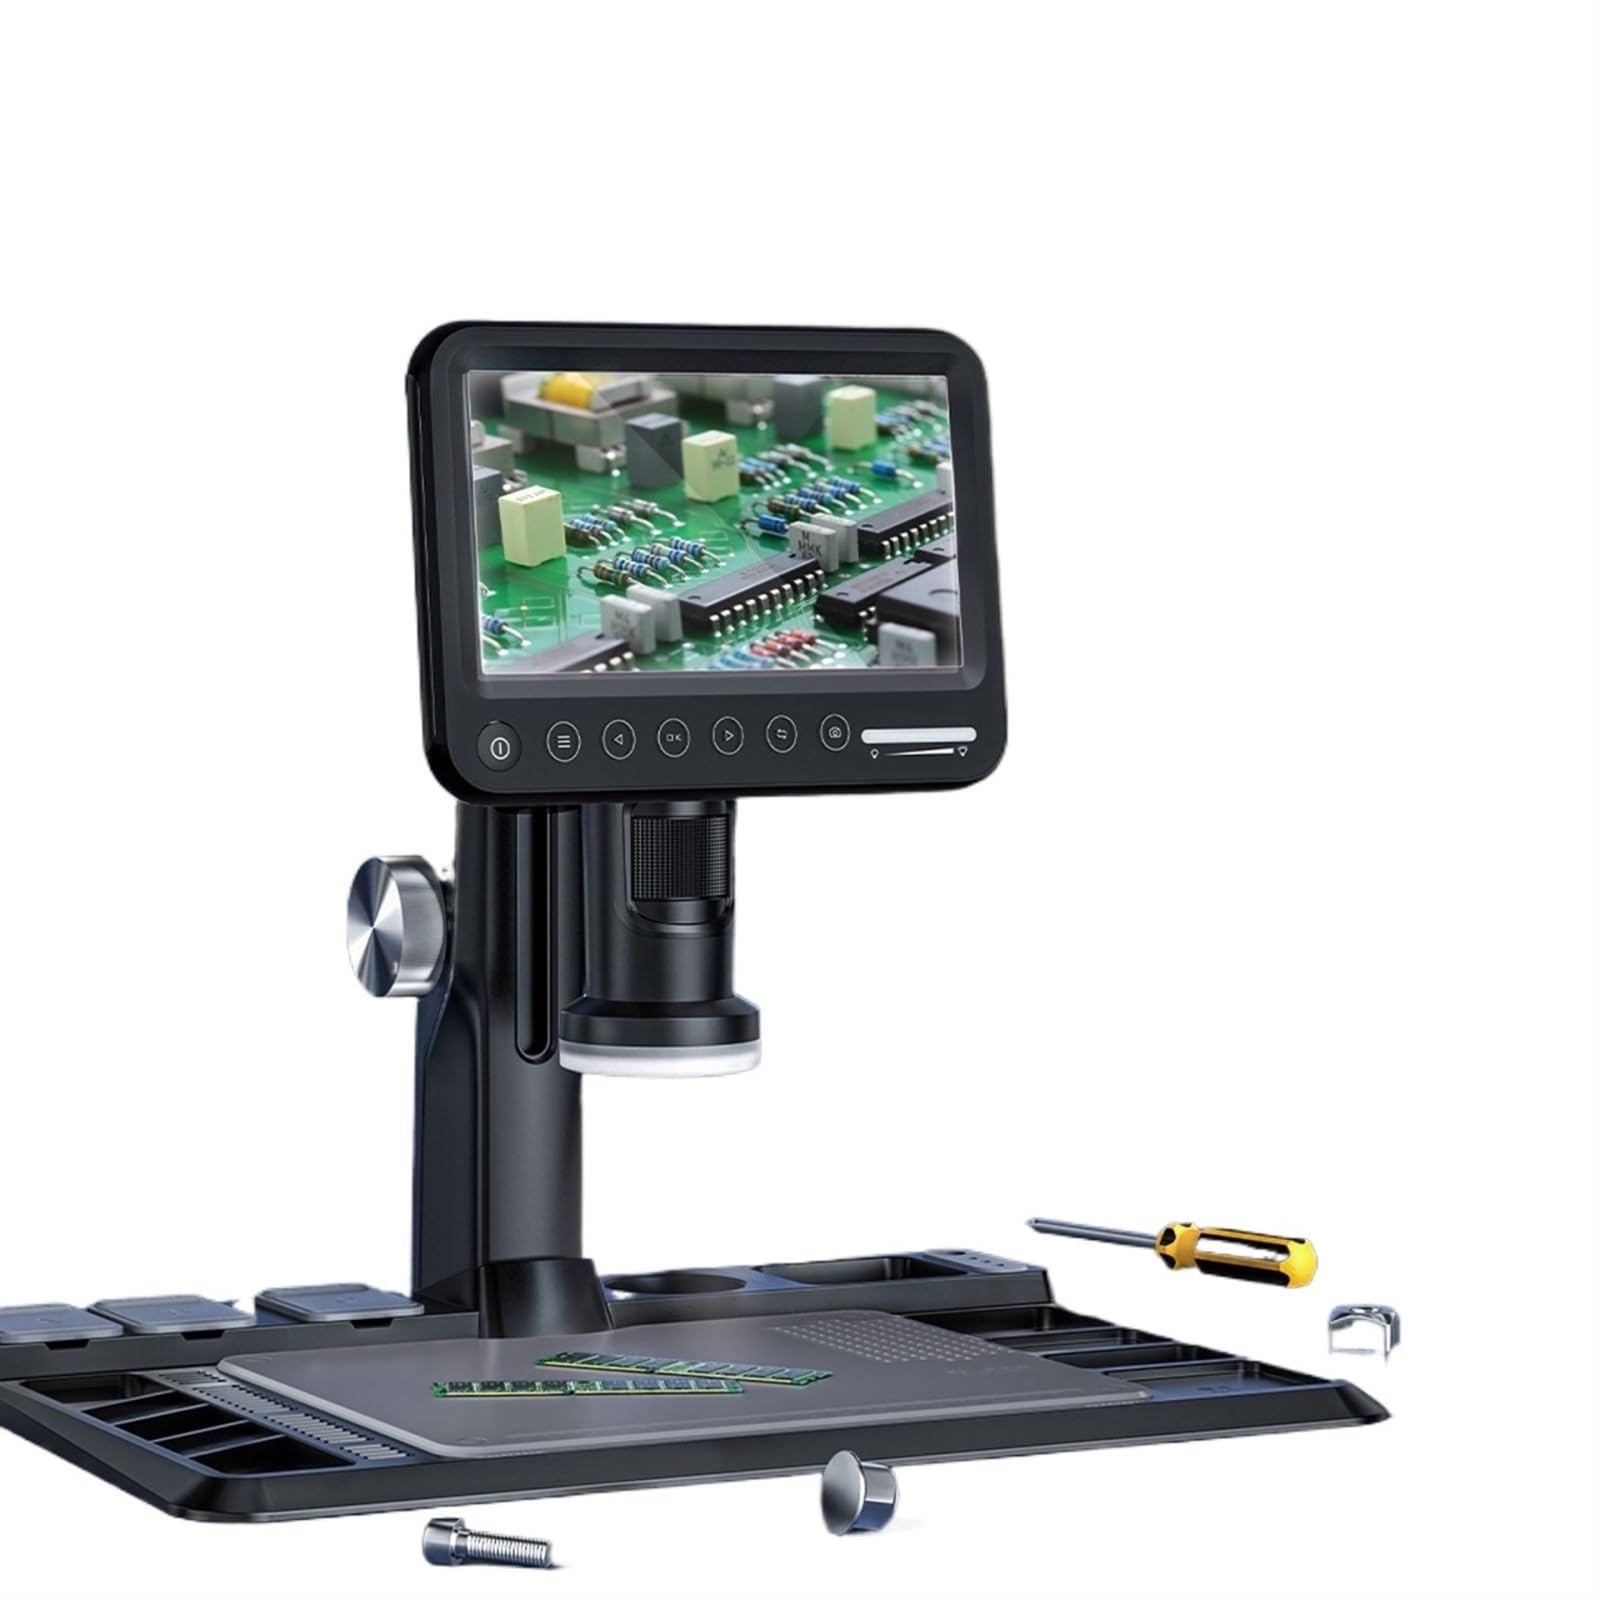
Rysunek 4.1: WVCLTVJA 318C Digital Microscope Camera. This image illustrates the main unit, including the 7-inch IPS touch screen, the adjustable stand, and the attached ordinary lens. Key components include the screen, focus wheel, magnification adjustment, and power input port.
Kluczowe komponenty:
- 7-calowy ekran dotykowy IPS: Dla viewing live images, navigating menus, and adjusting settings.
- Ordinary Lens: The primary lens for standard magnification.
- Koło ostrości: Dostosowuje ostrość, aby uzyskać wyraźne obrazy.
- Regulacja powiększenia: Controls the optical magnification level.
- Oświetlenie LED: Built-in lights to illuminate the specimen.
- Przycisk zasilania: Włącza i wyłącza urządzenie.
- Port USB: Do zasilania i przesyłu danych.
- Gniazdo kart microSD: Do przechowywania przechwyconych obrazów i filmów.
5. Konfiguracja
5.1 Rozpakowanie i montaż
- Ostrożnie wyjąć wszystkie elementy z opakowania.
- Place the adjustable stand on a stable, flat surface.
- Attach the microscope main unit to the stand, ensuring it is securely fastened.
5.2 Montaż obiektywu
- Gently screw the ordinary lens onto the microscope body until it is firm. Do not overtighten.
- Ensure the lens is clean and free of dust before use.
5.3 Połączenie zasilania
- Connect the USB power cable to the microscope's USB port.
- Podłącz drugi koniec kabla USB do dostarczonego zasilacza.
- Podłącz zasilacz do standardowego gniazdka elektrycznego.
5.4 Pierwsze włączenie zasilania
- Press and hold the Power button on the microscope for a few seconds until the screen illuminates.
- The device will boot up and display the live view z kamery.
6. Instrukcja obsługi
6.1 Włączanie/wyłączanie zasilania
- Włączanie: Naciśnij i przytrzymaj przycisk zasilania, aż ekran się włączy.
- Aby wyłączyć: Press and hold the Power button until a shutdown prompt appears on the screen. Confirm to power off.
6.2 Umieszczanie próbki
Place the object you wish to observe directly on the stage beneath the lens. Ensure it is stable and centered.
6.3 Regulacja ostrości
- Adjust the distance between the lens and the specimen using the stand's height adjustment mechanism.
- Rotate the Focus Wheel slowly until the image on the screen becomes clear and sharp.
6.4 Regulacja powiększenia
The 318C offers digital magnification up to 1600X. Optical magnification is adjusted by rotating the lens barrel or by changing the distance between the lens and the object. Digital zoom can be controlled via the touch screen interface.
6.5 Przechwytywanie obrazu i wideo
The 318C allows you to capture high-resolution images and videos directly to a MicroSD card (not included).
- Ensure a MicroSD card (Class 10 or higher, up to 32GB recommended) is inserted into the card slot.
- Z koncertu view, tap the camera icon on the touch screen to take a photo.
- Tap the video camera icon to start recording. Tap again to stop recording.
- Złapany files może być ponownieviewed in the gallery mode, accessible via the main menu.
6.6 Menu Navigation (Touch Control)
The 7-inch IPS screen supports touch control for navigating the microscope's settings and features.
- Uzyskiwać: Select an option or icon.
- Trzepnąć: Scroll through lists or images in gallery mode.
- Powiększanie za pomocą szczypania: Adjust digital zoom in live view or gallery (if supported by software).
Typowe opcje menu obejmują:
- Rezolucja: Adjust image/video capture resolution.
- Narażenie: Control brightness.
- Balans bieli: Dostosuj temperaturę kolorów.
- Data/Godzina: Ustaw datę i godzinę systemową.
- Język: Wybierz język wyświetlania.
- Sformatuj kartę SD: Usuń wszystkie dane z karty MicroSD.
6.7 Przesyłanie danych
Przenieść filedo komputera:
- Podłącz mikroskop do komputera za pomocą kabla USB.
- The microscope should appear as a removable storage device.
- Alternatively, remove the MicroSD card from the microscope and insert it into a card reader connected to your computer.
7. Konserwacja
7.1 Czyszczenie
- Obiektyw: Use a soft, lint-free lens cleaning cloth and specialized lens cleaning solution. Do not use abrasive materials.
- Ekran: Wipe the touch screen gently with a microfiber cloth. For stubborn smudges, slightly dampWyczyść szmatkę wodą lub płynem do czyszczenia ekranów.
- Ciało: Use a soft, dry cloth to wipe the microscope body. Avoid harsh chemicals.
7.2 Przechowywanie
When not in use, store the microscope in a clean, dry, and dust-free environment. Use the original packaging or a protective case to prevent damage.
7.3 Pielęgnacja baterii (jeśli dotyczy)
If your model includes a rechargeable battery, ensure it is charged periodically even when not in use to maintain battery health. Avoid fully discharging the battery for extended periods.
8. Rozwiązywanie Problemów
If you encounter issues with your WVCLTVJA 318C Digital Microscope, refer to the following table for common problems and solutions.
| Problem | Możliwa przyczyna | Rozwiązanie |
|---|---|---|
| Urządzenie nie włącza się. | No power, loose connection, or discharged battery. | Check power adapter and cable connection. Ensure the power outlet is functional. Charge the device if it has an internal battery. |
| Obraz jest rozmazany. | Out of focus, dirty lens, or incorrect working distance. | Adjust the focus wheel. Clean the lens. Adjust the height of the microscope relative to the specimen. |
| Cannot capture images/videos. | No MicroSD card, full card, or card error. | Insert a MicroSD card. Check if the card is full and delete unnecessary files or replace it. Format the MicroSD card (this will erase all data). |
| Ekran nie reaguje. | Błąd oprogramowania lub chwilowe zawieszenie. | Restart the device by holding the power button. If unresponsive, disconnect power and reconnect after a few seconds. |
| Obraz jest zbyt ciemny/jasny. | Incorrect LED illumination or exposure settings. | Adjust the brightness of the LED lights. Modify exposure settings in the menu. |
Jeśli po wypróbowaniu tych rozwiązań problem nadal występuje, skontaktuj się z obsługą klienta.
9. Specyfikacje
Technical specifications for the WVCLTVJA 318C Digital Microscope Camera:
| Funkcja | Szczegół |
|---|---|
| Model | 318C |
| Rozdzielczość kamery | 12 megapiksela |
| Powiększenie | Up to 1600X (Digital) |
| Wyświetlacz | 7-calowy ekran dotykowy IPS |
| Składowanie | MicroSD Card (up to 32GB, Class 10 recommended) |
| Łączność | USB |
| Oświetlenie | Regulowane światła LED |
| Moc wejściowa | 5 V DC przez USB |
| Waga | Approximately 50 Grams (main unit) |
10. Gwarancja i wsparcie
The WVCLTVJA 318C Digital Microscope Camera comes with a standard manufacturer's warranty. Please refer to the warranty card included in your package for specific terms and conditions. For technical support, troubleshooting assistance, or warranty claims, please contact your retailer or the manufacturer directly using the contact information provided with your purchase.
Please have your model number (318C) and purchase date available when contacting support.