Wstęp
The NEEWER CRS6 Softbox Diffusion Dome is designed to soften and diffuse the harsh light from various flash units and continuous video lights, providing a more natural and flattering illumination. Its flexible silicone construction allows for different lighting effects, and the included adapter rings ensure broad compatibility with round head flashes, square speedlites, and NEEWER mount video lights.

Image: The NEEWER CRS6 Softbox Diffusion Dome shown with its three versatile adapter rings.
Zawartość opakowania
Sprawdź, czy w przesyłce znajdują się wszystkie elementy wymienione poniżej:
- 1 x Silikonowa kopułka dyfuzyjna
- 1 x Square Flash Head Adapter Ring
- 1 x Round Flash Head Adapter Ring
- 1 x NEEWER Mount Adapter Ring for Video Light
- 1 x Instrukcja obsługi
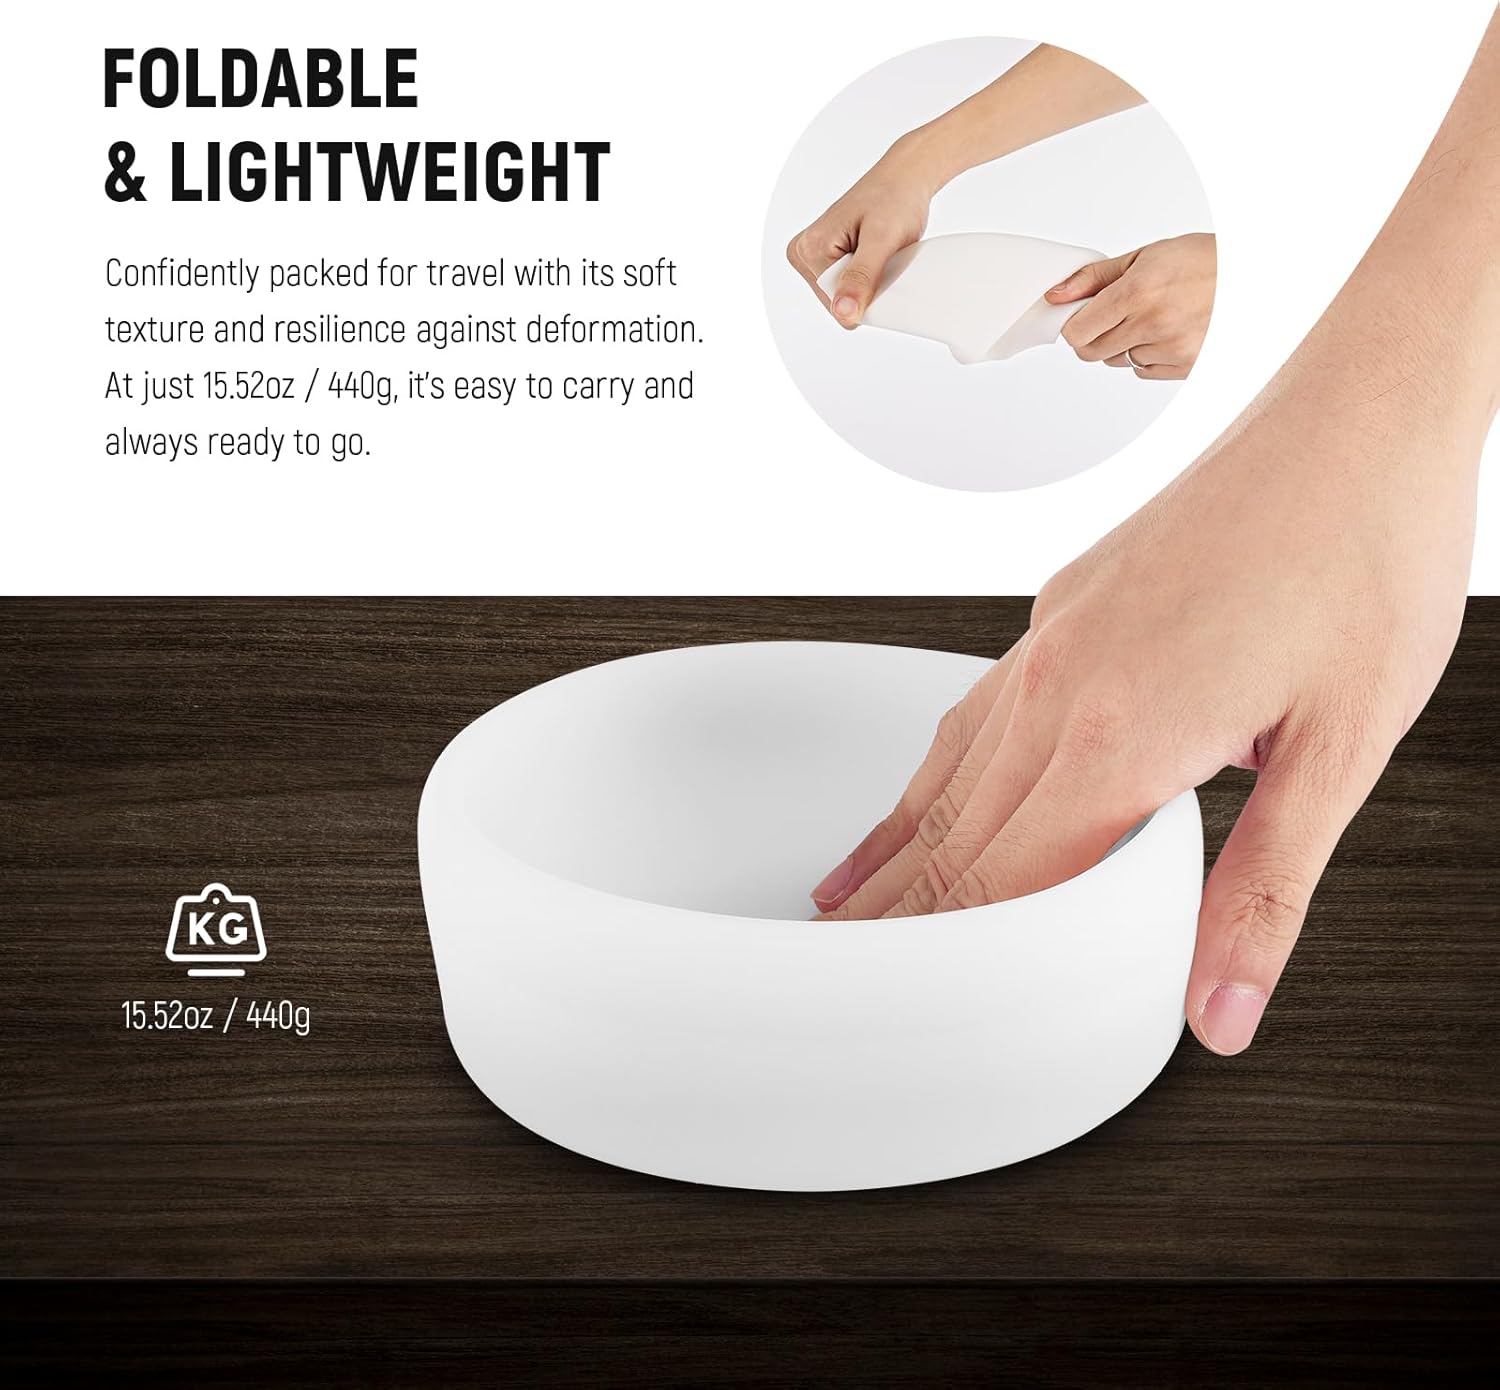
Image: All components included in the NEEWER CRS6 Softbox Diffusion Dome package.
Instrukcje konfiguracji
Follow these steps to properly attach the diffusion dome to your lighting equipment:
- Select the Appropriate Adapter Ring: Identify the correct adapter ring for your flash unit or video light. The kit includes a Round Flash Head Adapter Ring (compatible with Godox V1, NEEWER Z1/Z2 series), a Square Flash Head Adapter Ring (compatible with NEEWER Z760, NW700, NW620, NW645II, TT560), and a NEEWER Mount Adapter Ring (compatible with NEEWER MS60B, MS60C, MS150B, Q45).
- Attach Adapter Ring to Light Source:
- Dla Round Flash Head Adapter Ring: Align the adapter with your round head flash and secure it. This adapter features a built-in buckle for a secure fit.
- Dla Square Flash Head Adapter Ring: Slide the adapter onto your square head flash. Use the two tighten knobs to firmly secure it in place. This adapter also includes a cold shoe for additional expansion.
- Dla NEEWER Mount Adapter Ring: Attach this ring to compatible NEEWER video lights.
- Mount the Silicone Diffusion Dome: Once the adapter ring is securely attached to your light source, gently stretch the silicone diffusion dome over the adapter ring. Ensure the dome is fully seated and covers the adapter ring's rim for optimal light diffusion.
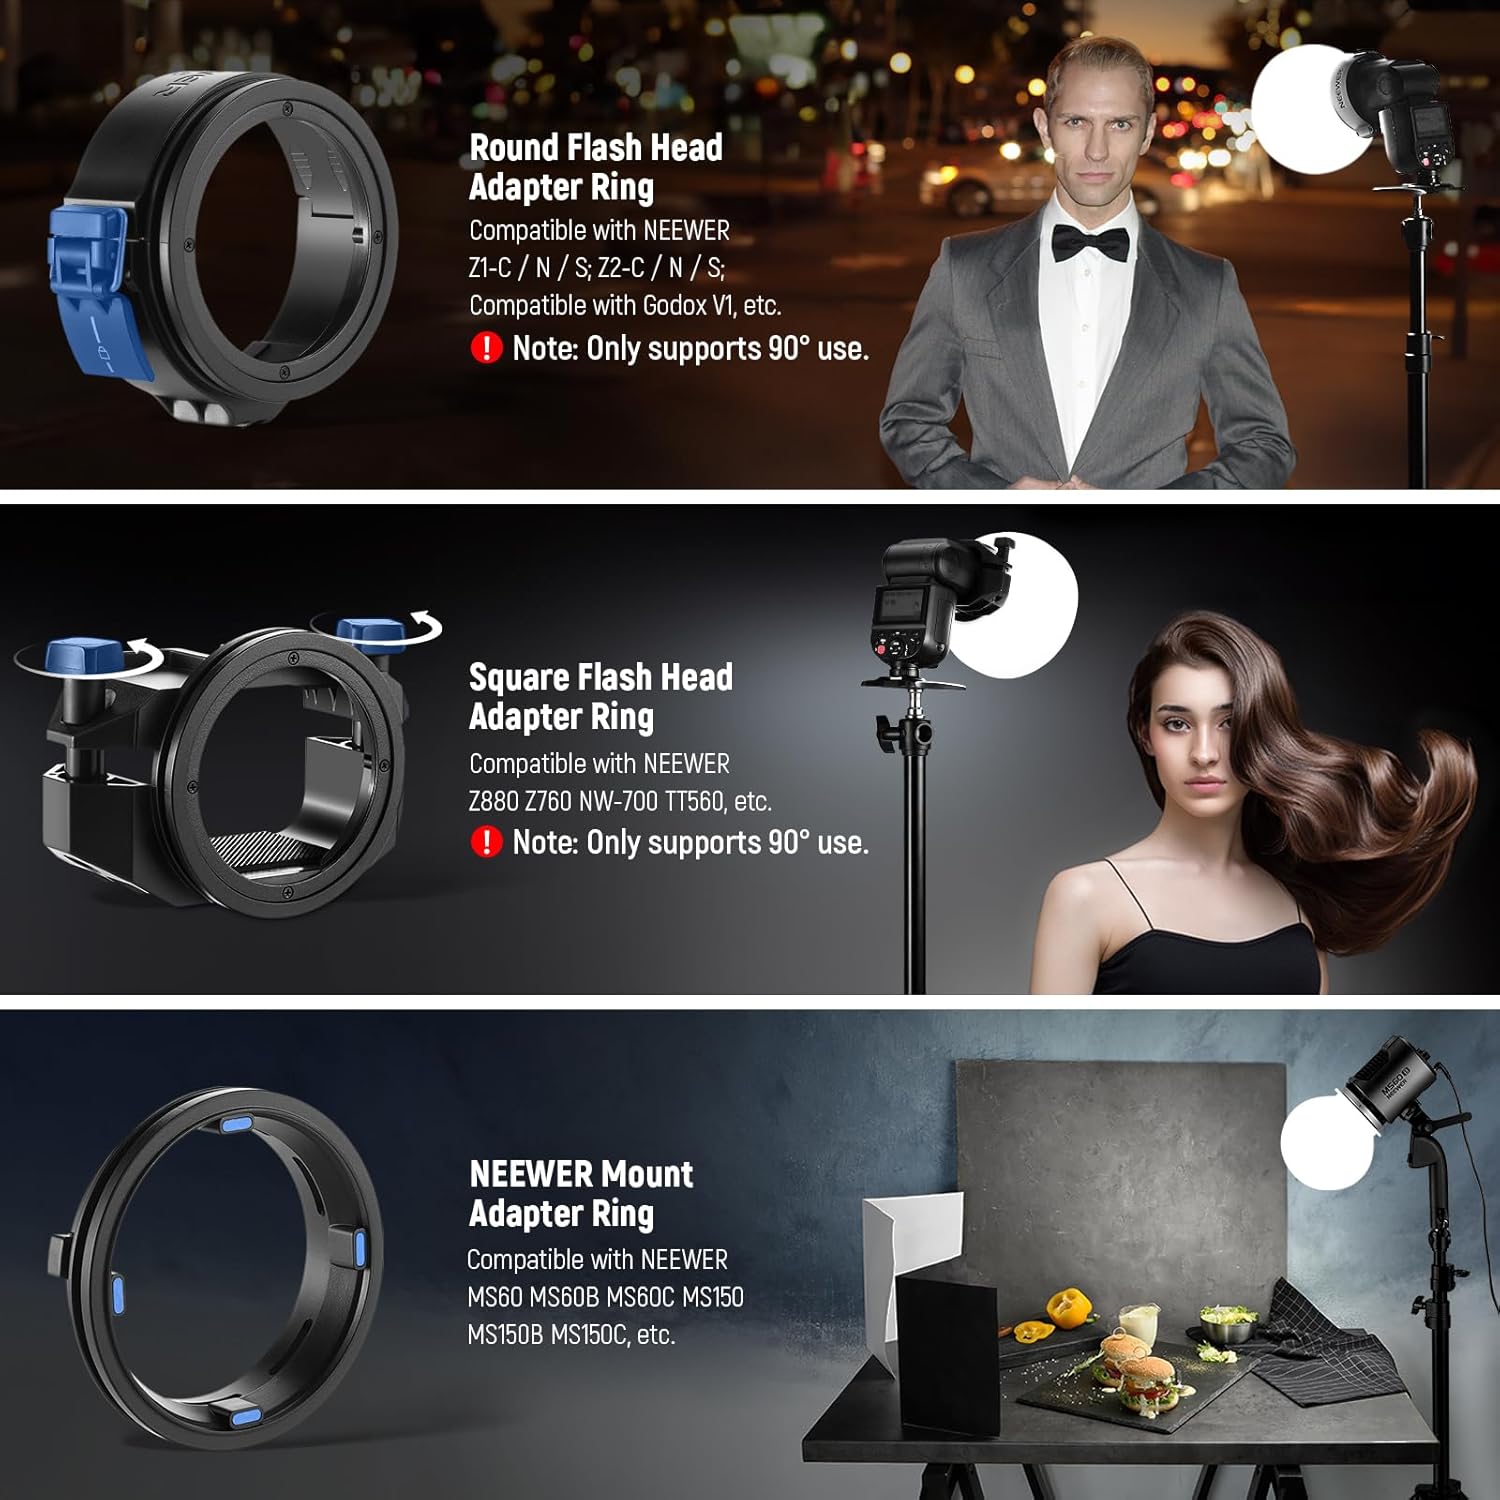
Image: Visual guide for attaching the three different adapter rings to various lighting units.
Tryby pracy
The flexible design of the CRS6 diffusion dome allows for various lighting effects:
- 360° Diffused Illumination: When the dome is fully expanded, it provides a soft, omnidirectional light spread, ideal for filling a space with even illumination.
- 180° Diffused Illumination: By folding the lower part of the dome inward, you can achieve a 180° diffused light, directing the light primarily forward and upward, suitable for specific subject lighting.
- Focused Illumination: Folding the upper part of the dome inward creates a more focused light beam, concentrating the light for a more direct effect.

Image: Demonstrates the different lighting effects achievable by manipulating the flexible dome.
The primary function of the CRS6 is to soften direct light and reduce harsh shadows, resulting in more flattering and natural illumination for your subjects.

Image: A visual comparison showing the significant difference in light quality when using the diffusion dome versus direct flash.
The CRS6 is suitable for a wide range of photographic applications, from portraiture to product photography, enhancing the quality of light in various settings.

Image: Illustrates diverse scenarios where the CRS6 diffusion dome can be effectively utilized.
Konserwacja
To ensure the longevity and optimal performance of your NEEWER CRS6 Softbox Diffusion Dome, please follow these maintenance guidelines:
- Czyszczenie: The silicone dome can be gently wiped clean with a soft, damp cloth. Avoid using abrasive cleaners or solvents that could damage the material. Ensure it is completely dry before storage.
- Składowanie: Thanks to its soft and foldable design, the dome can be easily packed for travel or storage. Store it in a clean, dry place away from direct sunlight and extreme temperatures to prevent deformation or damage.

Image: The diffusion dome's soft and flexible material allows for easy folding and compact storage.
Rozwiązywanie problemów
If you encounter any issues while using your NEEWER CRS6 Softbox Diffusion Dome, refer to the following common problems and solutions:
| Problem | Możliwa przyczyna / rozwiązanie |
|---|---|
| Dome does not attach securely to flash/light. |
|
| Light diffusion is uneven or insufficient. |
|
| Dome appears deformed or creased. |
|
Specyfikacje
| Funkcja | Szczegół |
|---|---|
| Numer modelu | CRS6 |
| Tworzywo | Rubber (Silicone) |
| Waga przedmiotu | 1.21 funta (około 440 g) |
| Wymiary opakowania | 6.18 x 6.18 x 4.69 cala |
| Kolor | Biały |
| Kompatybilność źródła światła | Flash, LED |
| Dołączone pierścienie adapterowe | Square Flash Head, Round Flash Head, NEEWER Mount for Video Light |
Gwarancja i wsparcie
NEEWER stands behind the quality of its products. For warranty activation and support, please refer to the information below:
- Aktywacja gwarancji: Aby aktywować gwarancję produktu, odwiedź oficjalną stronę NEEWER webstrona: www.neewer.com.
- Obsługa klienta: For any inquiries, technical assistance, or support needs, you may contact NEEWER customer service via email at: vip@neewer.com.

Image: The product packaging displaying warranty activation and customer support contact details.