1. Koniec produktuview
The Greadio R12 is a versatile portable radio designed for outdoor activities and emergency preparedness. It features multiple radio bands, Bluetooth connectivity, various charging methods, and essential emergency functions.
1.1. Komponenty i elementy sterujące
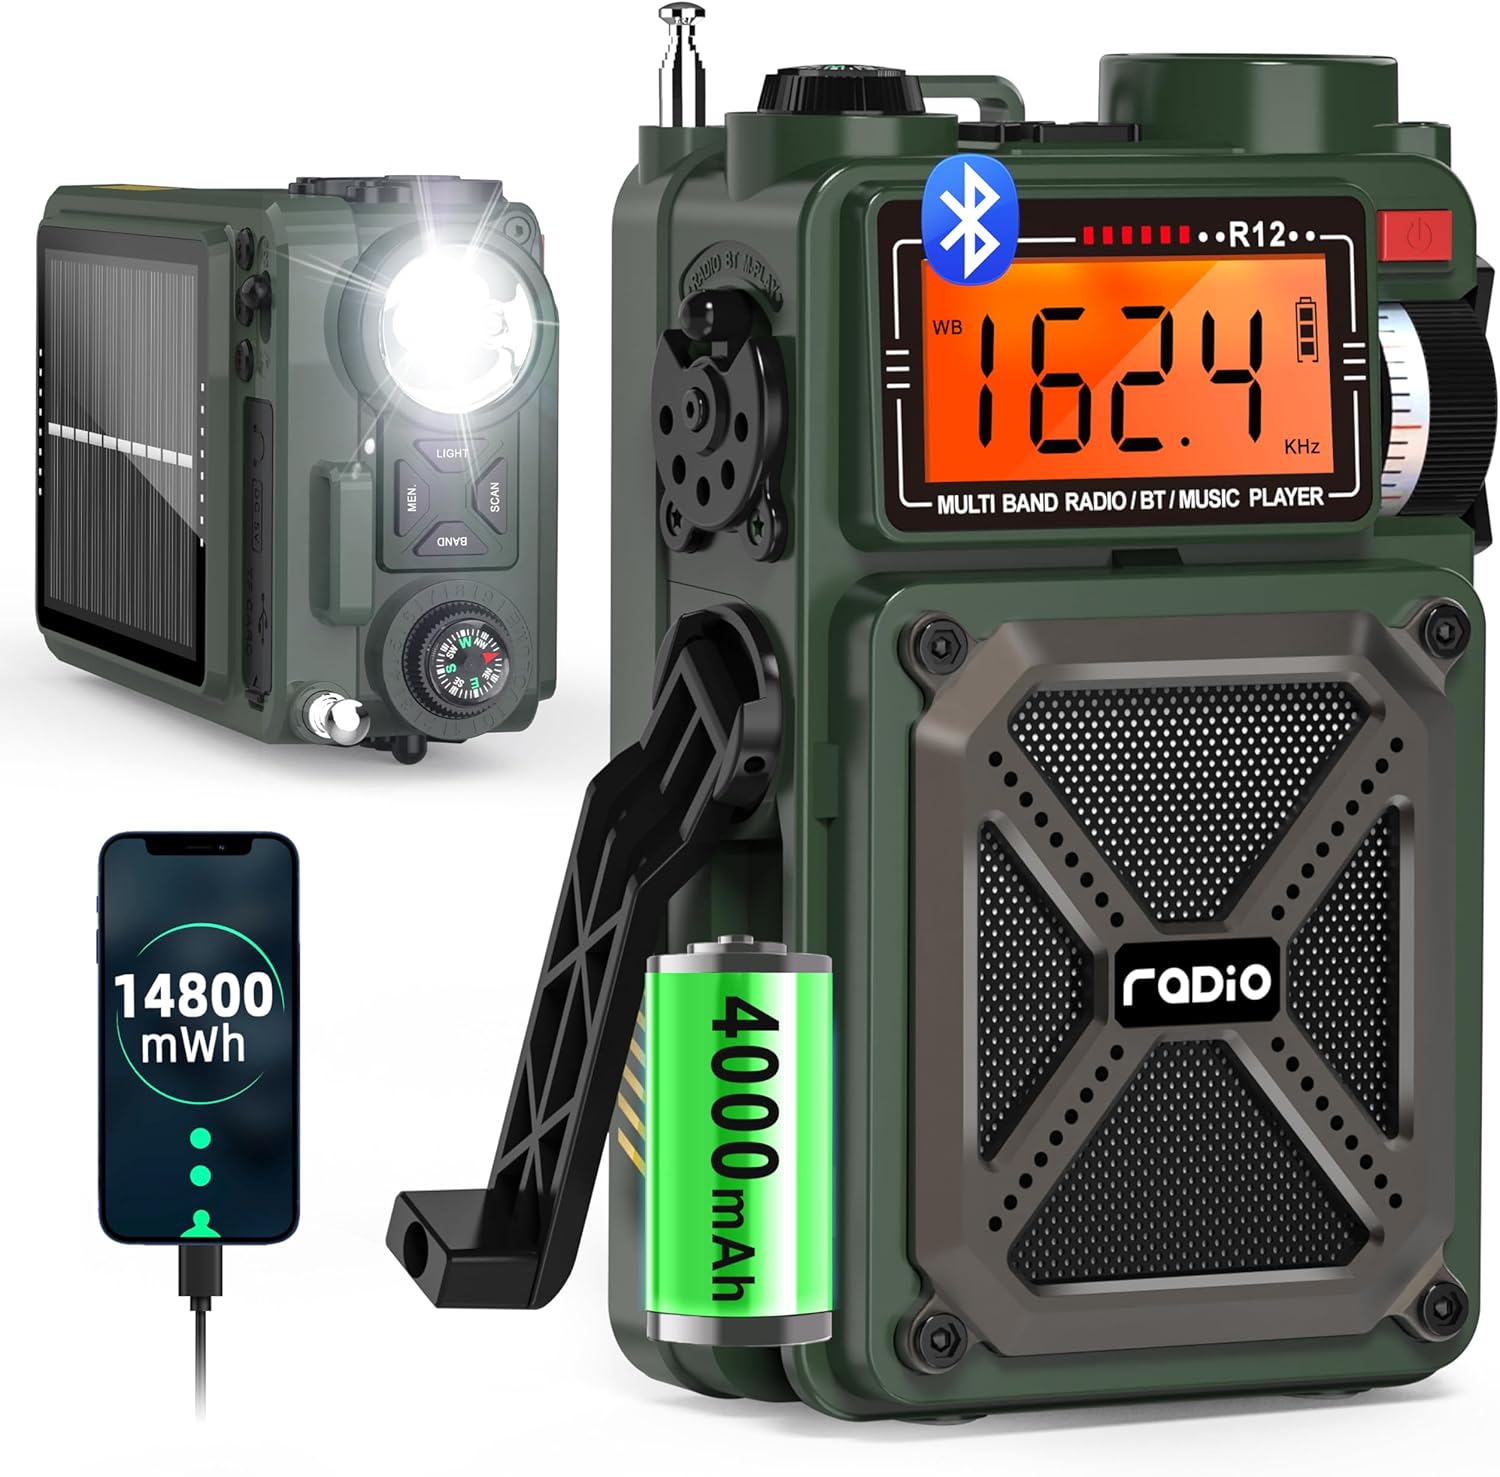
Figure 1: Greadio R12 Portable Multi-Band Emergency Radio. This image displays the front and side views of the green Greadio R12 radio, highlighting its compact design, digital display, speaker grille, flashlight, and hand crank.

Figure 2: Greadio R12 Multi-Function Radio Diagram. This diagram illustrates the various ports and controls on the side of the radio, including the 3.5mm earphone jack, USB Type-C charging port, TF/SD card slot, and USB port.
Panel przedni:
- Wyświetlacz LCD: Shows frequency, mode, battery level, and other indicators.
- Głośnik: Wyjście audio.
- Gałka strojeniowa: Dostosowuje częstotliwość radiową.
- Przycisk zasilania: Włącza/wyłącza radio.
- Wskaźnik ładowania: Zapala się podczas ładowania.
Górny panel:
- Latarka LED: Zapewnia oświetlenie.
- Kompas: Zintegrowany z nawigacją.
- Pokrętło głośności: Dostosowuje głośność dźwięku.
- Antena: Extendable for improved radio reception.
- Przycisk ŚWIATŁA: Włącza latarkę.
- MEM. Button: Accesses and stores preset stations.
- Przycisk BAND: Switches between radio bands (FM/AM/SW/WB).
- Przycisk SKANUJ: Initiates automatic station search.
Panel boczny:
- Przełącznik funkcji: Selects between Radio, Bluetooth (BT), TF/SD Card, and USB modes.
- Korba ręczna: Do ręcznego wytwarzania energii.
- SOS Switch: Włącza alarm awaryjny.
- Gniazdo słuchawkowe (3.5 mm): Do prywatnego słuchania.
- Port ładowania typu C: Do zewnętrznego zasilania.
- Gniazdo karty TF/SD: For playing audio from memory cards.
- Port USB: For playing audio from USB drives or charging external devices.
Tylny panel:
- Panel słoneczny: Do ładowania energią słoneczną.
2. Konfiguracja i ładowanie
2.1. Początkowe włączanie/wyłączanie zasilania
- To turn on the radio, long press the Wyłącznik zasilania przez około 2 sekundy.
- Aby wyłączyć radio, naciśnij i przytrzymaj przycisk Wyłącznik zasilania ponownie przez około 2 sekundy.
2.2. Ładowanie radia
The Greadio R12 offers three methods for charging its internal 4000mAh battery:

Figure 3: Three Ways to Charge the Greadio R12. This image visually explains the three charging methods: Type-C cable, hand crank, and solar panel.
- Ładowanie typu C: Connect a standard Type-C charging cable (5V 1A/2A adapter, not included) to the Type-C charging port on the side of the radio. The charging indicator light will turn red during charging.
- Ładowanie słoneczne: Place the radio with its solar panel facing direct sunlight. The charging indicator lights will turn red when solar charging is active. This method is ideal for maintaining charge or slow charging in outdoor conditions.
- Ładowanie korbą ręczną: Extend the hand crank on the side of the radio. Turn the hand crank clockwise or anti-clockwise. The red charging indicator will light up, indicating that power is being generated. Continuous cranking is required for effective charging.
Video 1: How to Use USB-C, Hand Crank and Solar Charging. This video demonstrates the three charging methods for the Greadio R12 radio: connecting a USB-C cable, utilizing the solar panel, and operating the hand crank.
3. Instrukcja obsługi
3.1. Radio Modes (AM/FM/SW/NOAA)

Figure 4: Greadio R12 Radio Bands. This image highlights the supported radio frequencies for WB (NOAA Weather Band), AM, FM, and SW (Shortwave) bands.
- Wybór zespołu: Naciśnij ZESPÓŁ button on the top panel to cycle through FM, AM, SW, and WB (NOAA Weather Band) modes.
- Strojenie: Użyj Gałka strojenia on the front panel to manually adjust the frequency within the selected band.
- Automatyczne wyszukiwanie: Naciśnij i przytrzymaj SKANDOWAĆ button to automatically search for and stop at available stations.
- Zaprogramowane stacje: Naciśnij i przytrzymaj MEM. button to automatically search and store stations as presets. Short press the MEM. button to recall preset stations, then use the Gałka strojenia przełączać się między nimi.
Video 2: How to Perform Radio Channel Switching and Feature Switching. This video demonstrates how to switch between different radio bands (AM, FM, SW, WB) and other features using the radio's controls.
Video 3: How to Preset Stations and Operate Bluetooth/TF/USB Modes. This video guides users through presetting radio stations and operating the Bluetooth, TF card, and USB playback modes.
3.2. Tryb Bluetooth

Figure 5: Greadio R12 Bluetooth 5.4 Connectivity. This image shows the radio connected via Bluetooth to a smartphone, illustrating the wireless audio streaming capability.
- Dostosuj Przełącznik funkcji on the side of the radio to the "BT" position to enter Bluetooth mode.
- On your mobile device, enable Bluetooth and search for the device named "R12".
- Select "R12" to pair and connect. Once connected, you can stream audio from your device to the radio.
3.3. Odtwarzanie z USB/karty TF
- Dostosuj Przełącznik funkcji to the "M-PLAY" position.
- Insert a Micro SD (TF) card or a USB drive into the respective slot/port. The radio supports MP3 and WAV formats up to 256GB.
- Use the Previous/Next buttons (often integrated with scan/mem buttons or separate controls) to navigate tracks. Short press the Play/Pause button to control playback.
4. Funkcje awaryjne
4.1. Alarm SOS

Figure 6: Greadio R12 SOS Alarm. This image shows the radio with its SOS alarm activated, emitting a loud sound and flashing light for emergency signaling.
In an emergency, slide the SOS Switch on the side of the radio to activate a loud siren and flashing light to attract attention.
Video 4: Emergency Outdoor Radio. This video highlights the emergency features of the Greadio R12, including the SOS alarm and flashlight, demonstrating their use in outdoor scenarios.
4.2. Latarka
Naciśnij ŚWIATŁO button on the top panel to turn on the integrated LED flashlight. Press it again to turn it off.
4.3. Funkcja powerbanku (wyjście USB)

Figure 7: Greadio R12 USB Output Charging Phone. This image shows the radio being used to charge a smartphone via its USB output port.
The radio can act as a power bank to charge external devices:
- Pchnij Przełącznik funkcji to the lightning symbol position (USB output mode).
- Plug your device's charging cable into the USB output port.
- Ensure the radio has sufficient charge to power your external device.
4.4. Kompas
The integrated compass on the top panel provides basic directional guidance. Ensure the radio is held level for an accurate reading.
5. Specyfikacje
| Funkcja | Szczegół |
|---|---|
| Wymiary produktu | 3.19 x 2.05 x 5.2 cala |
| Waga przedmiotu | 12.3 uncji |
| Numer modelu przedmiotu | R12 |
| Baterie | 2 Lithium Ion batteries required (built-in 4000mAh) |
| Marka | Greadio |
| Cechy specjalne | Built-In AM Antenna, Built-In Flashlight, Portable, Rechargeable, SOS Alarm |
| Technologia łączności | Bluetooth 5.4, USB |
| Technologia tunera | AM/FM/SW/WB |
| Źródło zasilania | Hand crank/Solar/Type-C Charging |
| Obsługiwane pasma radiowe | 4-Band (AM/FM/SW/WB) |
| Zawarte komponenty | Shortwave Radio *1, Type-C Cord*1, Owner's Manual, Military Style Gift Box*1, Hand Strap*1 |
6. Konserwacja i pielęgnacja
- Keep the radio dry and away from extreme temperatures.
- Oczyść z zewnątrz miękką, damp płótno. Nie używaj ostrych środków chemicznych ani ściernych środków czyszczących.
- Regularly charge the battery, even if not in use, to prolong its lifespan. Avoid complete discharge for extended periods.
- Przechowuj radio w chłodnym i suchym miejscu, gdy nie jest używane.
7. Rozwiązywanie Problemów
- Brak zasilania: Ensure the battery is charged. Try charging via Type-C, solar, or hand crank.
- Słaby odbiór radia: Extend the antenna fully. Try repositioning the radio. In AM/SW modes, rotating the radio may improve reception.
- Brak połączenia Bluetooth: Ensure the radio is in BT mode and your device's Bluetooth is enabled and discoverable. Check if other devices are connected to the radio.
- USB/TF Card Playback Issues: Ensure the card/drive is inserted correctly and contains supported audio formats (MP3, WAV). Check if the radio is in M-PLAY mode.
- SOS Alarm Not Working: Verify the SOS switch is fully engaged.
8. Gwarancja i wsparcie
Greadio is committed to providing quality products and customer service. For warranty information, technical support, or any inquiries regarding your Greadio R12 radio, please refer to the contact details provided in the included 'Greadio Card' or visit the official Greadio webstrona.
Proszę zachować dowód zakupu na wypadek ewentualnych roszczeń gwarancyjnych.