MOUNT PRO Freelift Pro Single
Instrukcja obsługi uchwytu biurkowego MOUNT PRO Freelift Pro Single Monitor
Model: Freelift Pro Single
1. Koniec produktuview
The MOUNT PRO Freelift Pro Single Monitor Desk Mount is designed to provide an ergonomic and space-saving solution for your workspace. This adjustable monitor arm supports a single screen, offering flexibility in positioning for optimal viewkomfort i produktywność.
Główne cechy:
- Uniwersalna kompatybilność: Fits most flat or curved LCD/LED screens from 13 to 32 inches, with a maximum load capacity of 22 lbs. Supports VESA patterns of 75x75mm and 100x100mm.
- Pełna regulacja ruchu: Offers 360° rotation, +/-90° swivel, and +85°/-45° tilt for versatile screen positioning.
- Optymalizacja przestrzeni: Frees up desktop space with two mounting options (clamp or grommet) and integrated cable management.
- Trwała konstrukcja: Features an aluminum arm and a gas spring counterbalance system for stable and long-lasting performance.
2. Informacje dotyczące bezpieczeństwa
Please read and understand all instructions before installation and use. Failure to do so may result in personal injury or property damage. If you have any questions, contact customer support.
- Nie przekraczać maksymalnego udźwigu wynoszącego 10 kg (22 funtów).
- Ensure the mounting surface (desk) is strong enough to support the combined weight of the mount and monitor.
- Use only the provided hardware. If any parts are missing or damaged, contact customer support for replacement.
- Podczas instalacji należy trzymać dzieci z dala od produktu.
- Adjust the gas spring tension carefully. Improper adjustment may cause the monitor to fall or spring up unexpectedly.
3. Zawartość opakowania
Przed przystąpieniem do instalacji sprawdź, czy wszystkie komponenty są obecne i nieuszkodzone.
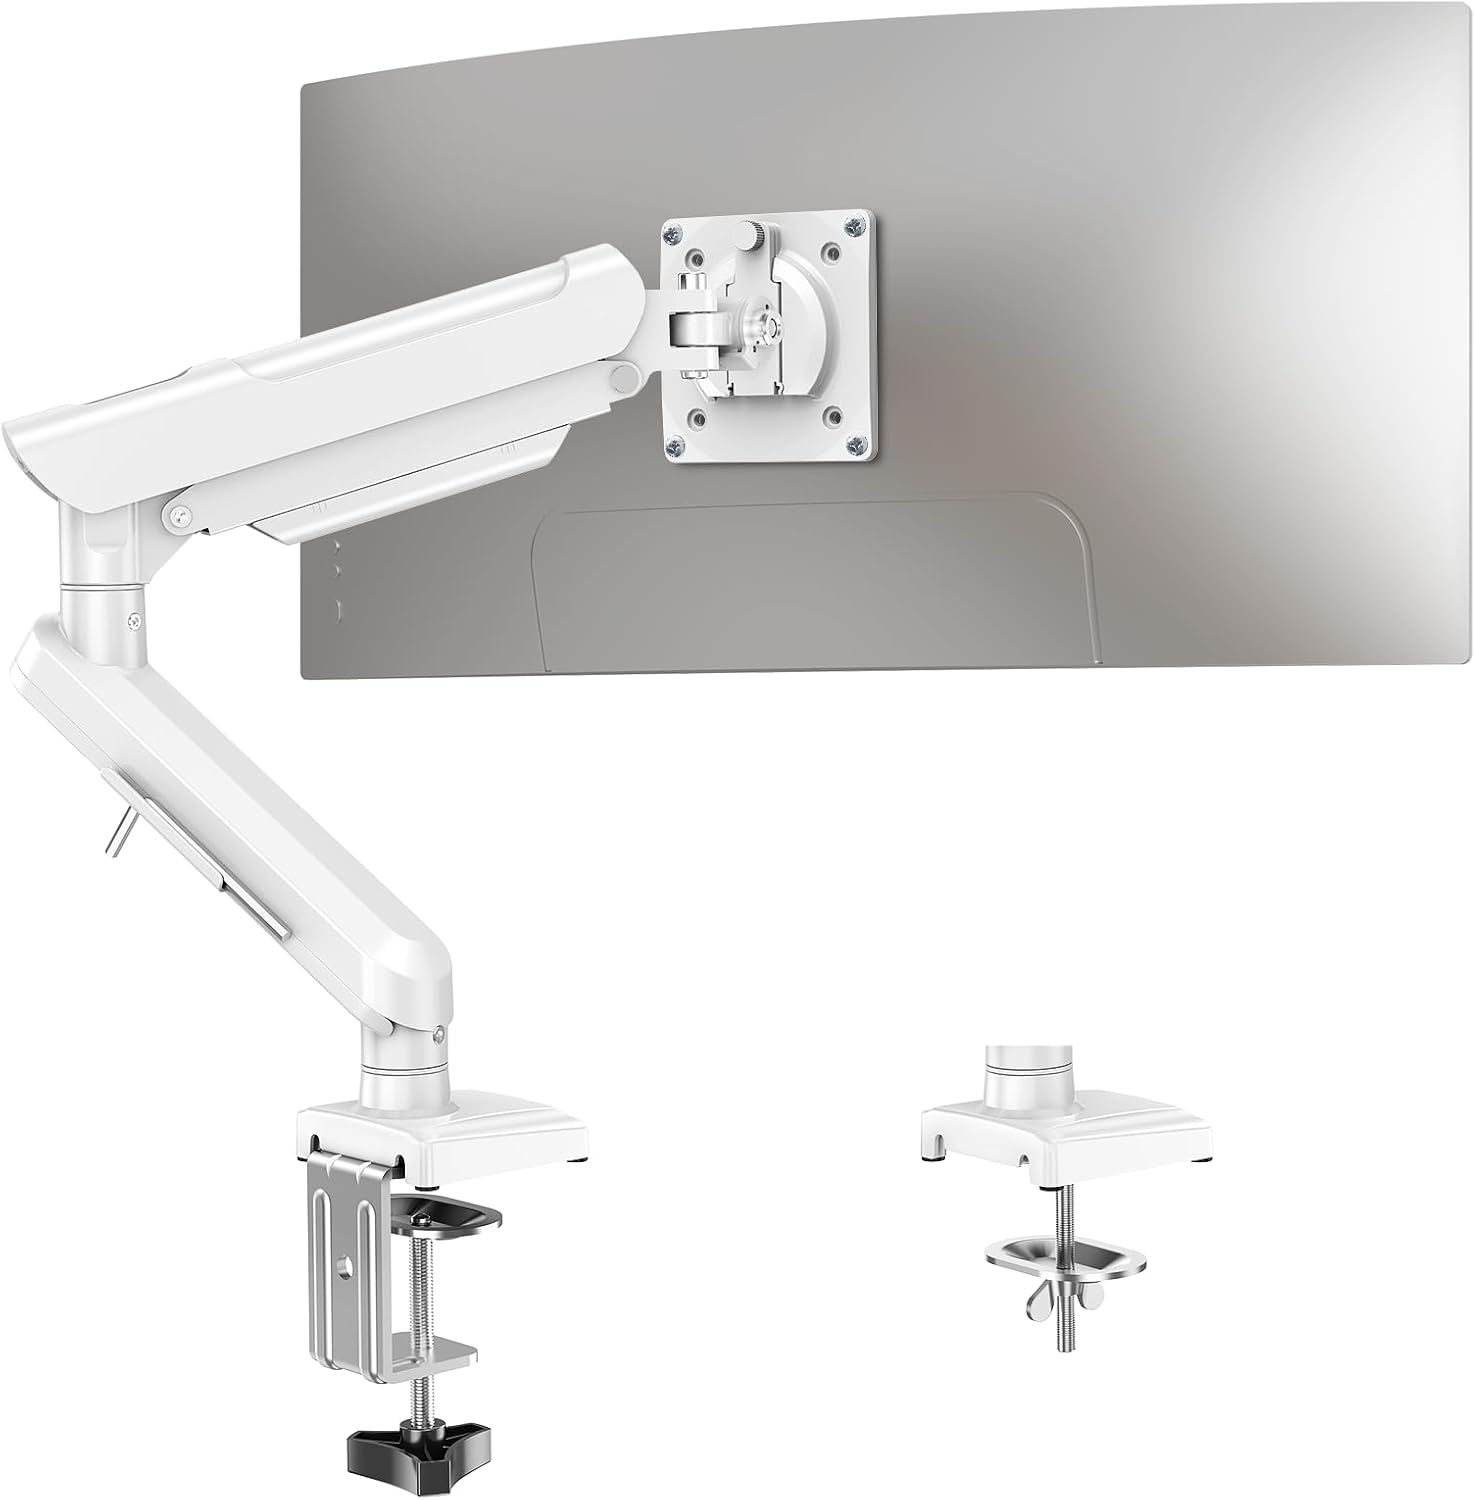
Image: All components of the MOUNT PRO Freelift Pro Single Monitor Desk Mount, including the arm, base, VESA plate, and hardware.
The package includes the monitor arm, desk clamp, grommet base components, VESA plate, and various screws and tools for assembly.
4. Konfiguracja i instalacja
4.1 Wybierz opcję montażu
The monitor mount offers two installation methods: C-clamp or Grommet base. Select the option that best suits your desk.

Image: Illustration showing the C-clamp mounting method on the right and the grommet mounting method on the left, with desk thickness requirements.
C-Clamp Instalacja:
- Suitable for desk thicknesses from 0.39 to 2.76 inches (10-70mm).
- Dołącz C-klamp to the base using the provided bolts and tighten securely.
- Umieść klamp on the edge of your desk and tighten the knob until the base is firmly secured.
Montaż podstawy przelotki:
- Suitable for desk thicknesses from 0.39 to 2.76 inches (10-70mm) and hole diameters from 0.39 to 2.36 inches (10-60mm).
- Zdemontuj C-clamp składniki.
- Insert the long bolt through the base, then through the grommet hole in your desk.
- Secure the base from underneath the desk using the clip plate and wingnut.
4.2 Install the Monitor Arm
- Slide the lower arm onto the base pole.
- Slide the upper arm onto the lower arm.
- Secure the arms by tightening the internal screws with the provided Allen key.
4.3 Przymocuj płytkę VESA do monitora
- Remove any existing monitor stand.
- Dopasuj płytkę VESA do otworów montażowych znajdujących się z tyłu monitora (75 x 75 mm lub 100 x 100 mm).
- Secure the VESA plate to the monitor using the appropriate screws.
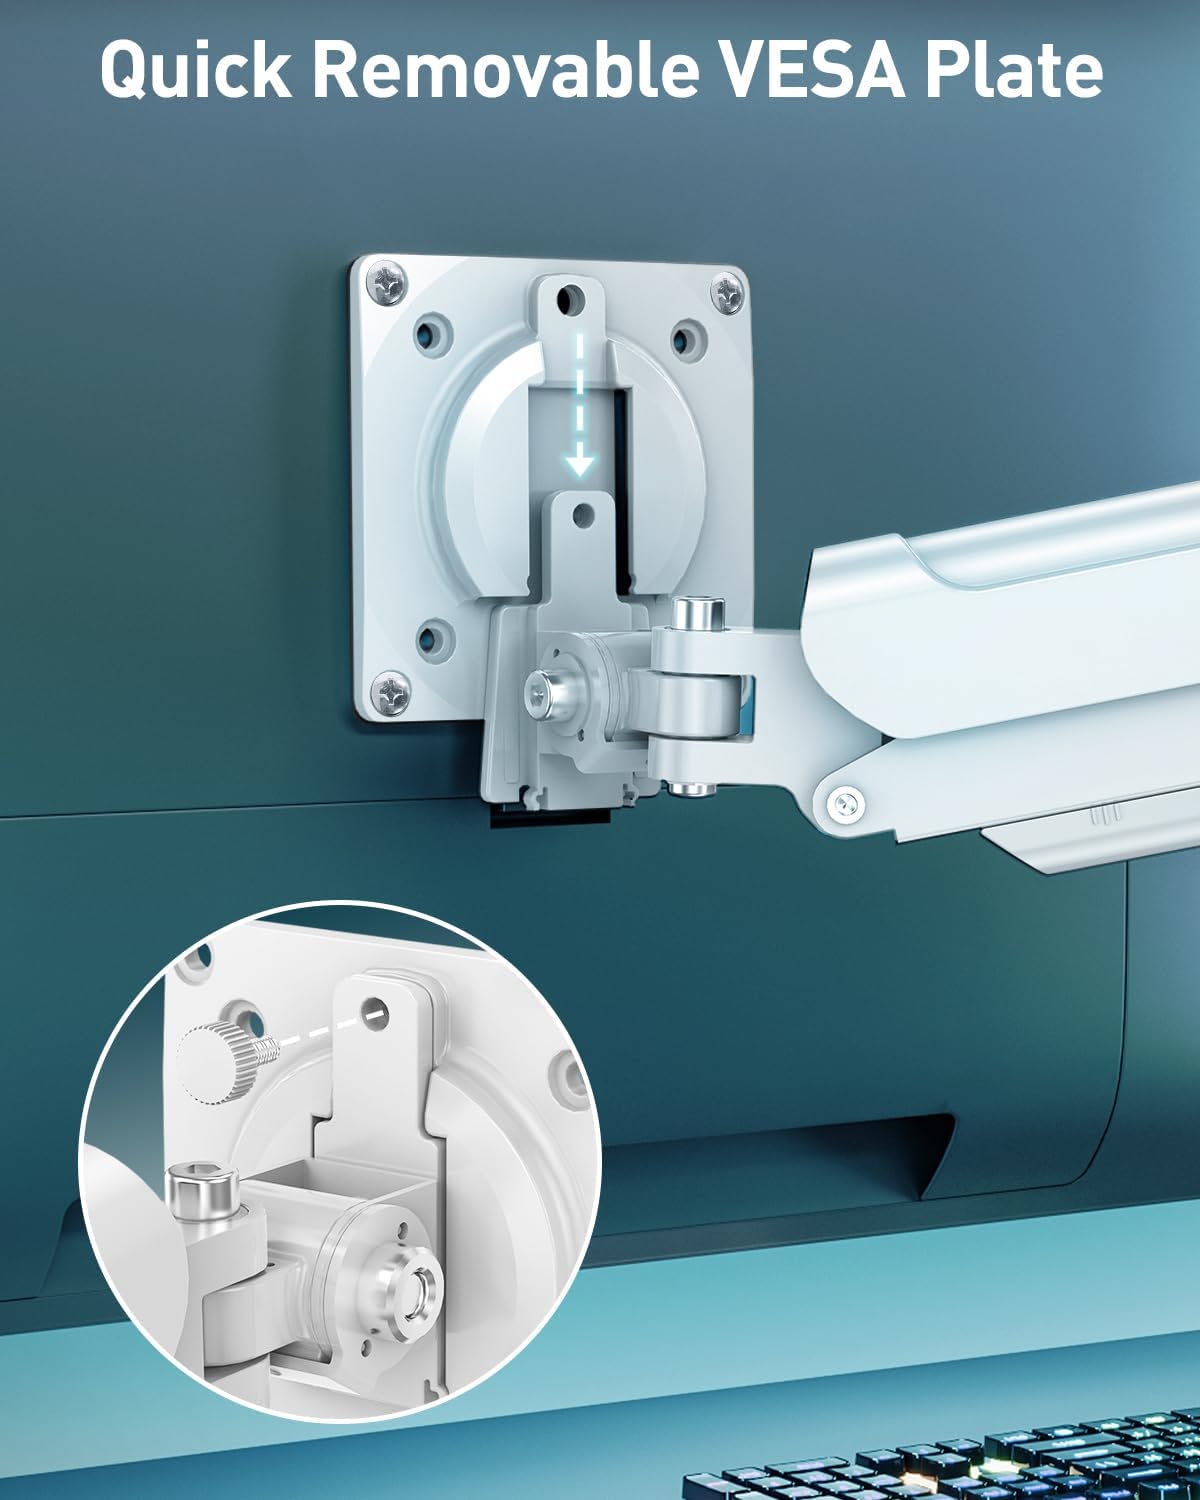
Obraz: Zbliżenie view of the quick-release VESA plate being attached to the back of a monitor with screws, highlighting the ease of installation.
4.4 Montaż monitora na ramieniu
- Carefully slide the monitor (with attached VESA plate) onto the end of the monitor arm.
- Install the security bolt to prevent accidental detachment.
4.5 Zarządzanie kablami
Route your monitor cables through the integrated cable management channels on the arm to maintain a tidy workspace. Allen keys can be stored in the designated slot on the lower arm for easy access.

Image: The monitor arm showing cables routed through its internal channels and a close-up of the Allen key storage slot.
Wideo instalacyjne:
Video: Official installation guide for the Freelift Pro White Single Monitor Arm, demonstrating step-by-step assembly.
5. Obsługa i regulacje
The monitor arm features a gas spring system for smooth and effortless adjustments.
5.1 Gas Spring Tension Adjustment:
The gas spring tension needs to be adjusted to match the weight of your monitor. This ensures the monitor stays in place at any height.

Image: Diagram showing how to adjust the gas spring tension. Turn clockwise towards '-' to reduce tension for lighter monitors, and counter-clockwise towards '+' to increase tension for heavier monitors. Hold the arm horizontally during adjustment.
- If the monitor rises too easily or does not stay down, turn the adjustment screw clockwise (towards '-') to reduce tension.
- If the monitor falls or is difficult to raise, turn the adjustment screw counter-clockwise (towards '+') to increase tension.
- Hold the arm in a horizontal position while adjusting the tension.
5.2 Tilt, Swivel, and Rotation:
Dostosuj swój viewing experience with a wide range of motion.

Image: Visual representation of the monitor arm's adjustable features: tilt (+85° to -45°), swivel (180° at two points), and 360° rotation.
- Przechylenie: Adjust the monitor angle +85°/-45° to reduce glare and find your ideal viewkąt.
- Obracać: Swivel the monitor +/-90° at the VESA plate and +/-180° at the arm joints for easy screen sharing.
- Obrót: Obróć monitor o 360°, aby przełączać się między orientacją poziomą i pionową.
5.3 Height and Extension Adjustment:
Easily position your screen at the optimal height and distance.

Image: Diagram illustrating the maximum extension of 19.7 inches (50cm) and a height range from 5.1 to 17.3 inches (13-44cm) above the desk surface.
- The arm can extend up to 19.7 inches (50cm) to bring the screen closer.
- Adjust the height from 5.1 inches (13cm) to 17.3 inches (44cm) above the desk surface.
6. Konserwacja
Regularna konserwacja zapewnia długowieczność i optymalną wydajność uchwytu monitora.
- Czyszczenie: Przetrzyj uchwyt miękką ściereczką.amp szmatką. Unikaj środków czyszczących o działaniu ściernym i rozpuszczalników.
- Kontrola: Okresowo sprawdzaj wszystkie śruby i połączenia, aby upewnić się, że są dobrze dokręcone i zabezpieczone. W razie potrzeby dokręć je ponownie.
- Sprężyna gazowa: If the monitor's weight changes (e.g., replacing the monitor), re-adjust the gas spring tension as described in Section 5.1.
7. Rozwiązywanie Problemów
Jeśli napotkasz jakiekolwiek problemy, zapoznaj się z poniższymi typowymi problemami i rozwiązaniami:
- Monitor opada lub nie utrzymuje się na żądanej wysokości: The gas spring tension is too low for your monitor's weight. Increase tension by turning the adjustment screw counter-clockwise (towards '+').
- Monitor springs up or is difficult to push down: The gas spring tension is too high for your monitor's weight. Decrease tension by turning the adjustment screw clockwise (towards '-').
- Monitor is wobbly: Upewnij się, że wszystkie śruby montażowe (na biurku)amp/grommet and VESA plate) are securely tightened. Check that the desk surface is stable.
- Difficulty with movement (tilt/swivel): Check if any adjustment bolts are overtightened. Loosen slightly if necessary.
Jeśli problem nadal występuje, skontaktuj się z obsługą klienta, aby uzyskać dalszą pomoc.
8. Specyfikacje
| Funkcja | Specyfikacja |
|---|---|
| Marka | MONTAŻ PRO |
| Model | Freelift Pro Single |
| Kompatybilność z rozmiarem ekranu | 13-32 cala |
| Nośność | 4.4 to 22 lbs (2-10 kg) |
| Zgodność ze standardem VESA | 75x75mm, 100x100mm |
| Kąt nachylenia | +85° do -45° |
| Kąt obrotu | +/-90° (at VESA plate), +/-180° (at arm joints) |
| Obrót | 360° |
| Maksymalne wydłużenie ramienia | 19.7 cale (50 cm) |
| Zakres wysokości | 5.1 to 17.3 inches (13-44cm) |
| Opcje montażu | C-Clamp, Podstawa przelotki |
| Grubość biurka (Clamp) | 0.39 to 2.76 inches (10-70mm) |
| Grubość biurka (przelotka) | 0.39 to 2.76 inches (10-70mm) |
| Średnica otworu przelotki | 0.39 to 2.36 inches (10-60mm) |
| Tworzywo | Aluminium |
| Kolor | Biały |
9. Gwarancja i wsparcie
For warranty information or technical support, please refer to the product packaging or contact MOUNT PRO customer service directly. Keep your purchase receipt for warranty claims.
Ask a question about this manual
Ask about setup, troubleshooting, compatibility, parts, safety, or missing instructions. Manuals+ will review the question and use this page’s manual context to help answer it.