
1. Wprowadzenie
Welcome to the user manual for your Emerson CKSS7071 Sunrise Smartset Alarm Clock Radio. This device is designed to enhance your daily routine with its unique features, including a sunrise simulation, soothing sound options, Bluetooth connectivity, and an 8-color dimmable LED display. Please read this manual thoroughly to understand the full functionality and ensure proper use and care of your new alarm clock radio.
Wideo 1: Nadview of the Emerson CKSS7071 Sunrise Smartset Alarm Clock Radio. This video demonstrates the key features and design of the product.
2. Ważne informacje dotyczące bezpieczeństwa
- Przeczytaj wszystkie instrukcje przed uruchomieniem urządzenia.
- Zachowaj tę instrukcję do wykorzystania w przyszłości.
- Nie należy używać tego urządzenia w pobliżu wody.
- Czyścić wyłącznie suchą szmatką.
- Nie zasłaniaj żadnych otworów wentylacyjnych. Montaż należy wykonać zgodnie z instrukcją producenta.
- Nie należy instalować w pobliżu źródeł ciepła, takich jak grzejniki, kratki wentylacyjne, piece lub inne urządzenia (w tym amp(lifiers) wytwarzające ciepło.
- Chroń przewód zasilający przed deptaniem i przytrzaśnięciem, zwłaszcza przy wtyczkach, gniazdkach i miejscach, w których wychodzi z urządzenia.
- Stosować wyłącznie dodatki/akcesoria wskazane przez producenta.
- Odłączaj urządzenie od zasilania podczas burzy z piorunami lub jeśli nie używasz go przez dłuższy czas.
- Wszelkie prace serwisowe należy zlecać wykwalifikowanemu personelowi serwisowemu. Serwisowanie jest wymagane, gdy urządzenie zostało w jakikolwiek sposób uszkodzone, np. przewód zasilający lub wtyczka są uszkodzone, płyn został wylany lub przedmioty wpadły do urządzenia, urządzenie zostało wystawione na działanie deszczu lub wilgoci, nie działa normalnie lub zostało upuszczone.
3. Zawartość opakowania
Sprawdź, czy po otwarciu opakowania znajdują się wszystkie elementy:
- Emerson CKSS7071 Sunrise Smartset Alarm Clock Radio
- Zasilacz sieciowy
- Instrukcja obsługi
4. Koniec produktuview
4.1 Przód View

Obraz 1: Przód view of the alarm clock, featuring the digital time display and the sunrise simulation light panel.
The front of the unit features the main 1.2-inch LED time display and the large circular light panel for sunrise simulation and ambient lighting. Indicators for AM/PM, Alarm 1/2, and Bluetooth status are also visible.
4.2 Bok View (Sterownica)
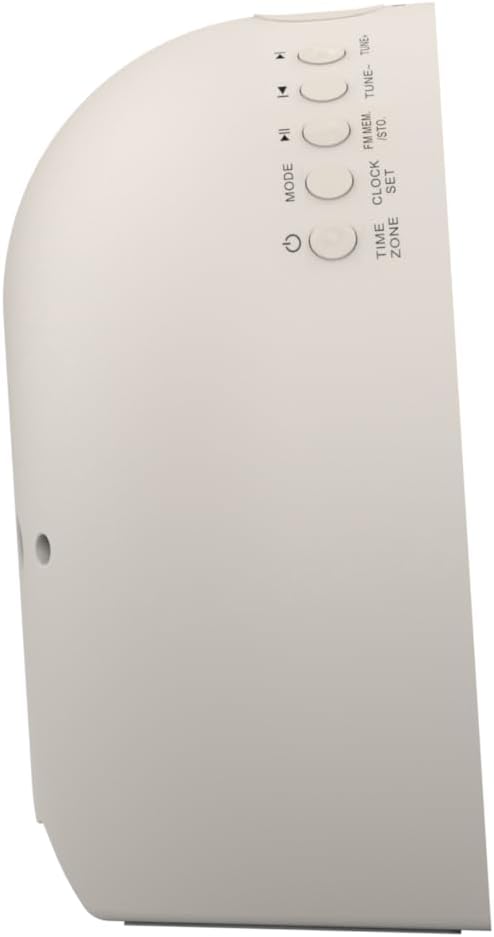
Obraz 2: Strona view budzika, podświetlając przyciski sterujące różnymi funkcjami.
The side panel houses the primary control buttons, including Power, Mode, Clock Set, Time Zone, Tune/Skip, and Volume controls. These buttons are used for setting time, alarms, and navigating audio functions.
4.3 Tył View

Obraz 3: Tył view of the alarm clock, showing the speaker grille and power connection port.
The rear of the unit features the main speaker grille and the power input port for connecting the AC adapter.
5. Konfiguracja
5.1 Połączenie zasilania
- Plug the AC power adapter into the DC IN jack located on the back of the unit.
- Plug the other end of the adapter into a standard wall outlet (AC 100-240V, 50/60Hz).
- Urządzenie włączy się automatycznie.
5.2 SmartSet Automatic Time Setting
The SmartSet system automatically sets the correct time and date as soon as you plug in the unit. It also maintains time and alarm settings during power disruptions or outages, provided the button cell battery is installed.
5.3 Instalacja baterii zapasowej
A button cell battery (CR2032, included) is required for battery backup. This ensures that time and alarm settings are retained during a power outage.
- Znajdź komorę baterii na spodzie urządzenia.
- Otwórz pokrywę komory baterii.
- Insert one CR2032 button cell battery, ensuring the correct polarity (+/-).
- Dokładnie zamknij pokrywę komory baterii.
6. Instrukcja obsługi
6.1 Setting the Clock Manually
- Naciśnij i przytrzymaj ZEGAR przycisk. Cyfry godziny zaczną migać.
- Użyj DOSTRAJ -/+ Przyciski do ustawienia godziny. Naciśnij ZEGAR aby potwierdzić.
- The minute digits will flash. Use the DOSTRAJ -/+ Przyciski do ustawienia minut. Naciśnij ZEGAR aby potwierdzić.
- Kontynuuj ten proces, aby ustawić rok, miesiąc i dzień.
- Naciskać ZEGAR ponownie, aby wyjść z trybu ustawiania czasu.
6.2 Ustawianie alarmów (Alarm 1 i Alarm 2)
The unit features dual alarms. Follow these steps for each alarm:
- Naciśnij i przytrzymaj ALARM 1 or ALARM 2 przycisk. Cyfry godziny alarmu zaczną migać.
- Użyj DOSTRAJ -/+ buttons to adjust the alarm hour. Press the respective ALARM przycisk aby potwierdzić.
- The alarm minute digits will flash. Use the DOSTRAJ -/+ buttons to adjust the alarm minutes. Press the respective ALARM przycisk aby potwierdzić.
- Select the alarm source (Buzzer, FM Radio, or Soothing Sound). Press the respective ALARM przycisk aby potwierdzić.
- Dostosuj głośność alarmu za pomocą GŁOŚNOŚĆ -/+ buttons. Press the respective ALARM przycisk aby potwierdzić.
- The alarm is now set. The alarm indicator (AL1 or AL2) will appear on the display.
6.3 Symulacja wschodu słońca
The sunrise simulation feature gradually brightens the light panel before your set alarm time, mimicking a natural sunrise to gently wake you.
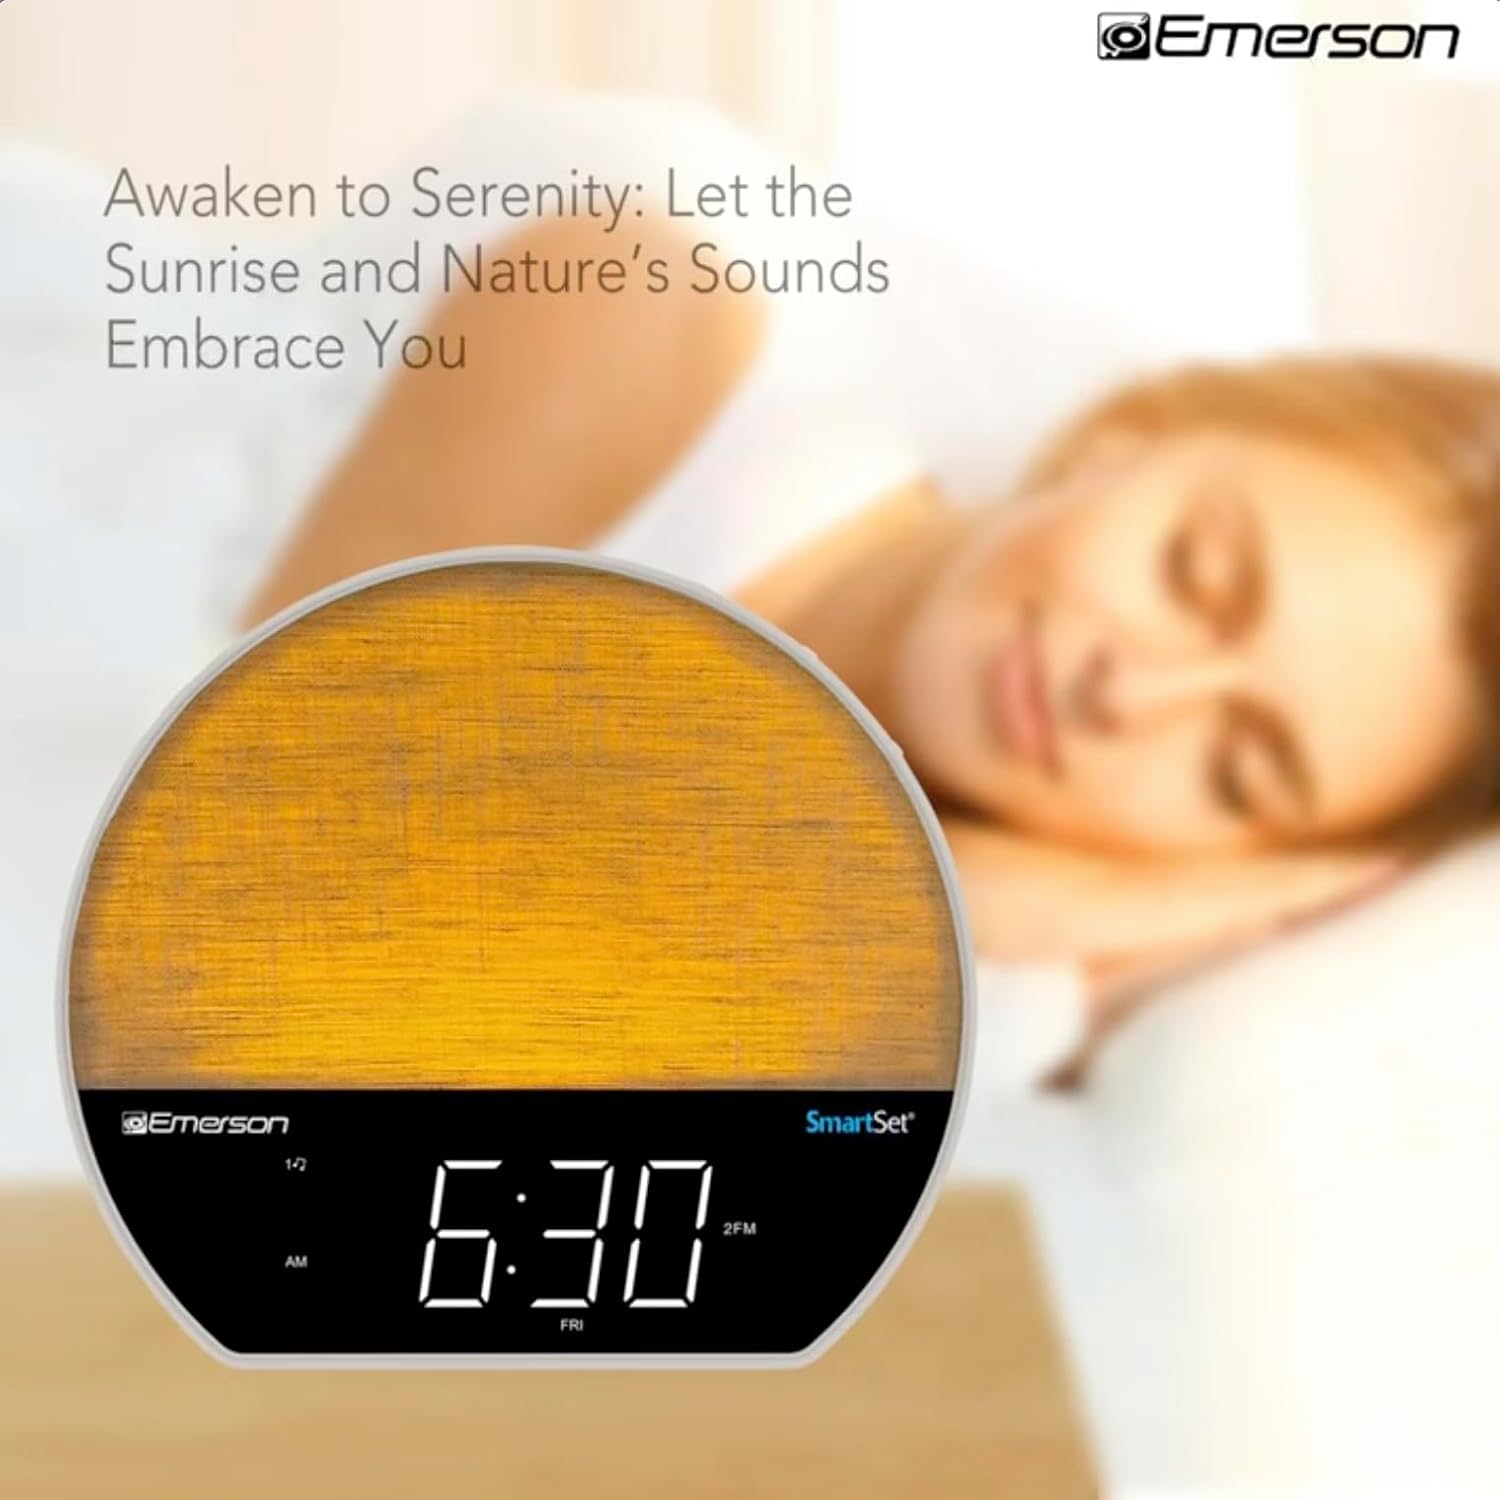
Obraz 4: The alarm clock simulating a sunrise with a warm, increasinintensywność światła g.
To activate, ensure the sunrise option is selected during alarm setup. The light will begin to brighten 30 minutes before the alarm sounds.
6.4 Soothing Sounds and White Noise
The unit includes 6 soothing sounds and white noise to help with relaxation or waking up.
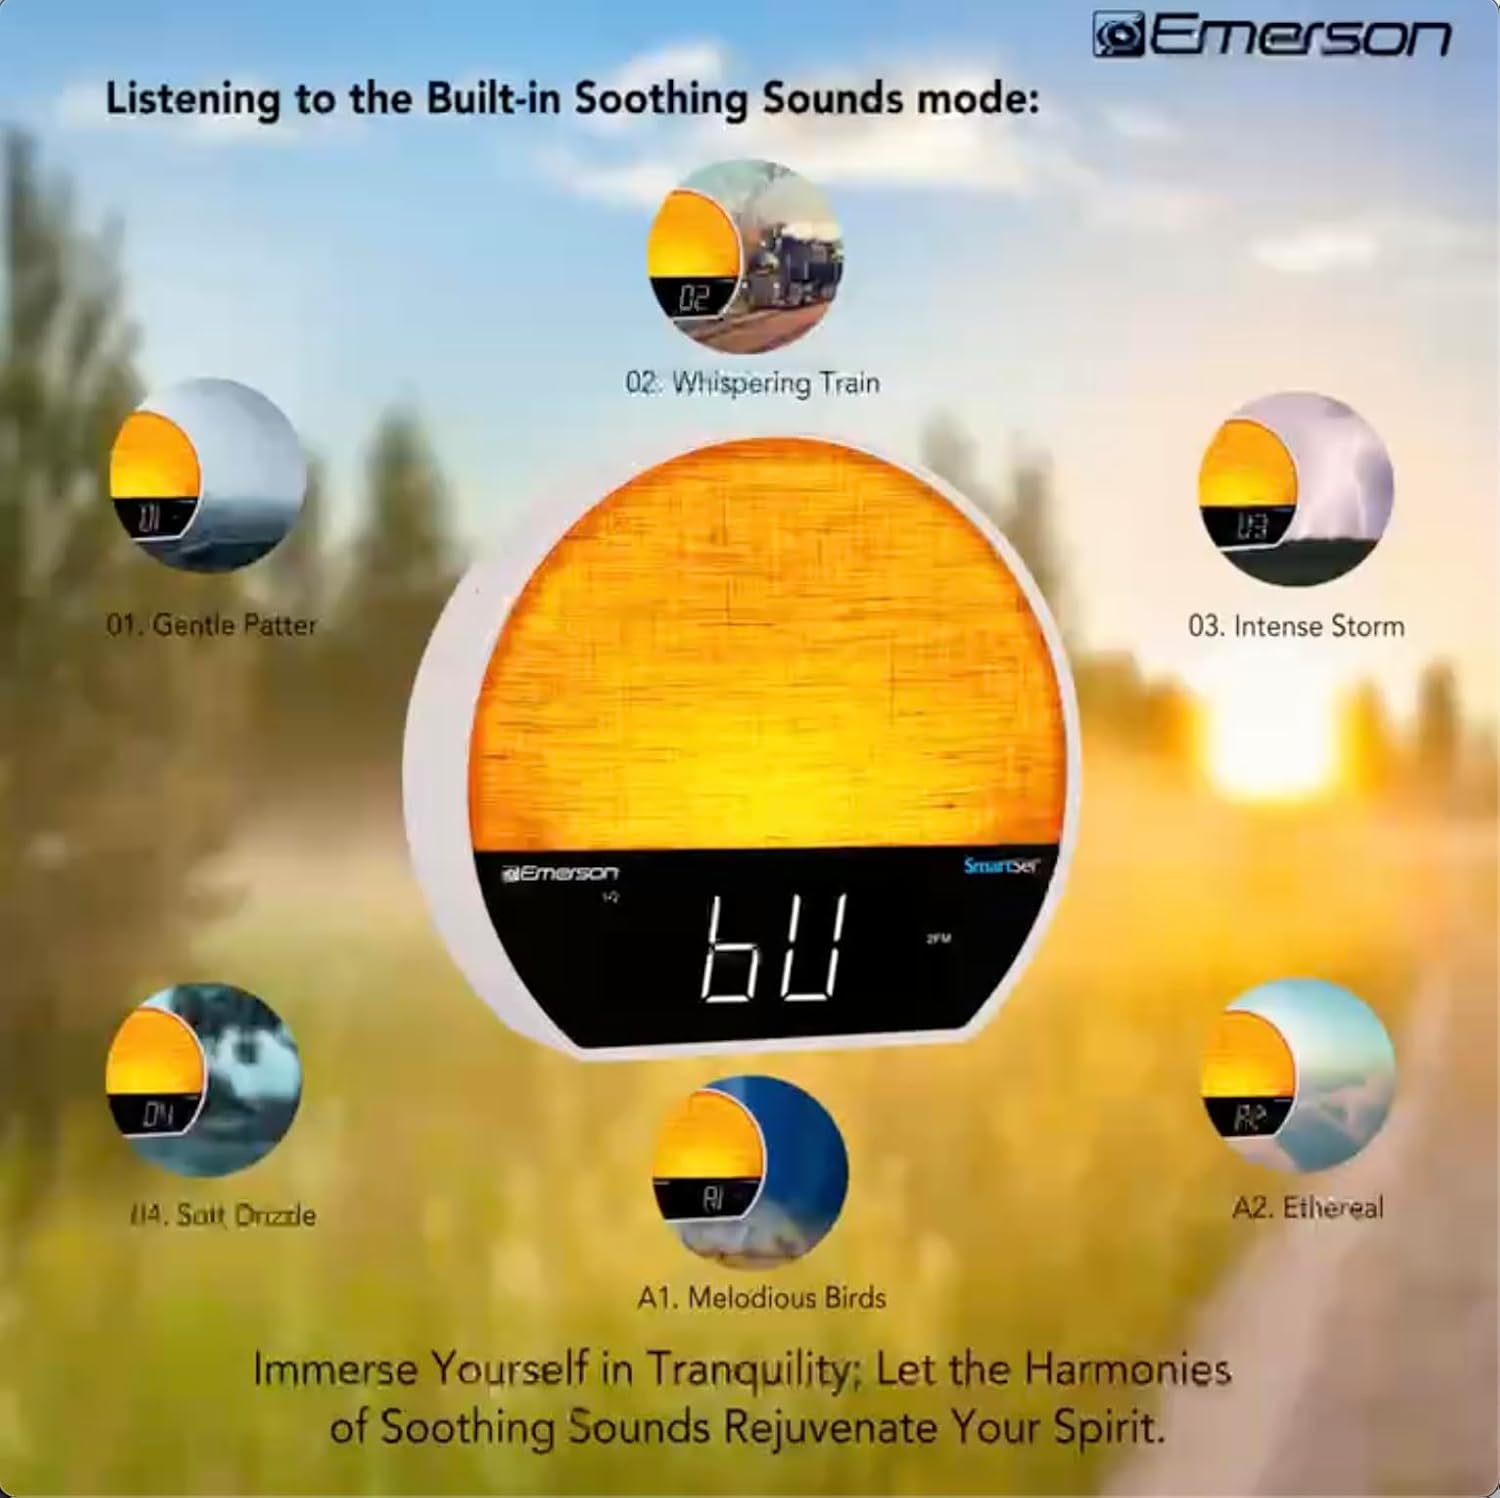
Obraz 5: Visual representation of the six soothing sound modes available on the alarm clock.
- Naciśnij TRYB button repeatedly until the Soothing Sound mode is selected.
- Użyj DOSTRAJ -/+ buttons to cycle through the available sounds (e.g., Gentle Patter, Whispering Train, Intense Storm, Soft Drizzle, Melodious Birds, Ethereal, White Noise).
- Dostosuj głośność za pomocą GŁOŚNOŚĆ -/+ pikolak.
6.5 Funkcja głośnika Bluetooth
Podłącz swój smartfon lub inne urządzenie obsługujące technologię Bluetooth, aby bezprzewodowo przesyłać strumieniowo dźwięk.

Obraz 6: The alarm clock in Bluetooth mode, paired with a mobile device for audio streaming.
- Naciśnij TRYB button until 'BT' appears on the display, indicating Bluetooth mode.
- On your device, enable Bluetooth and search for 'Emerson CKSS7071'.
- Select the device to pair. A confirmation tone will sound upon successful pairing.
- Możesz teraz odtwarzać dźwięk ze swojego urządzenia przez głośnik budzika.
6.6 Obsługa radia FM
Słuchaj swoich ulubionych stacji radiowych FM.
- Naciśnij TRYB Naciskaj przycisk, aż na wyświetlaczu pojawi się napis „FM”.
- Naciśnij DOSTRAJ -/+ buttons briefly to manually tune to a station.
- Naciśnij i przytrzymaj DOSTRAJ -/+ przyciski umożliwiające automatyczne skanowanie następnej dostępnej stacji.
- Aby zapisać stację, naciśnij i przytrzymaj FM MEM Naciskaj przycisk, aż numer ustawienia zacznie migać. Użyj DOSTRAJ -/+ aby wybrać numer ustawienia wstępnego, a następnie naciśnij FM MEM ponownie, aby zapisać.
6.7 LED Decor and Dimmer Control
Customize the ambient light with 8 different colors and adjust the brightness.

Obraz 7: The alarm clock demonstrating its 8-color dimmable LED decor options.
- Naciśnij ŚWIATŁO button to cycle through the 8 available colors or turn the light off.
- To adjust the brightness of the LED decor light, press and hold the ŚWIATŁO button. The brightness will cycle through 5 levels. Release the button at your desired brightness.
6.8 Display Dimmer Control
Adjust the brightness of the 1.2-inch LED time display.

Obraz 8: The alarm clock illustrating the five distinct levels of display luminescence.
Naciśnij OPORNIK button (often combined with another function, refer to button labels) to cycle through 4 levels of display brightness (Bright, Moderate, Dim, Faint).
6.9 Wyłącznik czasowy
Set a timer for the audio to automatically turn off after a specified duration.

Obraz 9: The alarm clock set for a sunset sleep timer, providing a harmonious end to the day.
- While audio is playing (FM or Soothing Sound), press the SPAĆ przycisk.
- Naciśnij wielokrotnie SPAĆ button to cycle through available sleep timer durations (e.g., 15, 30, 60, 90 minutes, or OFF).
- The audio will automatically turn off after the selected time.
6.10 Funkcja drzemki
Gdy zabrzmi alarm, naciśnij przycisk DRZEMKA Naciśnij przycisk (zazwyczaj duży przycisk na górze), aby tymczasowo wyciszyć alarm na kilka minut. Alarm włączy się ponownie po upływie czasu drzemki.
7. Konserwacja
7.1 Czyszczenie
- Zawsze odłączaj urządzenie od gniazdka elektrycznego przed czyszczeniem.
- Do czyszczenia powierzchni zewnętrznych należy używać miękkiej, suchej ściereczki.
- Do not use liquid cleaners, abrasive cleaners, or chemical sprays, as these may damage the finish.
7.2 Wymiana baterii
Jeżeli ustawienia czasu i alarmu nie zostaną zachowane podczas wyłączenia zasilania,tage, the button cell backup battery may need to be replaced. Follow the instructions in section 5.3 to replace the CR2032 battery.
8. Rozwiązywanie Problemów
| Problem | Możliwa przyczyna | Rozwiązanie |
|---|---|---|
| Urządzenie nie włącza się. | Zasilacz nie jest podłączony lub jest uszkodzony. | Sprawdź, czy zasilacz sieciowy jest prawidłowo podłączony do urządzenia i do sprawnego gniazdka ściennego. |
| Ustawienia czasu/alarmu zostały utracone po wyłączeniu zasilaniatage. | Bateria zapasowa jest rozładowana lub nie została zainstalowana. | Install or replace the CR2032 button cell battery (see section 5.3). |
| Alarm nie włącza się. | Alarm nie jest włączony lub głośność jest zbyt niska. | Ensure the alarm is set and activated (AL1/AL2 indicator on). Increase alarm volume. |
| Nie można sparować urządzenia Bluetooth. | Unit not in Bluetooth mode or device too far. | Ensure the unit is in Bluetooth mode ('BT' displayed). Move your device closer to the unit. Try unpairing and re-pairing. |
| Słaby odbiór radia FM. | Antena nie jest wysunięta i nie powoduje zakłóceń. | Extend the FM wire antenna fully and reposition it for better reception. Avoid placing near other electronic devices. |
| Wyświetlacz jest zbyt jasny/ciemny. | Należy dostosować ustawienia ściemniacza wyświetlacza. | Naciśnij OPORNIK button to cycle through brightness levels (see section 6.8). |
9. Specyfikacje
| Funkcja | Szczegół |
|---|---|
| Numer modelu | CKSS7071 |
| Źródło zasilania | AC 100-240V, 50/60Hz (via AC adapter) |
| Zapasowa bateria | 1 x CR2032 Button Cell Battery (included) |
| Typ wyświetlacza | 1.2-calowy wyświetlacz LED |
| Wersja Bluetooth | V5.4 |
| Uspokajające dźwięki | 6 Nature Sounds + White Noise |
| LED Decor Colors | 8 Dimmable Colors |
| Wymiary produktu (szer. x gł. x wys.) | 7.09" x 3.15" x 6.37" |
| Waga | Nie określono |
10. Informacje o gwarancji
Emerson products are manufactured to the highest quality standards. This product is covered by a limited warranty against defects in materials and workmanship for a period of one (1) year from the original date of purchase. This warranty does not cover damage caused by misuse, accident, unauthorized modification, or normal wear and tear. Proof of purchase is required for all warranty claims. Please retain your receipt.
11. Obsługa klienta
If you have any questions, require assistance, or experience issues with your Emerson CKSS7071 Sunrise Smartset Alarm Clock Radio, please contact our customer support team.
- Webstrona: Odwiedź oficjalną stronę Emerson webStrona z odpowiedziami na często zadawane pytania i zasobami pomocy.
- E-mail: Zapoznaj się z opakowaniem produktu lub oficjalnym webstrona służąca do kontaktu mailowego z obsługą klienta.
- Telefon: Zapoznaj się z opakowaniem produktu lub oficjalnym webstrona z numerami telefonów obsługi klienta.
Please have your model number (CKSS7071) and proof of purchase ready when contacting support.