
1. Wprowadzenie
The ATOMSTACK P9 M50 is a portable and professional laser engraver designed for various materials including wood, leather, metal, and more. This manual provides essential information for safe operation, setup, and maintenance of your device, ensuring optimal performance and longevity.
2. Informacje dotyczące bezpieczeństwa
OSTRZEŻENIE: Laser radiation can cause eye damage and skin burns. Always follow safety guidelines to prevent injury.
- Ochrona oczu: The laser module includes a protective cover. While this cover helps, it is highly recommended to wear additional laser safety goggles (not included) during operation to ensure maximum eye protection.
- Awaryjny postój: Familiarize yourself with the emergency stop button. In case of any unexpected situation, press this button immediately to halt all machine operations. Rotate the button to disengage it before restarting.
- Wentylacja: Operate the laser engraver in a well-ventilated area to dissipate fumes and smoke produced during engraving and cutting. Consider using an exhaust system.
- Bezpieczeństwo materiałów: Do not engrave or cut unknown materials. Some materials can produce toxic fumes or catch fire. Always verify material compatibility and safety data.
- Nadzór: Never leave the machine unattended during operation. Stay within close proximity to monitor the process.
- Dzieci i zwierzęta: Keep children and pets away from the operating area and the machine at all times.

Figure 2.1: Emergency Stop Button and Control Panel. The red button is the emergency stop, the silver button is On/Off, and the small button is Reset.
3. Zawartość opakowania
Sprawdź, czy w opakowaniu znajdują się wszystkie komponenty:
- 1 x ATOMSTACK P9 M50 Laser Engraving Machine
- Parts for screw assembly (steps 2/3/4/5)
- 1 x Anti-dust cloth
- 1 x Tool set
- 1 x Fixed focus film
- 3 x Acrylic panels
- 3 x Wood chips
- 1 x Czytnik kart
- 5 x opaski kablowe
- 1 x Accessory package
- 1 x Display assembly
- 1 x Display cable
- 1 x zasilacz
- 1 x kabel zasilający
- 1 x kabel danych
- 1 x Metal cutting support plate
- 1 x Instrukcja
- 1 x Laser assembly
- 1 x zespół osi X
- 1 x Y-axis assembly
- 2 x Stopki podporowe
- 4 x Mounting spacers
4. Przewodnik konfiguracji
The ATOMSTACK P9 M50 comes 85% pre-assembled, simplifying the setup process. Follow these steps to prepare your engraver for use:
- Rozpakowywanie: Carefully remove all components from the packaging and place them on a clean, stable surface.
- Montaż ramy: Connect the X-axis and Y-axis assemblies as per the included manual's diagrams. Secure them using the provided screws and tools. Ensure all connections are firm.
- Instalacja modułu laserowego: Mount the laser assembly onto the X-axis carriage. Ensure it is securely fastened and the cables are properly connected.
- Stopy wspierające: Attach the two support feet to the base of the machine for stability.
- Terminal sterujący: Connect the independent control terminal to the main unit using the display cable. The terminal features a magnetic adsorption design for easy attachment.
- Podłączenie zasilania: Connect the power adapter to the machine and then plug it into a suitable power outlet (100-240V AC, 50/60Hz).
- Łącze danych: For computer control, connect the machine to your computer using the provided USB data cable. Alternatively, you can use a TF card for offline operation.

Figure 4.1: Assembled ATOMSTACK P9 M50 Laser Engraver.
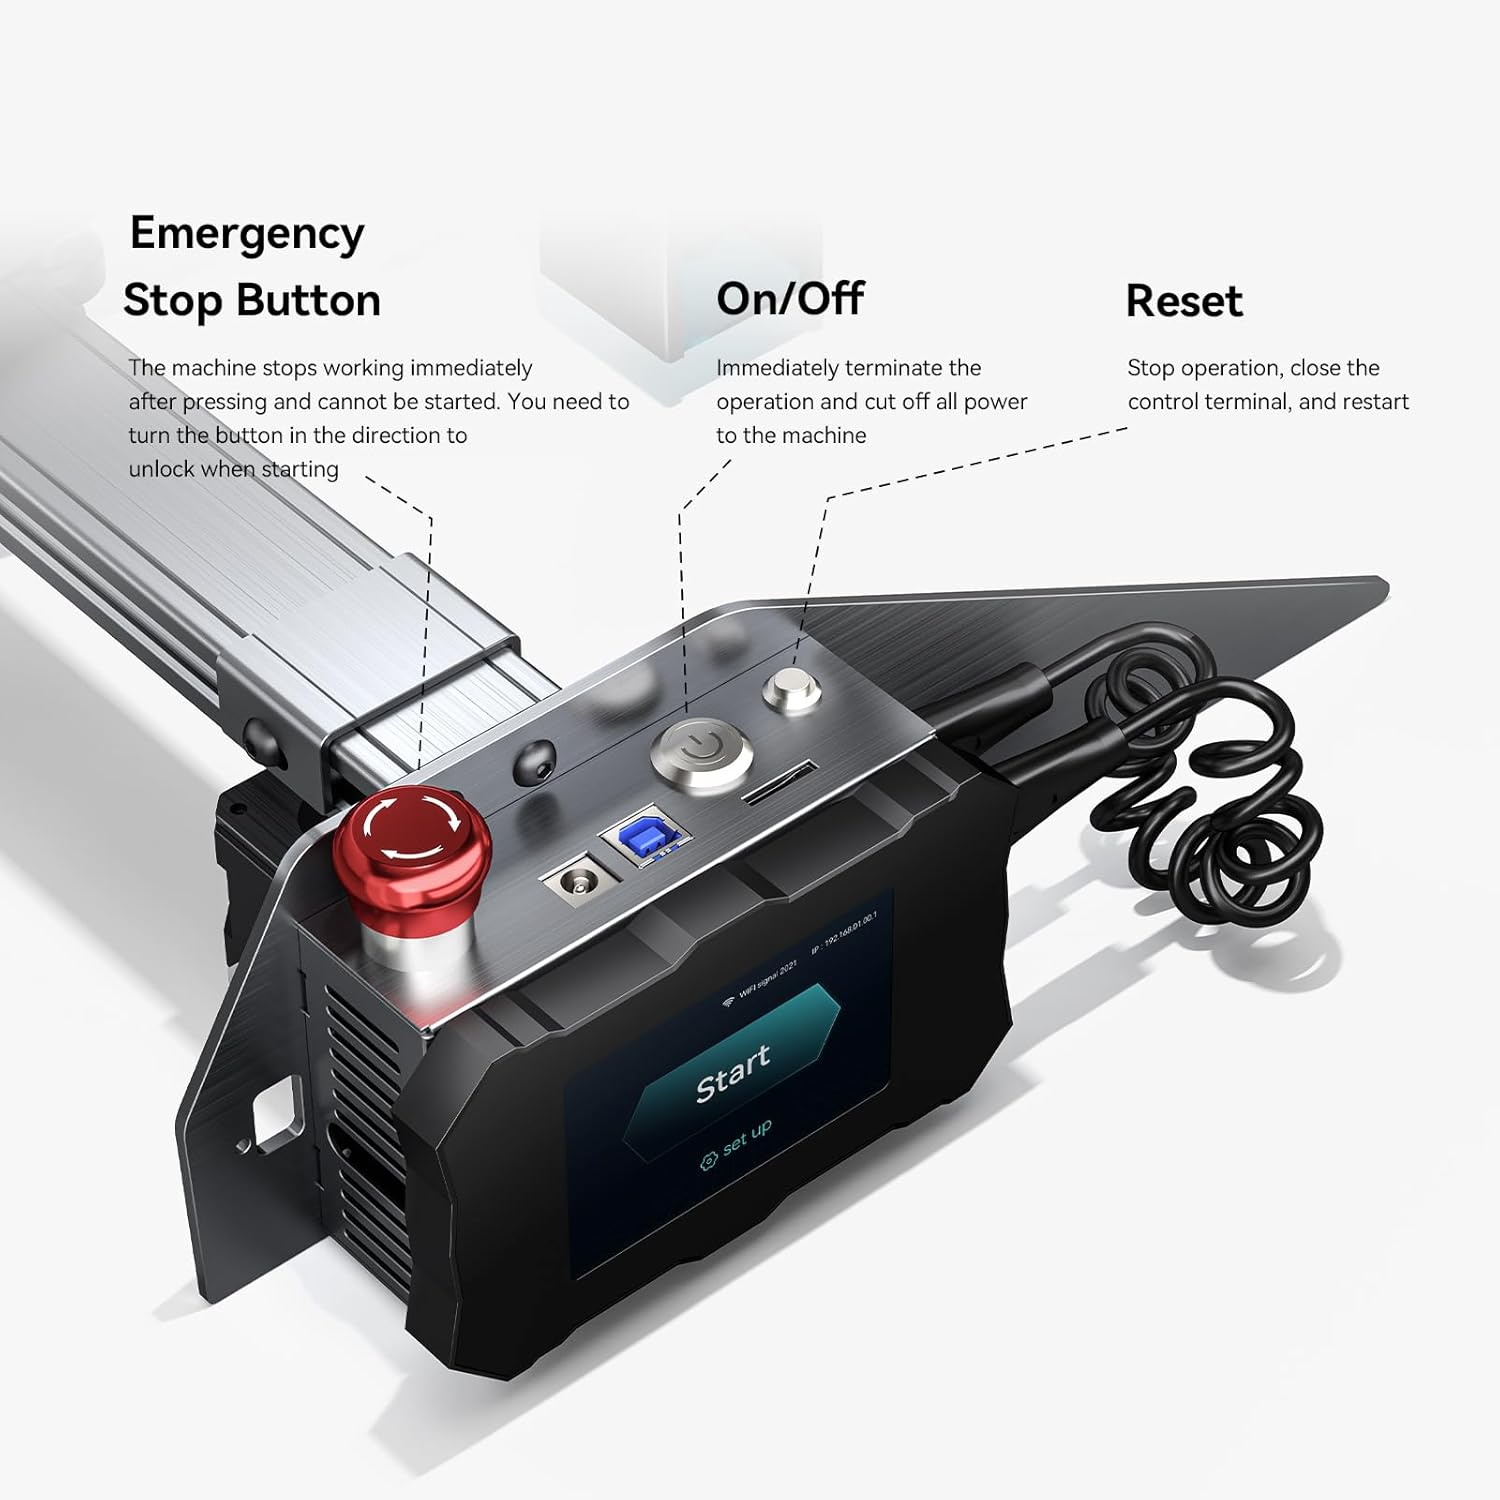
Figure 4.2: Independent Control Terminal connection.
5. Instrukcja obsługi
5.1 Instalacja i podłączenie oprogramowania
The ATOMSTACK P9 M50 is compatible with popular laser engraving software:
- LaserGRBL: Supports Win XP/Win 7/Win 8/XP/Win 10.
- LightBurn: Supports Win XP/Win 7/Win 8/XP/Win 10 and Mac systems.
Pobierz i zainstaluj preferowane oprogramowanie z oficjalnej strony websites. Connect the engraver to your computer via USB. Follow the software's instructions to establish a connection and begin your projects.

Figure 5.1: Software Compatibility and Connection.
5.2 Grawerowanie offline
The P9 M50 supports offline engraving via its independent control terminal and TF card, allowing operation without a continuous computer connection.
- Przygotuj grawerunek file (NC, BMP, JPG, PNG, DXF) using your chosen software.
- Zapisz file to a TF card.
- Insert the TF card into the slot on the control terminal.
- Use the terminal's interface to select and start your engraving project.

Figure 5.2: Independent Control Terminal for Offline Engraving.
5.3 Fixed Focus Laser
The P9 M50 features a fixed-focus laser, eliminating the need for manual focus adjustment. This design ensures consistent precision and high energy density for both engraving and cutting tasks.
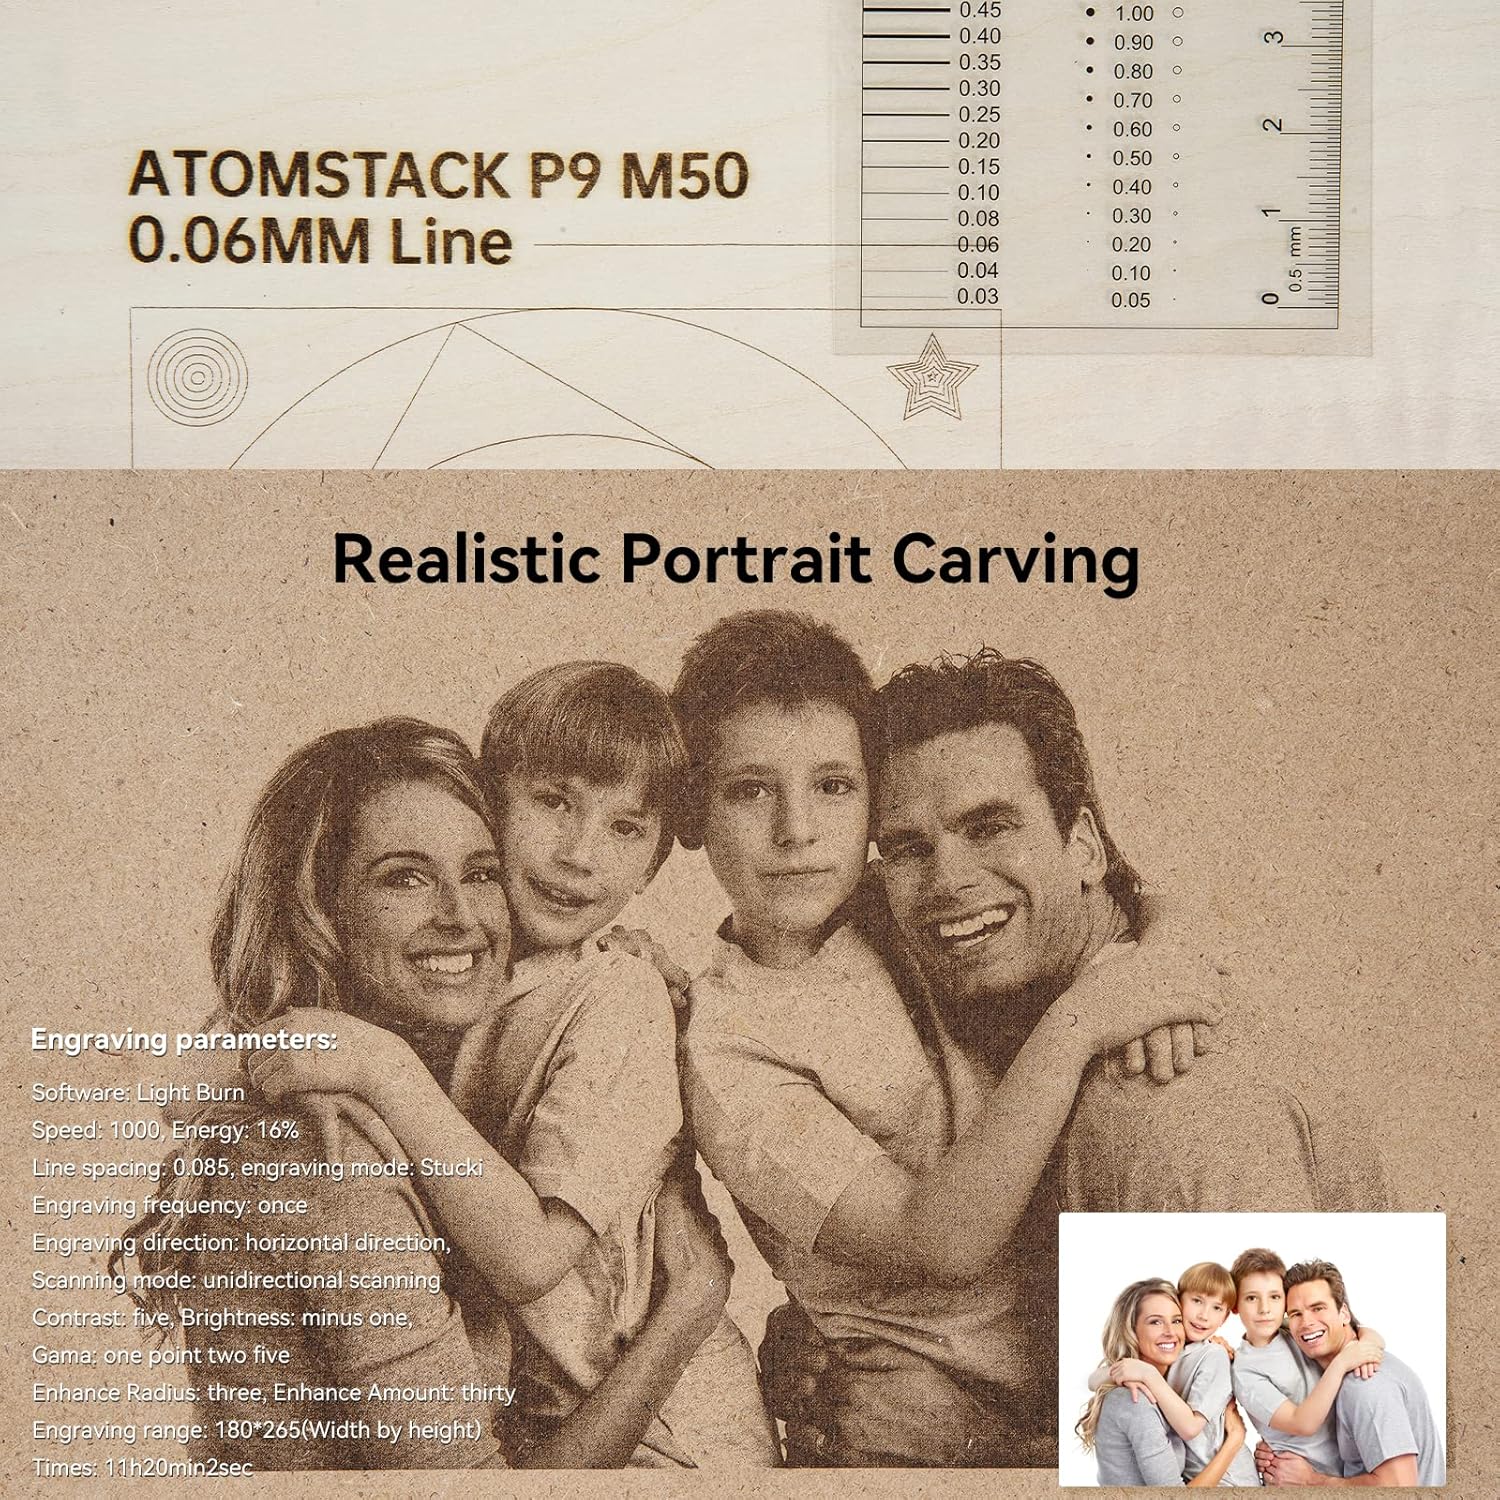
Figure 5.3: Fixed Focus Laser Technology.
5.4 Obsługiwane materiały
The ATOMSTACK P9 M50 can engrave and cut a wide range of materials:
- Drewno
- Bambus
- Karton
- Plastikowy
- Skóra
- Płytka drukowana
- Tlenek glinu
- Metal galwanizowany i malowany, nieodblaskowy
- 304 mirror stainless steel
- Szkło
- Ceramiczny
- Bawełna
- Łupek
- Karton
- Tkanina nietkana
- Wood board (up to 15mm)
- Acrylic (black, up to 15mm)
- Some thin plastic sheets
- Gąbka

Figure 5.4: Dual Compression Spot Coupling Technology for Cutting.
6. Konserwacja
Regular maintenance ensures optimal performance and extends the lifespan of your ATOMSTACK P9 M50. Perform these tasks periodically:
- Wyczyść soczewkę lasera: Periodically clean the laser lens with a soft, lint-free cloth and a specialized lens cleaning solution to maintain engraving precision and laser power.
- Posprzątaj miejsce pracy: Remove debris, dust, and residue from the engraving area after each use to prevent interference with the laser path and machine movement.
- Smarowanie ruchomych części: Apply a small amount of appropriate lubricant to the guide rails and lead screws as needed to ensure smooth and precise operation of the machine's axes.
- Sprawdź kable: Regularly check all power and data cables for signs of wear, fraying, or damage. Replace any damaged cables immediately to prevent electrical hazards.
7. Rozwiązywanie Problemów
This section addresses common issues you might encounter with your ATOMSTACK P9 M50.
| Problem | Możliwa przyczyna | Rozwiązanie |
|---|---|---|
| Maszyna się nie włącza | Power cable loose; power adapter faulty; emergency stop engaged | Check all power connections; ensure the emergency stop button is disengaged (rotate to unlock). Test power adapter if possible. |
| Laser nie działa | Laser module not connected; software settings incorrect; material too reflective | Check laser module connection; verify software power settings (e.g., 100% power); ensure material is suitable for laser engraving/cutting. |
| Engraving is blurry or weak | Dirty laser lens; incorrect material settings; material not flat or properly positioned | Clean the laser lens; adjust power/speed settings in software for the specific material; ensure material is flat and secure on the work surface. |
| Maszyna nie łączy się z komputerem | USB cable faulty; driver issues; incorrect port selection in software | Try a different USB cable or port; reinstall necessary drivers for the engraver; select the correct COM port in your engraving software. |
8. Specyfikacje
Detailed technical specifications for the ATOMSTACK P9 M50 Laser Engraver:
| Moc maszyny | 50 W |
| Moc optyczna lasera | 10-11 W |
| Długość fali lasera | 455 ± 5 mXNUMX |
| Dokładność grawerowania | 0.01 mm |
| Metoda ogniskowania | Stały fokus |
| Obszar grawerowania | 220x250mm |
| Przesyłanie danych | Połączenie USB / karta TF |
| Oprogramowanie operacyjne | LaserGRBL, LightBurn |
| Obsługiwany system operacyjny | Win XP/7/8/10, Mac (LightBurn) |
| Utrzymany File Formaty | NC, BMP, JPG, PNG, DXF |
| Moc wejściowa | 100–240 V prądu przemiennego, 50/60 Hz |
| Moc wyjściowa | 12 V 5 A |
| Masa netto | 3.5 kilogramów |
| Certyfikaty | CE, FCC, RoHS, FDA, PSE |
Rysunek 8.1: Wymiary produktu i najważniejsze specyfikacje.
9. Gwarancja i wsparcie
Aby uzyskać informacje dotyczące gwarancji i pomocy technicznej, zapoznaj się z oficjalną stroną ATOMSTACK webOdwiedź witrynę lub skontaktuj się ze sprzedawcą. Zachowaj paragon jako dowód zakupu.
Zasoby internetowe:
- Visit the official ATOMSTACK store on Amazon: Oficjalny sklep ATOMSTACK
- For software support, visit the official webstrony LaserGRBL I ŚwiatłoBurn.


