
1. Wprowadzenie
The Geekworm G469 GPIO Terminal Block Breakout Board provides a convenient and reliable solution for accessing the General Purpose Input/Output (GPIO) pins of your Raspberry Pi. This board simplifies wiring by converting the standard 40-pin GPIO header into screw terminals, making it ideal for prototyping, educational projects, and industrial applications.
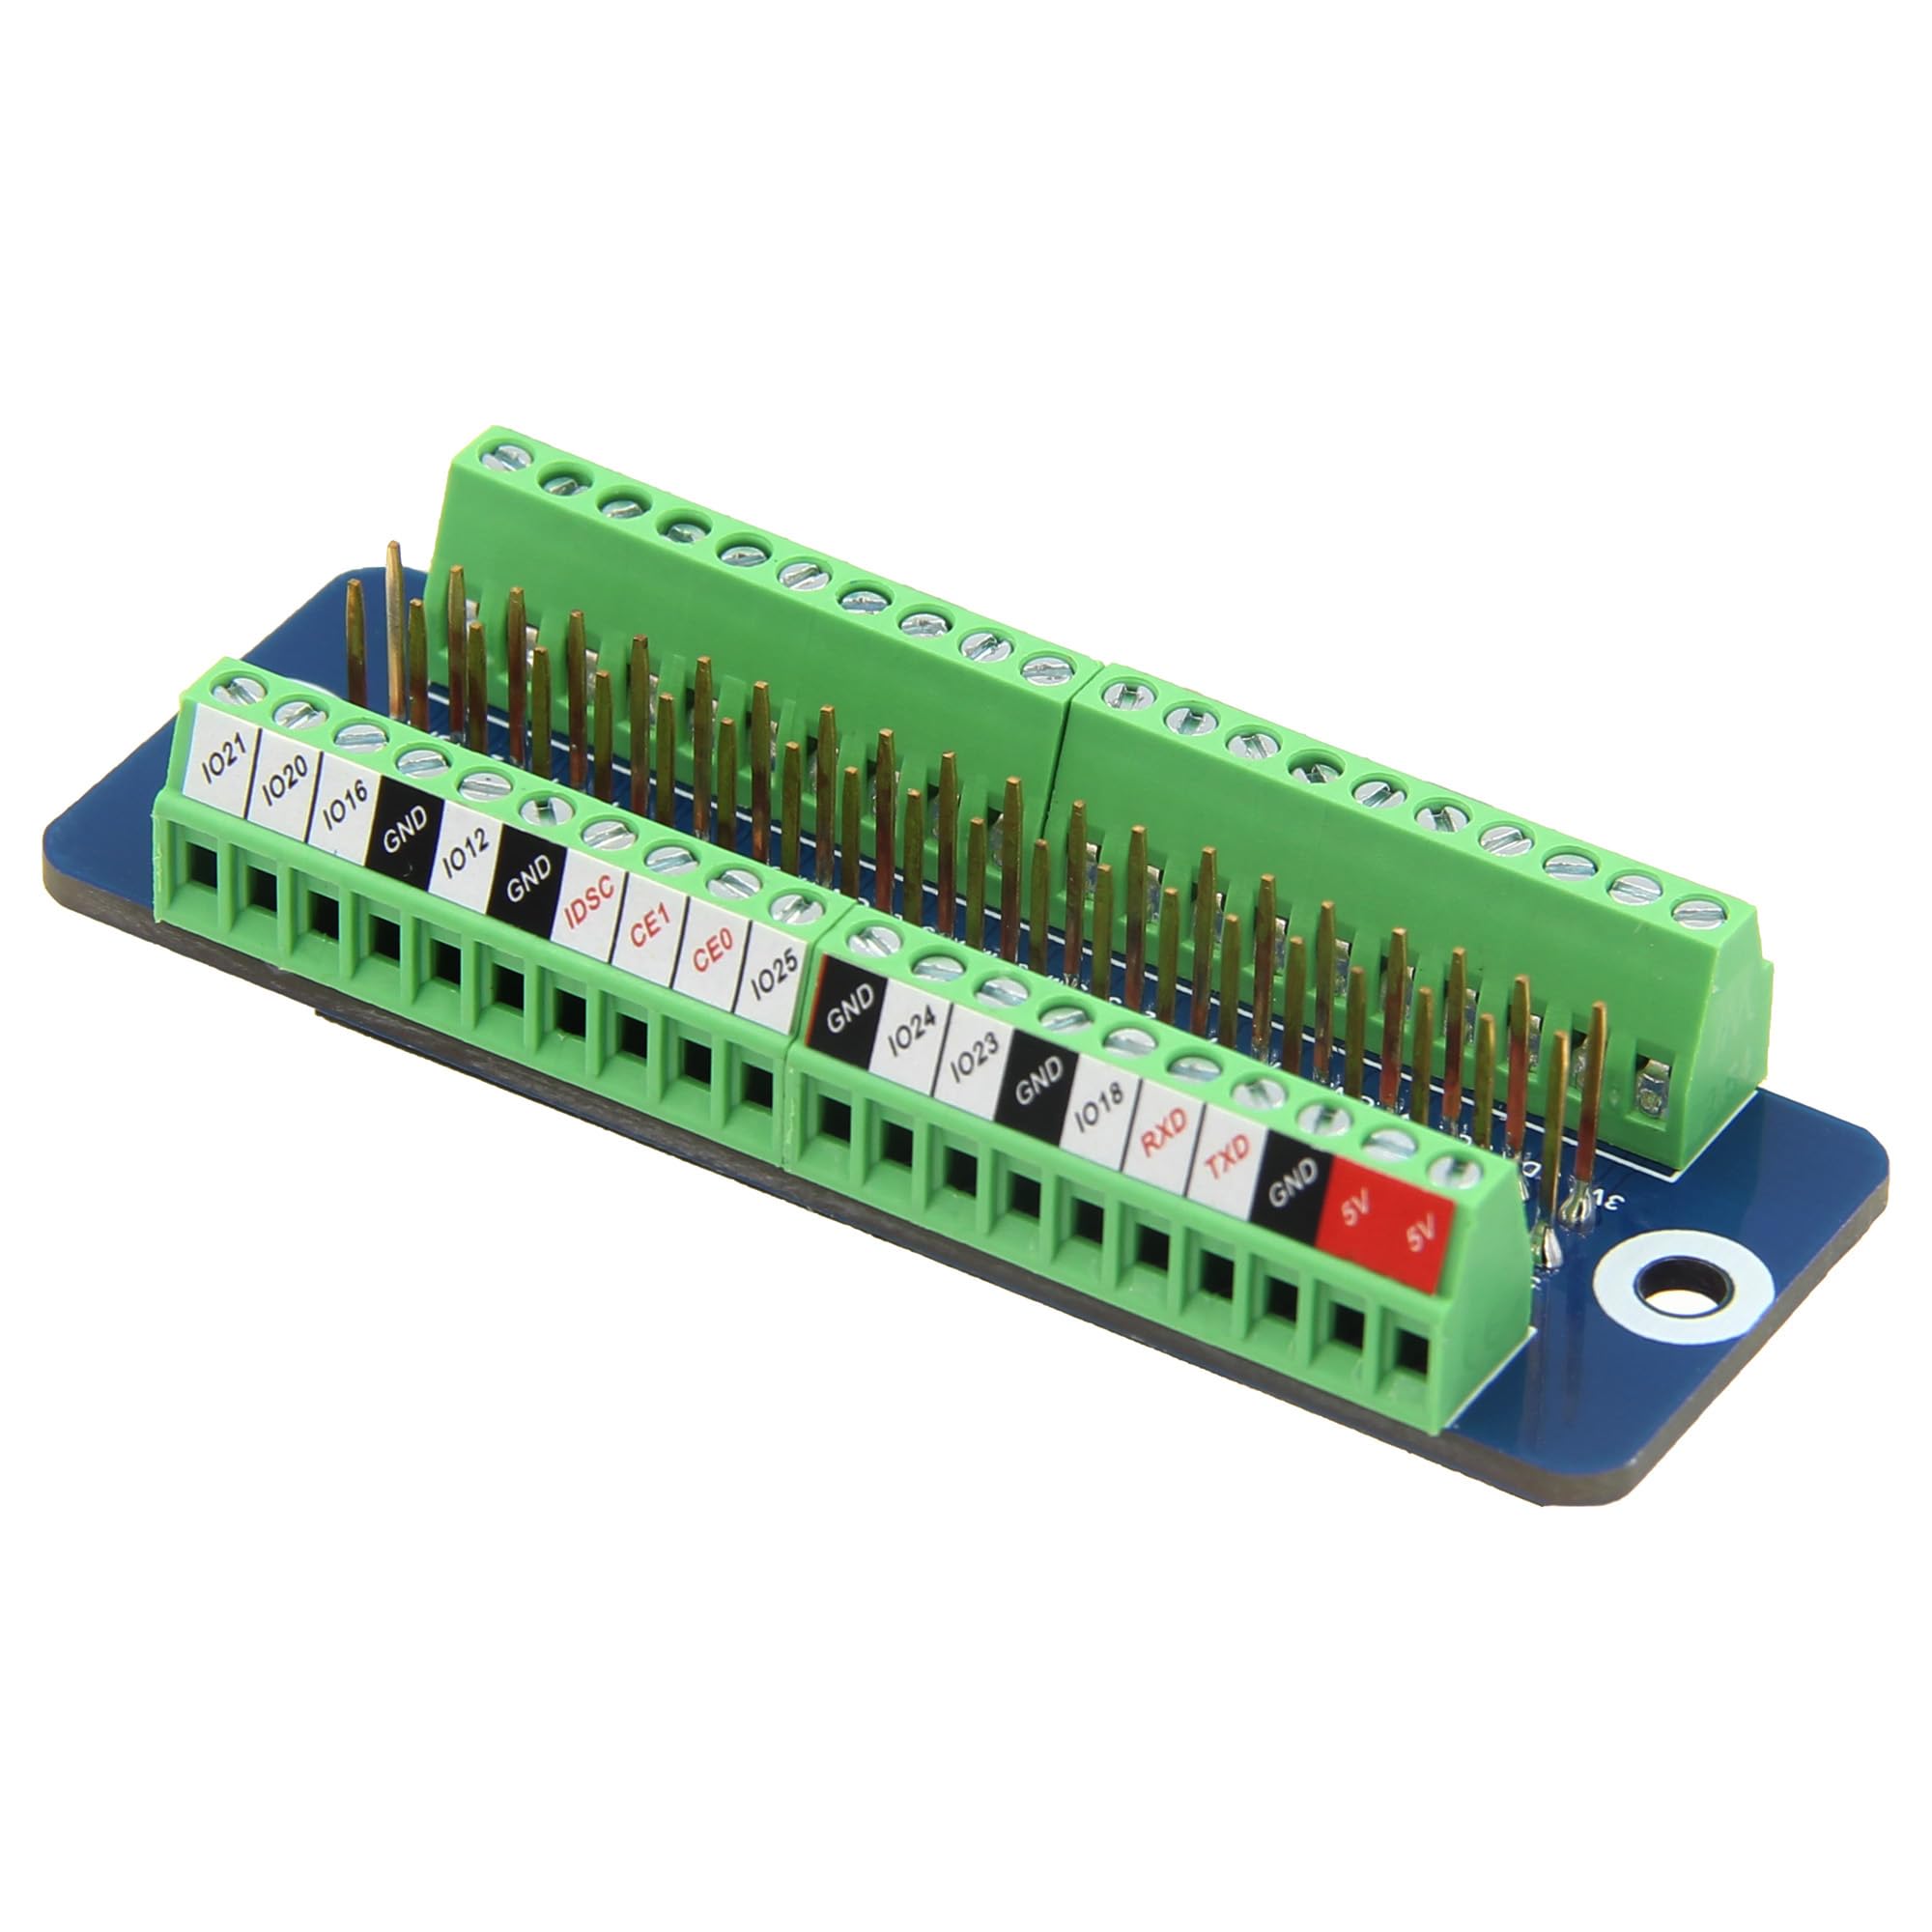
Rysunek 1.1: Ogólne view of the Geekworm G469 GPIO Terminal Block Breakout Board.
2. Koniec produktuview
The G469 breakout board is designed for ease of use and durability. It features clearly labeled pins and high-quality screw terminals to ensure secure connections. The compact design allows for integration into various projects without occupying excessive space.
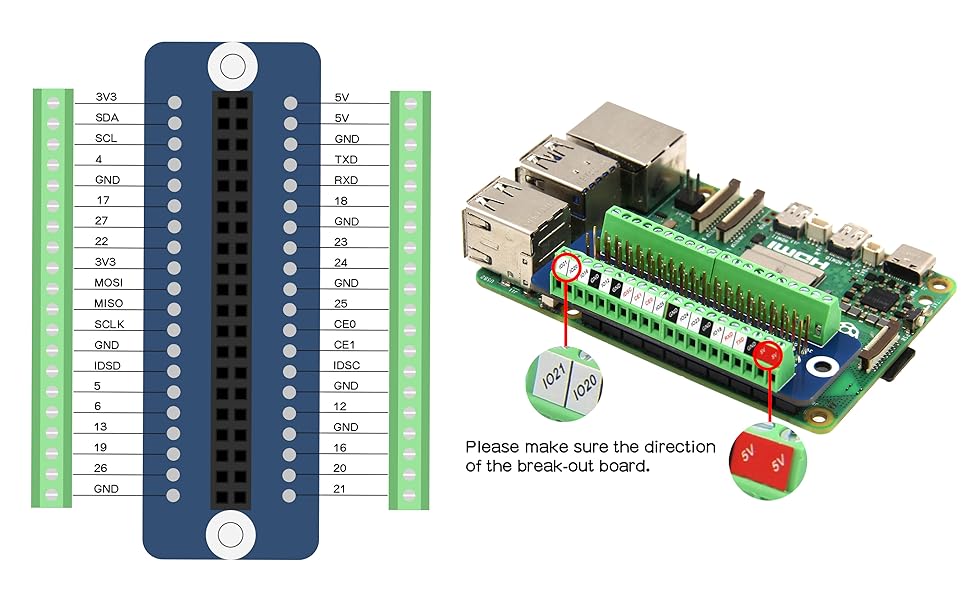
Figure 2.1: Detailed close-up of the G469 board, showing the screw terminals and pin headers.
3. Funkcje
- Mini GPIO Screw Terminal Block Breakout Board: Provides convenient access to Raspberry Pi GPIO pins.
- Easy and Clear Identification: Includes a pin definition sticker and silkscreen labels for each pin's function, simplifying wiring.
- Industrial Terminal Design: Equipped with high-quality industrial terminals for stable and reliable connections.
4. Zgodność
The Geekworm G469 GPIO Terminal Block Breakout Board is compatible with a wide range of Raspberry Pi models, including:
- Raspberry Pi 4B
- Raspberry Pi 3B+
- Raspberry Pi 3B
- Raspberry Pi 2B
- Raspberry Pi Zero 2W
- Other Raspberry Pi models with a standard 40-pin GPIO header.
5. Zawartość opakowania
W skład pakietu wchodzą następujące elementy:
- 1 x Geekworm G469 GPIO Terminal Block Breakout Board
6. Instrukcje konfiguracji
Follow these steps to set up your G469 GPIO Terminal Block Breakout Board:
- Identify Raspberry Pi GPIO Header: Locate the 40-pin GPIO header on your Raspberry Pi board.
- Align the Breakout Board: Carefully align the female header of the G469 breakout board with the GPIO pins on your Raspberry Pi. Ensure the orientation is correct, matching the 5V and GND pins as indicated on the breakout board's silkscreen.
- Podłącz płytkę: Gently press the breakout board onto the Raspberry Pi's GPIO header until it is securely seated.
- Połączenia przewodowe: Use small screwdrivers to connect your external components or wires to the corresponding screw terminals on the breakout board. Refer to the pinout diagram for correct pin assignments.

Rysunek 6.1: Góra view of the G469 board showing clear pin labels for easy identification.
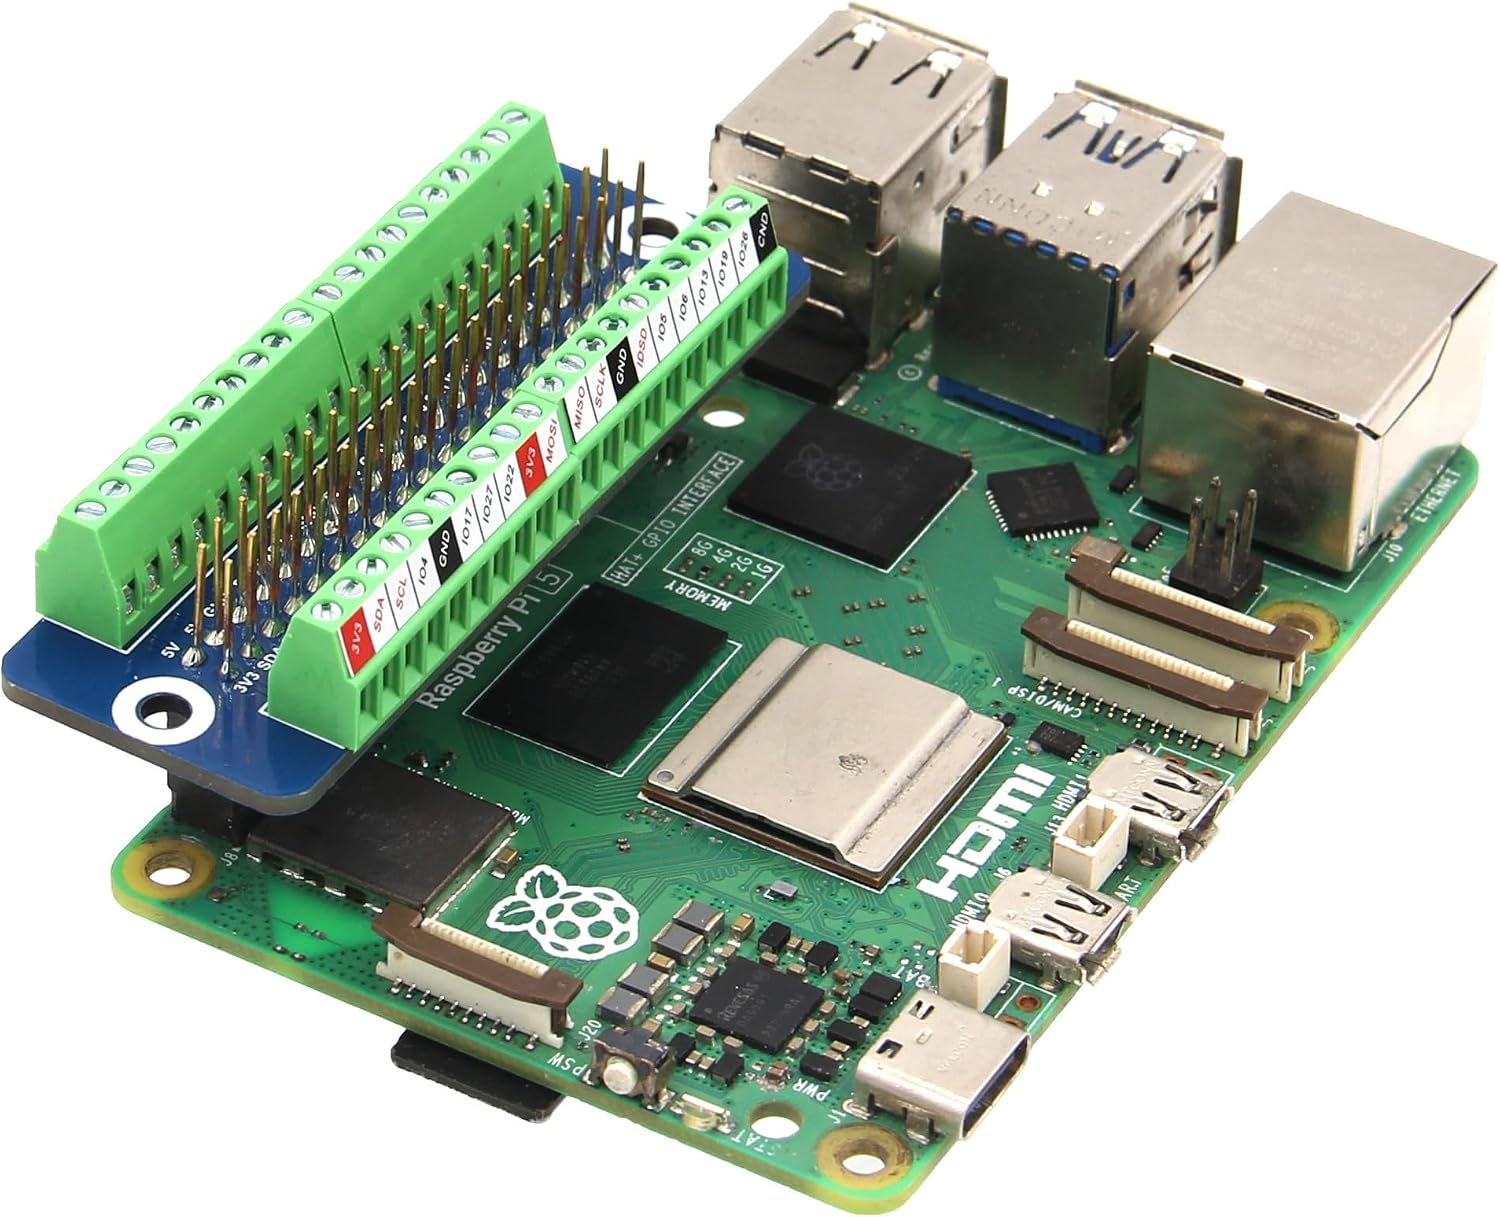
Figure 6.2: The G469 breakout board installed on a Raspberry Pi 5.

Figure 6.3: The G469 breakout board installed on a Raspberry Pi Zero.
7. Instrukcja obsługi
Once the G469 breakout board is physically connected to your Raspberry Pi and external components are wired, you can begin operating your project. The board acts as a direct extension of the Raspberry Pi's GPIO pins, allowing you to interact with them using standard Raspberry Pi programming libraries (e.g., RPi.GPIO in Python).
7.1. Schemat pinów
The following diagram illustrates the pin assignments for the G469 board, corresponding to the Raspberry Pi's 40-pin GPIO header:

Figure 7.1: Pinout diagram of the G469 board, showing the mapping of Raspberry Pi GPIO pins to the screw terminals.
Always double-check the pin labels on the board and the diagram before making connections to prevent damage to your Raspberry Pi or connected devices.
7.2. Wiring Best Practices
- Ensure all power to the Raspberry Pi and connected components is off before making or changing any wiring connections.
- Use appropriate wire gauges for your application.
- Tighten screw terminals sufficiently to ensure a good electrical connection, but do not overtighten.
- Verify all connections against the pinout diagram before applying power.
8. Konserwacja
The Geekworm G469 GPIO Terminal Block Breakout Board requires minimal maintenance. To ensure optimal performance and longevity:
- Utrzymuj deskę w czystości, bez kurzu i zanieczyszczeń. Do czyszczenia używaj miękkiej, suchej szczotki lub sprężonego powietrza.
- Avoid exposing the board to extreme temperatures, humidity, or corrosive environments.
- Periodically check screw terminal connections to ensure they remain tight and secure.
- Trzymaj płytkę za krawędzie, aby uniknąć dotykania podzespołów, zwłaszcza gdy jest podłączona do zasilania.
9. Rozwiązywanie Problemów
If you encounter issues with your G469 GPIO Terminal Block Breakout Board, consider the following troubleshooting steps:
- Brak połączenia/Połączenie przerywane:
- Ensure the breakout board is fully seated on the Raspberry Pi's GPIO header.
- Check that all wires are securely fastened in the screw terminals. Loose connections can cause intermittent behavior.
- Verify the correct pin assignments according to the pinout diagram (Figure 7.1).
- Incorrect Pin Functionality:
- Double-check your wiring against the pinout diagram. A common error is connecting to an adjacent pin.
- Ensure your software code correctly references the GPIO pin numbers you are using.
- Board Not Powering On (if applicable):
- The G469 is a passive breakout board and does not require external power. If your Raspberry Pi is not powering on, the issue is likely with the Raspberry Pi's power supply or the Pi itself, not the breakout board.
- Uszkodzenia fizyczne:
- Inspect the board for any visible damage, such as bent pins, cracked solder joints, or burnt components. If damage is found, discontinue use.
If these steps do not resolve your issue, please contact Geekworm customer support for further assistance.
10. Specyfikacje
| Specyfikacja | Wartość |
|---|---|
| Numer modelu | G469 |
| Marka | Robak geekowy |
| Wymiary produktu | Wymiary 6.5 x 2.5 x 2.5 cm |
| Waga przedmiotu | 23 gramów |
| Kraj pochodzenia | Chiny |
| Specific Product Use | For Raspberry Pi DIY |
| Zawarte komponenty | GPIO Terminal Block Breakout Board |
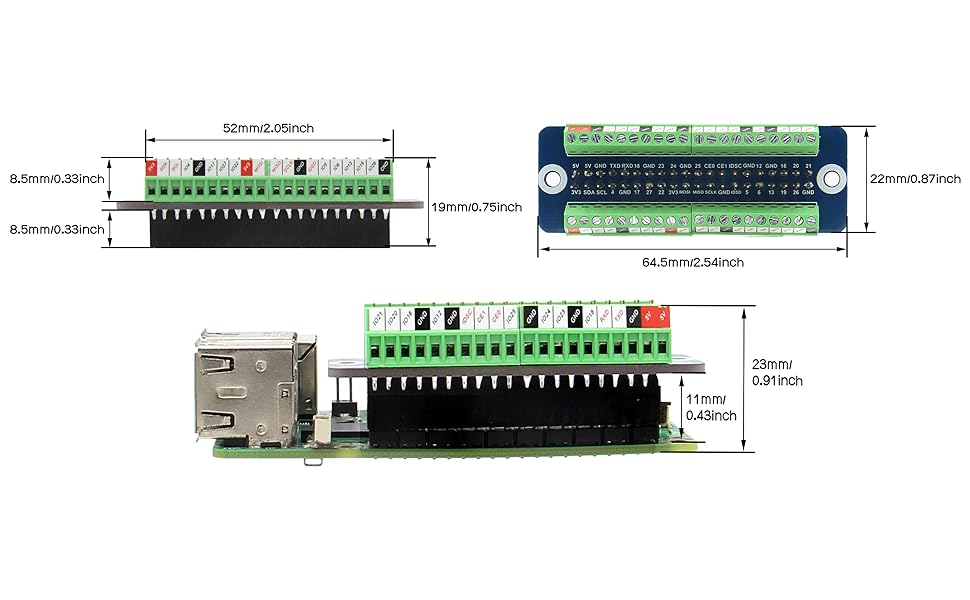
Rysunek 10.1: Szczegółowy views of the G469 board, including dimensions and component layout.
11. Gwarancja i wsparcie
Geekworm products are designed for quality and reliability. For information regarding warranty coverage, technical support, or returns, please refer to the official Geekworm webOdwiedź witrynę lub skontaktuj się ze sprzedawcą. Zachowaj paragon zakupu na wypadek reklamacji.
For direct support, you may visit the Geekworm store on Amazon: Geekworm Store