
1. Wprowadzenie
Thank you for choosing the Sharkoon AK6 RGB ATX PC Case. This manual provides essential information for the proper installation, operation, and maintenance of your new PC case. Please read this guide thoroughly before beginning the assembly process to ensure optimal performance and longevity of your components.
2. Informacje dotyczące bezpieczeństwa
- Always disconnect the power supply from the wall outlet before installing or removing any components inside the PC case.
- Ostrożnie obchodź się z panelami ze szkła hartowanego. Są delikatne i mogą pęknąć w razie upuszczenia lub uderzenia.
- Avoid exposing the case to extreme temperatures, humidity, or direct sunlight.
- Przechowuj małe części i śruby poza zasięgiem dzieci.
- Ensure proper grounding to prevent electrostatic discharge (ESD) damage to sensitive electronic components.
3. Zawartość opakowania
Sprawdź, czy w przesyłce znajdują się wszystkie elementy:
- Obudowa PC Sharkoon AK6 RGB ATX
- Accessory box (containing screws, cable ties, and other small parts)
- Instrukcja obsługi (ten dokument)
4. Koniec produktuview
The Sharkoon AK6 RGB ATX PC Case is designed with a modern glass aesthetic, featuring seamless integration of tempered glass on the front and side panels. It includes four pre-installed 120mm addressable RGB PWM fans for optimal airflow and visual appeal. The case supports a wide range of components, including BTF motherboards, and offers ample space for high-performance hardware.

Figure 4.1: Front interior view of the Sharkoon AK6 RGB PC case, showcasing the pre-installed addressable RGB fans and the spacious main chamber.

Rysunek 4.2: Kątowy view of the Sharkoon AK6 RGB PC case, highlighting the tempered glass side panel and the top mesh for ventilation.

Rysunek 4.3: Tył view of the Sharkoon AK6 RGB PC case, showing the I/O shield cutout, rear exhaust fan mount, and expansion slots.
Przedni panel I/O
The front I/O panel is located on the side of the case and includes:
- Przycisk zasilania
- Przycisk resetowania
- 2 x USB Ports (Type-A)
- 1 porty USB typu C
- Audio Jacks (TRRS)
5. Konfiguracja i instalacja
Follow these steps to install your components into the Sharkoon AK6 RGB PC Case.
5.1 Przygotowanie sprawy
- Połóż obudowę na płaskiej i stabilnej powierzchni.
- Carefully remove the tempered glass side panel by unscrewing the thumb screws at the rear and gently pulling the panel away.
- Remove the rear metal side panel by unscrewing the thumb screws.
5.2 Instalacja płyty głównej
The AK6 RGB supports Mini-ITX, Micro-ATX, ATX, and BTF motherboards.
- Install the I/O shield into the cutout at the rear of the case (if not pre-installed on your motherboard).
- Align your motherboard with the standoffs inside the case. Ensure all standoffs match the motherboard's mounting holes.
- Przymocuj płytę główną odpowiednimi śrubami z pudełka z akcesoriami.
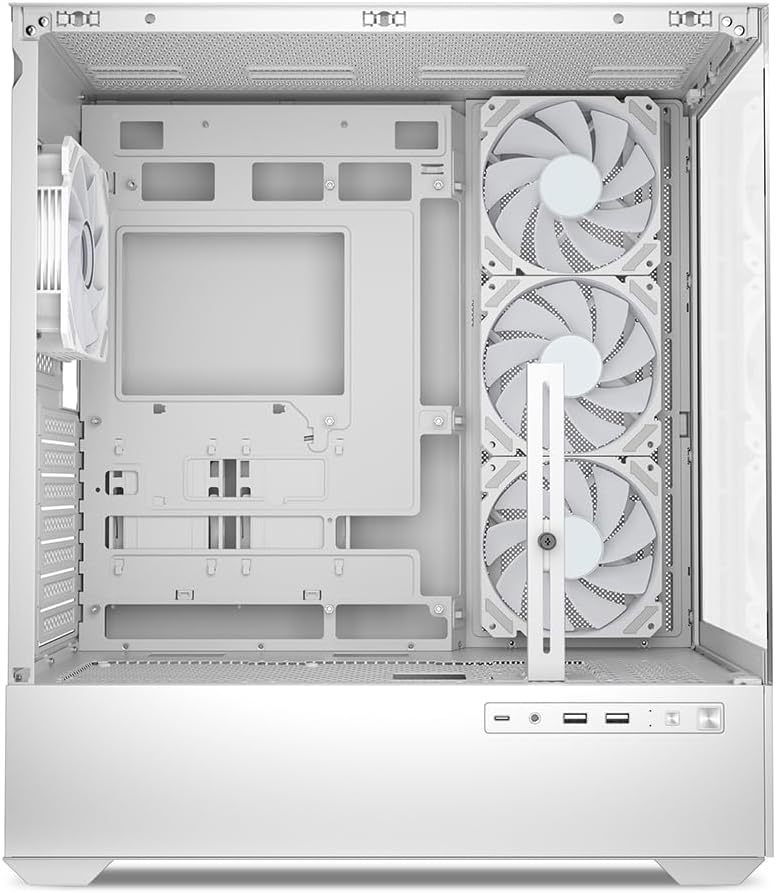
Rysunek 5.1: Wnętrze view of the Sharkoon AK6 RGB PC case, illustrating the motherboard tray, cable management cutouts, and front fan mounting points.
5.3 Instalacja zasilania
The case features a bottom-mount power supply design.
- Wsuń zasilacz (PSU) do dedykowanej komory w dolnej tylnej części obudowy.
- Dopasuj zasilacz do otworów na śruby z tyłu obudowy.
- Secure the PSU with the provided screws.
5.4 Instalacja urządzenia pamięci masowej
The AK6 RGB supports up to two 3.5" HDDs or four 2.5" SSDs.
- W przypadku dysków twardych 3.5": Locate the drive cages beneath the PSU shroud. Slide the HDD into a drive tray and secure it with screws.
- W przypadku dysków SSD 2.5": SSDs can be mounted on the dedicated brackets behind the motherboard tray or on the 3.5" drive trays using adapter screws.
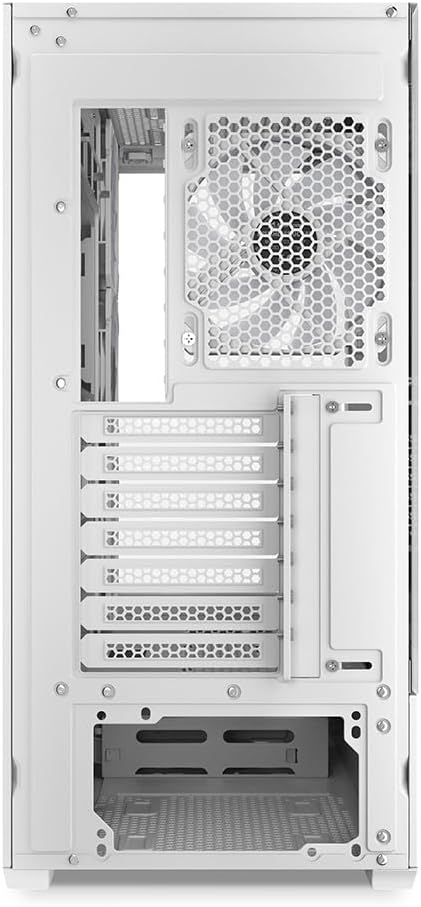
Rysunek 5.2: Wnętrze tyłu view of the Sharkoon AK6 RGB PC case, detailing the drive cages for 3.5-inch HDDs and 2.5-inch SSDs, and the power supply shroud area.
5.5 Instalacja karty graficznej i karty rozszerzeń
- Zdejmij niezbędne zaślepki gniazd rozszerzeń z tyłu obudowy.
- Umieść kartę graficzną lub inną kartę rozszerzeń w odpowiednim gnieździe PCIe na płycie głównej.
- Secure the cards with screws. The case includes a rubberized graphics card support for larger cards.
5.6 CPU Cooler and Radiator Installation
The case supports CPU coolers up to 17 cm in height and allows for extensive liquid cooling setups.
- Zainstaluj chłodzenie procesora zgodnie z instrukcją producenta.
- For liquid cooling, the case can accommodate a 360mm radiator at the top and an additional 280mm radiator.
5.7 Zarządzanie kablami
Wykorzystaj wycięcia na kable i punkty mocowania za tacką płyty głównej, aby poprowadzić i zabezpieczyć kable. Poprawia to przepływ powietrza i estetykę.
6. Instrukcja obsługi
6.1 Włączanie
After all components are installed and cables are connected, replace the side panels. Connect the power cable to your PSU and a wall outlet, then press the power button on the front I/O panel to start your system.
6.2 Sterowanie wentylatorem RGB
The AK6 RGB comes with four pre-installed addressable RGB PWM fans. These fans are connected to an RGB controller which also provides connections for up to four LED elements and four PWM fans. The RGB lighting can typically be controlled via your motherboard's RGB software (if compatible) or through a dedicated button on the case (if present and connected).
6.3 Optymalizacja przepływu powietrza
The case is designed for ideal airflow, with three inverted fans drawing air from the side into the case. The top and rear fan mounts allow for additional exhaust fans. Ensure proper fan orientation for optimal cooling performance.

Rysunek 6.1: Example of a fully assembled system within the Sharkoon AK6 RGB PC case, featuring various components and active RGB lighting.
7. Konserwacja
Regularna konserwacja pomaga zapewnić długowieczność i wydajność podzespołów komputera.
- Filtry przeciwpyłowe: Periodically clean the removable dust filters (e.g., on the top and bottom) to maintain optimal airflow and prevent dust buildup inside the case. Use compressed air or a soft brush.
- Panele szklane: Czyść panele ze szkła hartowanego miękką, niepozostawiającą włókien ściereczką i środkiem do czyszczenia szkła. Unikaj materiałów ściernych, które mogłyby zarysować powierzchnię.
- Czyszczenie wnętrza: Użyj sprężonego powietrza, aby usunąć kurz z wewnętrznych podzespołów i wentylatorów. Przed czyszczeniem upewnij się, że system jest wyłączony i odłączony od zasilania.
8. Rozwiązywanie Problemów
If you encounter issues with your PC case, refer to the following common troubleshooting steps:
- Brak zasilania: Ensure the power supply is properly connected to the wall outlet and the motherboard. Check all internal power cables (24-pin ATX, 8-pin CPU, PCIe power).
- Wentylatory nie kręcą się/RGB nie działa: Verify that all fan and RGB cables are correctly connected to the motherboard or the included RGB controller. Check your motherboard's BIOS/UEFI settings or RGB software for fan speed and lighting control.
- Przednie porty wejścia/wyjścia nie działają: Confirm that the front panel connectors (USB, audio, power/reset switches) are correctly plugged into the corresponding headers on your motherboard.
- Przegrzanie: Ensure all fans are spinning correctly and oriented for proper airflow. Clean dust filters and internal components. Verify CPU cooler installation.
For further assistance, please contact Sharkoon support.
9. Specyfikacje
| Funkcja | Specyfikacja |
|---|---|
| Marka | Rekin |
| Nazwa modelu | AK6 RGB |
| Numer modelu | C-AK6W |
| Typ sprawy | Wieża ATX |
| Kolor | Biały |
| Tworzywo | Szkło hartowane |
| Zgodność płyty głównej | Mini ITX, Micro ATX, ATX, BTF |
| Typ montażu zasilacza | Mocowanie dolne |
| Metoda chłodzenia | Powietrze |
| Fabrycznie zainstalowane wentylatory | 4 x 120mm Addressable RGB PWM Fans |
| Maksymalna wysokość chłodnicy procesora | 17 cm |
| Maksymalna długość karty graficznej | 41 cm (with rubberized support) |
| Maksymalna długość zasilacza | 23.5 cm |
| Wsparcie chłodnicy | Top: up to 360mm, Additional: up to 280mm |
| Zatoki napędowe | 2 x 3.5" HDD or 4 x 2.5" SSD |
| Przednie porty we / wy | 2 x USB Type-A, 1 x USB Type-C, Audio (TRRS) |
| Waga przedmiotu | 6.1 kilograma |
| Cechy specjalne | RGB Lighting, Unique Glass Appearance, BTF Motherboard Support |
10. Gwarancja
Sharkoon products are manufactured to high quality standards. For detailed warranty information, please refer to the warranty card included with your product or visit the official Sharkoon webGwarancja zazwyczaj obejmuje wady materiałowe i wykonawcze wynikające z normalnego użytkowania.
11. Wsparcie
If you require technical assistance or have questions regarding your Sharkoon AK6 RGB ATX PC Case, please visit the official Sharkoon website for support resources, FAQs, and contact information. You may also find updated drivers or software for the RGB controller there.
Webstrona: www.sharkoon.com


