ScopeAround SA200S
Instrukcja obsługi otoskopu cyfrowego ScopeAround SA200S z ekranem IPS o przekątnej 1.85 cala
Model: SA200S | Brand: ScopeAround
1. Wprowadzenie
This manual provides detailed instructions for the safe and effective use of your ScopeAround SA200S Digital Otoscope. This device is designed for visual inspection of the ear canal and eardrum, featuring an integrated 1.85-inch IPS screen, a 720p HD camera, and adjustable LED lighting. It also supports photo and video capture for documentation.
Przed rozpoczęciem korzystania z urządzenia należy uważnie przeczytać instrukcję i zachować ją do wykorzystania w przyszłości.
2. Informacje dotyczące bezpieczeństwa
- Do not insert the otoscope too deeply into the ear canal to avoid injury.
- Always use the provided specula to prevent direct contact with the ear canal.
- Clean the lens and accessories thoroughly before and after each use to prevent cross-contamination. Refer to the "Maintenance and Cleaning" section.
- Keep the device out of reach of children. Adult supervision is required if used on children.
- Do not use the device if you experience pain or discomfort. Consult a medical professional.
- Unikaj wystawiania urządzenia na działanie ekstremalnych temperatur, bezpośredniego światła słonecznego i wilgoci.
- Nie próbuj samodzielnie demontować ani naprawiać urządzenia. Skontaktuj się z obsługą klienta, aby uzyskać pomoc.
- The built-in battery pack is non-removable.

Figure 2.1: Safe and Dangerous Ear Canal Insertion
3. Zawartość opakowania
Sprawdź, czy w opakowaniu znajdują się wszystkie elementy:
- SA200S Digital Otoscope with Screen
- Ear Picks (x4)
- Specula (x5)
- Waciki z alkoholem
- Patyczki kosmetyczne
- Karta pamięci 8 GB
- Kabel USB (Typ C)
- Instrukcja obsługi

Rysunek 3.1: Zawartość opakowania
4. Koniec produktuview
The ScopeAround SA200S Digital Otoscope is an all-in-one device designed for convenient ear examination. It features a high-resolution camera and an integrated display for direct viewing.

Figure 4.1: ScopeAround SA200S Digital Otoscope
4.1 Komponenty urządzenia

Figure 4.2: Labeled Components of the Otoscope
- Navigation Buttons UP: Used to navigate menus or adjust settings.
- Navigation Buttons Down: Used to navigate menus or adjust settings.
- Gniazdo karty pamięci: For inserting the 8GB memory card (included).
- Przycisk Zdjęcie/Wideo: Press to capture photos or start/stop video recording.
- Power Button / LED Light Adjustment: Naciśnij i przytrzymaj, aby włączyć/wyłączyć zasilanie. Naciśnij krótko, aby przełączać poziomy jasności diody LED.
- 1.85" IPS LCD Screen: Integrated display for real-time viewing.
- Przycisk ustawień: Uzyskaj dostęp do ustawień urządzenia.
- Przycisk OK: Potwierdź wybór w menu.
- Otoscope Camera: The camera probe for ear canal inspection.
- Port typu C: Do ładowania i przesyłania danych.
5. Konfiguracja
5.1 Ładowanie urządzenia
Before first use, fully charge the otoscope. Connect the provided USB Type-C cable to the device's Type-C port and a compatible USB power adapter (not included). The charging indicator will show the charging status. A full charge provides approximately 3 hours of working time.
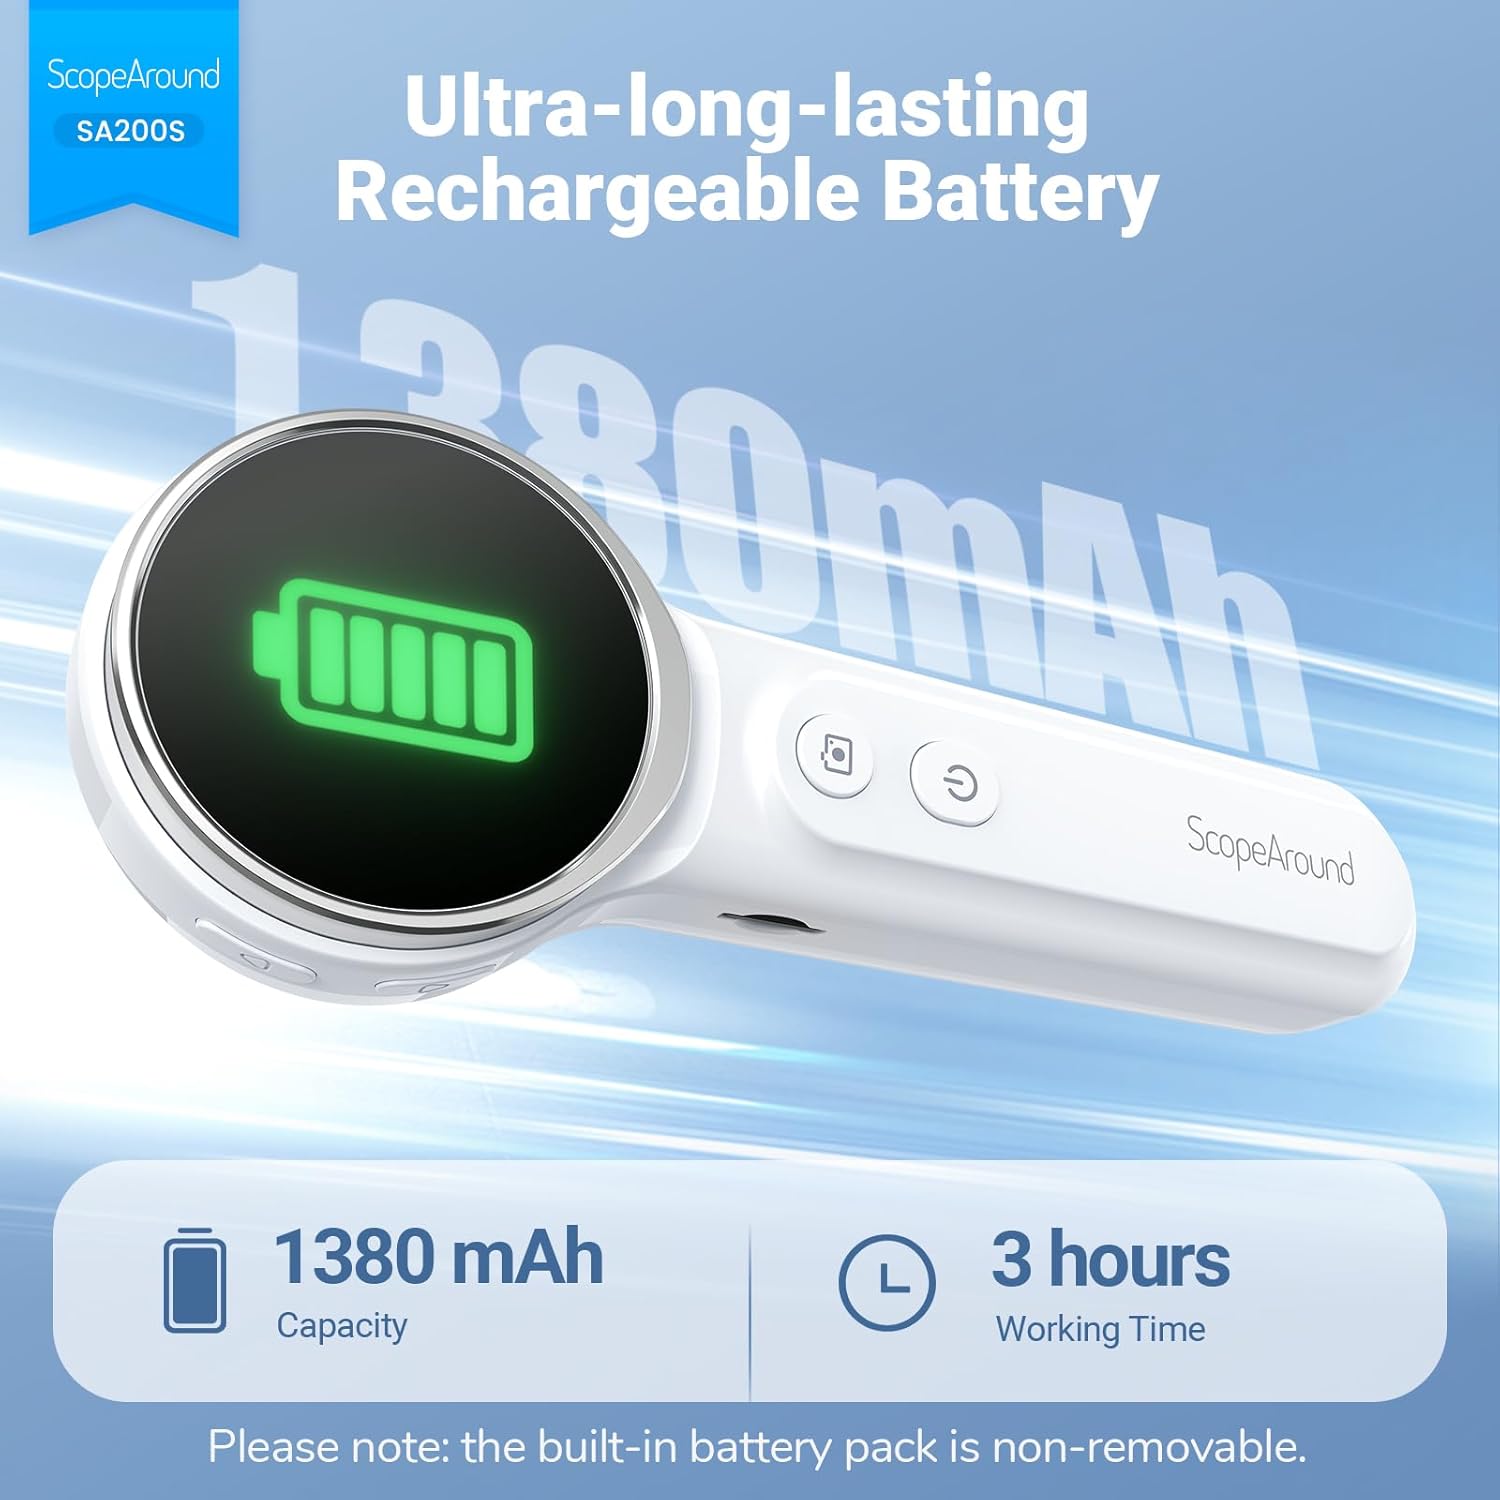
Rysunek 5.1: Ładowanie i żywotność baterii
5.2 Mocowanie akcesoriów
Select an appropriate speculum and ear pick. Gently attach the chosen speculum to the tip of the otoscope camera. If using an ear pick, ensure it is securely fitted over the camera tip, inside the speculum, before insertion into the ear.
5.3 Włączanie/wyłączanie
- Aby włączyć: Naciśnij i przytrzymaj przycisk Przycisk zasilania (5) until the screen illuminates.
- Aby wyłączyć: Naciśnij i przytrzymaj przycisk Przycisk zasilania (5) again until the screen turns off.
5.4 Łączenie się z aplikacją (opcjonalnie)
For additional features and a larger viewing experience, you can connect the otoscope to your smartphone or tablet via Wi-Fi.
- Pobierz aplikację: Scan the QR code provided in the manual or on the device packaging, or search for "Smart Otoscope" in the Apple App Store or Google Play Store. You can also visit gto.so/smart-otoscope.
- Power On Otoscope: Long press the power button on the otoscope to turn it on.
- Połącz Wi-Fi: On your smartphone or tablet, go to Wi-Fi settings and connect to the network named "Smart Otoscope_XXX". The default password is 55556666.
- Uruchom aplikację: Open the "Smart Otoscope" app. The live view from the otoscope camera should appear.

Figure 5.2: Wi-Fi Connection Steps
Note: Once connected to the app, you can operate the device and view the feed on your phone.
6. Instrukcja obsługi
6.1 Basic Ear Examination
- Ensure a clean speculum is attached to the otoscope camera.
- Gently pull the outer ear up and back to straighten the ear canal.
- Carefully insert the speculum tip into the ear canal while observing the integrated 1.85-inch IPS screen. Do not force the device.
- Powoli dostosuj kąt i głębokość, aby uzyskać wyraźny obraz. view kanału słuchowego i błony bębenkowej.

Figure 6.1: Self-Examination with Integrated Screen
6.2 Adjusting LED Lights and Brightness
The otoscope features 6 adjustable LED lights with 3 brightness settings for optimal visibility.
- Naciśnij krótko Przycisk zasilania (5) to cycle through the 3 brightness levels.

Figure 6.2: Camera Specifications and Brightness Settings
6.3 Magnification Levels
The device supports 3 levels of magnification (1.0x, 1.3x, 1.5x) for detailed viewing. Use the Navigation Buttons UP/DOWN (1, 2) to adjust magnification.

Figure 6.3: Adjustable Magnification and Image Rotation
6.4 Robienie zdjęć i nagrywanie wideo
The otoscope allows you to capture images and record videos directly to the included 8GB memory card.
- To take a photo: Press the Przycisk Zdjęcie / Wideo (4) raz.
- To record a video: Long press the Przycisk Zdjęcie / Wideo (4) to start recording. Long press again to stop recording.

Figure 6.4: Photo and Video Capture Interface (App View)
6.5 Przenoszenie Files
To transfer captured photos and videos to a computer:
- Connect the otoscope to your computer using the provided USB Type-C cable.
- The device should appear as a removable storage device. You can then access the files on the 8GB memory card.
- Alternatively, remove the 8GB memory card from the slot (3) and insert it into a compatible card reader connected to your computer.

Rysunek 6.5: File Transfer for Sharing Insights
7. Konserwacja i czyszczenie
Proper maintenance ensures the longevity and hygiene of your otoscope.
- Czyszczenie obiektywu: Use the provided Q-tips and alcohol pads to gently clean the camera lens before and after each use. Ensure no residue remains.
- Akcesoria do czyszczenia: Wash the reusable ear picks and specula with soap and water, then sterilize them with alcohol pads. Allow them to dry completely before storage or reuse.
- Korpus urządzenia: Wipe the main body of the otoscope with a soft, dry cloth. Do not immerse the device in water.
- Składowanie: Przechowuj urządzenie w chłodnym i suchym miejscu, z dala od bezpośredniego światła słonecznego i ekstremalnych temperatur.

Figure 7.1: Cleaning the Otoscope Lens
8. Rozwiązywanie Problemów
| Problem | Możliwa przyczyna | Rozwiązanie |
|---|---|---|
| Urządzenie nie włącza się. | Niski poziom naładowania baterii. | Naładuj całkowicie urządzenie za pomocą dostarczonego kabla USB. |
| Brak obrazu na ekranie. | Device not powered on; Camera lens obstructed. | Ensure device is powered on. Check and clean the camera lens. |
| Obraz jest rozmazany lub niewyraźny. | Dirty lens; Incorrect focal distance; Magnification setting. | Clean the camera lens. Adjust the distance from the ear canal. Adjust magnification using navigation buttons. |
| Nie można połączyć się z siecią Wi-Fi. | Incorrect Wi-Fi password; Device not in pairing mode; App issue. | Ensure the otoscope is powered on. Verify the Wi-Fi password (55556666). Restart the otoscope and your phone/tablet. Reinstall the app if necessary. |
| Nie można zapisać zdjęć/filmów. | Memory card full or faulty; Memory card not inserted. | Check if the 8GB memory card is correctly inserted. Ensure there is sufficient space. Try formatting the card (if data is backed up) or using a different card. |
9. Specyfikacje
| Funkcja | Szczegół |
|---|---|
| Nazwa modelu | SA200S |
| Rozmiar ekranu | 1.85-calowy wyświetlacz IPS LCD |
| Rozdzielczość kamery | Rozdzielczość 720p HD |
| Średnica soczewki | 3.9mm Ultra-thin Lens |
| Źródło światła | 6 LED Lights (3 brightness settings) |
| Odległość ogniskowa | 0.39 - 1.18 cali |
| Kąt rzeczywisty View | 78 stopni |
| Powiększenie | Up to 1.5x (1.0x, 1.3x, 1.5x) |
| Pojemność baterii | Polimer litowy 1380 mAh |
| Czas pracy | Około 3 godzin |
| Łączność | Wi-Fi (do połączenia z aplikacją) |
| Składowanie | Karta pamięci 8 GB (w zestawie) |
| Port ładowania | Typ C |
| Kompatybilne urządzenia | Android/iPhone smartphones and tablets (Not compatible with Macbook & Windows PC) |
| Waga przedmiotu | 12 uncji |
| Wymiary | 7.52 x 4.61 x 2.68 cala (opakowanie) |
| Tworzywo | Plastikowy |
| Kolor | Biały |
10. Gwarancja i wsparcie
ScopeAround is committed to providing high-quality products and customer satisfaction. For any questions, technical support, or warranty inquiries, please contact our US-based after-sales support team.
Contact information can typically be found on the product packaging, the official ScopeAround weblub za pośrednictwem platformy zakupowej.
Ask a question about this manual
Ask about setup, troubleshooting, compatibility, parts, safety, or missing instructions. Manuals+ will review the question and use this page’s manual context to help answer it.