
1. Wprowadzenie
This manual provides essential information for the safe installation, operation, and maintenance of your ASD 2x4 Center Basket LED Troffer Panel Light. Please read these instructions thoroughly before installation and retain them for future reference.
2. Informacje dotyczące bezpieczeństwa
OSTRZEŻENIE: Ryzyko porażenia prądem. Przed instalacją lub serwisowaniem należy odłączyć zasilanie.
- Instalację powinien wykonać wykwalifikowany elektryk, zgodnie z krajowymi i lokalnymi przepisami elektrycznymi.
- Zapewnij objętość podażytagjest kompatybilny z oprawą oświetleniową (120-277V).
- Do not handle the fixture with wet hands or when standing on wet surfaces.
- Nie modyfikuj urządzenia. Wszelkie modyfikacje mogą unieważnić gwarancję i stwarzać zagrożenie dla bezpieczeństwa.
- Podczas pracy urządzenia należy trzymać materiały łatwopalne z dala od niego.
- Osprzęt ten jest przeznaczony doamp lokalizacje.
3. Funkcje produktu
The ASD 2x4 Center Basket LED Troffer Panel Light is designed for commercial and industrial applications, offering efficient and versatile lighting. Key features include:
- Trwała obudowa klasy komercyjnej: Constructed from iron, resistant to rust and impact.
- Anti-Glare PC Lens: Provides even light distribution and reduces glare.
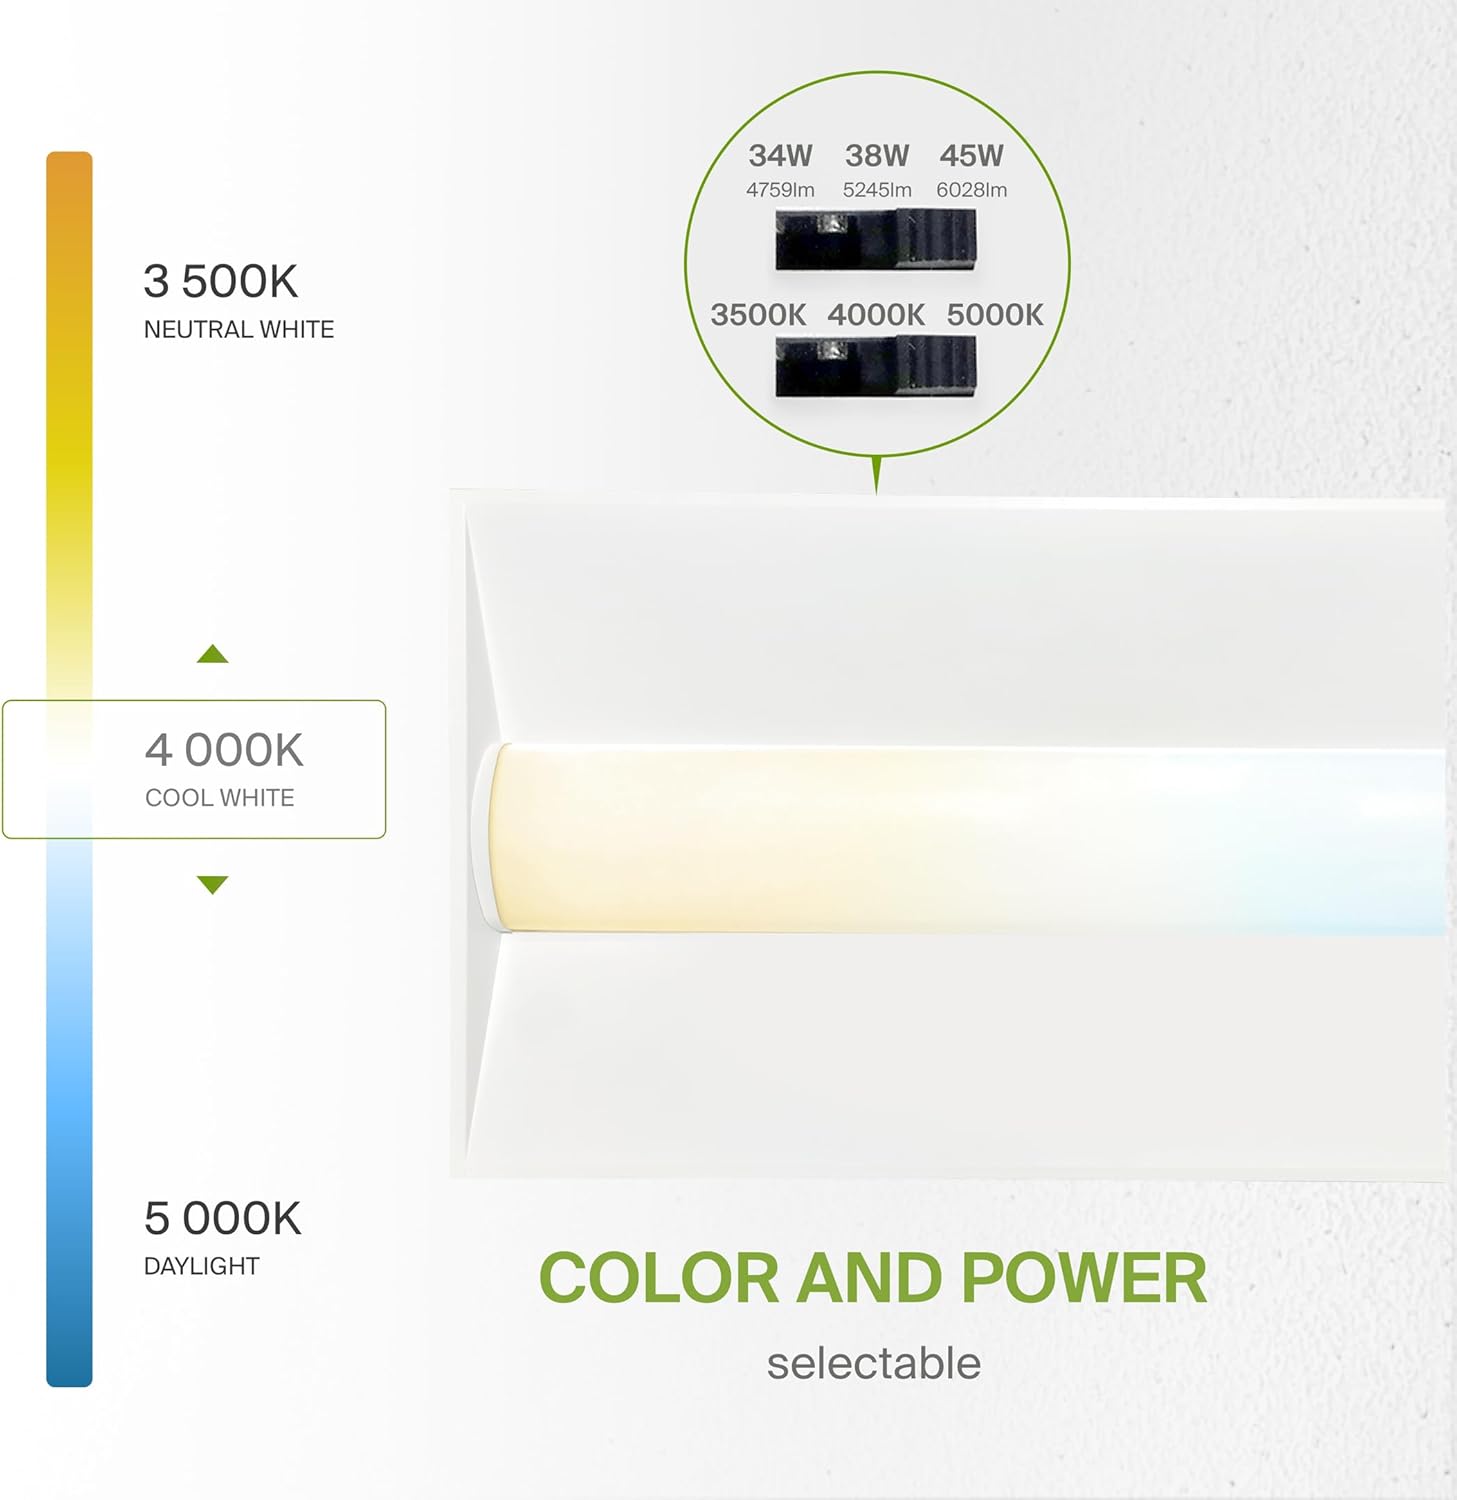
- Możliwość wyboru koloru i mocy: Adjustable color temperatures (3500K, 4000K, 5000K) and power settings (34W, 38W, 45W).
- Zintegrowany sterownik: Features circuit overload, short circuit, and low-voltagochrona.
- Szybka i łatwa instalacja: Designed for recessed installation into grid ceilings with built-in T-grid clips.

4. Konfiguracja i instalacja
Follow these steps for recessed installation into a grid ceiling. Ensure power is disconnected at the circuit breaker before beginning.
- Przygotuj sufit: Ensure the ceiling grid opening is appropriate for a 2x4 fixture.
- Access Mounting Clips: Lift all mounting clips located along the edges of the panel. Turn the mounting clip head to prepare for securing.
- Pozycja urządzenia: Carefully place the LED troffer panel into the ceiling grid opening.
- Zabezpieczenie osprzętu: Once positioned, lower and secure the mounting clips onto the T-grid rails to hold the fixture in place.
- Okablowanie: Locate the driver box. Remove the knockout hole with a screwdriver, then remove the screw and take out the driver cover. Connect the electrical wires as follows:
- Black wire from fixture to Black (Line) wire from supply.
- White wire from fixture to White (Neutral) wire from supply.
- Green wire from fixture to Green (Ground) wire from supply.
For dimming functionality, connect the 0-10V dimming wires (purple and gray) to a compatible 0-10V dimmer, if applicable. Ensure all connections are secure.
- Close Driver Box: Cover the driver box and tighten it with a screwdriver to complete the connection.
For a full cut sheet with detailed diagrams, please refer to the official documentation: ASD LTR Cut Sheet (PDF).
5. Instrukcja obsługi
Your LED Troffer Panel Light features selectable color temperature and power settings, allowing customization to suit your environment.
5.1. Wybór temperatury barwowej (CCT)
The fixture offers three color temperature options: 3500K (Neutral White), 4000K (Cool White), and 5000K (Daylight). A switch located on the fixture's driver allows you to select the desired CCT before or after installation. Ensure power is off when adjusting this switch.
5.2. Power Output Selection (Wattage)
You can also select between 34W, 38W, or 45W power output settings. A separate switch on the driver controls the wattage. Adjust this switch to achieve the desired brightness level. Ensure power is off when adjusting this switch.
5.3. Funkcja ściemniania
This luminaire supports 0-10V dimming. Connect the purple and gray dimming wires to a compatible 0-10V dimmer switch (sold separately) to adjust the light intensity from 100% down to 10%.

6. Konserwacja
The ASD LED Troffer Panel Light requires minimal maintenance.
- Czyszczenie: Przed czyszczeniem upewnij się, że zasilanie jest odłączone. Użyj miękkiej, suchej lub lekko szorowatej szczoteczki.amp cloth to wipe the exterior surfaces. Do not use abrasive cleaners or solvents, as these can damage the finish or lens.
- Brak części nadających się do samodzielnej naprawy przez użytkownika: The LED components and driver are integrated and not designed for user replacement. Do not attempt to open or repair the fixture.
7. Rozwiązywanie Problemów
If you encounter issues with your LED Troffer Panel Light, refer to the following common troubleshooting steps:
- Światło się nie włącza:
- Sprawdź wyłącznik automatyczny, aby upewnić się, że do urządzenia jest dostarczane zasilanie.
- Verify all wiring connections are secure and correct (Line, Neutral, Ground).
- Ensure the fixture's internal switches for CCT and wattage are set correctly and not in an intermediate position.
- Światło migocze lub jest słabe:
- Confirm the power output (wattage) switch is set to the desired level.
- If using a dimmer, ensure it is a compatible 0-10V dimmer and that the dimming wires are correctly connected. Test the dimmer's functionality.
- Sprawdź, czy połączenia przewodów nie są luźne.
- Nieprawidłowa temperatura barwowa:
- Verify the CCT selection switch on the fixture is set to your preferred color temperature (3500K, 4000K, or 5000K).
Jeśli powyższe kroki nie rozwiążą problemu, skontaktuj się z obsługą klienta.
8. Specyfikacje
Detailed specifications for the ASD 2x4 Center Basket LED Troffer Panel Light (Model A-LTR-24A45):

| Specyfikacja | Szczegół |
|---|---|
| Numer modelu | A-LTR-24A45(2p) |
| Wymiary (dł. x szer. x wys.) | 47.74" x 23.74" x 2.13" (1213 mm x 603 mm x 54 mm) |
| Cotage | 34 W / 38 W / 45 W (do wyboru) |
| Jasność | Do 6028 Lumenów |
| Efektywność | 134 lm/W |
| Temperatura barwowa (CCT) | 3500K / 4000K / 5000K (do wyboru) |
| Tomtage | 120-277 V |
| Możliwość ściemniania | Ściemnianie 0-10V |
| Tworzywo | Iron, Polycarbonate |
| Zastosowanie wewnątrz/na zewnątrz | Tylko do użytku wewnątrz pomieszczeń |
| Poziom wodoodporności | Not Water Resistant (Damp Lokalizacja oceniona) |
| Certyfikaty | UL, DLC Standard |
| Calculated Lifespan | Do 180,000 godzin |
| Waga przedmiotu | 12.3 funtów |
9. Informacje o gwarancji
ASD provides a 5-year limited warranty for this product, guaranteeing top quality and safety. This warranty covers defects in materials and workmanship under normal use and service. Please retain your proof of purchase for warranty claims.
The product is UL and DLC certified, ensuring it meets high standards for safety and energy efficiency.
10. Obsługa klienta
For technical assistance, warranty claims, or any questions regarding your ASD LED Troffer Panel Light, please contact ASD Lighting Corp customer support. Refer to the product packaging or the official ASD webna tej stronie znajdziesz najbardziej aktualne dane kontaktowe.
When contacting support, please have your model number (A-LTR-24A45) and proof of purchase readily available.
