
1. Wprowadzenie
This manual provides detailed instructions for the Baideluo HD Three-Camera Car Recorder. This device is designed to capture high-definition footage from the front, center (interior), and rear of your vehicle, ensuring comprehensive coverage for your driving safety and record-keeping needs. Key features include continuous loop recording, G-sensor technology for automatic incident protection, and night vision capabilities.
Please read this manual thoroughly before operating the device to ensure proper installation and optimal performance.
2. Co znajduje się w pudełku
- Dash Camera Unit
- Ładowarka samochodowa
- Car Mount (Suction Cup Mount)
- Kamera tylna z kablem
- Karta pamięci 32 GB
- Instrukcja obsługi
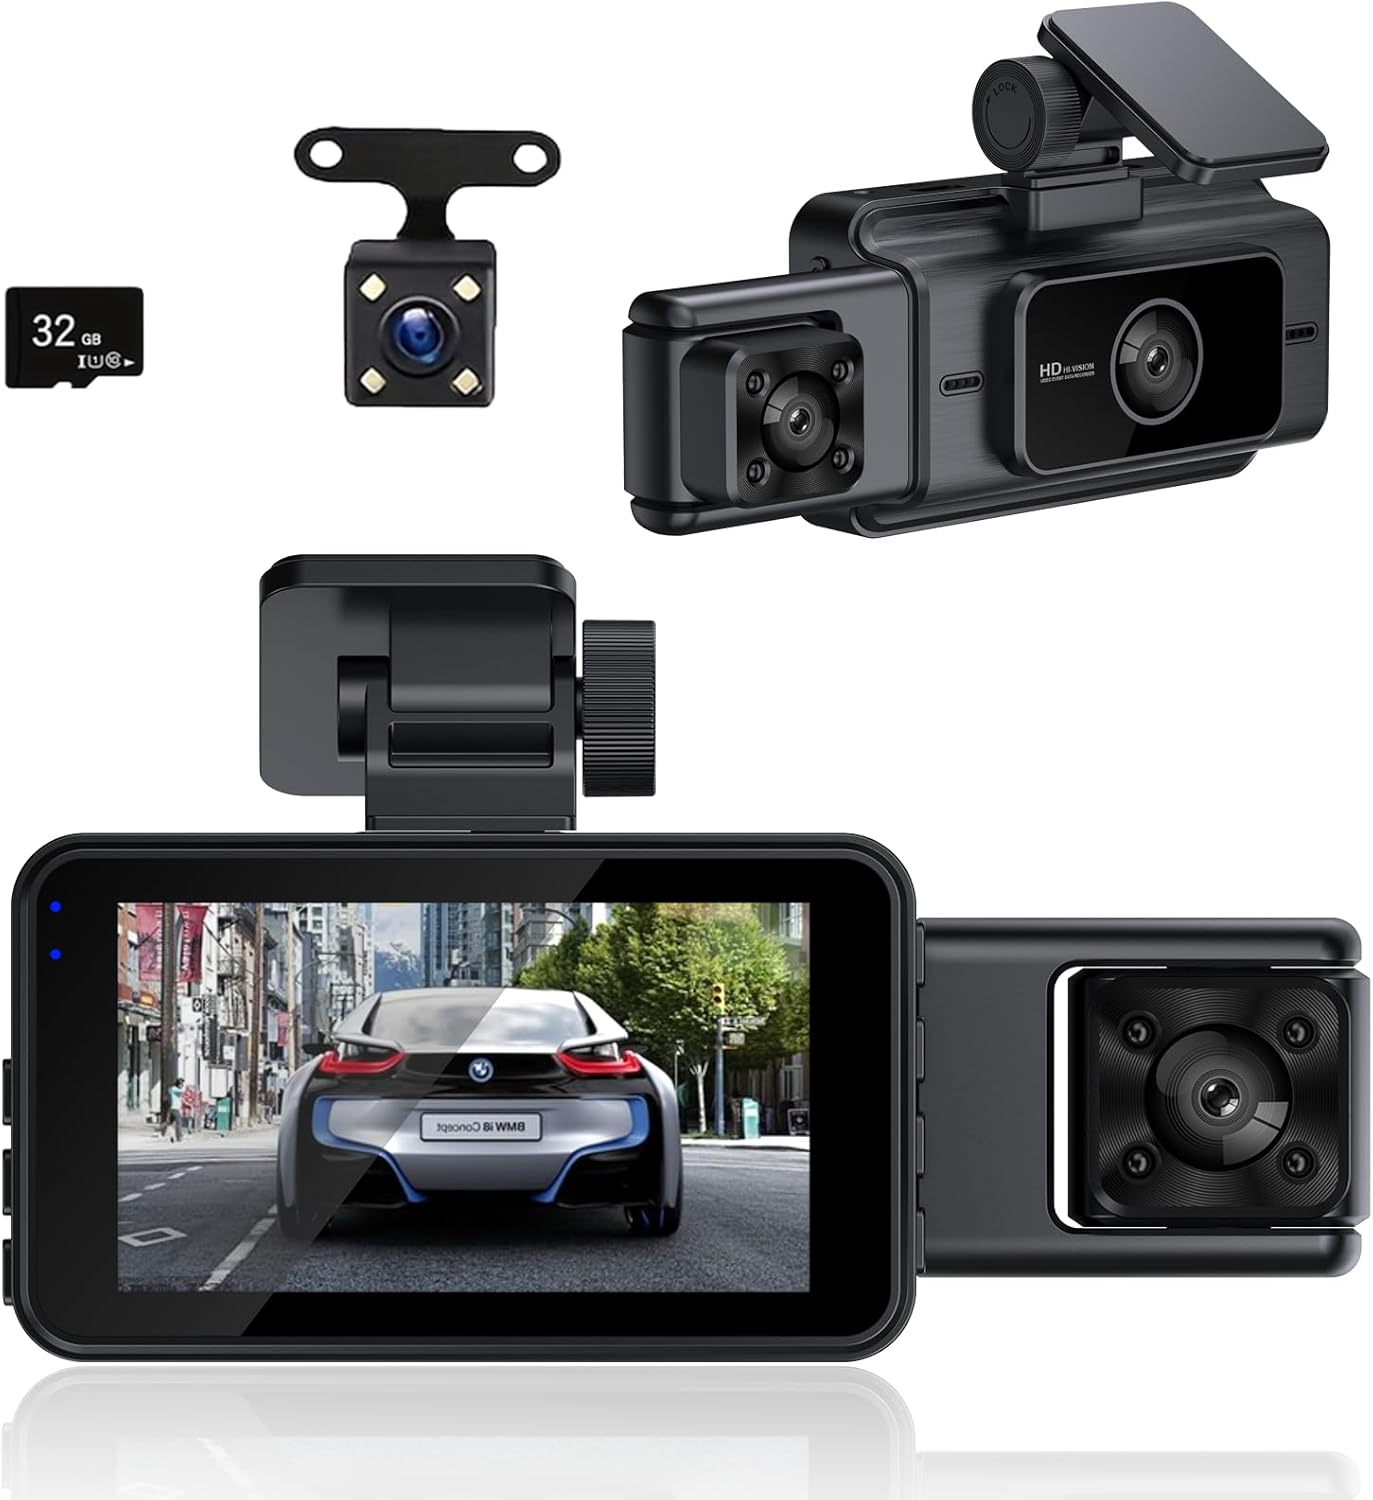
Figure 2.1: Included components of the Baideluo HD Three-Camera Car Recorder.
3. Konfiguracja i instalacja
3.1 Rozpakowywanie i wstępne przygotowanie
Upon unboxing, carefully remove all components. Before first use, ensure to remove any protective films from the camera lenses and the display screen. These films are present to prevent scratches during transit and should be peeled off for clear recording and viewing.
Video 3.1: A detailed unboxing of the dash cam, showing all included accessories and the process of removing protective films from the device's screen and lenses.
3.2 Wkładanie karty pamięci
Locate the memory card slot on the side of the dash camera unit. Gently insert the provided 32GB memory card into the slot until it clicks into place. Ensure the card is inserted correctly to avoid damage.
3.3 Montaż kamery samochodowej
Attach the suction cup mount to the main dash camera unit. Clean the desired area on your vehicle's windshield thoroughly. Press the suction cup firmly against the windshield and flip the lever to secure it. Adjust the camera angle to ensure a clear view drogi przed nami.

Figure 3.1: The dash camera unit with the suction cup mount attached.
3.4 Podłączanie tylnej kamery
Connect the rear camera cable to the designated AV input port on the main dash camera unit. Route the cable neatly along the vehicle's interior trim to the rear of the vehicle. Mount the rear camera in a suitable location, typically above the license plate or on the rear window, ensuring a clear view. Connect the red wire of the rear camera to the vehicle's reverse light power source for automatic display when reversing (professional installation recommended for this step).
3.5 Zasilanie urządzenia
Plug the car charger into your vehicle's cigarette lighter socket. Connect the USB-C end of the car charger cable to the USB port on the dash camera unit. The device will automatically power on and begin recording once power is supplied.
4. Instrukcja obsługi
4.1 Funkcje przycisków
Familiarize yourself with the buttons on the dash camera unit:

Figure 4.1: Dash Cam Button Layout and Functions.
- Przycisk OK: In video recording mode, short press to pause/start recording. In menu, confirms selection.
- Przycisk menu (M): Short press to enter the menu options. Before entering the menu, ensure recording is paused by pressing the OK button.
- Up/Down Buttons (Triangle/Inverted Triangle): Navigate through menu options. In video recording mode, short press the down button to switch between camera views (front, interior, rear). Short press the up button to turn the microphone on/off (manual microphone control is recommended for privacy).
- Przycisk blokady: During recording, short press to lock the current video file, zapobiegając jego nadpisaniu przez nagrywanie w pętli.
- Przycisk zasilania: Long press to turn the machine on/off. Short press to turn the screen on/off while the device is recording.
Video 4.1: Demonstration of how to use the various buttons on the dash cam for different functions.
4.2 Tryby nagrywania
The dash cam supports multiple recording modes to suit various needs:
- Multi-Camera Recording: Simultaneously captures HD footagz przedniej, wewnętrznej i tylnej kamery.
- Nagrywanie w pętli: Zapewnia ciągłość nagrywania poprzez automatyczne nadpisywanie najstarszych odblokowanych plików files when the memory card is full. Video files are typically divided into five-minute segments.
- Technologia czujnika G: Built-in G-sensor automatically detects sudden shocks or collisions. When an impact is detected, the current video footage is locked and protected from being overwritten, serving as crucial evidence.

Figure 4.2: Multiple application scenarios for the three-camera system.

Figure 4.3: Explanation of the automatic loop recording feature.

Figure 4.4: G-sensor automatically locks footage podczas nagłych uderzeń.
4.3 Odtwarzanie wideo
Do view recorded videos or photos, enter the recording mode switching menu (short press the mode button). Navigate to the playback option and select the desired file. Use the up/down buttons to browse through files and the OK button to play/view.
5. Główne cechy
- HD Three-Camera System: Records simultaneously from front, interior, and rear for comprehensive coverage.
- Technologia HDR: Equipped with HDR technology, the front camera provides great exposure and dynamic range in low light conditions, enhancing clarity during nighttime driving.
- Wbudowany wyświetlacz: Features a 2.8-inch LED display for real-time viewi łatwa nawigacja.
- Kompaktowa i dyskretna konstrukcja: Elegancki i niskoprofesjonalnyfile, allowing for seamless integration into your vehicle's interior without obstructing your view.

Figure 5.1: HDR Technology for enhanced low-light performance.
Wideo 5.1: 360 stopni view of the product body, showcasinze względu na jego konstrukcję i różne kąty.
6. Specyfikacje produktu
| Funkcja | Specyfikacja |
|---|---|
| Wymiary produktu | 1.3 x 5 x 1.96 cala |
| Waga przedmiotu | 11.7 uncji |
| Nazwa modelu | Y50B+32G |
| Rozdzielczość przechwytywania wideo | 1080p |
| Technologia łączności | USB |
| Cechy specjalne | Loop Recording, G-Sensor, Night Vision, Built-In Display |
| Typ montażu | Mocowanie przyssawki |
| Źródło zasilania | 1 bateria litowo-polimerowa (w zestawie) |

Rysunek 6.1: Wymiary produktu.
7. Rozwiązywanie Problemów
- Urządzenie się nie włącza: Ensure the car charger is properly connected to both the vehicle's power outlet and the dash cam. Check the vehicle's power outlet for functionality.
- Nagrywanie zostaje nieoczekiwanie przerwane: Verify that the memory card is inserted correctly and is not full. Format the memory card regularly to maintain optimal performance. Ensure loop recording is enabled.
- Słaba jakość wideo: Ensure protective films are removed from all lenses. Clean the lenses regularly with a soft cloth. Check the resolution settings in the menu.
- Kamera tylna nie jest wyświetlana: Check the connection of the rear camera cable to the main unit. Ensure the rear camera itself is not damaged.
- Przyciski nie reagują: Try resetting the device by pressing the reset button (if available, typically a small pinhole) or by disconnecting and reconnecting the power.
8. Gwarancja i wsparcie
For warranty information and technical support, please refer to the contact details provided on the product packaging or the official Baideluo webZachowaj paragon jako dowód zakupu na wypadek reklamacji.