1. Informacje dotyczące bezpieczeństwa
Always keep the lockable drawer securely locked when not in use. Ensure the desk is properly anchored to the floor to prevent tipping. Never leave children unattended near the desk.
2. Koniec produktuview
The Giantex Reception Desk is designed for versatile use in various settings such as offices, beauty salons, retail stores, or home offices. It features a spacious desktop, an elevated corner shelf, a lockable drawer for secure storage, and a 2-tier open shelf with adjustable positions for customized organization. Constructed from durable engineered wood with a 1-inch thickened tabletop, it offers stability and a modern aesthetic.
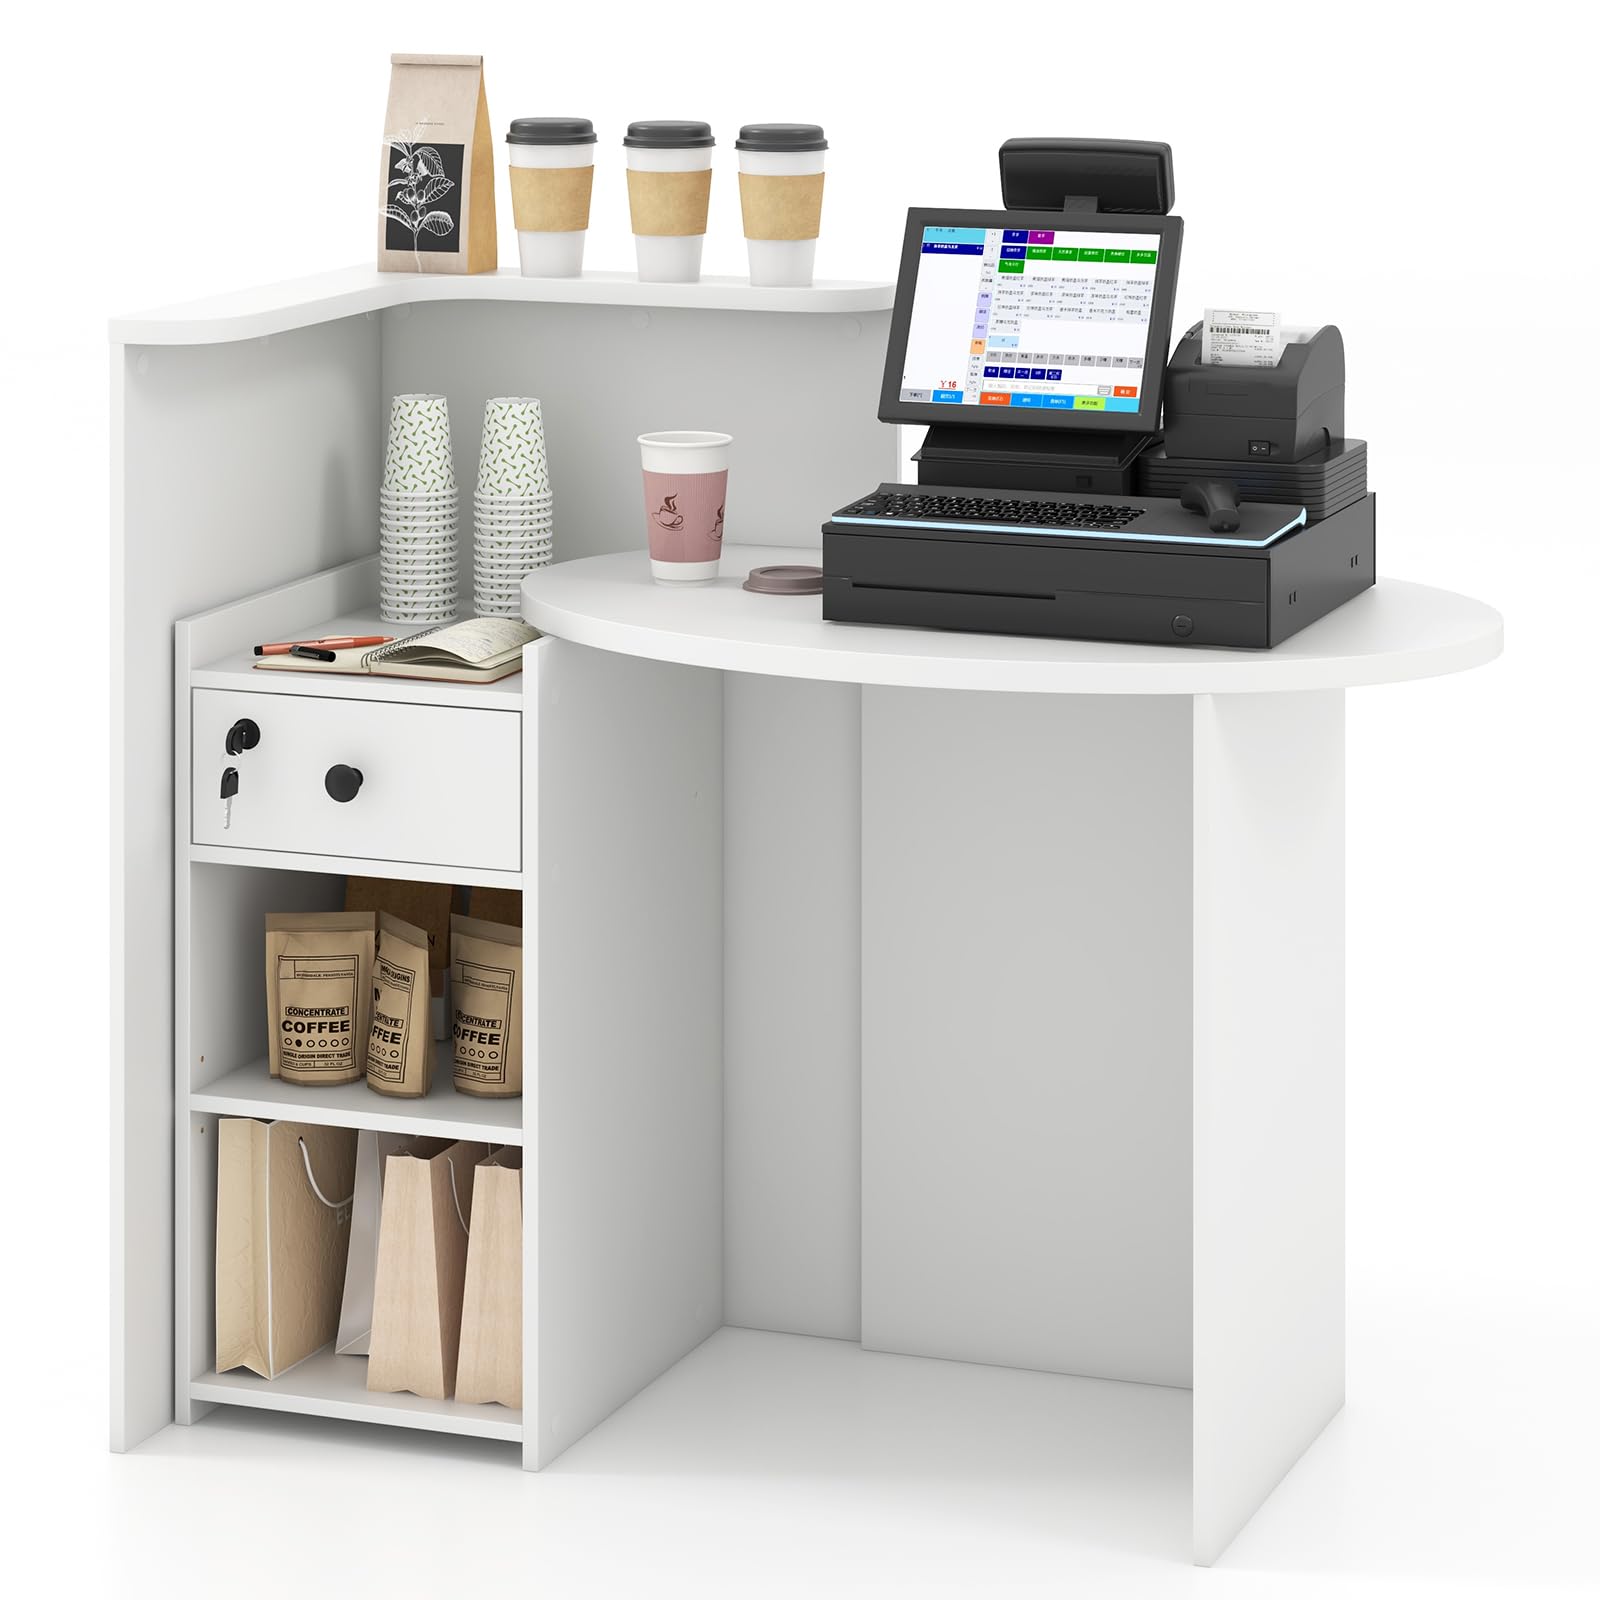
Image: The Giantex Reception Desk, Model GX-10404-BC, in a white finish, showcasinjego designu i funkcjonalności w środowisku biurowym.
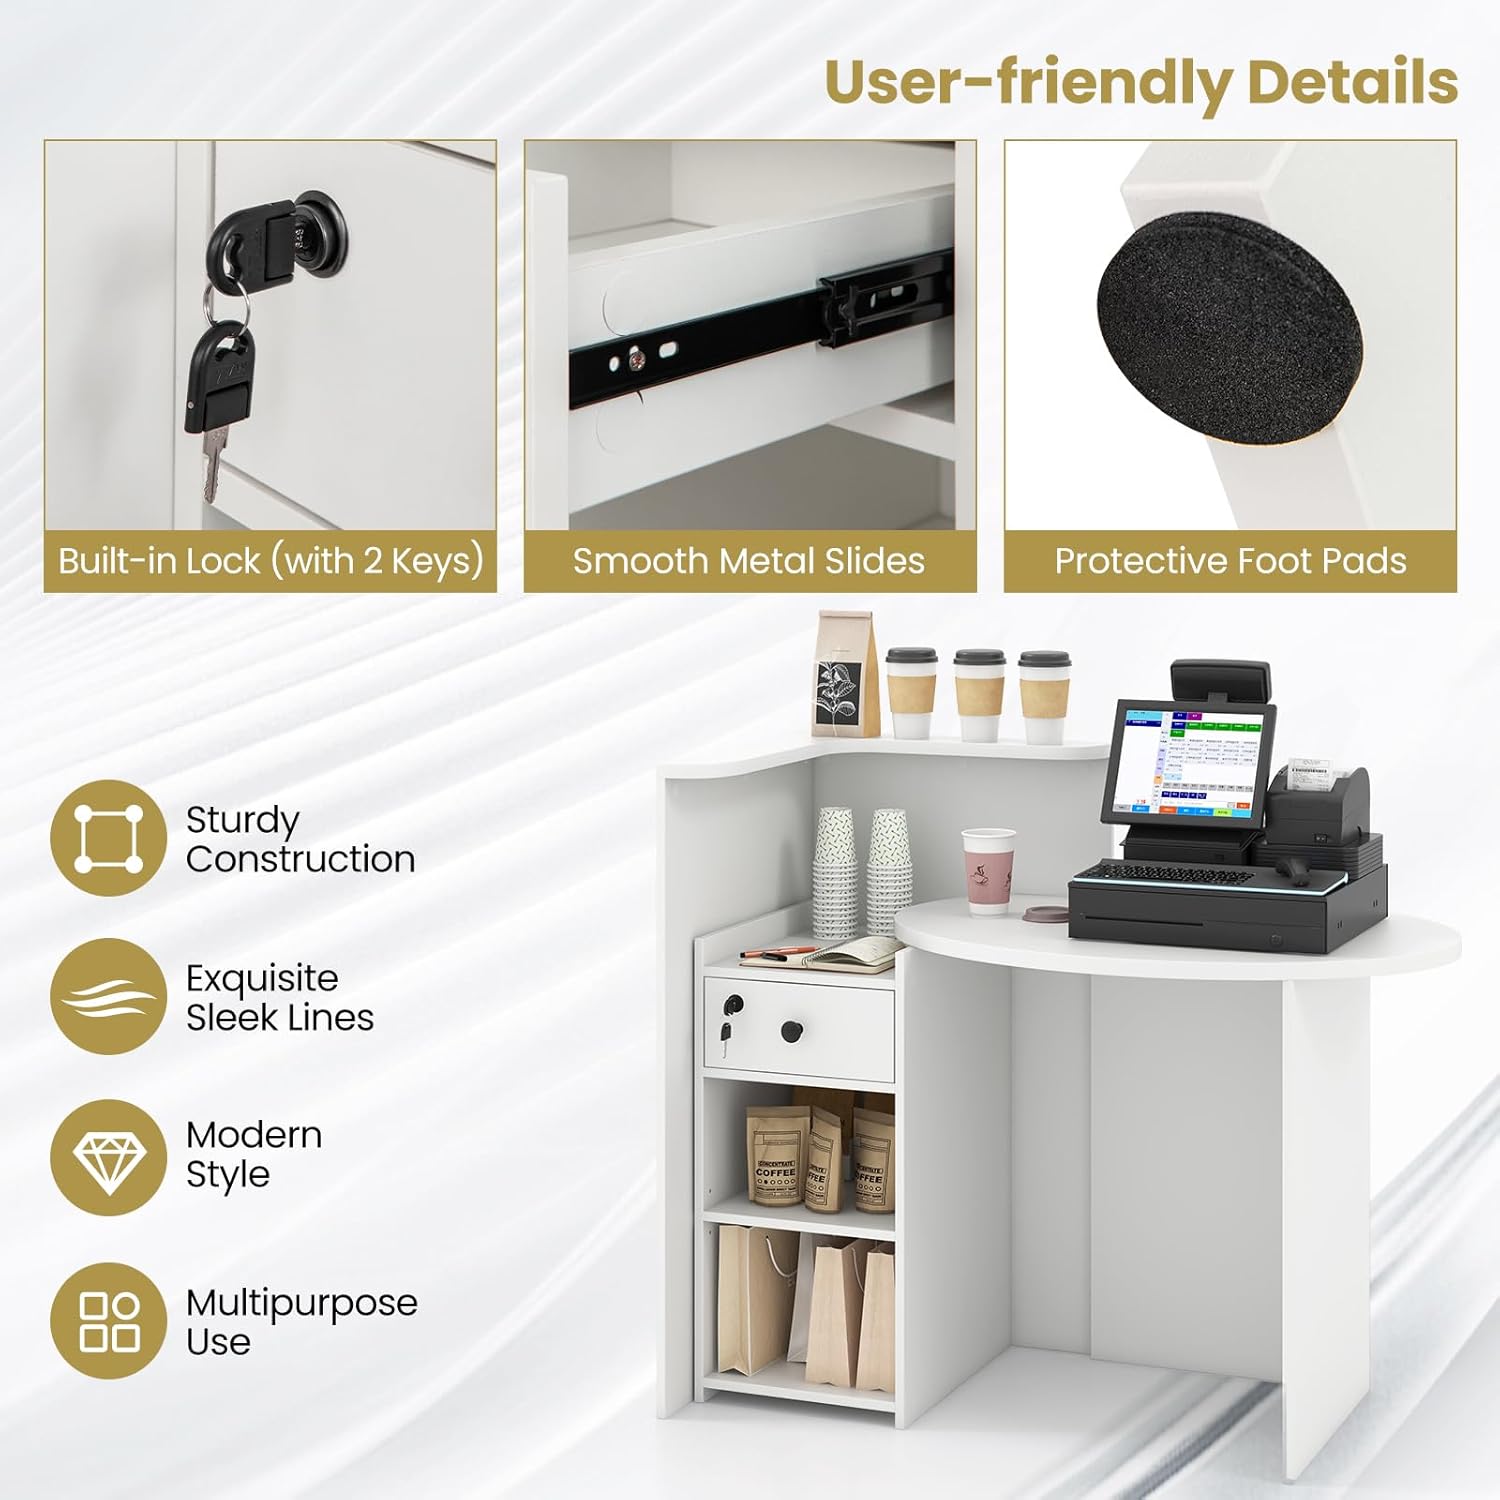
Image: Close-up of user-friendly details including the built-in lock, smooth metal slides for drawers, and protective foot pads.
3. Zawartość opakowania
- 1 x Reception Desk
- 1 x Instrukcja obsługi
- Wszystkie niezbędne elementy montażowe (śruby, kołki itp.)
4. Instrukcja montażu
The desk requires assembly. Please follow the instructions provided in the user guide to assemble the desk. Ensure you have all the necessary tools and parts before starting the assembly process. Follow the step-by-step instructions carefully to avoid any damage to the product. Assembly tools are not included.
Instrukcja montażu w formie filmu
Video: A detailed assembly guide for the Giantex Reception Desk. This video demonstrates each step of the assembly process, from identifying parts to final construction.
Montaż krok po krokuview
- Przygotuj komponenty: Lay out all parts and hardware. Identify the main tabletop (1), side panels (2, 3), and corner support (4).
- Assemble Drawer Components: Attach the lock (Bi) and handle (F) to the drawer front. Secure the drawer slides (Q1, Q2) to the drawer sides (15, 16) and the main desk panels (7, 8).
- Construct Side Panels: Connect the side panels (5, 6) using dowels (C) and cam locks (B).
- Attach Corner Support: Secure the corner support (4) to the assembled side panels using dowels (C) and cam locks (B). Apply protective foot pads (X) and cover caps (Z).
- Assemble Main Desk Structure (White Parts): Connect the white side panels (2, 3) using dowels (C) and cam locks (B).
- Attach Round Tabletop: Secure the round tabletop (1) to the white side panels using dowels (C) and cam locks (B). Apply protective foot pads (X) and cover caps (Z).
- Install Drawer Slides to Desk: Attach the remaining drawer slides (Q1, Q2) to the main desk panels (7, 8) using screws (E).
- Złóż szufladę: Connect the drawer box sides (13, 17) and back (18) to the bottom (16) using dowels (C) and cam locks (B). Apply cover caps (Z) and protective foot pads (X).
- Złóż regał: Connect the shelf unit panels (7, 8, 9, 10, 11, 14) using dowels (C) and screws (L). Apply cover caps (Z) and protective foot pads (X).
- Montaż półki regulowanej: Insert the adjustable shelf (10) into the shelf unit using shelf pins (Y) and screws (E).
- Montaż końcowy: Carefully align and connect the assembled drawer unit, round tabletop unit, and shelf unit. Ensure all connections are secure.

Image: Detailed dimensions of the Giantex Reception Desk, including height, width, and depth of various sections.
5. Instrukcja obsługi
Zamykana szuflada
The reception desk includes a lockable drawer for securing personal belongings or sensitive documents. Use the provided keys to lock and unlock the drawer. Always ensure the drawer is fully closed before locking.

Image: The oval desktop, L-shaped corner shelf, lockable storage drawer, and 2-tier open shelf for various items.
Regulowana półka
The 2-tier open shelf features 3-position adjustable shelving. To adjust the shelf height, remove the shelf pins, reposition the shelf to the desired height, and reinsert the pins to secure it. This allows for customized storage space.
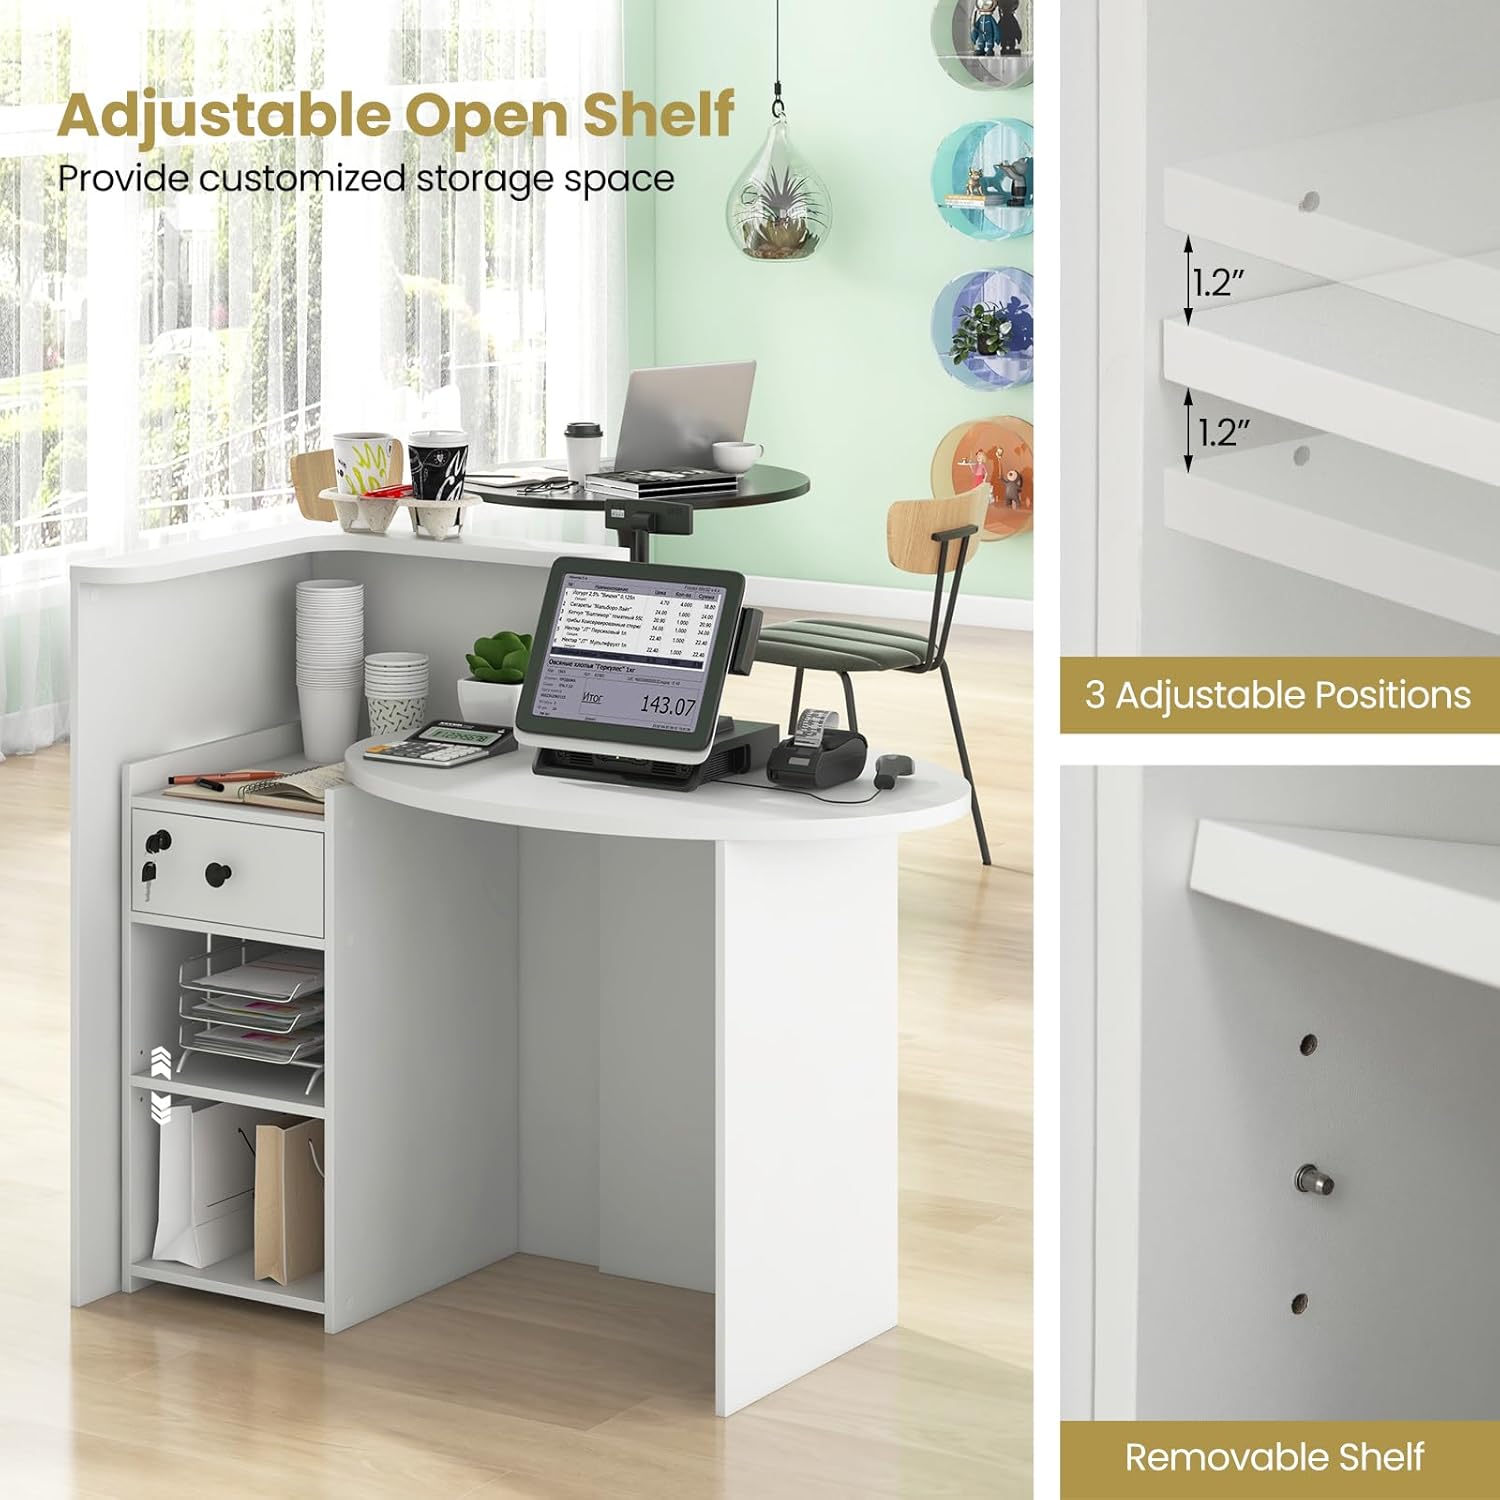
Obraz: Zbliżenie view of the adjustable open shelf, highlighting the three adjustable positions for flexible storage.
6. Konserwacja
- Przetrzyj powierzchnie miękką, damp płótno. Unikaj ostrych środków chemicznych.
- Okresowo sprawdzaj wszystkie śruby i połączenia, aby mieć pewność, że są dobrze dokręcone.
- Aby zapobiec odkształceniom lub odbarwieniom, biurko należy chronić przed bezpośrednim działaniem promieni słonecznych i nadmierną wilgocią.
- For the lockable drawer, ensure the lock mechanism is clean and free of debris.
7. Rozwiązywanie Problemów
Szuflada nie wysuwa się płynnie:
Check that the drawer slides are properly aligned and free of obstructions. Ensure all screws securing the slides are tight.
Biurko jest chwiejne:
Verify that all cam locks and screws are fully tightened. Ensure the desk is placed on a flat, even surface. Adjust protective foot pads if necessary.
Lockable drawer not locking:
Ensure the drawer is completely closed and flush with the desk frame. Check that the key is fully inserted and turned correctly.
8. Specyfikacje
| Marka | Gigantex |
| Numer modelu | GX-10404-BC |
| Wymiary produktu (Gł. x Szer. x Wys.) | 27.5" gł. x 48" szer. x 39" wys. |
| Kolor | Biały |
| Typ materiału | Drewno inżynieryjne |
| Rodzaj wykończenia | Laminated, Glossy Lacquer |
| Waga przedmiotu | 101 funtów |
| Liczba szuflad | 1 (zamykane) |
| Liczba półek | 3 (1 regulowane) |
| Maksymalna zalecana waga | 110 funtów |
9. Gwarancja i wsparcie
For warranty information, product support, or to purchase replacement parts, please contact Giantex customer service. Refer to your purchase documentation for specific contact details or visit the official Giantex webstrona.