
1. Wprowadzenie
This manual provides essential information for the safe assembly, operation, maintenance, and troubleshooting of your Lyromix 15FT Outdoor Trampoline. Please read all instructions carefully before use to ensure safety and prolong the life of your product.
The Lyromix 15FT Outdoor Trampoline is designed for recreational use by children and adults. It features a curved pole design for enhanced stability and safety, an ASTM-certified construction, and includes a basketball hoop and safety enclosure net.
Certyfikacja bezpieczeństwa: To jestampoline is ASTM-certified, ensuring it meets recognized safety and quality standards for recreational tramplinie.
2. Koniec produktuview
Główne cechy
- Curved Pole Design: Enhances stability and minimizes contact with enclosure poles during use.
- High-Performance Jump Mat: Durable and designed for consistent bounce.
- Safety Enclosure Net: High-density PE material provides 360-degree protection.
- Obręcz do koszykówki: Integrated for added recreational activity.
- Konstrukcja odporna na warunki atmosferyczne: UV and water-resistant materials for outdoor durability.
- Solidna rama: Alloy steel frame with 6 W-shaped legs for stability, featuring hot-dip galvanizing technology for corrosion resistance.
Komponenty
trampoline includes the following main components:
- Frame (Alloy Steel, galvanized)
- W-shaped Legs
- Jump Mat (PP material)
- Safety Enclosure Net (High-density PE)
- Curved Enclosure Poles (with foam padding)
- Springs (96 chromium-plated springs)
- Spring Cover Pad
- Basketball Hoop Assembly
- Drabina
- Sprzęt montażowy (śruby, podkładki, nakrętki)
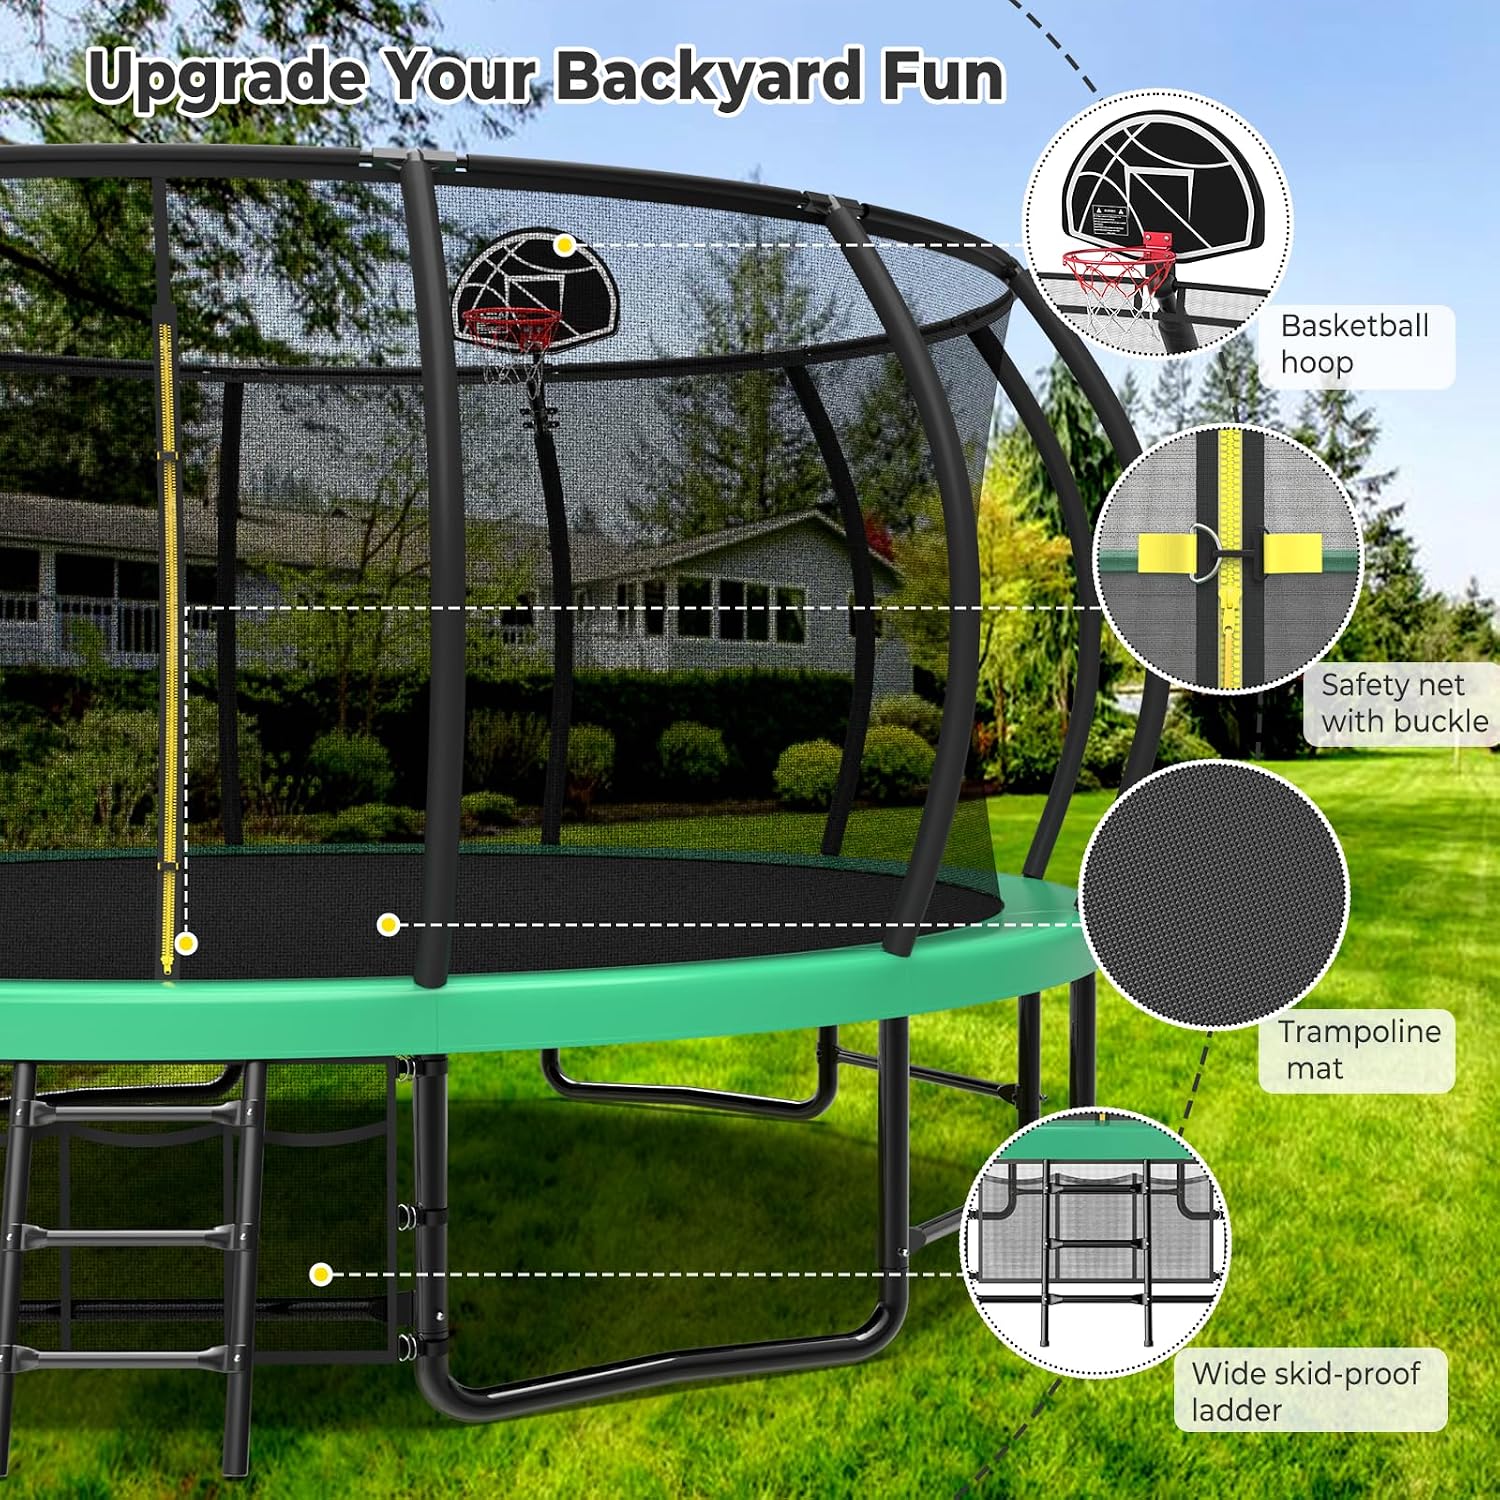
Figure 2.1: Main components of the Lyromix Tramponline.
3. Specyfikacje
| Atrybut | Szczegół |
|---|---|
| Marka | Lyromix |
| Nazwa modelu | Trampolines for Adults |
| Rozmiar ramki | 15 stóp |
| Kształt | Okrągły |
| Wymiary produktu (dł. x szer. x wys.) | 180" dł. x 180" szer. x 108" wys. |
| Materiał ramy | Stal stopowa |
| Jump Mat Material | Polipropylen (PP) |
| Safety Net Material | High-density Polyethylene (PE) |
| Waga przedmiotu | 65 funtów |
| Liczba sprężyn | 96 |
| Kolor | Zielony |

Rysunek 3.1: Trampwymiary linioweview.
4. Instrukcje konfiguracji
Careful assembly is crucial for the safety and stability of your trampoline. It is recommended that two adults perform the assembly. Ensure all parts are present and undamaged before beginning.
Kroki montażu powyżejview:
- Rozpakuj i zidentyfikuj części: Lay out all components on a clean, flat surface. Refer to the parts list in your packaging to ensure everything is accounted for.
- Złóż ramę: Connect the curved frame sections to form the main circular frame. Secure these connections using the provided hardware.
- Przymocuj nogi: Connect the W-shaped legs to the main frame. Ensure all connections are tight and secure.
- Install the Jump Mat: Carefully spread the jump mat over the assembled frame.
- Zamontuj sprężyny: Using the provided spring tool, attach the springs from the jump mat to the frame. Install springs diagonally first to distribute tension evenly, then fill in the remaining springs.
- Place the Spring Cover Pad: Cover the springs and frame with the protective padding.
- Assemble and Install Enclosure Poles: Insert the foam-padded upper poles into the lower pole sections. Attach these to the tramprama liniowa.
- Install the Safety Net: Secure the safety enclosure net to the top of the enclosure poles and the bottom of the tramprama liniowa.
- Assemble and Attach Basketball Hoop: Follow the specific instructions for assembling the basketball hoop and securely attaching it to an enclosure pole.
- Montaż drabiny: Attach the ladder to the side of the trampRama nośna zapewniająca bezpieczne wejście i wyjście.
Visual Guide: TrampZgromadzenie Oline
Video 4.1: Detailed guide on how to install the Lyromix trampoline, covering frame assembly, spring attachment, and safety net installation.
Detailed Assembly Steps with Images:
Below are visual aids for key assembly stages:
Montaż ramy

Figure 4.2: Connecting frame sections. Ensure the spring holes align correctly.

Figure 4.3: Attaching the W-shaped legs to the main frame using bolts and nuts.

Figure 4.4: Completed trampoline frame assembly.
Instalacja sprężynowa

Figure 4.5: Spring installation method for even tension.

Figure 4.6: Attaching springs to the jump mat and frame.
Safety Enclosure and Basketball Hoop

Figure 4.7: Installing foam padding onto enclosure poles and sliding them into the net sleeves.

Figure 4.8: Assembling the basketball hoop components.

Figure 4.9: Final assembled tramponline.
5. Instrukcja obsługi
Wytyczne dotyczące bezpiecznego użytkowania:
- Nadzór: Zawsze nadzoruj dzieci, gdy korzystają z tramponline.
- Jeden skoczek na raz: To prevent collisions and injuries, allow only one person to jump on the tramponline na raz.
- Żadnych salt i salt: Avoid performing somersaults or flips, as these can lead to serious head and neck injuries.
- Oczyść obszar: Upewnij się, że obszar wokół trampoline is clear of obstacles and other individuals.
- Prawidłowe wejście i wyjście: Use the provided ladder for safe entry and exit. Do not jump on or off the tramponline.
- Limit wagowy: Adhere to the maximum weight limit specified in the product documentation to prevent damage and ensure safety.
- Warunki atmosferyczne: Nie używaj tramplinii przy silnym wietrze, deszczu lub innych niekorzystnych warunkach pogodowych.
- Obuwie: Jump barefoot or in appropriate athletic shoes. Avoid shoes with hard soles that could damage the mat.

Figure 5.1: Children enjoying the trampbezpiecznie.
6. Konserwacja
Regular maintenance helps ensure the longevity and safety of your tramponline.
- Regularna kontrola: Okresowo sprawdzaj dokręcenie wszystkich nakrętek, śrub i połączeń. Upewnij się, że rama jest stabilna, wolna od rdzy i uszkodzeń.
- Kontrola wiosenna: Inspect all springs for damage, stretching, or detachment. Replace any compromised springs immediately.
- Mat and Net Inspection: Check the jump mat and safety net for tears, holes, or excessive wear. Repair or replace damaged components to maintain safety.
- Stan wypełnienia: Ensure the spring cover pad is securely in place and free from damage to protect users from springs and the frame.
- Czyszczenie: Clean the jump mat and net with mild soap and water. Avoid harsh chemicals that could degrade materials.
- Przechowywanie w zimie: W rejonach o surowych zimach należy rozważyć demontaż i przechowywanie trampprzechowywać w pomieszczeniu, aby chronić go przed ekstremalnymi warunkami pogodowymi.

Figure 6.1: Importance of inspecting frame components for damage.
7. Rozwiązywanie Problemów
W tej sekcji omówiono typowe problemy, jakie mogą wystąpić podczas korzystania z urządzenia.amponline.
- Zmniejszone odbicie: Check if all springs are properly attached and undamaged. Ensure the jump mat is taut.
- Piszczące dźwięki: Inspect frame connections for looseness. Tighten any loose bolts. Applying a silicone-based lubricant to joints may help.
- Net Sagging or Damage: Verify that the safety net is correctly attached to all poles and the frame. Inspect for tears and repair or replace the net if significantly damaged.
- Niestabilność ramy: Ensure all W-shaped legs are firmly on the ground and all frame connections are tightened. Check for any bent or damaged frame parts.
- Basketball Hoop Issues: Check all mounting hardware for tightness. Ensure the backboard and rim are securely fastened.
If you encounter issues not covered here or require further assistance, please contact Lyromix customer support.
8. Gwarancja i wsparcie
Informacje o gwarancji:
Your Lyromix Trampoline jest dostarczany z 12-miesięczna gwarancja from the date of purchase. This warranty covers manufacturing defects in materials and workmanship under normal use and service. It does not cover damage resulting from misuse, accidents, unauthorized modifications, or normal wear and tear.
Proszę zachować dowód zakupu na potrzeby roszczeń gwarancyjnych.
Obsługa klienta:
For any questions, concerns, or assistance with your Lyromix Trampoline, please contact our dedicated customer support team. Our team is ready to assist with any issues, ensuring you have a smooth and enjoyable experience.
You can visit the official Lyromix store for more information and support resources: Lyromix Store