
Wstęp
This manual provides detailed instructions for the operation and maintenance of your ASHATA Compact Digital Camera. Please read this manual thoroughly before using the camera to ensure proper function and optimal performance. Keep this manual for future reference.
Produkt ponadview
Zapoznaj się z podzespołami i elementami sterowania aparatu.

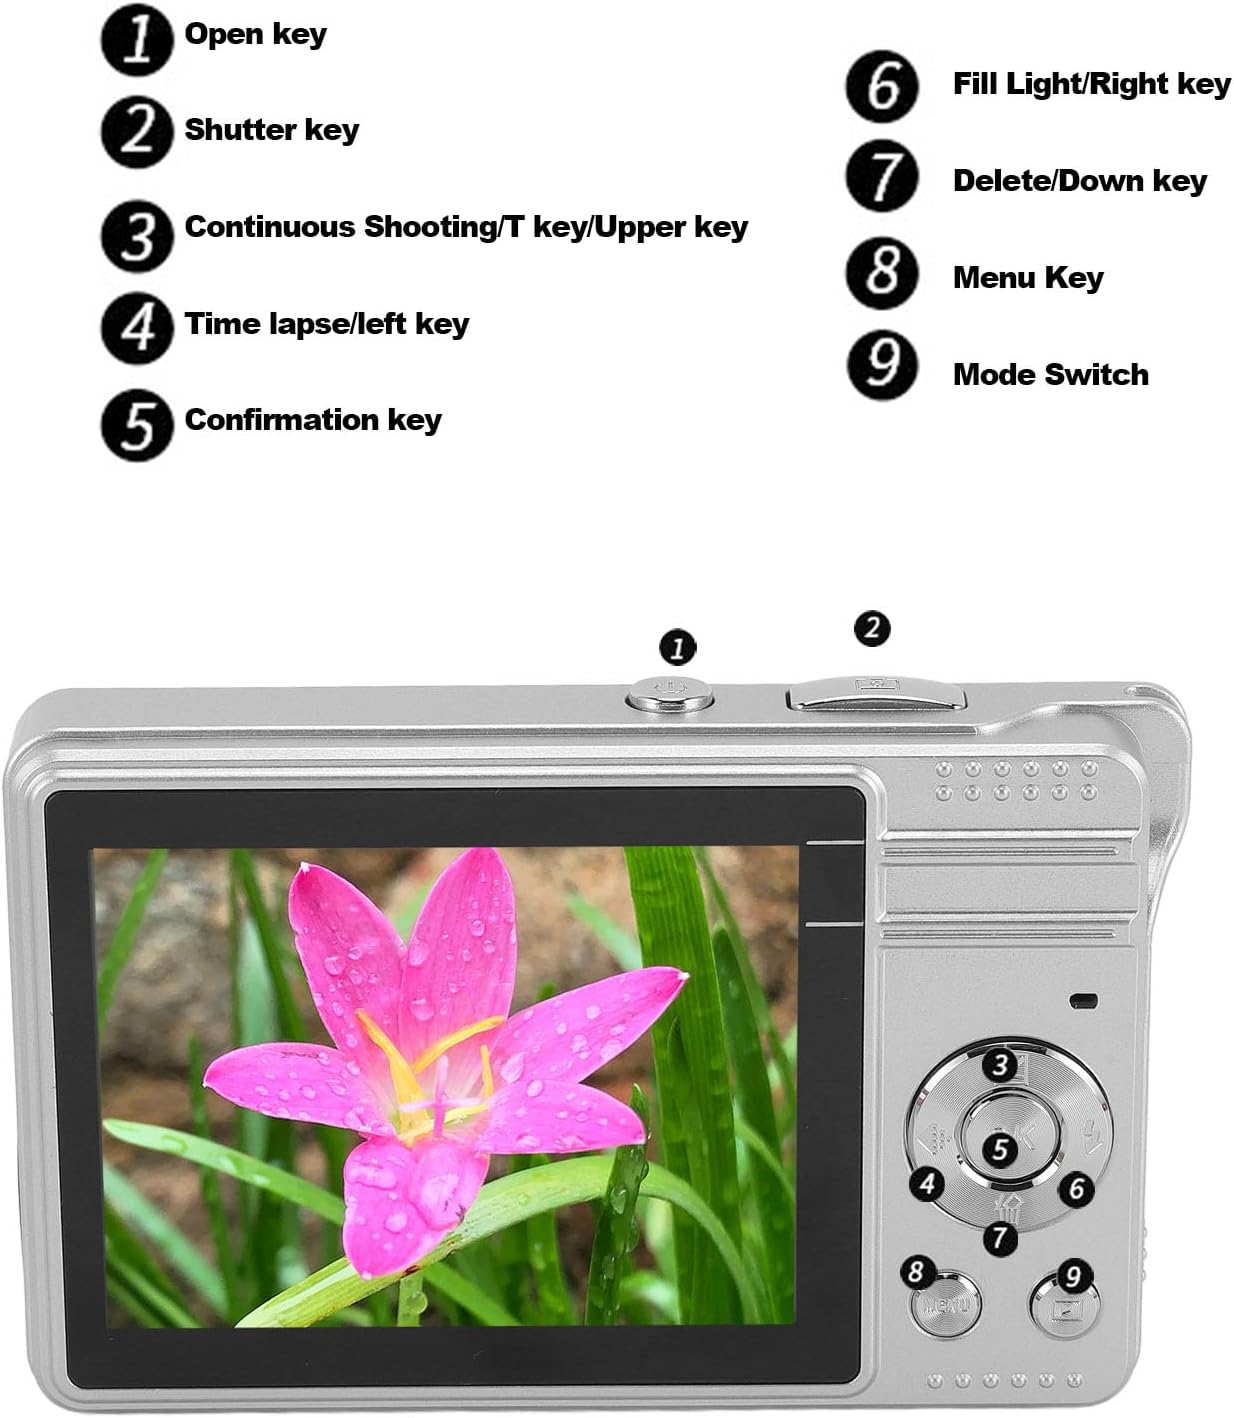
Obraz: przód i tył view of the camera with key components labeled.
- Klucz otwarty: Włącza lub wyłącza kamerę.
- Klucz migawki: Naciśnij, aby zrobić zdjęcie lub rozpocząć/zatrzymać nagrywanie wideo.
- Continuous Shooting/T Key/Upper Key: Activates continuous shooting mode, controls zoom (telephoto), and navigates menus upwards.
- Time Lapse/Left Key: Activates time-lapse video mode and navigates menus left.
- Klucz potwierdzający: Potwierdza wybór w menu.
- Fill Light/Right Key: Activates the built-in LED fill light and navigates menus right.
- Delete/Down Key: Deletes selected photos/videos and navigates menus downwards.
- Klawisz menu: Dostęp do menu ustawień aparatu.
- Zmiana trybu: Przełącza między trybami zdjęć, wideo i odtwarzania.
Obraz: Przód view of the ASHATA Compact Digital Camera, showing the lens, flash, and microphone.

Obraz: Bok view of the ASHATA Compact Digital Camera, highlighting the TF card slot and USB port.
Organizować coś
1. Instalacja baterii
- Znajdź pokrywę komory baterii znajdującą się na spodzie aparatu.
- Przesuń zatrzask pokrywy, aby otworzyć komorę.
- Włóż baterię zgodnie ze wskaźnikami polaryzacji (+/-) wewnątrz komory.
- Zamknij pokrywę komory baterii, aż zatrzaśnie się na swoim miejscu.
2. Instalacja karty pamięci
This camera uses a TF (MicroSD) card for storage. A memory card is required to save photos and videos.
- Locate the TF card slot on the side of the camera (refer to the side view obraz).
- Insert the TF card with the metal contacts facing downwards until it clicks into place.
- Aby wyjąć kartę, delikatnie ją wciśnij, aż wysunie się.
3. Ładowanie aparatu
Connect the camera to a power source using the provided USB cable. The charging indicator light will illuminate during charging and turn off when fully charged.
Instrukcja obsługi
1. Włączanie/wyłączanie zasilania
Naciśnij Open Key (1) to turn the camera on. Press and hold the Open Key ponownie, aby wyłączyć.
2. Robienie zdjęć
- Ensure the camera is in photo mode using the Przełącznik trybu (9).
- Frame your shot using the 2.8-inch TFT screen. The camera features autofocus to ensure clarity.
- Naciśnij Klucz migawki (2) halfway down to focus, then press fully to capture the image.
Funkcja Zoom
Użyj Continuous Shooting/T Key (3) for telephoto zoom (magnifying the subject) and the Time Lapse/Left Key (4) for wide-angle zoom (broadening the view). The camera supports 16x digital zoom.
Flashlight (Fill Light)
Naciśnij Fill Light/Right Key (6) to activate or deactivate the built-in LED flashlight for low-light conditions.

Image: Demonstrates the effect of the built-in LED flash, showing a 'Before' image without flash and an 'After' image with flash for improved lighting.
Automatyczny zegar
Dostęp do menu uzyskasz za pomocą Klawisz menu (8) to set the auto timer for 2s, 5s, or 10s. This allows for delayed photo capture.
Ciągłe fotografowanie
Naciśnij Continuous Shooting/T Key (3) to activate continuous shooting mode, capturing multiple photos in quick succession.
Advanced Photo Settings
Poprzez Klawisz menu (8), you can adjust settings such as exposure compensation, white balance, ISO sensitivity, and anti-shake for various shooting conditions.
3. Nagrywanie filmów
- Przełącz Przełącznik trybu (9) to video mode.
- Naciśnij Klucz migawki (2) to start recording. A recording indicator will appear on the screen.
- Naciśnij Klucz migawki (2) again to stop recording.
Time-Lapse and Slow Motion
These functions can be accessed through the camera's menu (Klawisz menu 8) in video mode. Refer to the on-screen prompts for specific settings.
4. Odtwarzanie
- Przełącz Przełącznik trybu (9) to playback mode.
- Use the navigation keys (3, 4, 6, 7) to browse through your photos and videos.
- Naciśnij Klucz Potwierdzenie (5) do view wybrany element.
- To delete an item, select it and press the Delete/Down Key (7), then confirm your choice.
5. Nawigacja i ustawienia menu
Naciśnij Klawisz menu (8) to enter the camera's settings menu. Use the navigation keys (3, 4, 6, 7) to scroll through options and the Klucz Potwierdzenie (5) to select. Press the Klawisz menu (8) again to exit the menu.
Efekty filtrów
The camera offers various filter effects to enhance your photos. These can be applied through the menu settings.

Image: A grid displaying a single image with various color filters applied, demonstrating the camera's filter effects feature.
Konserwacja
1. Czyszczenie aparatu
- Do czyszczenia korpusu aparatu należy używać miękkiej, niepozostawiającej włókien ściereczki.
- Do czyszczenia soczewek i ekranu należy używać specjalnej ściereczki i płynu do czyszczenia soczewek. Unikać silnych środków chemicznych.
- Do not spray cleaning solution directly onto the camera.
2. Przechowywanie
- Przechowuj kamerę w chłodnym, suchym miejscu, z dala od bezpośredniego światła słonecznego i ekstremalnych temperatur.
- Jeśli przechowujesz urządzenie przez dłuższy czas, wyjmij baterię, aby zapobiec wyciekowi.
- Use the provided pouch to protect the camera from dust and scratches.
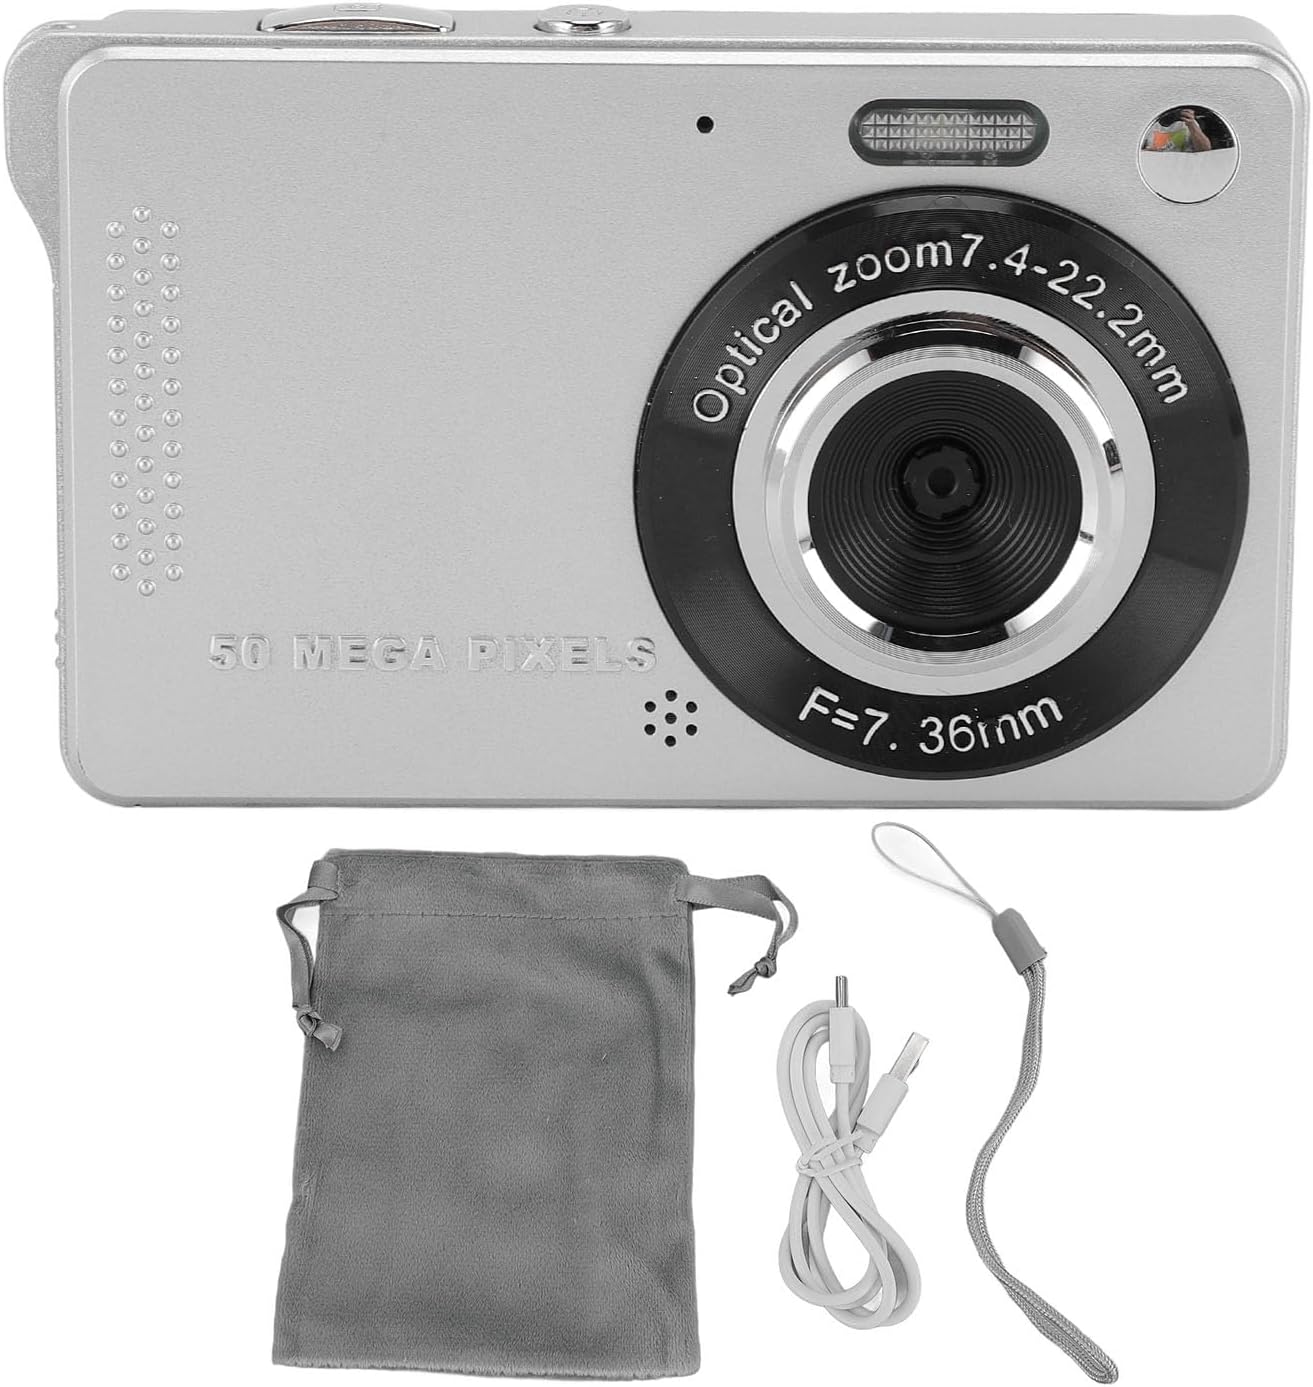
Image: The ASHATA Compact Digital Camera displayed alongside its accessories, including a protective pouch, USB cable, and wrist strap.
3. Pielęgnacja baterii
- Całkowicie naładuj baterię przed pierwszym użyciem.
- Aby przedłużyć żywotność baterii, należy unikać jej częstego całkowitego rozładowywania.
- Nie wystawiaj baterii na działanie wysokich temperatur.
Rozwiązywanie problemów
| Problem | Możliwa przyczyna | Rozwiązanie |
|---|---|---|
| Kamera się nie włącza. | Bateria jest słaba lub nie została prawidłowo włożona. | Naładuj baterię lub włóż ją prawidłowo. |
| Nie można robić zdjęć/kręcić filmów. | Karta pamięci jest pełna, nie została włożona lub jest uszkodzona. | Insert a TF card, delete unnecessary files lub sformatuj kartę (spowoduje to usunięcie wszystkich danych). |
| Obrazy są niewyraźne. | Obiektyw jest brudny, światło jest niewystarczające lub aparat się trzęsie. | Clean the lens, use the flash, or enable anti-shake in settings. |
| Flash nie działa. | Flash is turned off or battery is low. | Naciśnij Fill Light/Right Key (6) to activate, or charge the battery. |
Specyfikacje
- Model: ASHATA3os5gpbrk9-12
- Efektywna rozdzielczość zdjęć: 50 megapiksela
- Rozdzielczość wideo: 1080P
- Rozmiar ekranu: 2.8-calowy wyświetlacz TFT
- Zoom cyfrowy: 16x
- Autofokus: Tak
- Błysk: Wbudowana latarka LED
- Nośniki danych: Karta TF (MicroSD)
- Cechy szczególne: Playback, Fill Light, Time Lapse Video, Slow Motion, Continuous Shooting, Auto Timer (2s, 5s, 10s), Exposure Compensation, White Balance, ISO, Anti-shake.
Gwarancja i wsparcie
For warranty information and technical support, please refer to the documentation included with your purchase or contact ASHATA customer service through their official channels. Keep your proof of purchase for warranty claims.