
Wstęp
This manual provides detailed instructions for the NEMTMCUA Digital Wall Clock, an 8.5-inch large display LED clock. It features a multifunctional display showing time, date, day of the week, and temperature. The clock includes two independent alarms and three adjustable brightness levels. It is designed for versatile placement, suitable for wall mounting or desktop use in various indoor environments such as living rooms, bedrooms, and offices.

Obraz: Ponadview of the NEMTMCUA Digital Wall Clock's features, including multiple displays, 3 AAA battery option, 2 alarm sets, USB charging, 3 brightness levels, and 2 placement methods.
Zawartość opakowania
Sprawdź, czy w przesyłce znajdują się wszystkie elementy:
- Digital Wall Clock x 1
- Kabel USB x 1
- Instrukcja obsługi x 1
Organizować coś
Zasilacz
The NEMTMCUA Digital Wall Clock supports two power supply modes: USB plug-in power or 3 AAA batteries (not included).
- Zasilanie USB: Connect the provided USB cable to the clock's power input and a compatible USB power adapter (not included). This is the primary power source for continuous display.
- Battery Power (3 x AAA, not included): When powered solely by batteries, the screen will automatically turn off after 10 seconds to conserve energy. To activate the display, make a sound such as tapping on the clock or the surface it rests on.
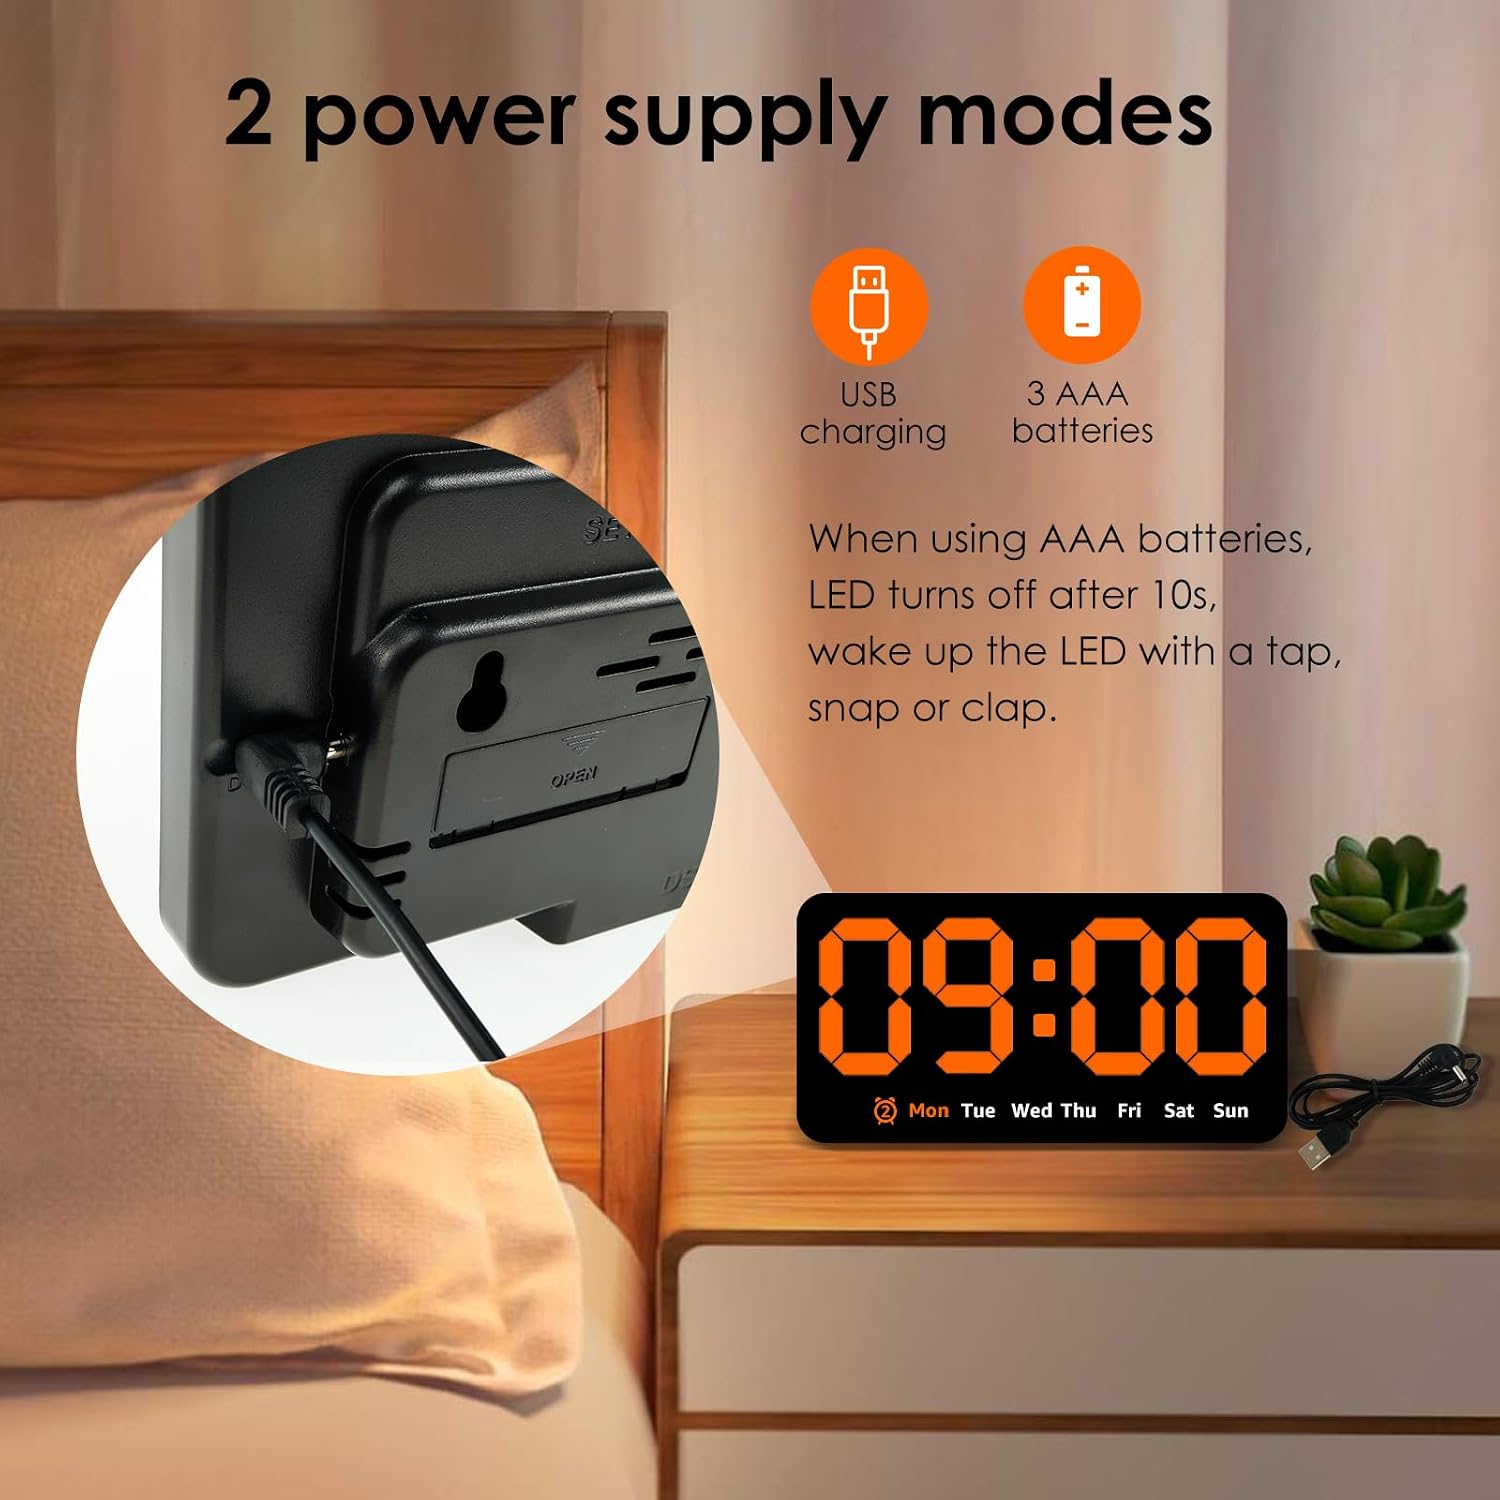
Obraz: Tył view of the clock highlighting the USB charging port and the battery compartment, illustrating the two power supply options.
Umieszczenie
The clock offers flexible placement options:
- Montaż na ścianie: Utilize the two hanging holes located on the back of the clock to securely mount it on a wall.
- Umieszczenie na pulpicie: The clock can also stand independently on any flat surface, such as a desk, nightstand, or shelf.
Video: An unboxing and initial setup guide for the Digital Wall Clock, demonstrating how to power on the device and its basic display functions.
Instrukcja obsługi
Funkcje przycisków
The clock features several buttons on its top for setting and adjusting functions:
- ZESTAW: Used to enter setting modes for time, date, and alarms.
- +: Used to increase values during setting or switch display modes.
- -: Służy do zmniejszania wartości podczas ustawiania.
- ALARM (Bell Icon): Used to activate/deactivate alarms or enter alarm setting mode.
Ustawianie czasu i daty
- Naciśnij USTAWIĆ Naciśnij przycisk raz, aby wejść w tryb ustawiania czasu. Cyfry godziny zaczną migać.
- Użyj + or - przyciski do regulacji godziny.
- Naciskać USTAWIĆ ponownie, aby przejść do ustawienia minut. Użyj + or - aby ustawić minuty.
- Kontynuuj naciskanie USTAWIĆ aby przełączać się między ustawieniami roku, miesiąca i dnia, dostosowując każde z nich + or -.
- Naciskać USTAWIĆ po raz ostatni, aby wyjść z trybu ustawień.
Ustawianie alarmów
Zegar obsługuje dwa niezależne alarmy.
- Naciśnij ALARM button to cycle through Alarm 1, Alarm 2, and Alarm Off.
- Aby ustawić alarm, naciśnij i przytrzymaj ALARM button when the desired alarm (e.g., AL1) is displayed. The hour digits will flash.
- Użyj + or - przyciski do ustawienia godziny alarmu.
- Naciskać ALARM ponownie, aby przejść do ustawienia minut. Użyj + or - aby ustawić minuty alarmu.
- Naciskać ALARM one last time to confirm and exit alarm setting mode.
- When an alarm sounds, press any button to enter snooze mode.

Image: Detail of the clock's top-mounted control buttons, including SET, +, -, and the alarm button, with an alarm icon visible on the display.
Regulacja jasności
The clock offers three levels of brightness. To adjust the brightness:
- W normalnym trybie wyświetlania czasu naciśnij przycisk + button to cycle through the three brightness levels.
- Dimming the light at night can improve sleep comfort.

Image: A visual comparison of the clock's display at three distinct brightness settings, from brightest to dimmest.
Tryby wyświetlania
The clock supports two main display modes:
- DP1: Displays only the time and day of the week.
- DP2: Cycles between time + day of the week, and temperature + date.
To switch between display modes, long press the + przycisk.

Image: A composite image showing the clock's various display options, including time-only (DP1) and cycling displays of time, date, and temperature (DP2).
Konserwacja
To ensure the longevity and proper functioning of your NEMTMCUA Digital Wall Clock, follow these maintenance guidelines:
- Czyszczenie: Gently wipe the clock's surface with a soft, dry cloth. Avoid using abrasive cleaners, solvents, or harsh chemicals, as these can damage the display or casing.
- Wymiana baterii: If using battery power, replace all three AAA batteries simultaneously when the display becomes dim or unresponsive. Ensure correct polarity when inserting new batteries.
- Środowisko: Trzymaj zegar z dala od ekstremalnych temperatur, bezpośredniego światła słonecznego i wysokiej wilgotności.
Rozwiązywanie problemów
If you encounter issues with your NEMTMCUA Digital Wall Clock, refer to the following common problems and solutions:
| Problem | Możliwa przyczyna | Rozwiązanie |
|---|---|---|
| Display turns off after 10 seconds (on battery power) | This is a power-saving feature when running on batteries. | Make a sound (e.g., tap the clock or table) to reactivate the display. For continuous display, use USB power. |
| Clock loses time or is inaccurate | Unstable power supply or internal malfunction. | Ensure the USB power connection is stable. If using batteries, replace them with fresh ones. If the issue persists, try resetting the clock by disconnecting all power sources for a few minutes. |
| Alarm sounds even when set to OFF | Alarm setting not properly deactivated. | Press the ALARM button repeatedly until no alarm icon is displayed, indicating all alarms are off. |
| Wyświetlacz jest zbyt jasny lub zbyt ciemny | Wymagana jest regulacja poziomu jasności. | In normal time display mode, press the '+' button to cycle through the three available brightness levels until the desired setting is reached. |
| Clock resets to 0:00 when touched or moved | Loose power connection or internal issue. | Ensure the USB cable is firmly connected. If using batteries, check they are securely seated. Avoid excessive force when handling the clock. |
Specyfikacje

Image: Diagram illustrating the product dimensions of the NEMTMCUA Digital Wall Clock, measuring 21.4cm (8.43in) in width and 11cm (4.33in) in height, with a thickness of 2.8cm (1.1in).
| Funkcja | Szczegół |
|---|---|
| Marka | NEMTMCUA |
| Numer modelu | 450220240009071633 |
| Typ wyświetlacza | Cyfrowa dioda LED |
| Kolor | Pomarańczowy |
| Wymiary produktu (szer. x wys.) | 8.27" szer. x 4.33" wys. (ok. 21.4 cm x 11 cm) |
| Typ materiału | Akrylonitryl-butadien-styren (ABS) |
| Źródło zasilania | USB (cable included) or 3 x AAA Batteries (not included) |
| Cechy specjalne | Adjustable Brightness (3 levels), Double Alarm, Date, Week, Temperature Display, Wall Mountable / Desktop |
| Typ pokoju | Living Room, Bedroom, Office, Classroom |
| Waga przedmiotu | 0.28 kilograma |
Gwarancja i wsparcie
For warranty information, please refer to the documentation provided at the time of purchase or contact your retailer. For technical support or further assistance, please reach out to the manufacturer or the seller through your purchase platform.