
Wstęp
The ACEGMET PF2C Golf Rangefinder is designed to provide accurate distance measurements for golfers. Featuring advanced PIN-Grab technology, it offers quick and stable distances with ±1 yard accuracy and 6x magnification. This device includes a magnetic attachment for convenience and a rechargeable battery for extended use. This manual provides detailed instructions for setting up, operating, and maintaining your rangefinder.
Co jest w pudełku
Upon opening your ACEGMET PF2C Golf Rangefinder package, you should find the following components:
- ACEGMET PF2C Laser Rangefinder
- Portable Soft Case with Hook
- Magnetyczny klips do paska
- Lina ręczna (smycz)
- Instrukcja obsługi (ten dokument)
- Ściereczka do czyszczenia soczewek
- Kabel ładujący USB-C
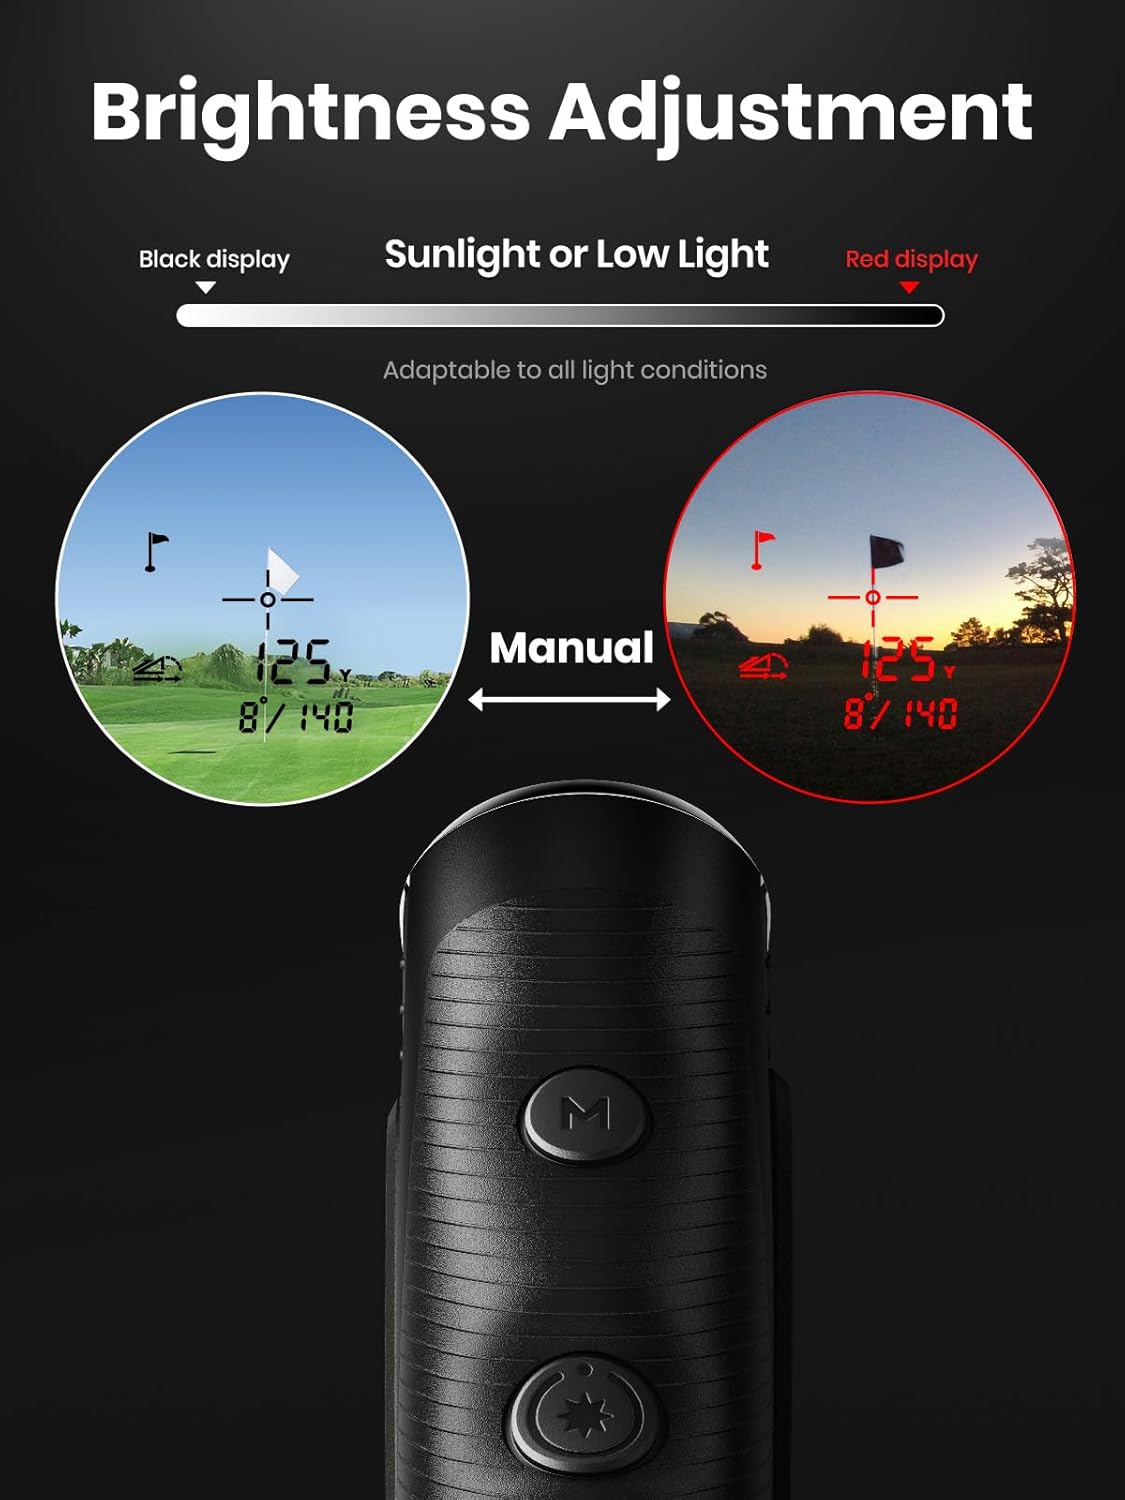
Image: The ACEGMET PF2C Golf Rangefinder shown with its protective soft case, magnetic belt clip, and other accessories.
Organizować coś
Instalacja i ładowanie baterii
The PF2C rangefinder features a dual power supply system: a built-in rechargeable lithium battery and a CR2 lithium battery. The CR2 battery is typically pre-installed. To activate it, open the battery cover and remove any insulating plastic piece.
- Bateria CR2: Ensure the CR2 battery is correctly inserted. Remove the red insulating plastic piece if present.
- Akumulator: Connect the provided USB-C cable to the charging port on the bottom of the device and to a USB power source. The device will charge its internal 1000mAh battery. A full charge supports over 35,000 measurements.

Image: Close-up of the USB-C charging port on the rangefinder, indicating where to connect the charging cable.
Regulacja okularu
Rotate the eyepiece to adjust the focus until the display and target appear clear to your vision.
Instrukcja obsługi
The ACEGMET PF2C Golf Rangefinder is equipped with two main buttons: the Power/Measure button and the Mode button.
Powering On/Off and Measurement
- Włączanie: Short-press the Power/Measure button (marked with a star icon) to turn on the device.
- Pojedynczy pomiar: Once powered on, short-press the Power/Measure button again to take a single distance measurement.
- Ciągłe skanowanie: Long-press the Power/Measure button to activate continuous scanning. Release the button to stop scanning. This is useful for scanning multiple targets or moving objects.
- Automatyczne wyłączanie: The device will automatically power off after 16 seconds of inactivity to conserve battery.
Wybór trybu
Short-press the Mode button (marked with 'M') to cycle through the available measurement modes:
- Flag Lock Mode: This mode is designed to quickly lock onto the flagstick, ignoring background objects. When the flag is detected, the device will vibrate and display the distance.
- Tryb trenerski: This mode assists in calculating distances from your ball to the pin. Measure the distance from your current position (ME) to the ball (P), then from ME to the pin (PI). The device will then calculate the distance from the ball to the pin, with slope compensation enabled.
- Tryb skanowania: Allows for continuous measurement as you pan across the landscape.
- Tryb dysku: Specifically for Disc Golf players, this mode displays line of sight distance (LOS), elevation, and slope angle in feet.

Image: The rangefinder's display showing a flag target locked at 176.5 yards, demonstrating the fast flag-lock feature.
Funkcja nachylenia
The slope function provides adjusted distances based on elevation changes, which is useful for practice but may be prohibited in official competitions. To enable or disable slope:
- Locate the slide switch on the side of the device, near the logo.
- Slide it to reveal green for slope ON, or black for slope OFF.

Image: A visual representation of how the external slope switch adjusts the measured distance based on uphill or downhill terrain.
Rain/Fog Mode
To activate or deactivate the rain and fog mode, press both the Power/Measure and Mode buttons simultaneously. An icon of a cloud with three raindrops will appear on the screen when this mode is active.
Regulacja jasności
Long-press the Mode button to adjust the brightness of the display backlight. This allows for optimal visibility in various lighting conditions, from bright sunlight to low light.

Image: A golfer using the ACEGMET PF2C Golf Rangefinder on a course, demonstrating typical operation.
Mocowanie magnetyczne
The rangefinder features a strong magnetic design, allowing it to be securely attached to a golf cart frame or other metallic surfaces for easy access during play.

Image: The rangefinder is shown attached to the metal frame of a golf cart, highlighting its magnetic feature.
Filmy instruktażowe
ACEGMET PF2C Golf Rangefinder Features
Video: This video demonstrates the speed and accuracy of the ACEGMET PF2C Golf Rangefinder's flag-locking feature.
Magnetic and Rechargeable Features Overview
Wideo: Krótki przeglądview highlighting the magnetic attachment and rechargeable battery features of the ACEGMET golf rangefinders.
Konserwacja
- Czyszczenie soczewek: Use the provided lens cleaning cloth to gently wipe the objective and eyepiece lenses. Do not use abrasive materials or harsh chemicals, as this can damage the optical coatings.
- Składowanie: When not in use, store the rangefinder in its portable soft case to protect it from dust, moisture, and physical impact.
- Pielęgnacja baterii: Recharge the internal battery regularly, especially if the device will not be used for an extended period. If using the CR2 battery, replace it when the low battery indicator appears.
- Unikaj ekstremalnych warunków: Do not expose the rangefinder to extreme temperatures, direct sunlight for prolonged periods, or excessive moisture.
Rozwiązywanie problemów
| Problem | Możliwa przyczyna | Rozwiązanie |
|---|---|---|
| Urządzenie nie włącza się. | Low battery or CR2 insulating tab still in place. | Charge the internal battery using the USB-C cable. Check and remove the red insulating tab from the CR2 battery compartment. |
| Niedokładne pomiary. | Lens obstruction, unstable hand, or measuring beyond range. | Clean lenses with the provided cloth. Ensure a steady hand. Confirm target is within the 5-1100 yard range. |
| Difficulty locking onto flag. | Background interference or flag too far. | Ensure Flag Lock Mode is active. Aim carefully at the flag. The flag-locking range is 5-350 yards. Try scanning mode for general distance. |
| Wyświetlacz jest słaby lub trudny do odczytania. | Brightness setting is too low for current lighting. | Long-press the Mode button to adjust display brightness. |
Specyfikacje
- Model: PF2C
- Zakres pomiarowy: 5-1100 jardów
- Flag-Locking Range: 5-350 jardów
- Dokładność: ±1 jarda
- Powiększenie: 6x
- Pin-Grab Technology: 0.3s response time with vibration
- Bateria: 1000mAh Rechargeable Lithium (USB-C) + CR2 Lithium
- Tworzywo: Plastikowy
- Kolor: Czarny
- Wymiary (dł. x szer. x wys.): 4.33" x 2.95" x 6.3" (approximate, based on product images)
- Waga: 0.45 kilograma (w przybliżeniu)
- Klasa laserowa: Produkt laserowy klasy 1

Image: Technical drawing showing the length, width, and height dimensions of the ACEGMET PF2C Golf Rangefinder.
Gwarancja i wsparcie
ACEGMET zapewnia 24-miesięczna gwarancja for the PF2C Golf Rangefinder from the date of purchase. Additionally, lifetime technical support is available for all ACEGMET golf rangefinders and accessories.
For warranty claims, technical assistance, or any product-related inquiries, please refer to the contact information provided on the warranty card included in your package or visit the official ACEGMET webstrona.