
ATTOP X-PACK 2
Instrukcja obsługi składanego drona ATTOP X-PACK 2 Mini
Model: X-PACK 2 | Marka: ATTOP
1. Wprowadzenie
Welcome to the ATTOP X-PACK 2 Mini Foldable Drone user manual. This guide provides essential information for setting up, operating, and maintaining your new drone. Designed for kids and beginners, the X-PACK 2 offers an intuitive flying experience with features like FPV video, voice control, altitude hold, and headless mode. Please read this manual thoroughly before first use to ensure safe and optimal performance.
Ważne ostrzeżenie dotyczące bezpieczeństwa:
- Always use the original USB charging cable for charging.
- Do not use an adapter or power supply with a voltage exceeding 5V. A 5V2A adapter or power supply is most suitable. Exceeding 5V can damage the charging cable due to excessive voltage i przeciążenie.
- Ensure correct polarity when connecting the charging cable; incorrect insertion can cause the cable to emit smoke.
- Confirm the drone is fully charged before flight. An undercharged battery may cause propellers to rotate but prevent the drone from flying.
- Verify propellers are installed in the correct direction as per the installation manual. Incorrect installation will prevent propeller rotation and drone flight.
- It is recommended to use this drone indoors.
2. Zawartość opakowania
The ATTOP X-PACK 2 Mini Foldable Drone package includes the following items:
- ATTOP X-PACK 2 Mini Foldable Drone with Camera
- Pilot zdalnego sterowania
- Kabel ładujący USB
- Zapasowe śmigła
- Śrubokręt
- Uchwyt na telefon
- Instrukcja obsługi (ten dokument)

Image: Contents of the ATTOP X-PACK 2 Mini Foldable Drone package, including the drone, remote controller with phone holder, spare propellers, USB charging cable, and screwdriver.
3. Koniec produktuview
The ATTOP X-PACK 2 is a compact and portable drone designed for ease of use. Its foldable arm design allows it to be stored conveniently within the remote controller itself.
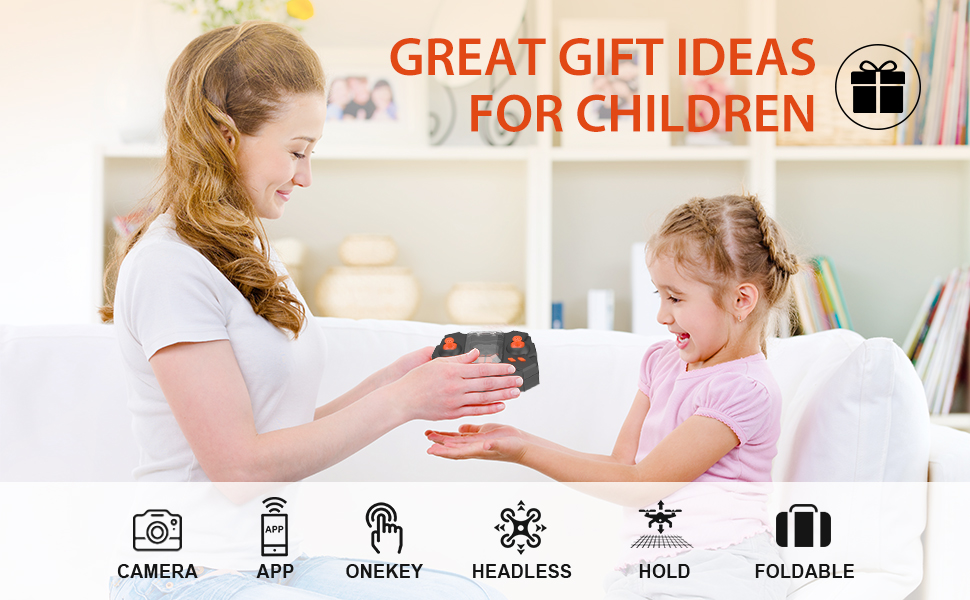
Obraz: Ponadview of the ATTOP X-PACK 2 drone highlighting key features such as camera, app control, one-key functions, headless mode, altitude hold, and foldable design.
3.1 Funkcje drona
- Kamera HD: Capture photos and videos directly to your connected smartphone.
- FPV (widok z pierwszej osoby) View): Stream live video from the drone's camera to your phone for an immersive flying experience.
- Składana konstrukcja: Compact and portable, the drone arms fold for easy storage within the controller.
- Utrzymywanie wysokości: Automatically maintains a set altitude for stable hovering, making it easier to control and capture media.
- Tryb bezgłowy: Eliminates the need to adjust the drone's position before flight; the drone's direction is relative to the pilot.
- Tryby 3 prędkości: Adjustable speed settings suitable for beginners and more experienced pilots.
- Obrót o 360°: Perform impressive aerial stunts with a single button.
- Trajektoria lotu: Narysuj trasę na ekranie smartfona, a dron automatycznie ją obierze.
- Sterowanie głosowe: Control the drone with simple voice commands via the app.
- AR Game Mode: Experience augmented reality games through the "XT GO" app.
4. Konfiguracja
4.1 Ładowanie akumulatora drona
Before first use, fully charge the drone's battery using the provided USB charging cable. Connect the cable to a 5V2A power source (e.g., a computer USB port or a compatible wall adapter). The charging indicator will show the charging status and turn off when fully charged.
4.2 Instalowanie baterii kontrolera
The remote controller requires batteries (not included). Open the battery compartment on the back of the controller and insert the required batteries, ensuring correct polarity.
4.3 Rozkładanie drona
Gently unfold the drone's arms until they click into place. Ensure all four arms are fully extended before flight.
Video: Demonstrates the unfolding of the drone, installation of the phone holder on the remote, and the initial power-on and pairing process.
4.4 Montaż uchwytu telefonu
Attach the phone holder to the top of the remote controller. This allows you to mount your smartphone for FPV viewi sterowanie aplikacją.
4.5 Parowanie drona i kontrolera
- Umieść drona na płaskiej, poziomej powierzchni.
- Switch on the drone by pressing the power button. The drone's indicator lights will flash.
- Switch on the remote controller.
- Push the left joystick (throttle) all the way up, then pull it all the way down. The drone's lights will stop flashing and remain solid, indicating successful pairing.
4.6 Calibrating the Drone
After pairing, perform a calibration to ensure stable flight. Push both joysticks on the remote controller to the bottom-right corner simultaneously. The drone's lights will flash rapidly and then turn solid, indicating successful calibration.
5. Instrukcja obsługi
5.1 Start i lądowanie
- Jeden kluczowy punkt wyjścia: After pairing and calibration, press the One Key Take-Off button (usually indicated by an arrow pointing up) on the remote. The drone will automatically ascend and hover at a stable altitude.
- Start ręczny: After pairing and calibration, push both joysticks to the bottom-left corner simultaneously to unlock the motors. Then, slowly push the left joystick (throttle) upwards to take off.
- Jedno kluczowe lądowanie: Press the One Key Landing button (usually indicated by an arrow pointing down) on the remote. The drone will automatically descend and land gently.
- Lądowanie ręczne: Slowly pull the left joystick (throttle) downwards until the drone lands. Once landed, push both joysticks to the bottom-left corner simultaneously to lock the motors.

Image: Illustration of the drone performing a one-key take-off and landing, demonstrating its ease of use for beginners.
5.2 Sterowanie lotem
| Kontrola | Działanie | Opis |
|---|---|---|
| Lewy joystick (góra/dół) | Przepustnica | Controls the drone's altitude (ascend/descend). |
| Lewy joystick (lewo/prawo) | Myszkować | Controls the drone's rotation (turn left/right). |
| Prawy joystick (góra/dół) | Poziom | Controls the drone's forward/backward movement. |
| Prawy joystick (lewo/prawo) | Rolka | Controls the drone's left/right side flight. |
Video: Demonstrates basic flight controls including forward/backward, left/right side flight, and turning left/right.
5.3 Tryb bezgłowy
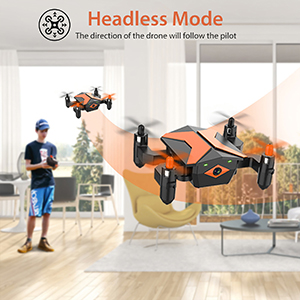
In Headless Mode, the drone's orientation is locked to the pilot's perspective, regardless of which way the drone is facing. This simplifies control for beginners. To activate/deactivate Headless Mode, press the dedicated Headless Mode button on the remote controller.
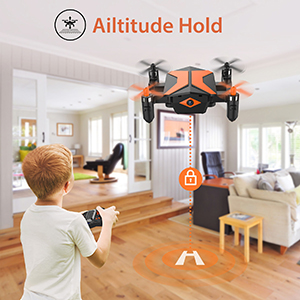
Image: A child operating the drone in headless mode, where the drone's direction follows the pilot's input regardless of its front orientation.
5.4 Obrót 360°
To perform a 360° flip, press the 360° Flip button on the remote, then quickly push the right joystick in the desired direction (forward, backward, left, or right). The drone will perform a flip in that direction.

Image: The drone performing a 3D flip, showcasing jego zdolności akrobatycznych.
5.5 App Control and FPV
Download the "XT GO" app from your smartphone's app store. Connect your phone to the drone's Wi-Fi network (usually named "ATTOP-XXXX"). Once connected, you can view live FPV video, control the drone, and access advanced features.
- FPV Experience: The app displays a live video feed from the drone's camera, allowing you to see what the drone sees in real-time.
- Trajektoria lotu: Within the app, draw a flight path on your screen. The drone will automatically follow the drawn path.
- Sterowanie głosowe: Use voice commands through the app to control basic flight functions.
- AR Game Mode: Engage in augmented reality games that integrate the drone's camera feed.
- Tryb wykrywania grawitacji: Steruj ruchem drona, przechylając swój smartfon.
Obraz: Użytkownik viewing the drone's live FPV feed on a tablet, showing the drone flying over a rooftop with a cat.
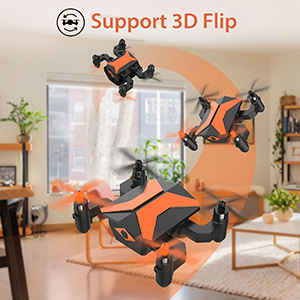
Image: A smartphone screen displaying the "XT GO" app interface with a drawn trajectory path for the drone to follow.

Image: A smartphone screen showing the AR Game mode, where virtual fighter planes are integrated into the live drone camera feed.
5.6 Nagrywanie zdjęć i filmów
With your smartphone connected to the drone via the "XT GO" app, you can capture photos and record videos directly to your phone's storage. Use the dedicated buttons within the app interface for these functions.
6. Konserwacja
6.1 Propeller Installation and Replacement
Ensure propellers are installed correctly. Each propeller is marked (e.g., A or B) and must match the corresponding motor arm. Incorrect installation will prevent the drone from flying properly. If a propeller is damaged, replace it with a spare from the package using the provided screwdriver.
6.2 Pielęgnacja baterii
- Zawsze używaj oryginalnego kabla ładującego.
- Unikaj przeładowywania lub całkowitego rozładowania akumulatora.
- Gdy nie używasz baterii, przechowuj ją w chłodnym i suchym miejscu.
- If the drone's battery is low, operate the remote to return the drone home to prevent unexpected landings.
7. Rozwiązywanie Problemów
- Drone does not fly after charging: Ensure the battery is fully charged. Check that propellers are installed correctly and not obstructed. Re-pair and re-calibrate the drone and controller.
- Charging cable emits smoke: Immediately disconnect the charging cable from the power source and the drone. This indicates incorrect voltage or polarity. Only use the original 5V2A charging setup.
- Dron dryfuje w czasie lotu: Perform a calibration as described in Section 4.6. Check for any damaged propellers and replace if necessary.
- No FPV video on phone: Ensure your phone is connected to the drone's Wi-Fi network. Verify the "XT GO" app is open and has necessary permissions.
- Krótki czas lotu: Upewnij się, że akumulator jest w pełni naładowany. Czas lotu może ulec skróceniu z powodu agresywnego lotu, warunków wietrznych i ciągłego nagrywania wideo.
8. Specyfikacje
| Funkcja | Szczegół |
|---|---|
| Marka | NA SZCZYCIE |
| Nazwa modelu | PAKIET X 2 |
| Zakres wiekowy (opis) | Dziecko |
| Kolor | Pomarańczowy |
| Rozdzielczość przechwytywania wideo | 720p |
| Technologia łączności | Wi-Fi |
| Poziom umiejętności | Początkujący |
| Format przechwytywania wideo | MP4 |
| Typ sterowania | Sterowanie głosowe |
| Tworzywo | Plastic, Transparent Material |
| Wymiary produktu | 2.1" dł. x 2.5" szer. x 1.2" wys. |
| Waga przedmiotu | 10.2 uncji |
| W zestawie akumulator | Tak (dla drona) |
| Czy pilot zdalnego sterowania jest w zestawie? | Tak |
9. Gwarancja i wsparcie
For warranty information and customer support, please refer to the contact details provided on the product packaging or visit the official ATTOP webstrona. Zachowaj dowód zakupu na potrzeby roszczeń gwarancyjnych.
Aby uzyskać dodatkowe zasoby i informacje o produkcie, odwiedź stronę ATTOP Store on Amazon.