
1. Wprowadzenie
Dziękujemy za zakupasing the TEEROK T20 Mini Drone. This drone is designed for children and beginners, offering an easy-to-control and safe flying experience. Please read this manual carefully before operating the drone to ensure proper use and to maximize your enjoyment.
2. Zawartość opakowania
- TEEROK T20 Mini Drone (1)
- Zdalne sterowanie (1)
- Akumulatory do dronów (3)
- Kabel do ładowania USB (1)
- Zapasowe śmigła (4)
- Propeller Guards (4, pre-installed or separate)
- Instrukcja obsługi (1)
3. Środki ostrożności
- Zawsze używaj drona na otwartej, czystej przestrzeni, z dala od ludzi, zwierząt i przeszkód.
- Nie lataj w pobliżu źródeł wysokiego napięciataglinie elektroniczne, lotniska lub zatłoczone miejsca.
- Keep the drone within your line of sight at all times.
- W przypadku dzieci obsługujących drona zaleca się nadzór osoby dorosłej.
- Nie dotykaj śmigieł, gdy się obracają.
- Przed każdym lotem upewnij się, że baterie są całkowicie naładowane.
- Nie wystawiaj baterii na działanie ekstremalnych temperatur ani bezpośredniego światła słonecznego.
- In case of emergency, press the emergency stop button (if available) or pull both joysticks down and inwards simultaneously.
4. Konfiguracja
4.1 Charging the Drone Batteries
- Podłącz kabel ładujący USB do zasilacza USB (nie ma go w zestawie) lub do portu USB komputera.
- Connect the other end of the charging cable to the drone battery.
- Kontrolka na kablu USB pokaże stan ładowania (np. świeci na czerwono, gdy ładowanie jest kontynuowane, a nie świeci, gdy urządzenie jest w pełni naładowane).
- Ładowanie baterii trwa zazwyczaj 60–90 minut. Nie przeładowuj.
4.2 Installing Drone Batteries
- Insert a fully charged battery into the battery compartment on the drone. Ensure it clicks securely into place.
4.3 Instalowanie baterii w pilocie zdalnego sterowania
- Otwórz pokrywę baterii z tyłu pilota.
- Włóż 3 baterie AAA (nie ma ich w zestawie) zgodnie z oznaczeniami biegunów.
- Zamknij pokrywę baterii.
4.4 Attaching Propeller Guards
- If not pre-installed, carefully snap the propeller guards onto the drone's motor arms. Ensure they are securely fastened to protect the propellers and for user safety.
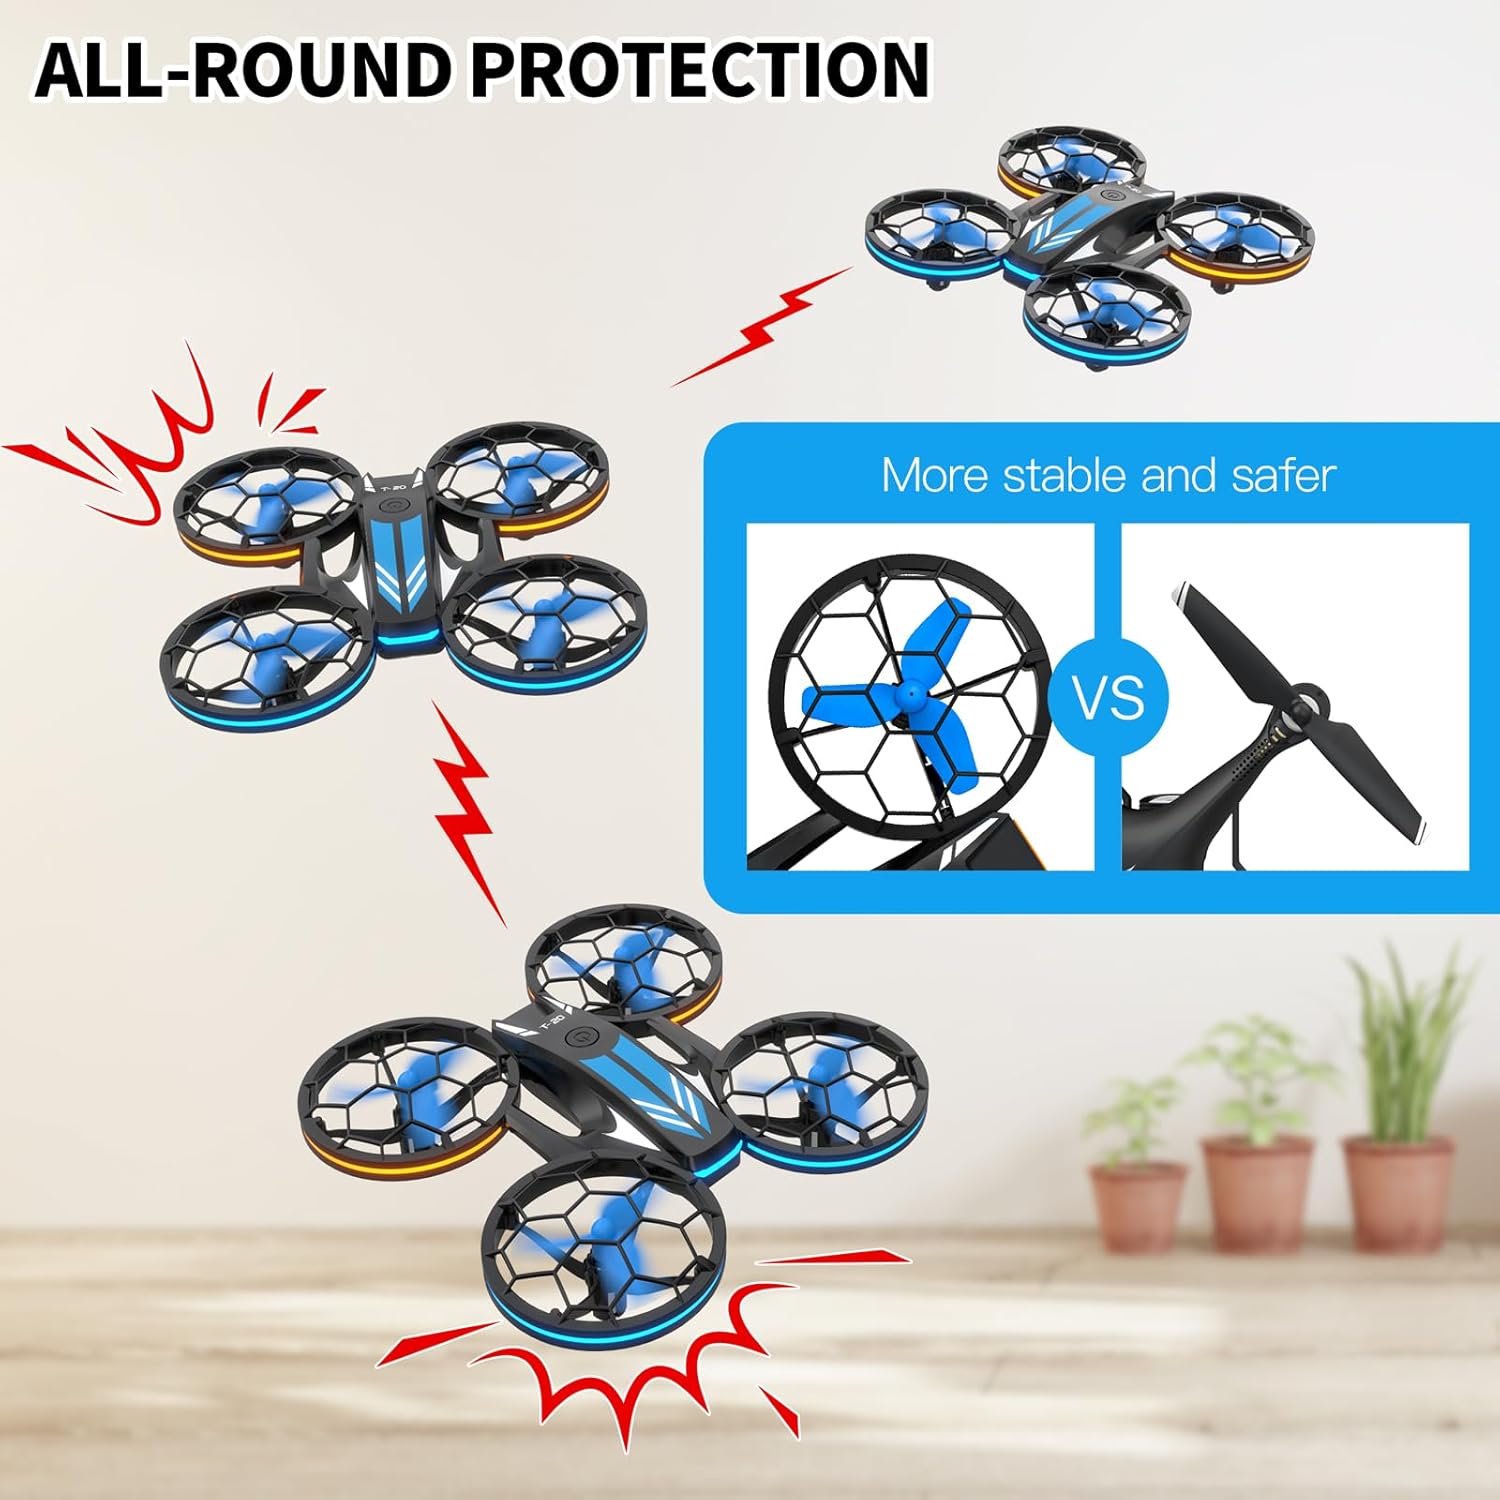
Image: The TEEROK T20 drone featuring its all-round propeller protection, highlighting its stable and safer design compared to drones without guards.
4.5 Parowanie drona i pilota
- Umieść drona na płaskiej, poziomej powierzchni.
- Włącz drona, naciskając przycisk zasilania. Diody LED drona zaczną migać.
- Włącz pilota.
- Przesuń lewy joystick (przepustnicę) do końca w górę, a następnie w dół. Diody drona przestaną migać i będą świecić światłem ciągłym, co oznacza pomyślne sparowanie.

Image: A visual representation of the user-friendly features including one-key start, headless mode, auto slow down, and the auto-connection process between the drone and its remote control.
5. Instrukcja obsługi
5.1 Podstawowe sterowanie
- Lewy joystick (przepustnica): Up/Down for ascend/descend; Left/Right for yaw (rotate).
- Prawy joystick (kierunek): Up/Down for forward/backward; Left/Right for left/right sideward flight.
- Refer to the remote control diagram (if provided with product) for specific button functions.
5.2 Start i lądowanie jednym klawiszem
- After pairing, press the One-Key Takeoff button (usually indicated by an arrow pointing up) on the remote control. The drone will automatically ascend and hover at a certain altitude.
- To land, press the One-Key Landing button (usually indicated by an arrow pointing down). The drone will slowly descend and land automatically.
5.3 Utrzymywanie wysokości
- The T20 drone features an altitude hold function, allowing it to maintain a stable height without constant throttle input. This makes it easier for beginners to control.
5.4 Tryb bezgłowy
- Press the Headless Mode button on the remote control to activate. In Headless Mode, the drone's forward direction is relative to the pilot, regardless of the drone's actual orientation. This simplifies control for beginners.
- Naciśnij przycisk ponownie, aby wyjść z trybu bezgłowego.
5.5 Regulacja prędkości
- The drone has three adjustable speed modes: Low, Medium, and High.
- Press the Speed button (often indicated by a fan icon or speed indicator) on the remote control to cycle through the speed settings.
- Start with Low speed for learning and gradually increase as you gain experience.

Image: The TEEROK T20 drone illustrating its three adjustable speed modes: Low, Medium, and High, allowing users to choose their preferred flight speed.
5.6 Obrót 3D
- Ensure the drone is flying at a sufficient height (at least 2-3 meters).
- Press the 3D Flip button (if available, or a combination of joystick presses).
- Immediately push the right joystick in the desired direction (forward, backward, left, or right) to perform a flip.

Image: The TEEROK T20 drone demonstrating its 3D flip capability, alongside an illustration of its extended battery life with three included batteries.
5.7 świateł LED
- The drone is equipped with blue and orange LED lights.
- These lights can be switched on or off using a dedicated button on the remote control (refer to remote diagram).
- The lights also feature three changing modes: flashing one by one, flashing back and forth alternately, and flashing left and right alternately.

Image: The TEEROK T20 drone showcasing its switchable blue and orange LED lighting modes, including three distinct flashing patterns.
6. Konserwacja
6.1 Czyszczenie
- Do czyszczenia drona i pilota używaj miękkiej, suchej ściereczki.
- Nie używaj wody ani środków czyszczących.
6.2 Wymiana śmigła
- If a propeller is damaged, carefully remove it and replace it with a spare propeller from the package.
- Ensure the new propeller is installed correctly according to its rotation direction (usually marked A or B).
6.3 Pielęgnacja i przechowywanie baterii
- Remove batteries from the drone and remote control when not in use for extended periods.
- Przechowuj baterie w chłodnym i suchym miejscu, z dala od bezpośredniego światła słonecznego i ciepła.
- Do not store fully charged or completely depleted batteries for long periods. Charge them to about 50% for optimal storage.
7. Rozwiązywanie Problemów
| Problem | Możliwa przyczyna | Rozwiązanie |
|---|---|---|
| Dron nie reaguje na pilota. | Not paired; Low battery (drone/remote); Out of range. | Re-pair the drone and remote; Charge/replace batteries; Fly within range. |
| Dron lata nieregularnie lub dryfuje. | Not calibrated; Damaged propeller; Uneven surface during takeoff. | Calibrate the drone (refer to remote instructions); Replace damaged propellers; Take off from a flat surface. |
| Krótki czas lotu. | Akumulator nie jest w pełni naładowany; Akumulator jest stary. | Ensure batteries are fully charged; Consider replacing old batteries. |
| Śmigła się nie kręcą. | Obstruction; Motor issue; Low battery. | Check for obstructions; Charge battery. If issue persists, contact support. |
8. Specyfikacje
| Funkcja | Szczegół |
|---|---|
| Nazwa modelu | T20 |
| Marka | TEEROK |
| Wymiary (dł. x szer. x wys.) | Wymiary 15 x 15 x 3.5 cm |
| Waga | 440 gramów |
| Bateria drona | 600 mAh Lithium-ion (3 included) |
| Bateria do pilota zdalnego sterowania | 3 x AAA (brak w zestawie) |
| Typ sterowania | Pilot zdalnego sterowania (częstotliwość radiowa) |
| Cechy specjalne | 3D Flip Capability, Multiple Speed Modes, Headless Mode, Altitude Hold, LED Lights |
| Zalecany wiek | Dziecko |
9. Gwarancja i wsparcie
The TEEROK T20 Mini Drone comes with a standard manufacturer's warranty. For detailed warranty information, please refer to the documentation included in your product packaging or contact the seller directly.
If you encounter any issues or have questions regarding your drone, please contact TEEROK customer support through the retailer's platform or the contact information provided with your purchase. Please have your model number (T20) and purchase date ready when contacting support.