
1. Wprowadzenie
This manual provides detailed instructions for the safe installation, operation, and maintenance of your MENCOLULU 22-inch Farmhouse Chandelier (Model: CH001-WD-4). This 4-light hanging pendant fixture features a distressed wood oak orb design, suitable for various indoor spaces such as dining rooms, kitchen islands, living rooms, bedrooms, foyers, entryways, and hallways. Please read this manual thoroughly before installation and retain it for future reference.
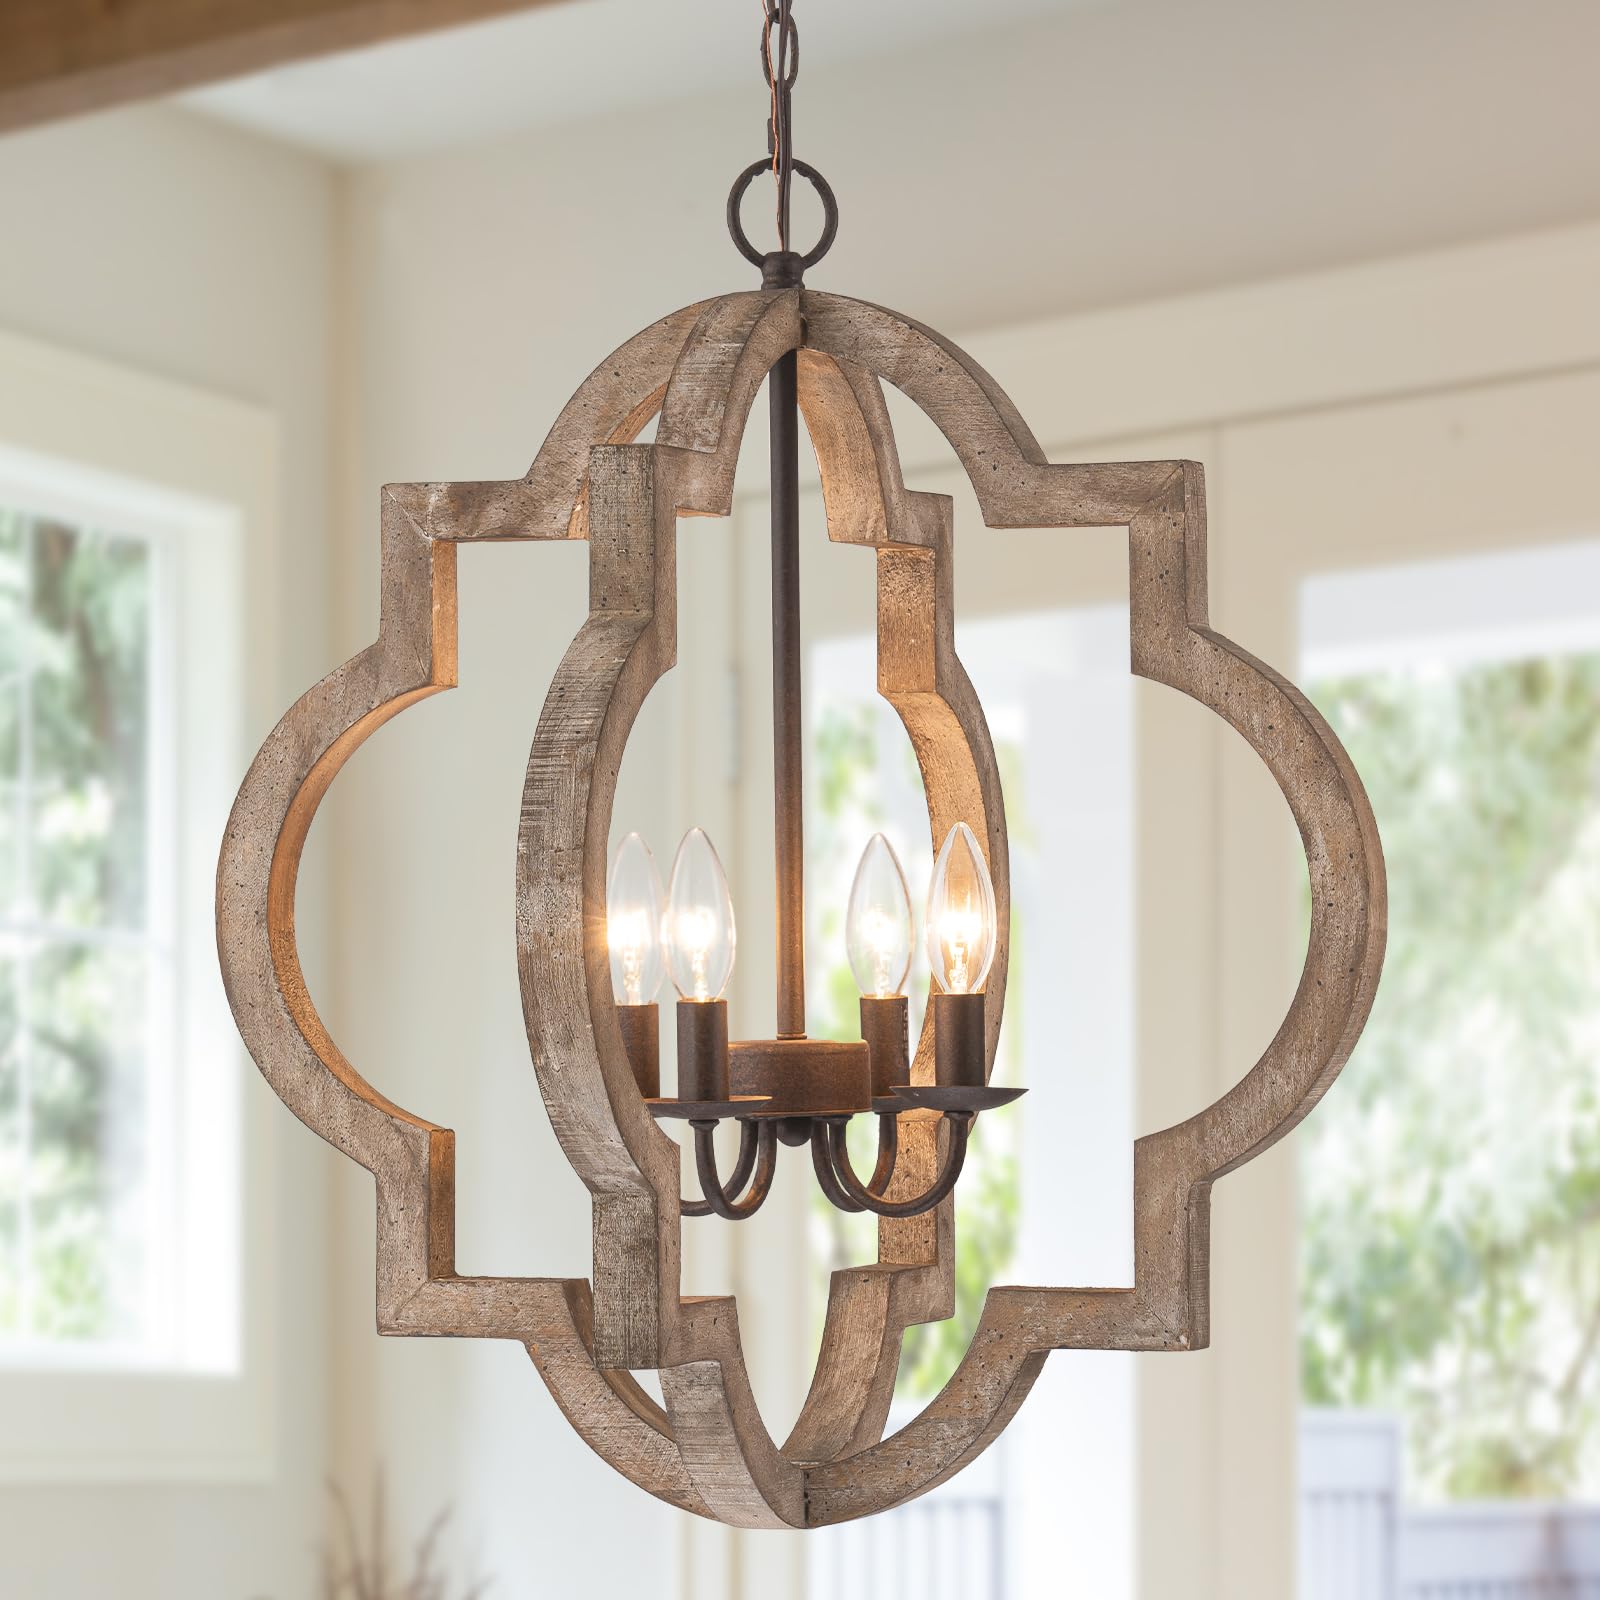
Figure 1: MENCOLULU 22-inch Farmhouse Chandelier, Distressed Oak Large.
2. Informacje dotyczące bezpieczeństwa
OSTRZEŻENIE: Aby zmniejszyć ryzyko pożaru, porażenia prądem elektrycznym lub obrażeń ciała, zawsze należy przestrzegać następujących środków ostrożności:
- Always disconnect power at the main circuit breaker before installation, removal, or servicing.
- Instalację musi wykonać wykwalifikowany elektryk lub osoba zaznajomiona z konstrukcją i działaniem produktu oraz związanymi z tym zagrożeniami.
- Należy upewnić się, że wszystkie połączenia elektryczne są zgodne z lokalnymi przepisami i rozporządzeniami, a także z Krajowym Kodeksem Elektrycznym (NEC).
- Nie montować tego urządzenia w wilgotnych lub mokrych pomieszczeniach.amp lokalizacji. Przeznaczony jest wyłącznie do użytku wewnątrz pomieszczeń.
- Stosuj wyłącznie żarówki o podanym typie i mocy.tage (4 x E12, Max 40W per bulb). Exceeding the maximum wattagMoże to spowodować przegrzanie i uszkodzenie.
- Handle the fixture with care. Avoid dropping or striking it.
- Nie podłączaj urządzenia do nieuziemionego układu elektrycznego.
- Trzymaj materiały łatwopalne z dala od żarówek.
3. Zawartość opakowania
Przed rozpoczęciem instalacji sprawdź, czy wszystkie elementy są obecne i nieuszkodzone. Jeśli brakuje którejkolwiek części lub jest ona uszkodzona, skontaktuj się z obsługą klienta.
- Chandelier Body (Distressed Oak Orb)
- Daszek montażowy
- Regulowany łańcuch wiszący (59 cala)
- Mounting Hardware (Crossbar, Screws, Wire Nuts)
- Instrukcja obsługi
4. Specyfikacje
| Marka | MENCOLULU |
| Numer modelu | CH001-WD-4 |
| Wymiary (dł. x szer. x wys.) | 21.7"L x 21.7"W x 84.6"H (Max Height) |
| Rozmiar | Średnica 21.7 cali |
| Tworzywo | Metal, Wood (Distressed Oak) |
| Kolor | Distressed Oak Large |
| Źródło światła | 4 żarówki E12 (brak w zestawie) |
| Maksymalna moctage na żarówkę | 40 W |
| Tomtage | 110 wolty |
| Regulowana wysokość | Yes, Max 85 inches (with 59-inch chain) |
| Typ montażu | Hanging, Semi Flush Mount |
| Compatible Ceiling Types | Płaski, pochyły, sklepiony |
| Metoda kontroli | App (requires compatible smart bulbs/system) |
| Zastosowanie wewnątrz/na zewnątrz | Tylko wewnątrz |

Figure 2: Chandelier dimensions and ceiling compatibility.

Figure 3: Detail of solid wood distressed oak and rust brown finish.
5. Konfiguracja i instalacja
Before installation, ensure the power is turned off at the circuit breaker. It is recommended to have two people for installation. This fixture comes with pre-assembled wiring for simplified setup.
- Przygotuj miejsce montażu: Turn off power at the main circuit breaker. Ensure the junction box is securely mounted and capable of supporting the fixture's weight.
- Install the Mounting Crossbar: Attach the mounting crossbar to the junction box using the provided screws.
- Dostosuj długość łańcucha: Determine the desired hanging height for your chandelier. The chain is adjustable up to 59 inches. Use pliers to open and remove excess chain links as needed. Thread the electrical wires through the chain and canopy.
- Wykonaj połączenia elektryczne: Connect the fixture's wires to the corresponding wires from the junction box using the provided wire nuts. Connect the black wire (live) to the black wire, the white wire (neutral) to the white wire, and the ground wire to the ground wire. Ensure all connections are secure.
- Zabezpiecz baldachim: Carefully push the canopy up to the ceiling, covering the junction box and wiring. Secure it in place with the provided screws or nuts.
- Zainstaluj żarówki: Screw four E12 base bulbs (not included) into the sockets. Do not exceed 40W per bulb.
- Przywróć zasilanie: Po zakończeniu instalacji włącz ponownie zasilanie za pomocą wyłącznika automatycznego.
Aby zapoznać się z wizualnym przewodnikiem po procesie instalacji, obejrzyj poniższy film:
Video 1: Installation guide for the Farmhouse Chandelier. This video demonstrates the steps for assembling and mounting the light fixture.
6. Instrukcja obsługi
Once installed and powered, the chandelier operates via your standard wall switch. For dimming functionality, ensure you use dimmable E12 bulbs and a compatible dimmer switch (both sold separately). The fixture supports various E12 bulb types including LED, CFL, Edison, and Smart bulbs.
If using smart bulbs with app control, follow the instructions provided with your smart bulbs for pairing and operation.
Wideo 2: Produkt w całościview of the Wood Farmhouse Chandelier. This video highlights key features and design aspects of the light fixture.
7. Konserwacja
Regular maintenance helps prolong the life and appearance of your chandelier.
- Czyszczenie: Before cleaning, ensure the power is off. Wipe the fixture with a soft, dry cloth. Do not use abrasive cleaners, solvents, or polishes as they may damage the finish.
- Wymiana żarówki: Always turn off power before replacing bulbs. Allow bulbs to cool completely before touching. Replace with E12 base bulbs, not exceeding 40W.
- Kontrola: Okresowo sprawdzaj wszystkie połączenia i elementy montażowe, aby mieć pewność, że są bezpieczne.
8. Rozwiązywanie Problemów
Jeśli masz problemy z żyrandolem, zapoznaj się z poniższymi, często spotykanymi problemami i ich rozwiązaniami:
| Problem | Możliwa przyczyna | Rozwiązanie |
|---|---|---|
| Światło się nie włącza | 1. Zasilanie jest wyłączone 2. Luźne połączenie przewodów 3. Wadliwa żarówka | 1. Sprawdź wyłącznik automatyczny i wyłącznik ścienny 2. Turn off power, check all wire connections 3. Replace bulb with a new one |
| Migotanie światła | 1. Luźna żarówka 2. Nieprawidłowy typ żarówki do ściemniacza 3. Luźne okablowanie | 1. Dokręć żarówkę 2. Ensure dimmable bulbs are used with a dimmer switch 3. Turn off power, check wire connections |
| Brzęczący hałas | Incompatible dimmer switch or bulbs | Ensure dimmer switch and bulbs are compatible with each other and the fixture. Consult a qualified electrician if needed. |
9. Gwarancja i wsparcie
This MENCOLULU product is covered by a 1-letnia gwarancja producenta od daty zakupu. Niniejsza gwarancja obejmuje wady materiałowe i wykonawcze przy normalnym użytkowaniu.
For warranty claims, technical support, or any questions regarding your product, please contact MENCOLULU customer service. Keep your proof of purchase for warranty validation.